Admin Panel : Create Downloads Area Section
Download Area is a module which allows Center Admin to have a section with files organised for website visitors' download.
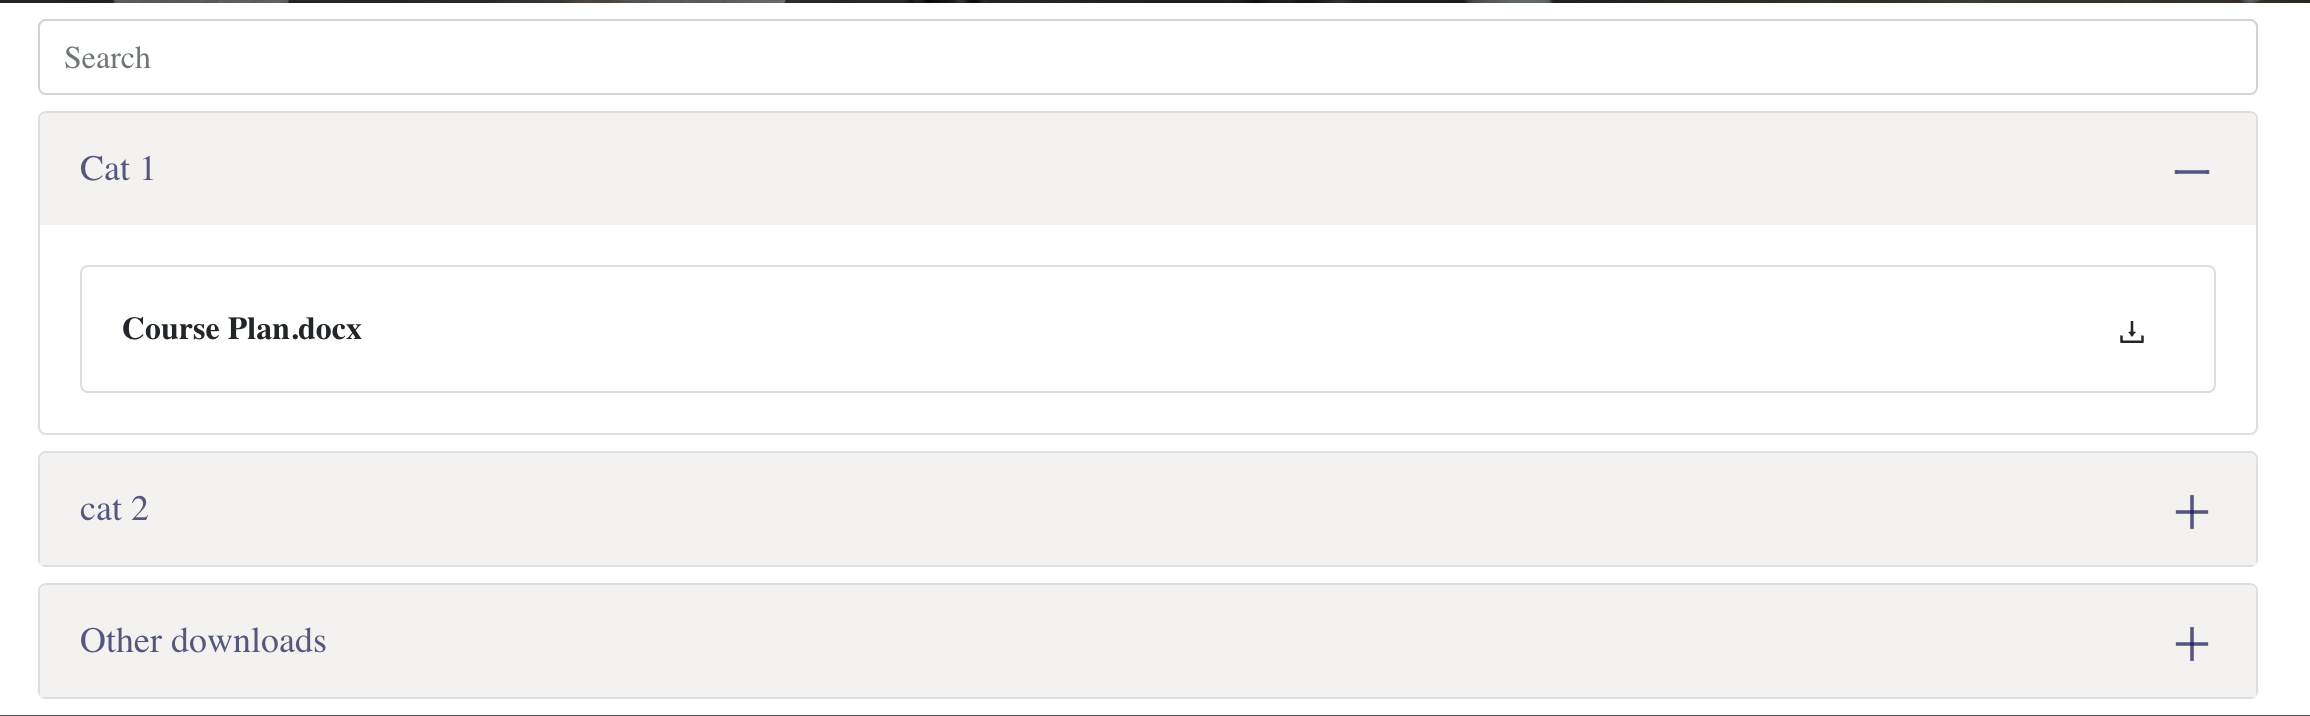
Example of Download Area on Live Site :
1. Setting Up Download Area
Go to Data Drive > Downloads
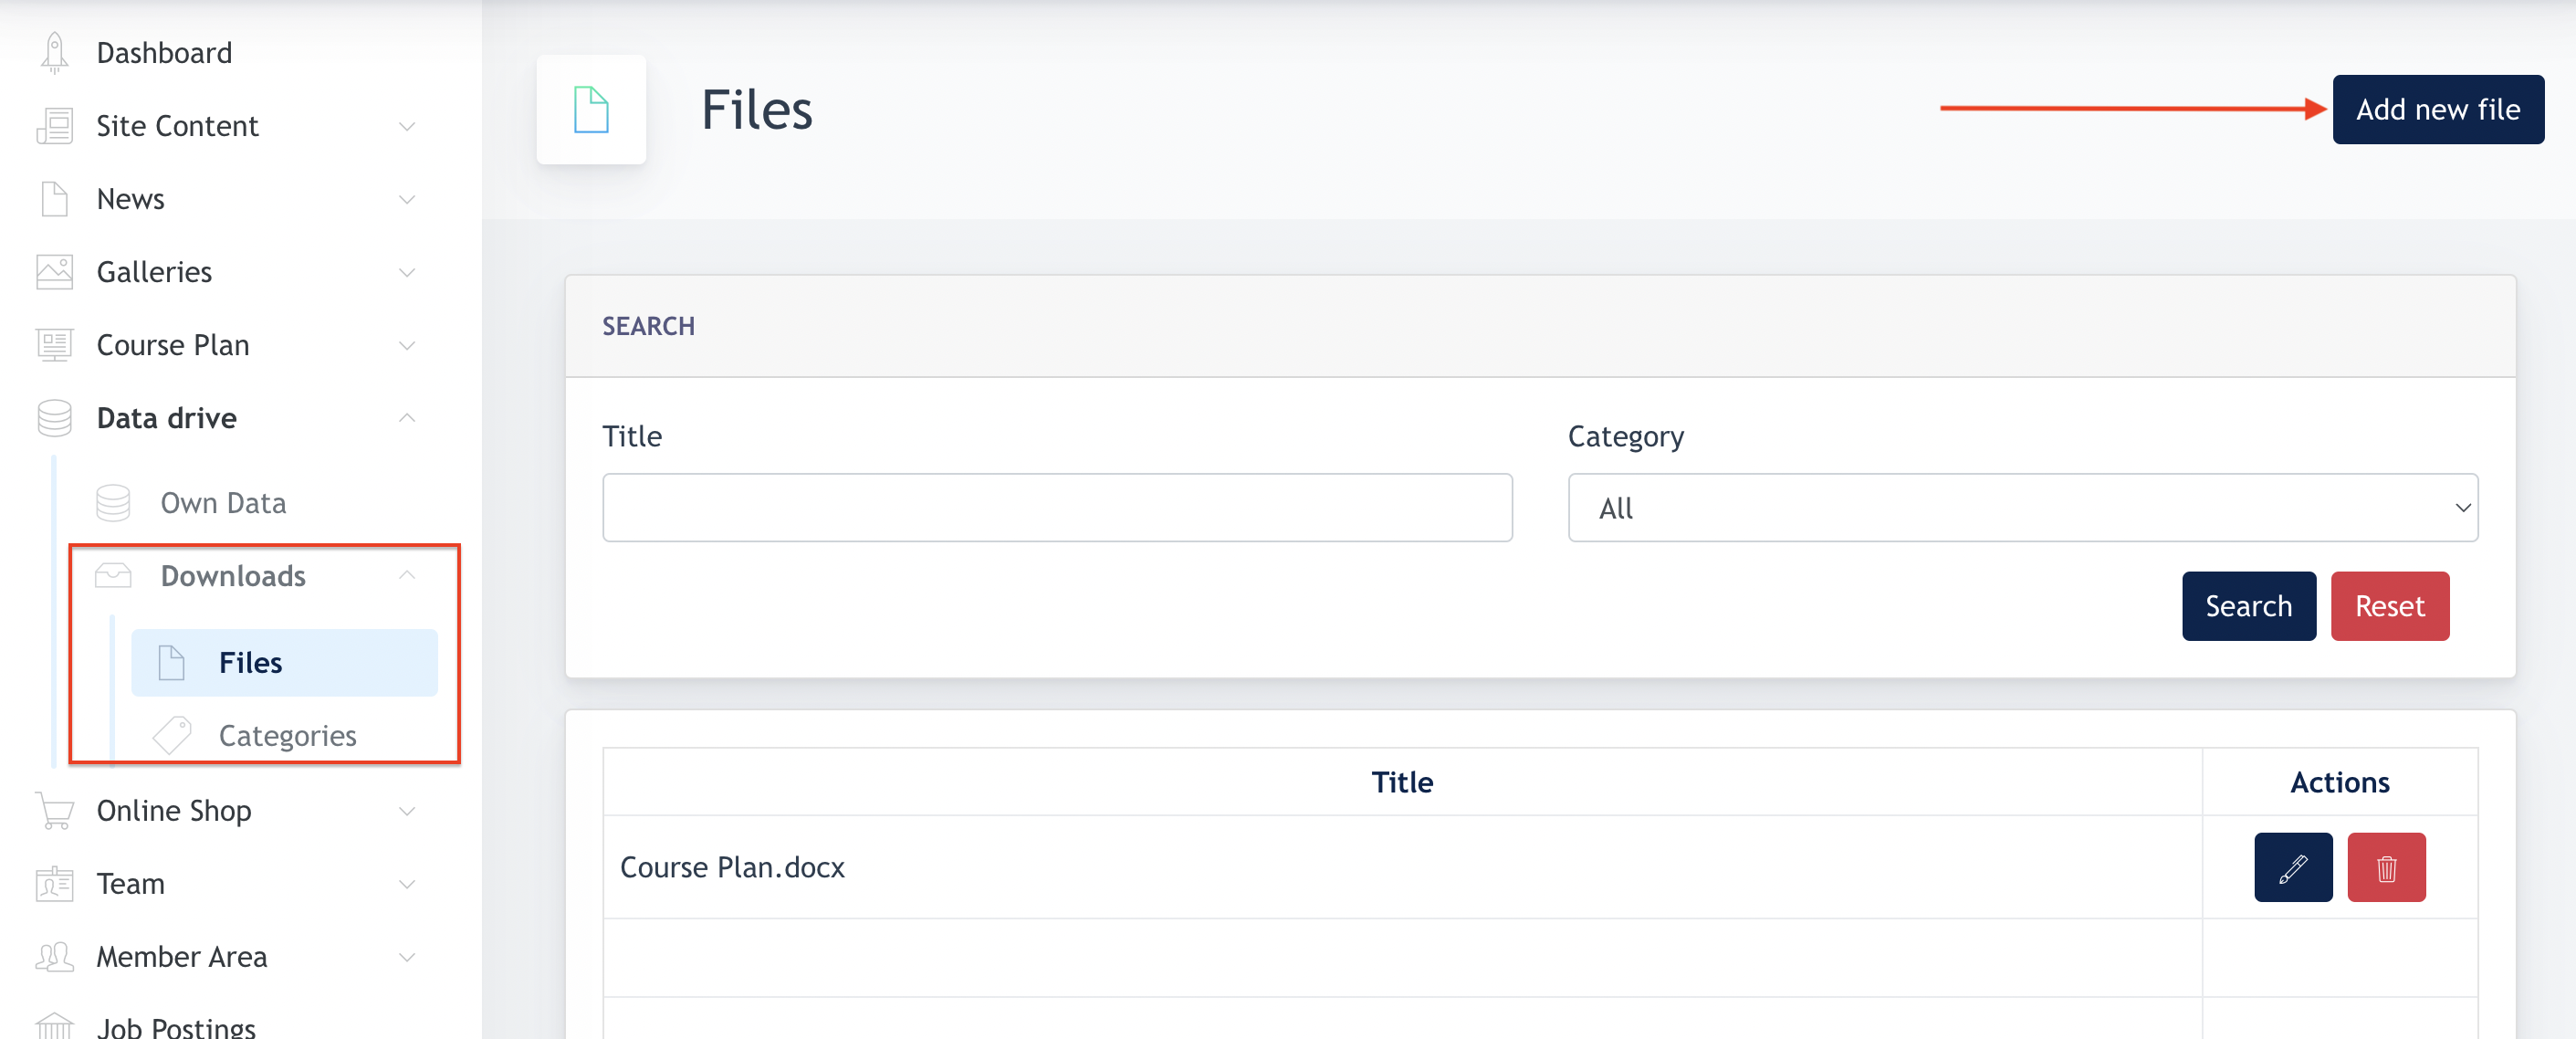
- Click on the [ Add New File ] button to add a file. File added will appear on the listing.
- Go to the listing, and click on the [ Edit ] button. The following modal will be opened :
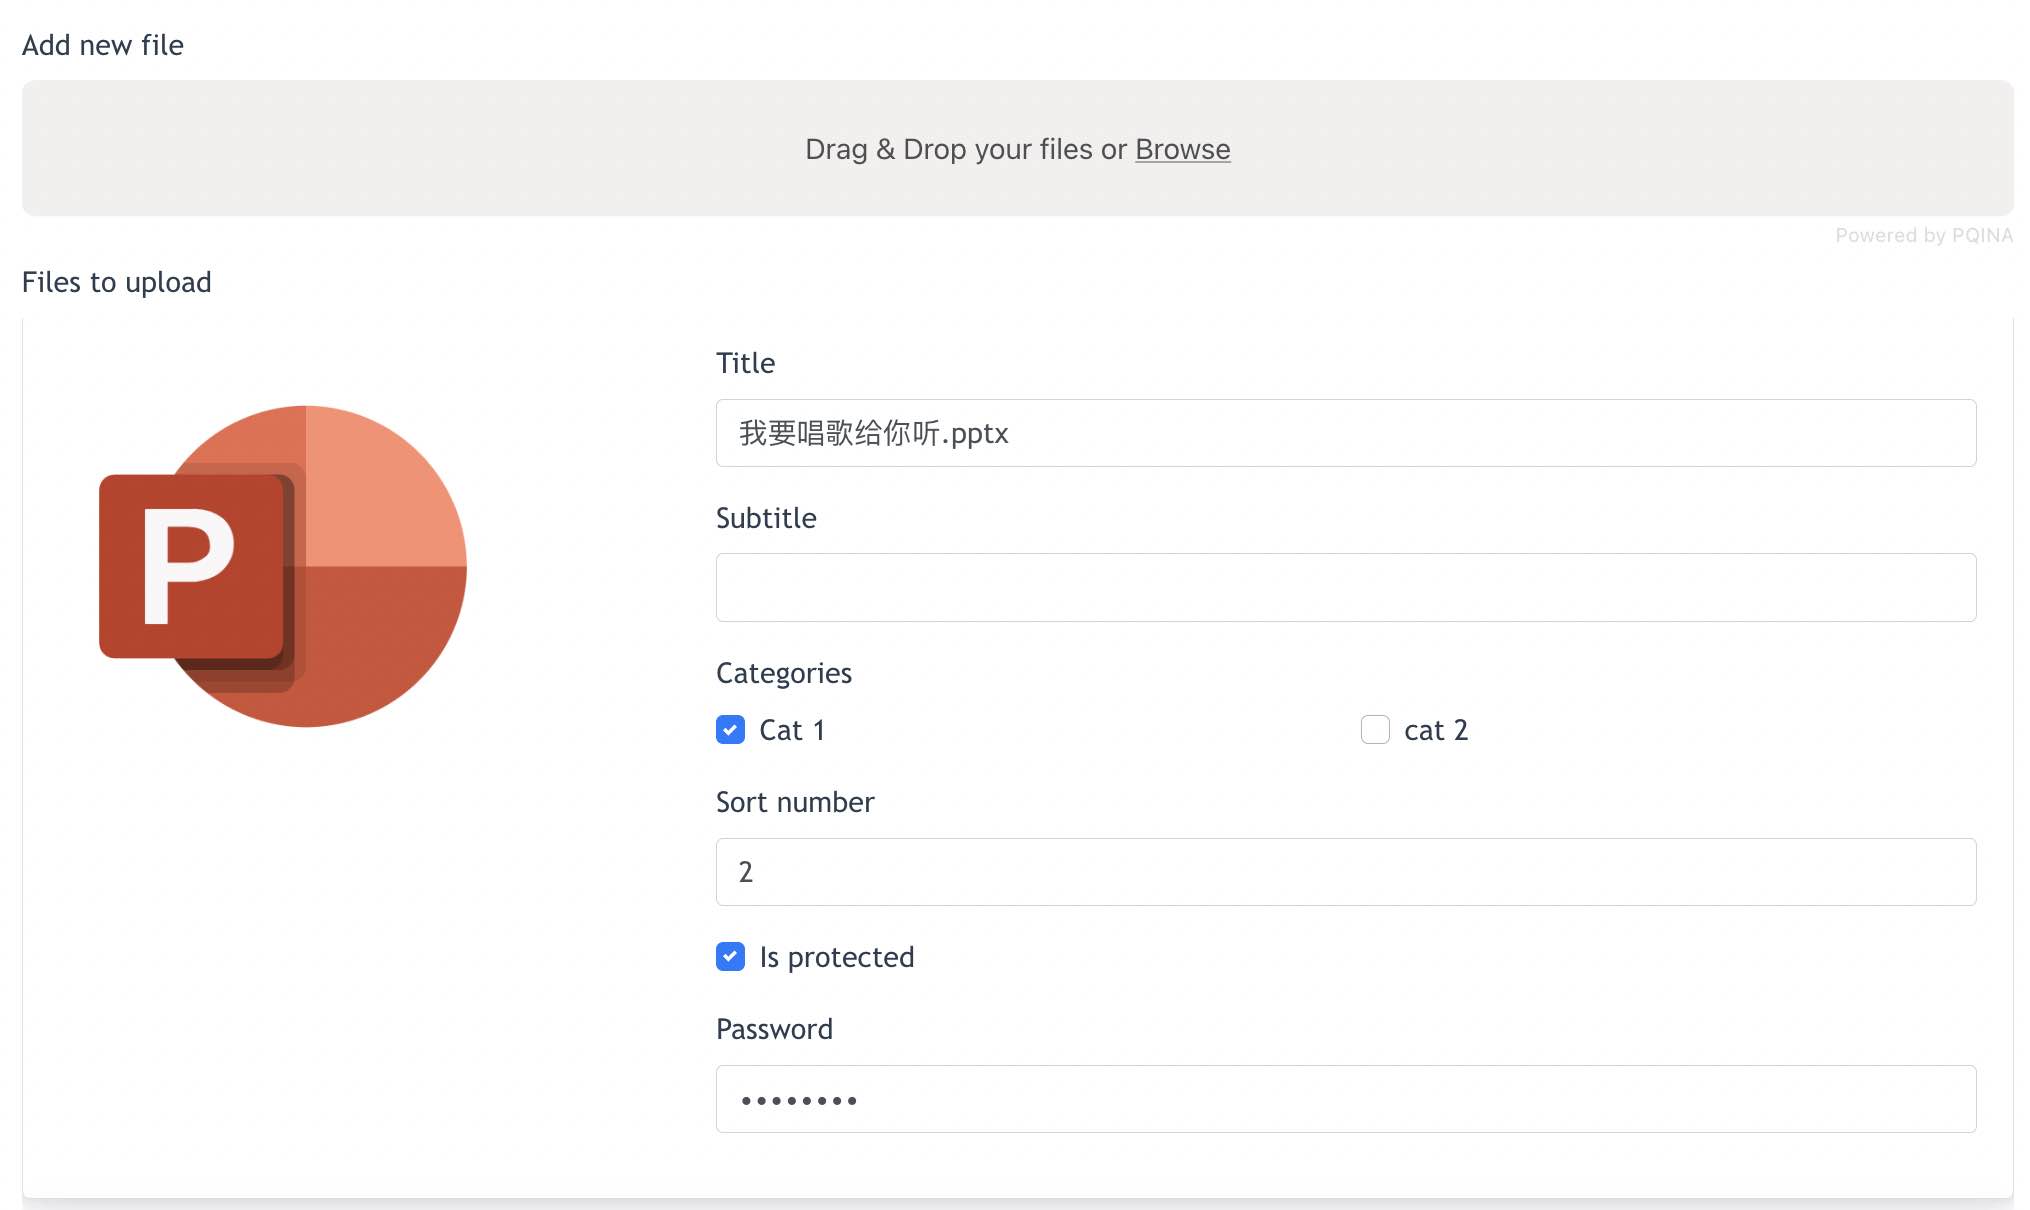
3. Browse or Drag & Drop to upload file
4. Configure the Categories
5. Sort number : configuration of the file order
6. Is protected : If this is checked ( like example shown above ) , then you'll need to key in a password. Remarks : This feature allows Admin to set a file is protected and can only be downloaded with password.
Admin may continue to add new files on this modal.
Categories :
It is mandatory to configure Categories in the first place, categories helps Admin to organise files effectively.
Go to Data Drive > Downloads > Categories

Click on [ Add New Category ]
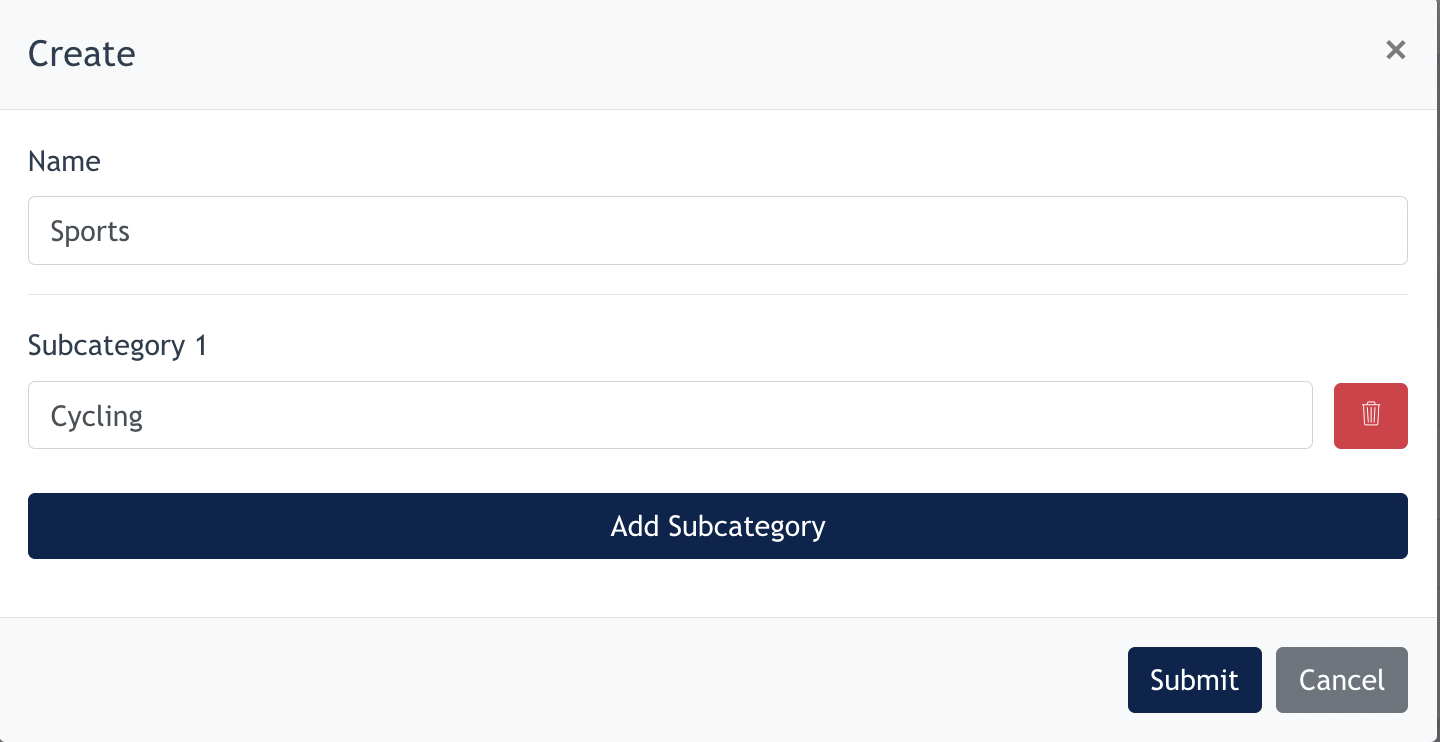
Admin may create a main category and a sub-category for the files.
After [ Files ] and [ Categories ] are setup, Admin may configure Downloads Section within the page.
2. Configuration Downloads Section
Go to Site Content > Site Pages
Admin may select any site pages, to add the Downloads section into it.
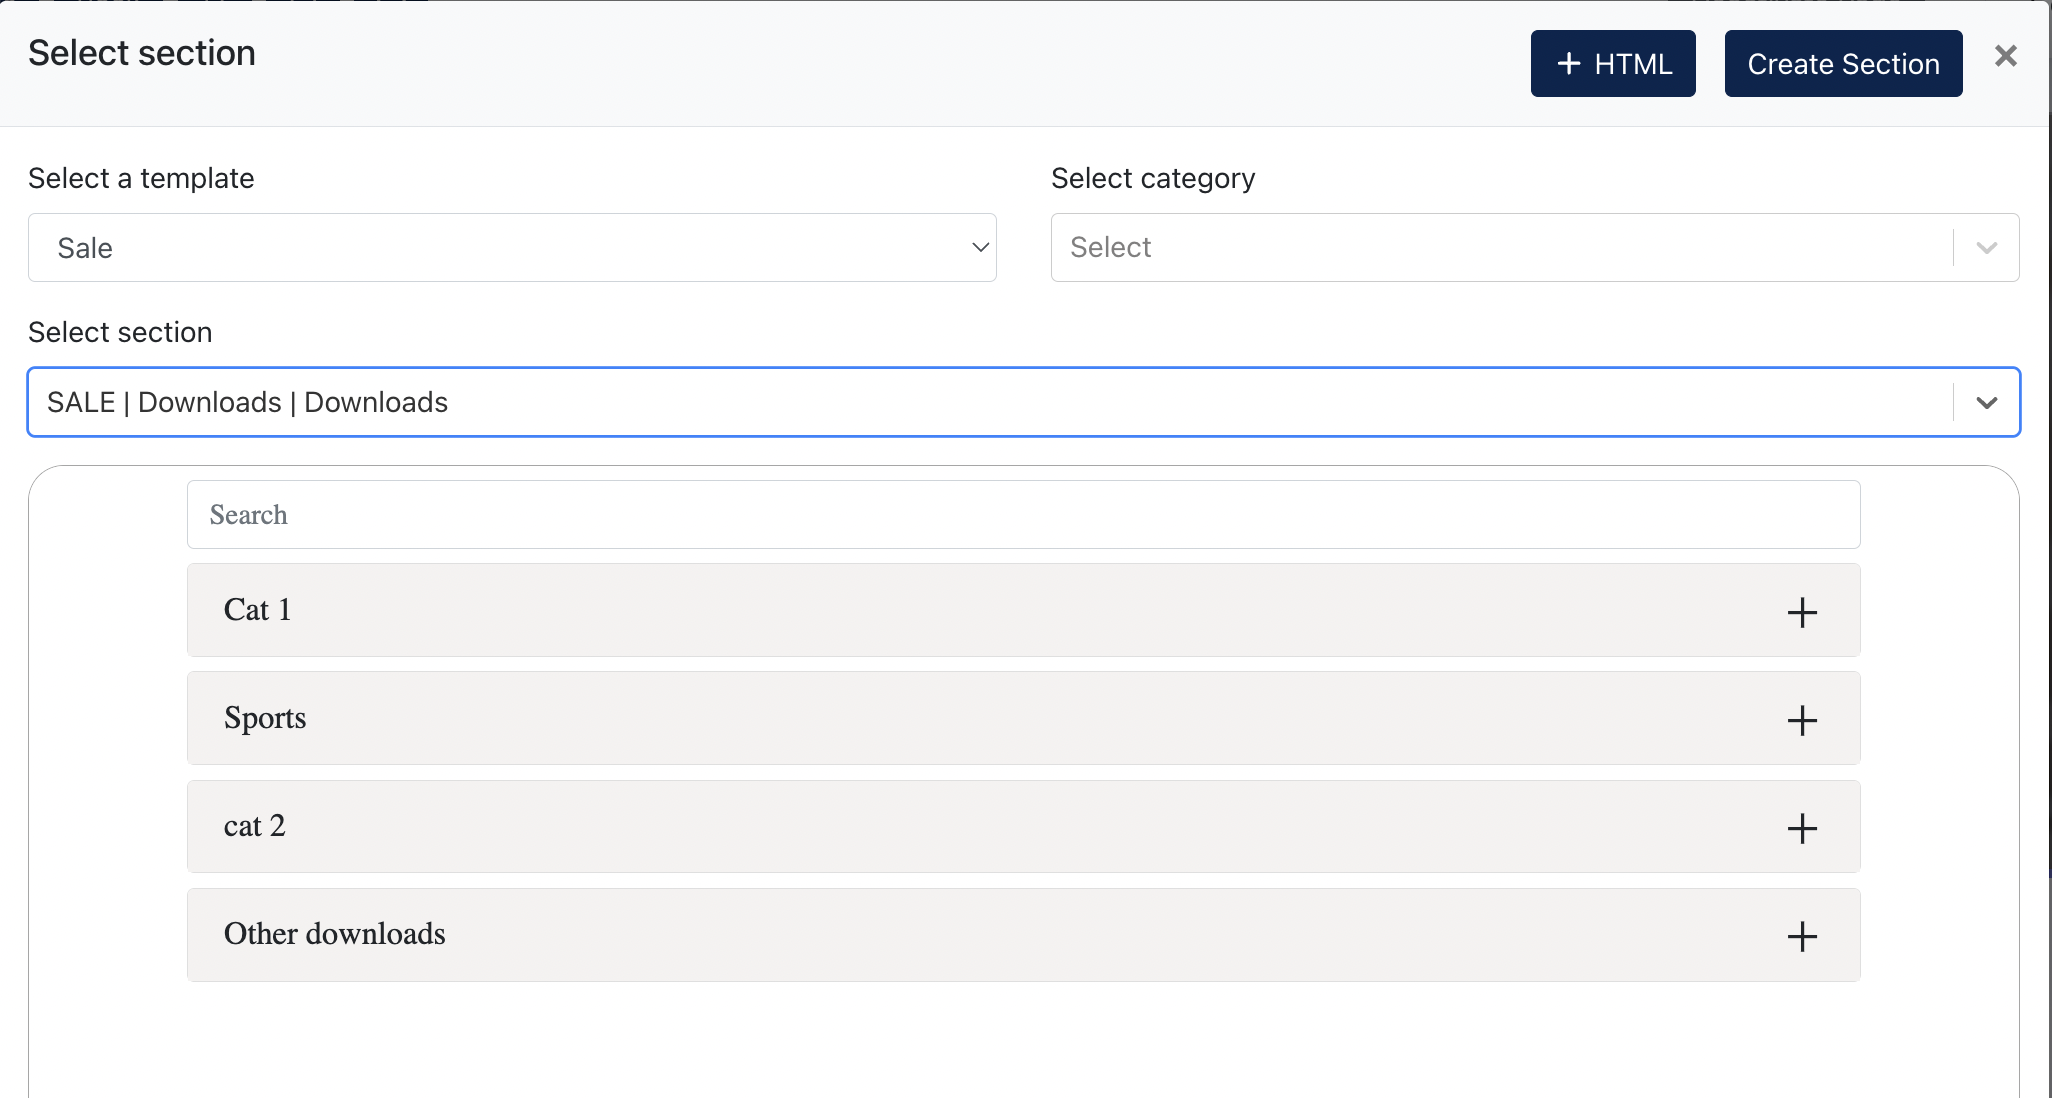
Configuration of the Download Section
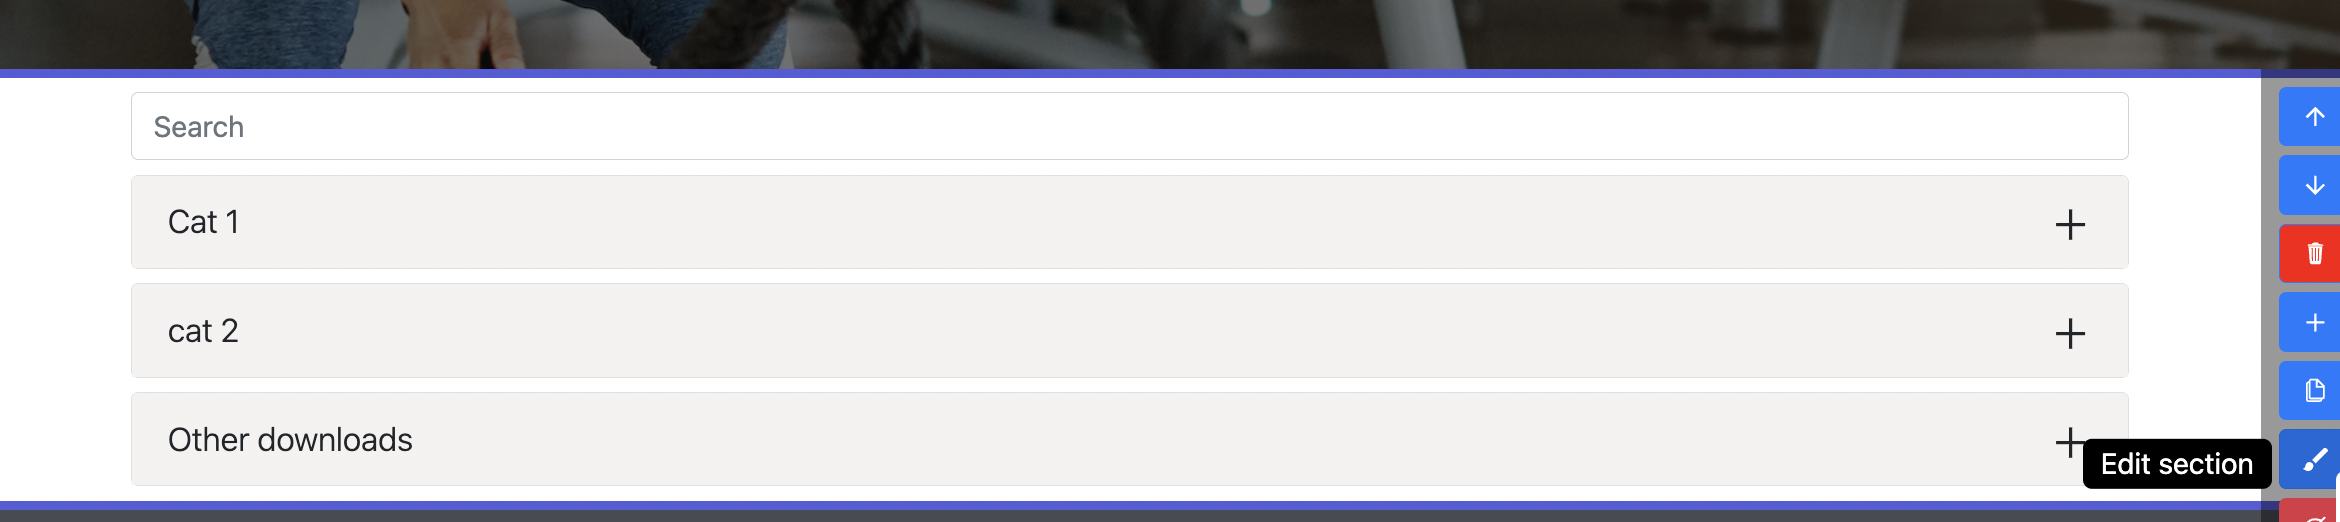
Click on the [ Edit Section ] Button :
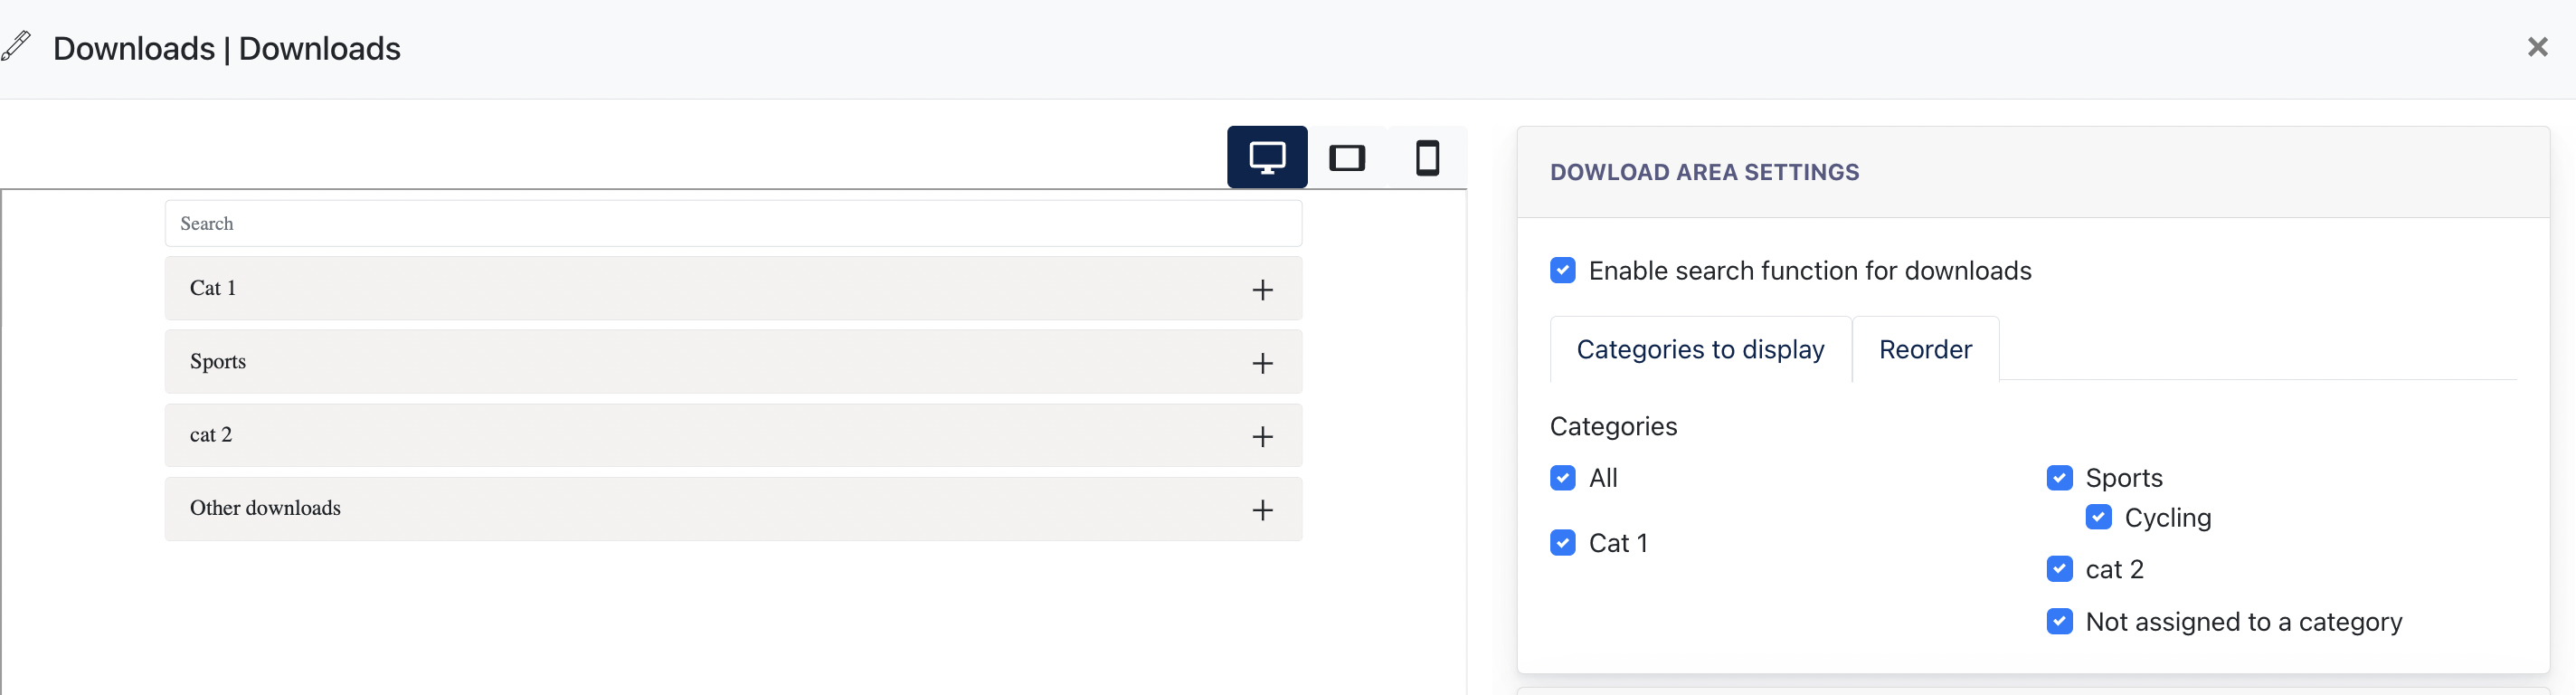
In the form [ Download Area Setting ] :
- Enable Search functions for downloads : When this is checked, a Search field will appear on the Download Sections on Live Site. Allowing Web Visitor to navigates the file easily using the Search function.
- Categories to display :
- All created categories will be listed here. Admin can decide if the category will appear under [ Add File ] for configuration.
- All - Show all created category / sub-category
- Not assigned to a category - Any files that doesn't assigned to category will fall under this category, which is [ Other Downloads ] on the Website.
- The End -