Setting up Courseplan
Course plan is one main module in conida website system. It allows every Center Admin creates new courses and display them on the course schedule, and allow Center members / website visitor to book the courses online.
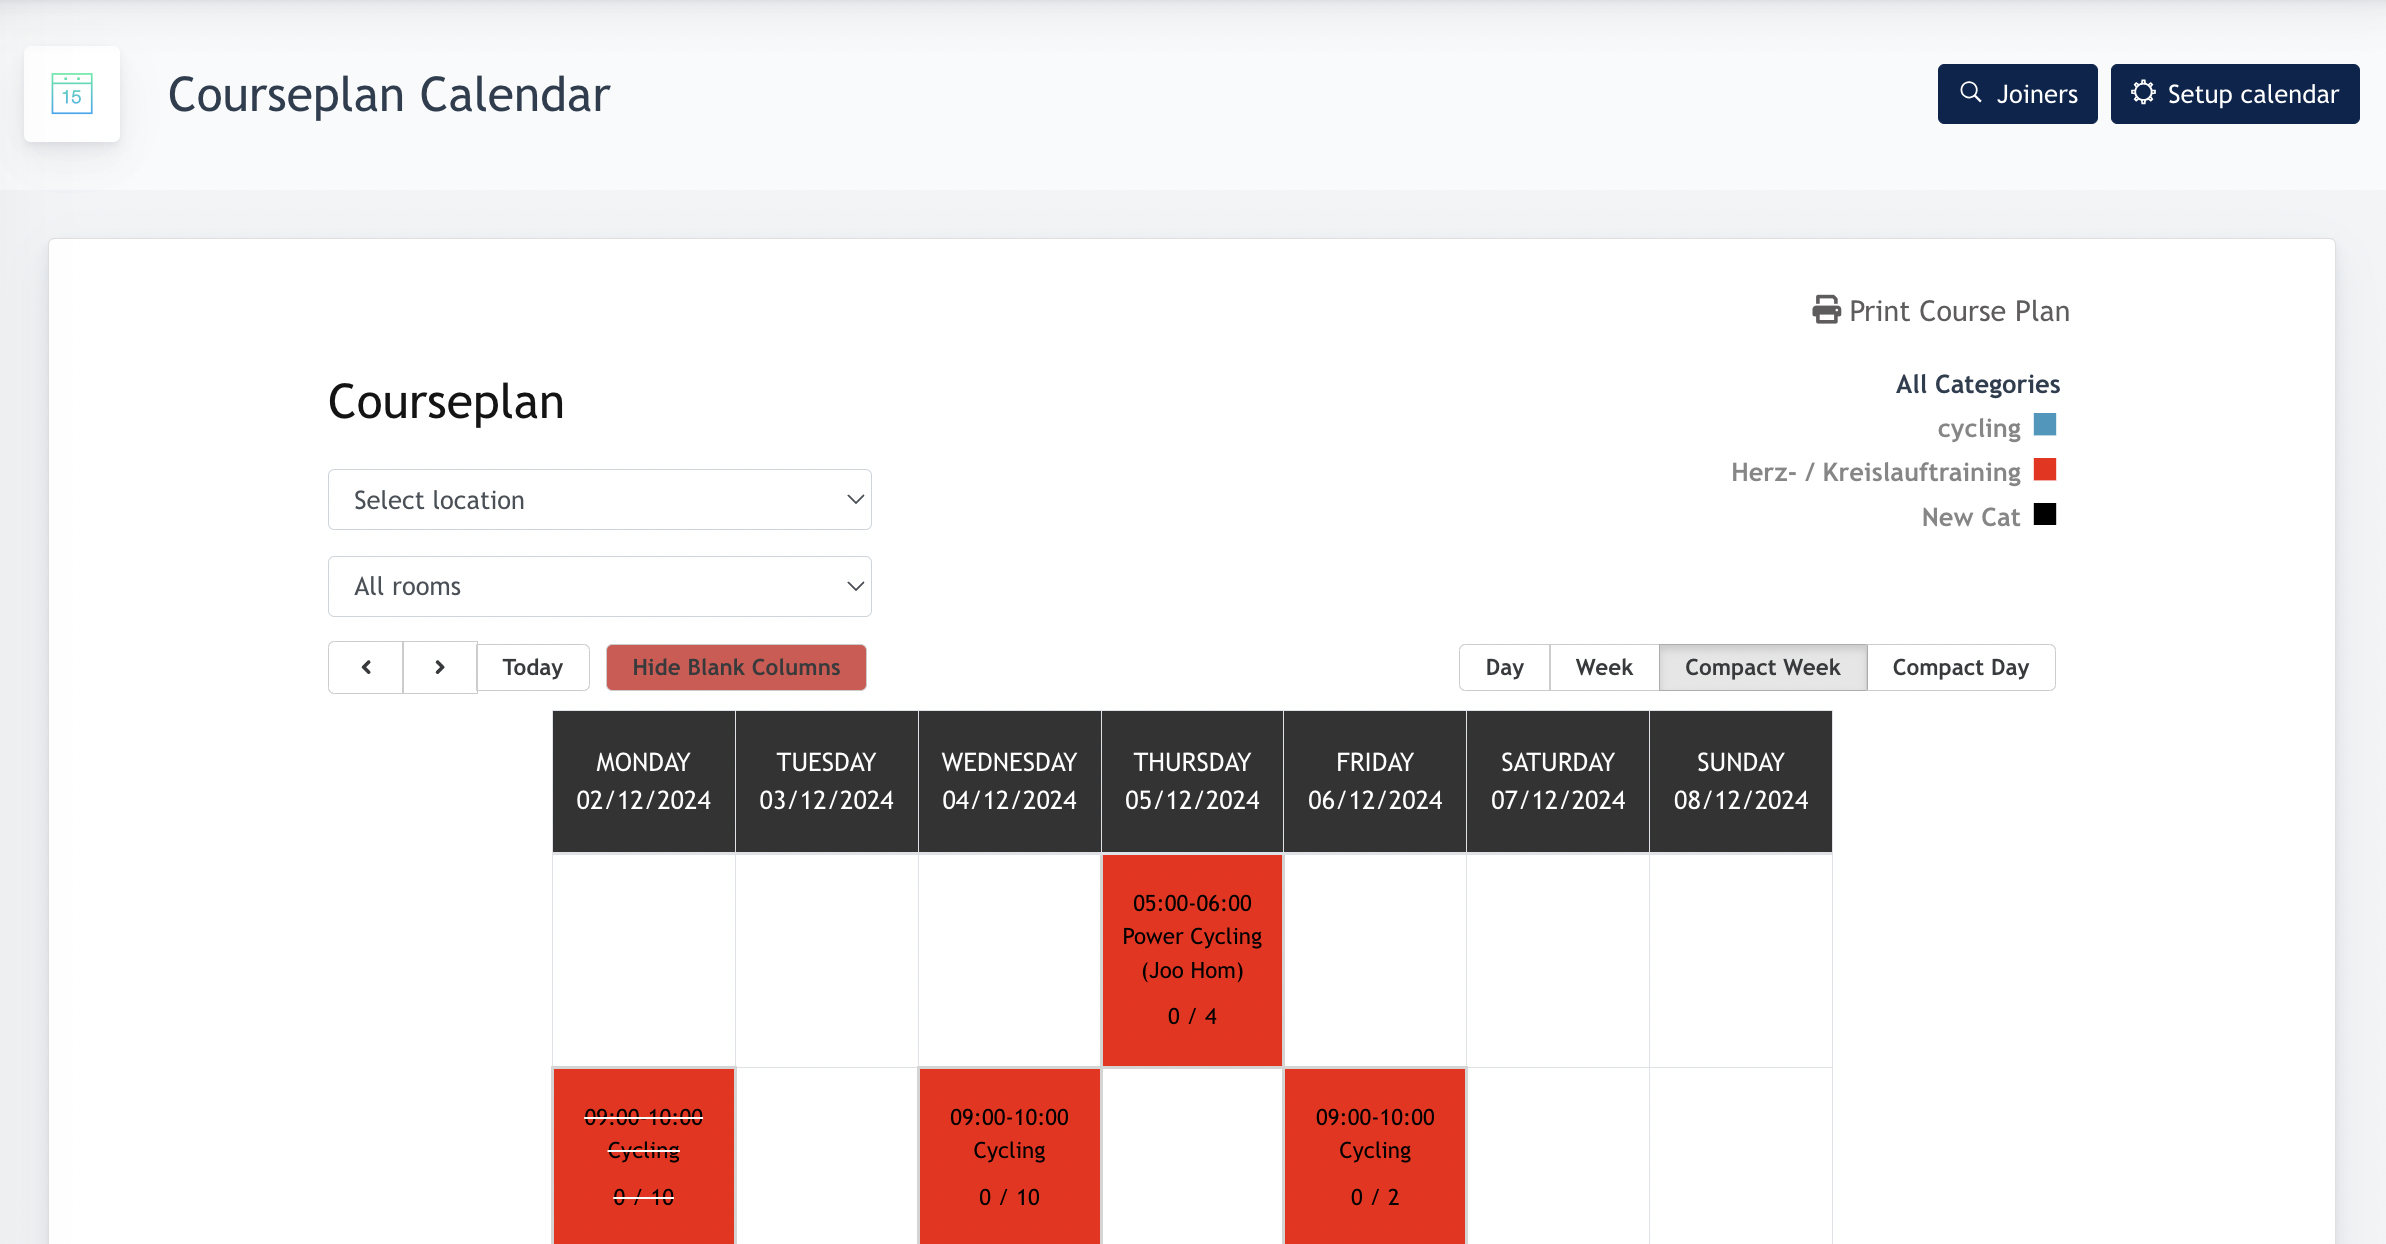
1. Courseplan Calendar
This is the place where Center Admin views existing schedule, create new course, and view joiners booking list.
Example of a courseplan admin panel page :
1.1 Setup Calendar
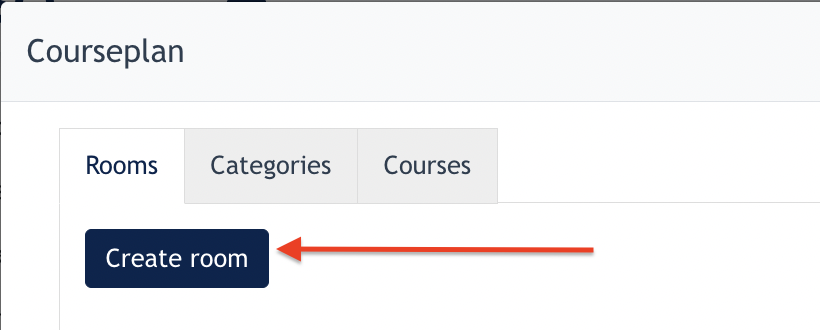
Create a Room
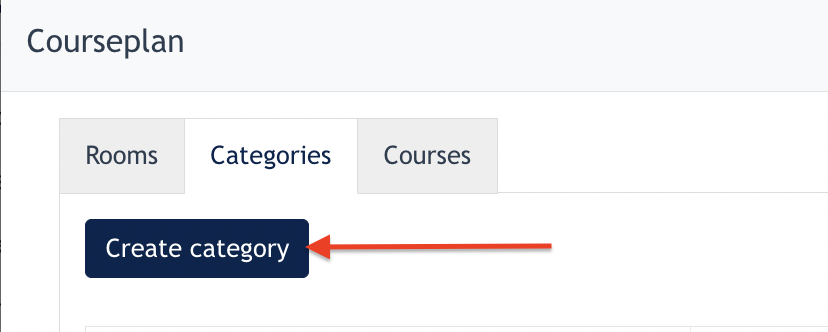
"Room" is mandatory in course creation. Click on [ Setup Calendar ] and this modal will opened up:
Click on the 1st tab : ROOM
Click on "Create Room" button
The following modal will appear:
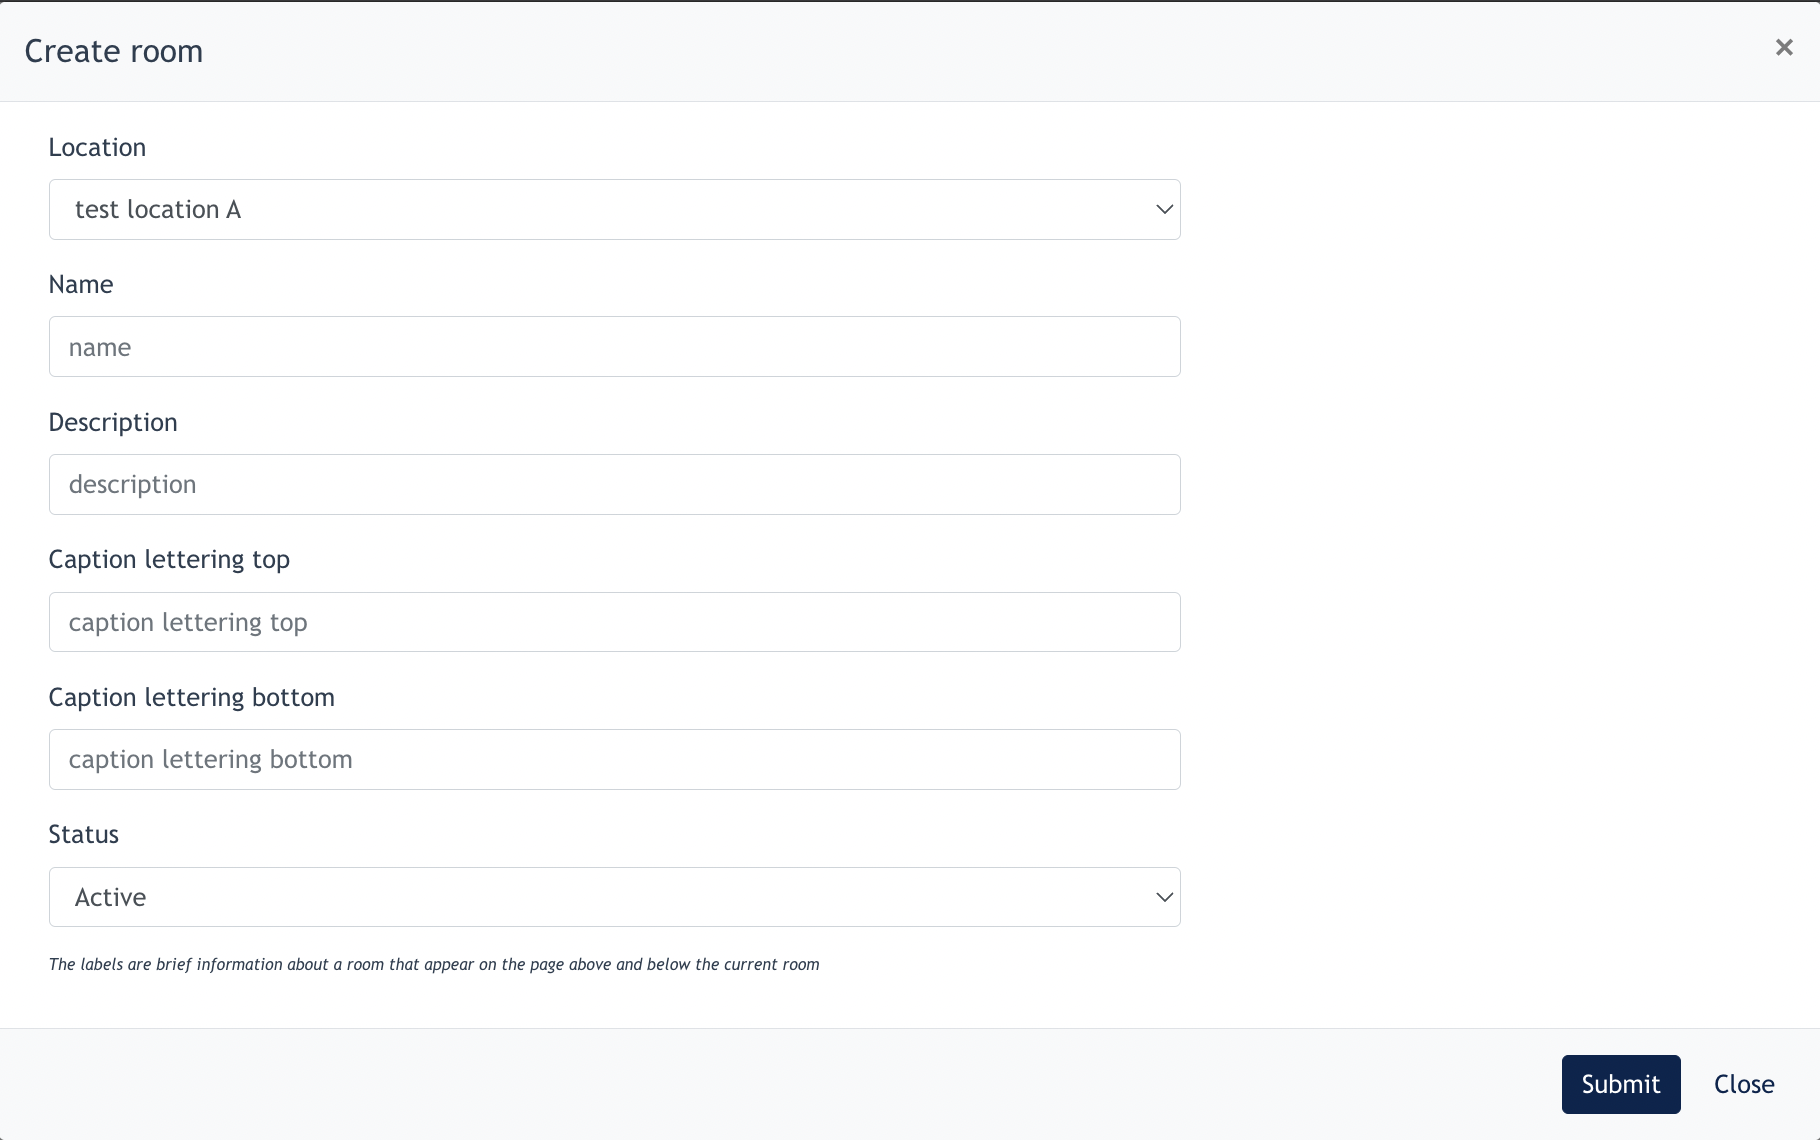
In the form :
- Location: The location of the room, select from the list
- Name: The name of the room
- Description: Describe this room, what is this for
- Caption lettering top: Description that is only visible at the print courseplan
- Caption lettering bottom: Description that is only visible at the print courseplan
- Status: Active/Inactive room
- Click Submit to save this Room.
Create Category
Category is mandatory in Course creation.
Click on the 2nd tab : CATEGORIES
Click "create category" and the following modal will appear :
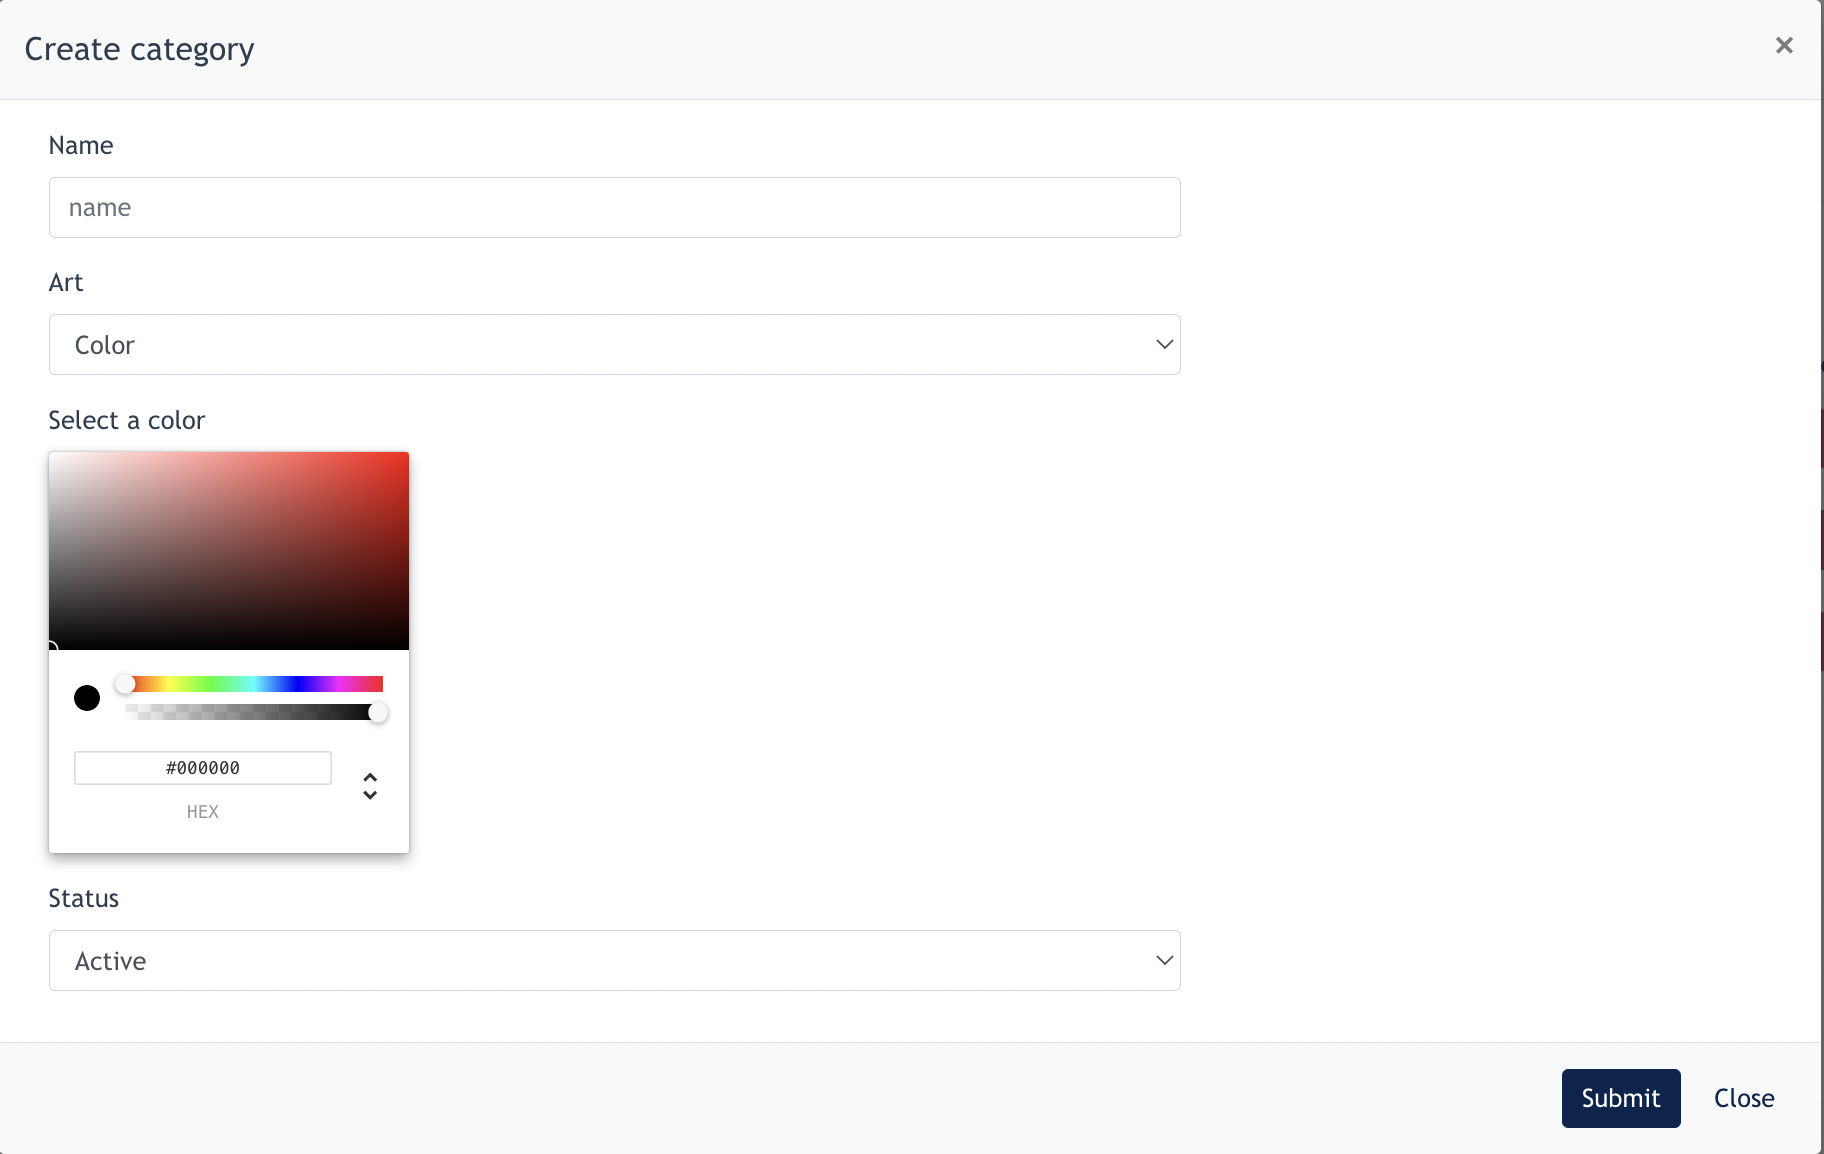
In the form :
- Name: The name of the category
- Art: Users can choose to use either colour or icon to represent the category, it will be displayed on the courseplan calendar.
- Colour -> pick a colour from the chart
- Icon -> upload an image
- Status: Active/Inactive
- Click submit to save the category into the Courseplan.
Create New Course
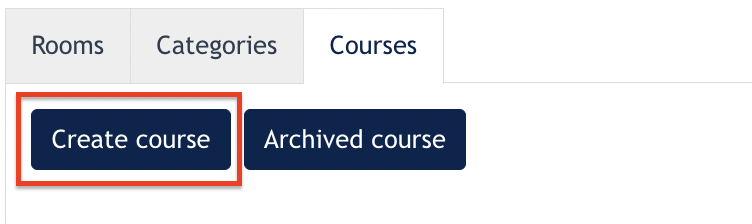
Go to the 3rd tab : COURSE
Click on "Create Course" button, the following modal will appear:
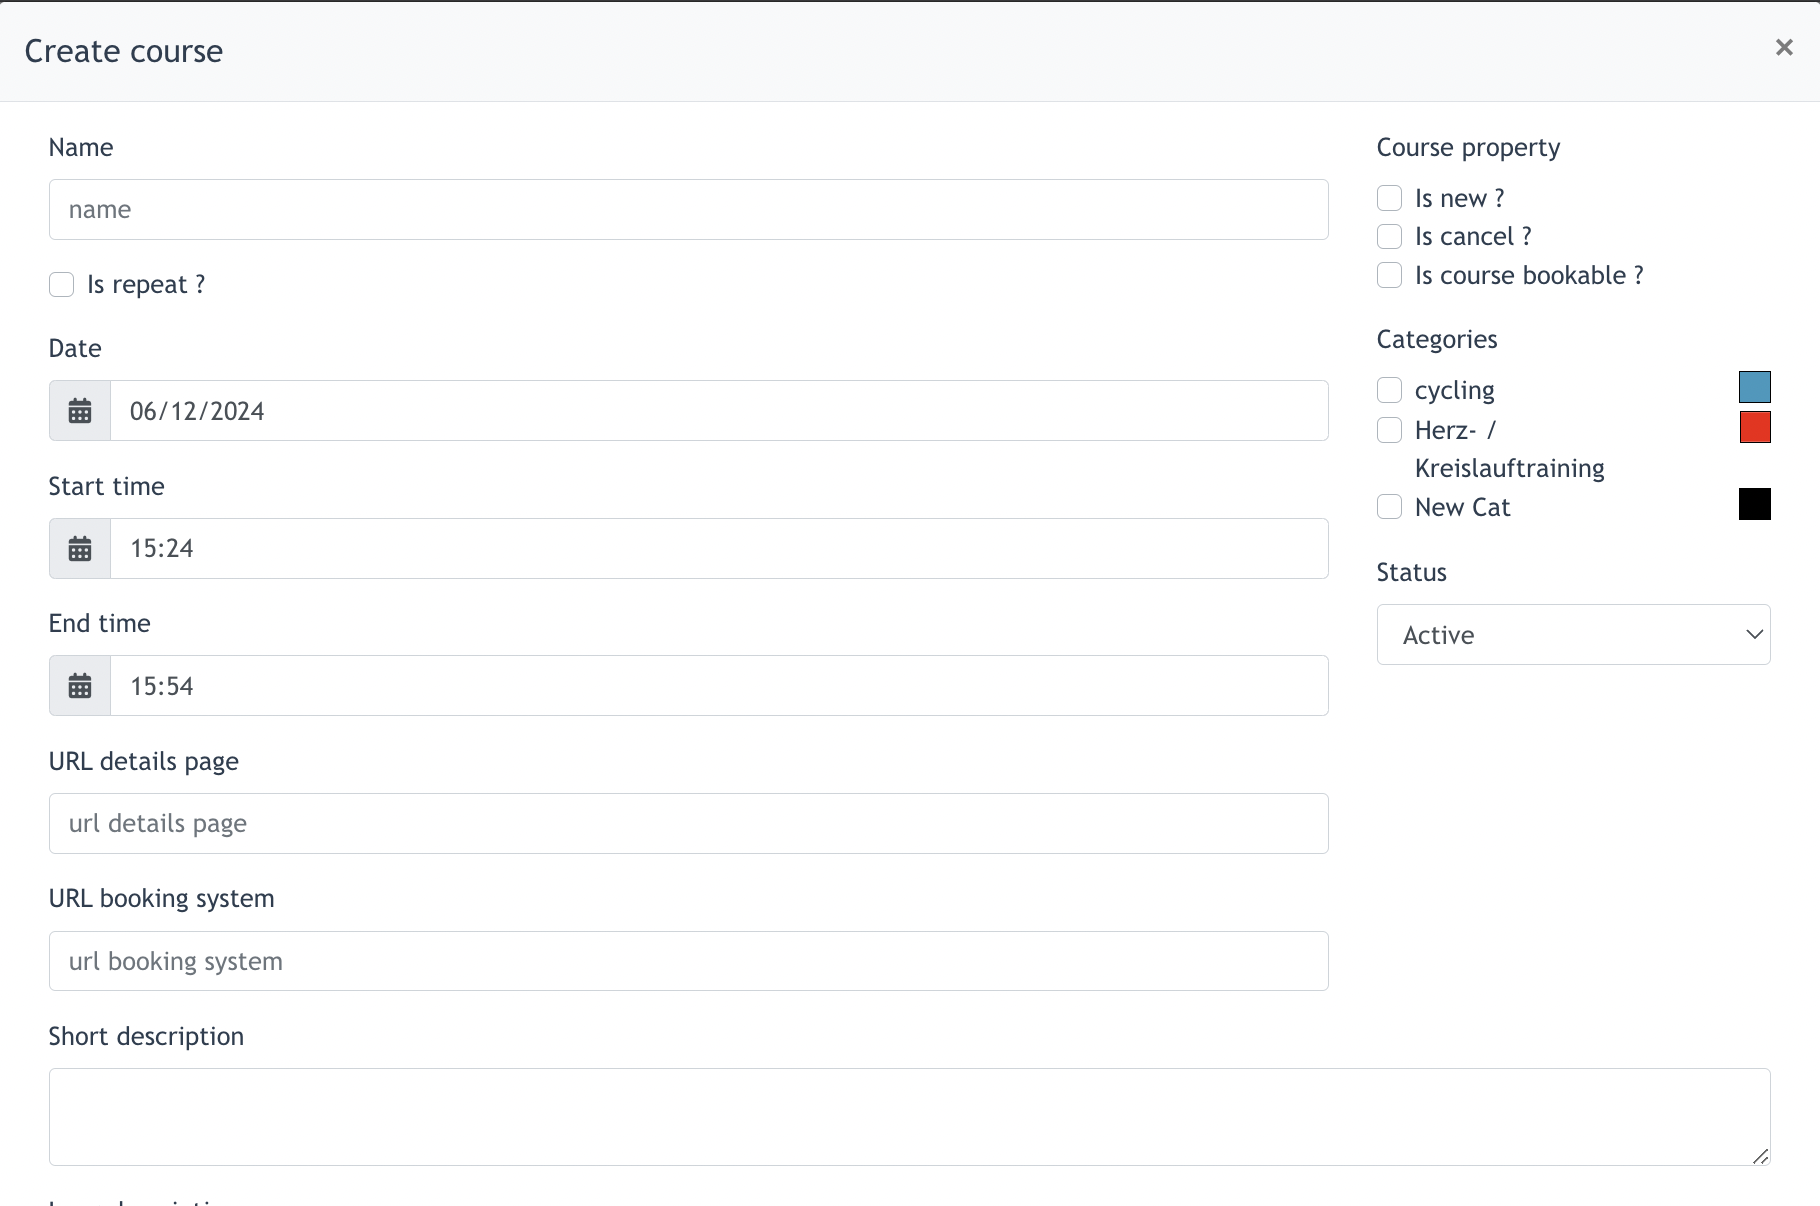
In the form :
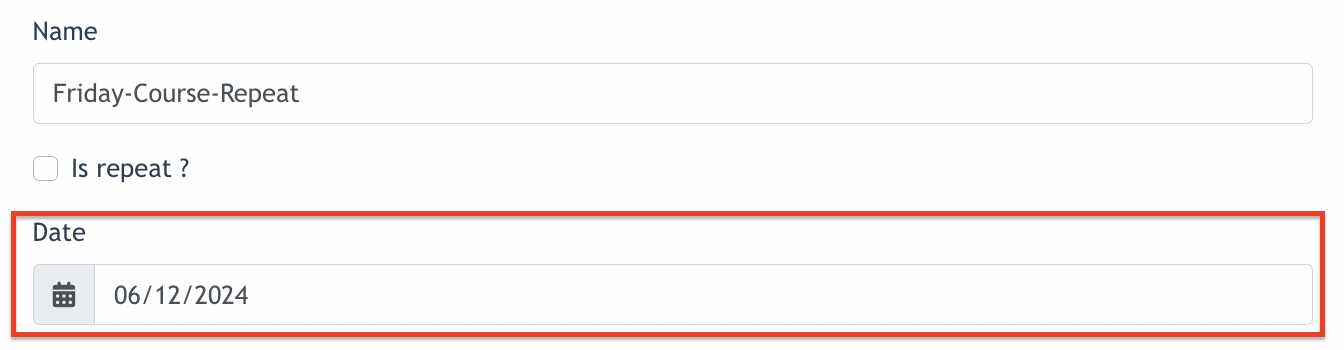
- Name: The name of the course
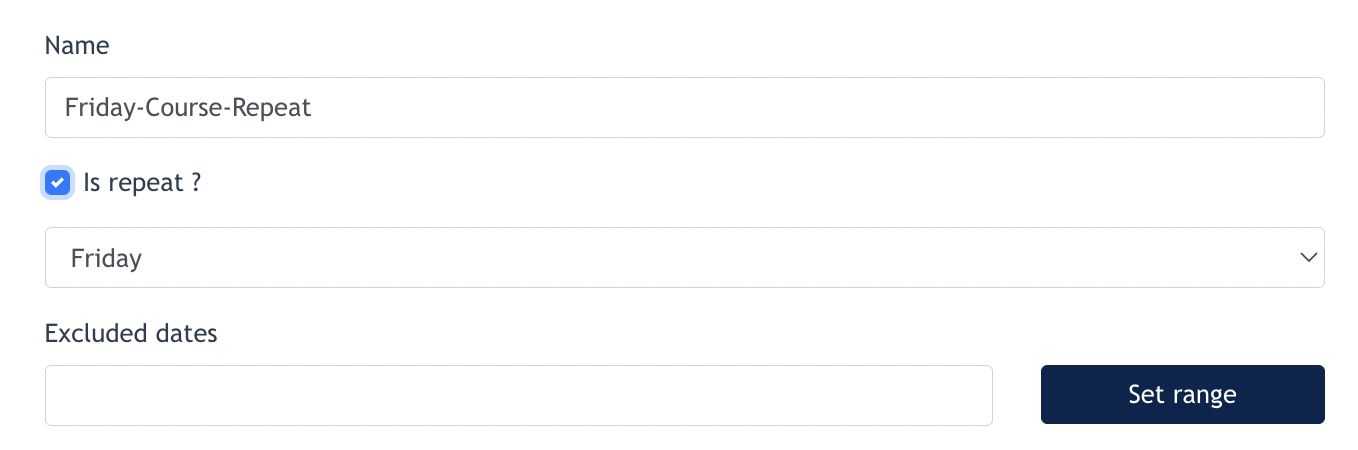
- Is repeat?: Check this box if the course repeats on the same day, same time weekly.

- If "Is Repeat" is checked, select which day the course is repeating
- Exclude dates : select which "Friday" (based on above example) should be excluded from course calendar.
- If "Is Repeat" is not selected, Admin just need to select a date for the course via the datepicker

- Start/End time: Configure the Start/End time of the Course
- URL details page: This slug can be used to generate a own url for the course
- URL booking system: If an external booking system shell be used the link can be set up here
- Short description: A short description of the course
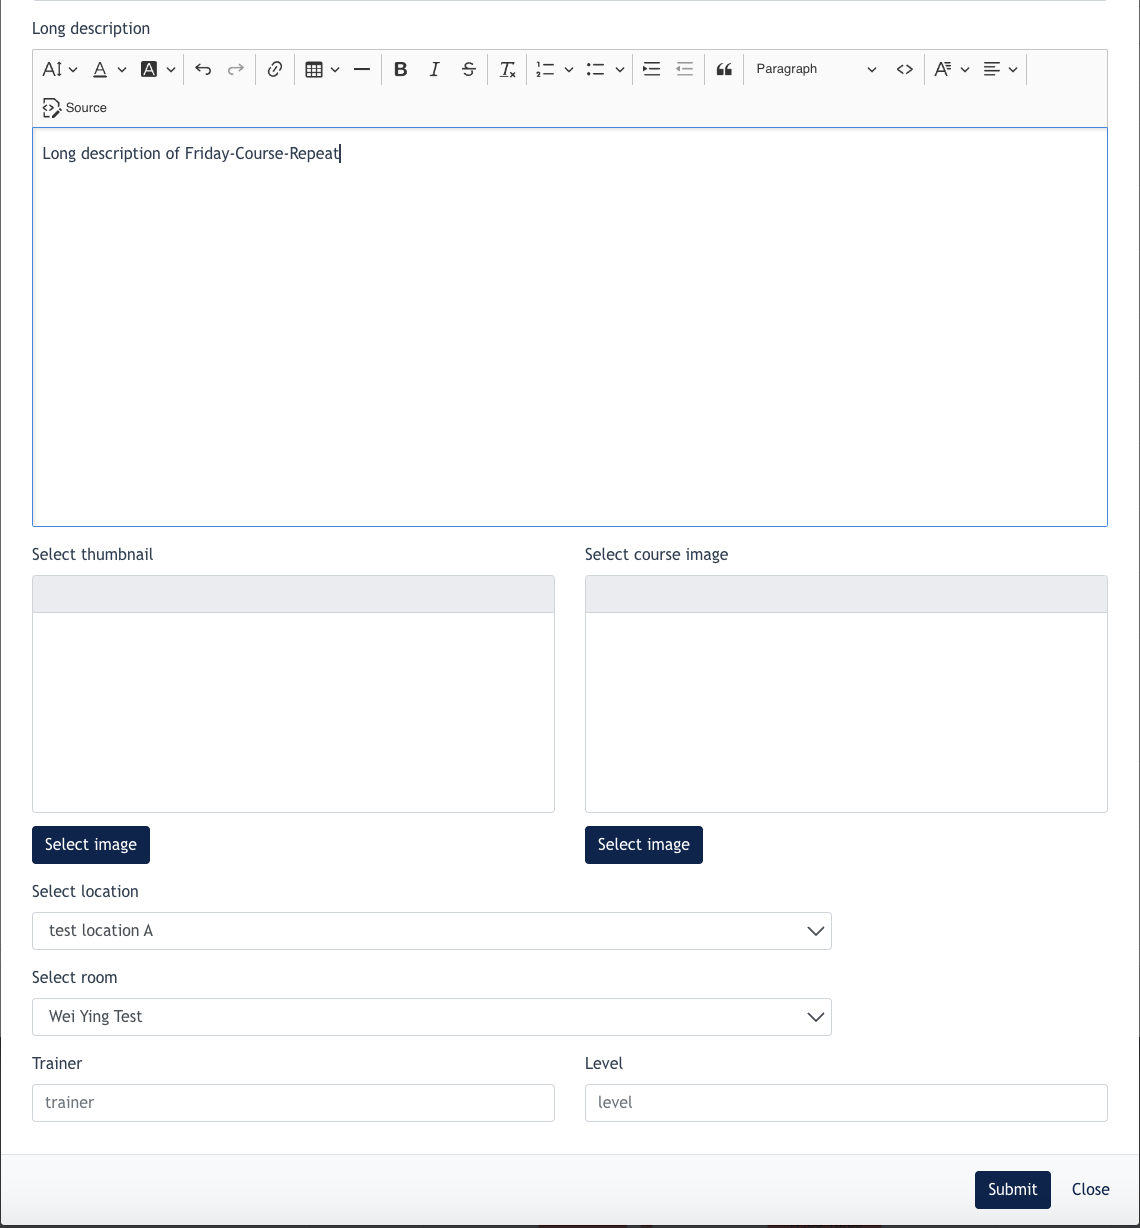
- Long description: Full description of the course that displays inside course details page
- Select thumbnail: Configure a thumbnail image of the course
- Select course image: Main image of the course that displays inside course details page
- Select location: Select which Center Location this course belongs to
- Select room: Select which room this course belongs to
- Trainer: Who is the trainer for this course
- Level: What are the level of this course
Before submitting the course detail, make sure the following are also configured :
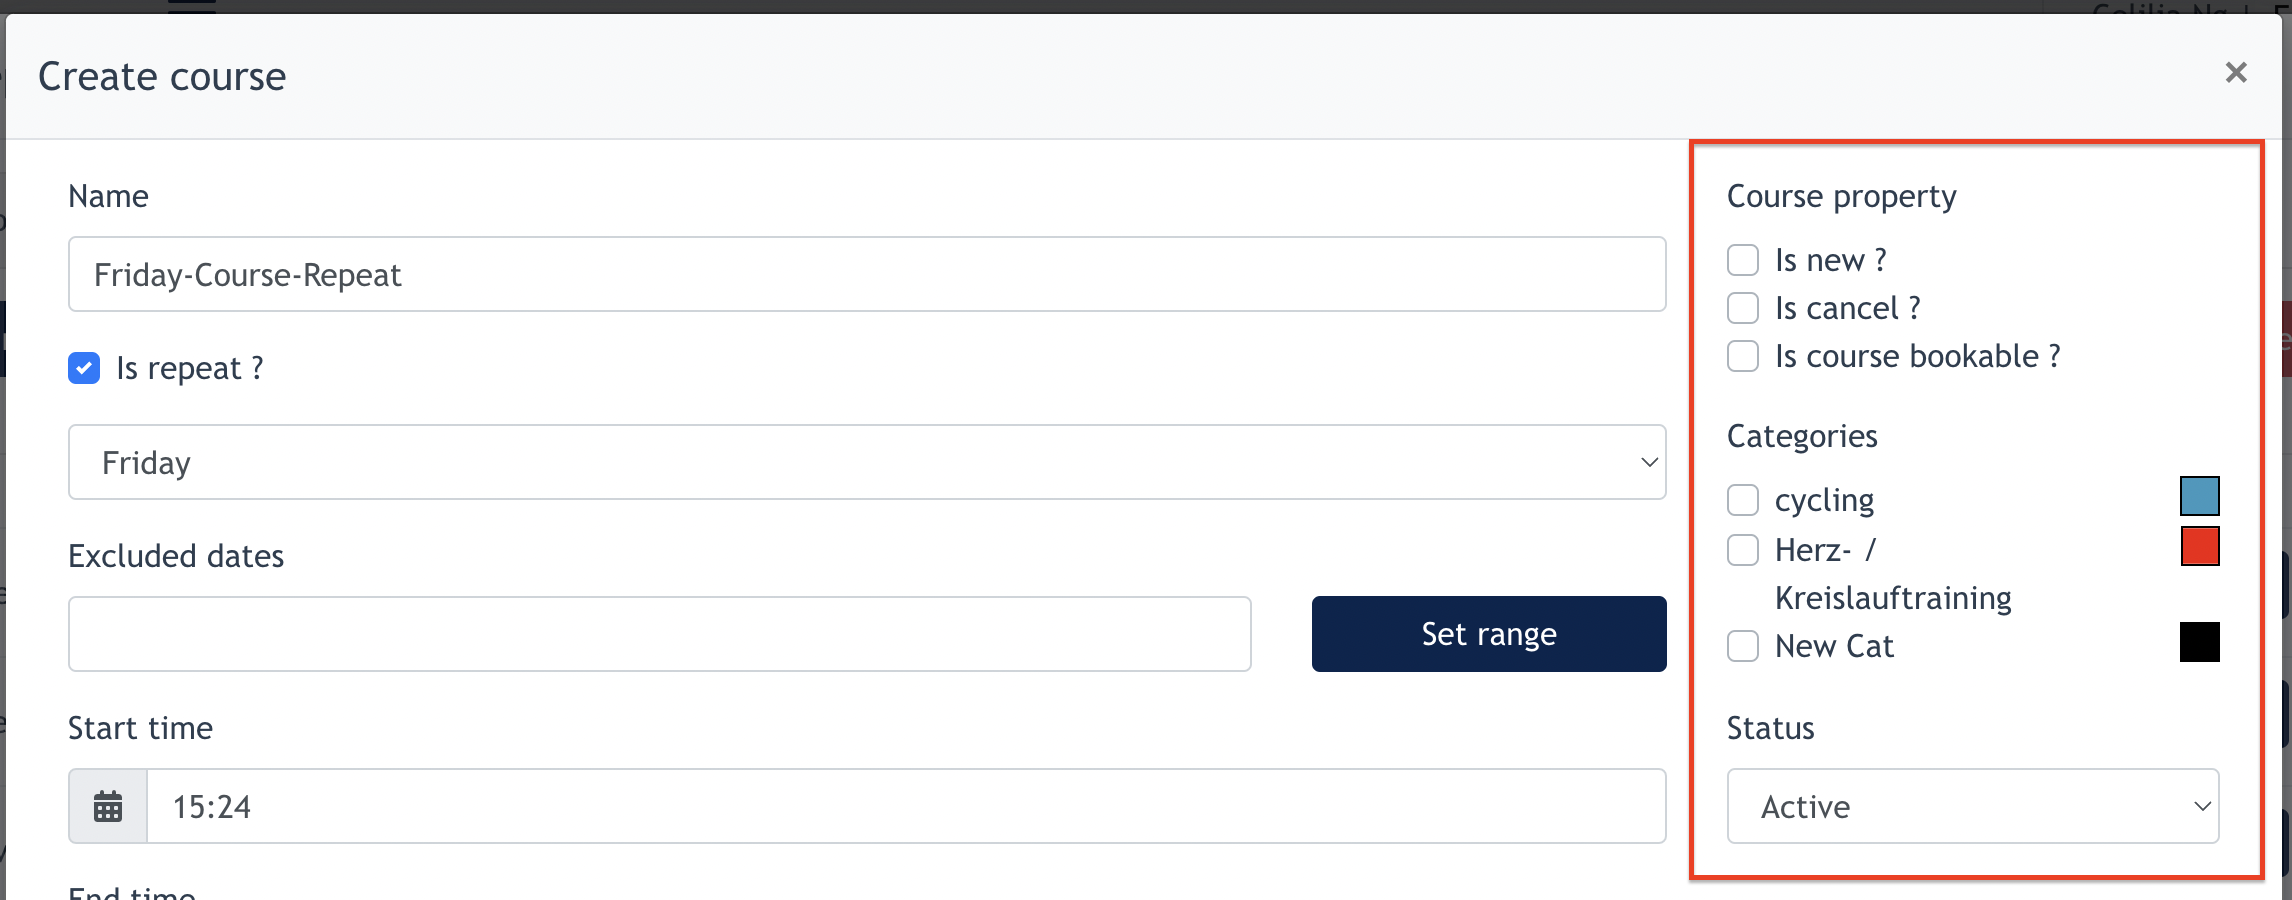
- Course property:
- Is New : Check this if the Course is Newly created course
- Is Cancel : Check this if Admin wants to cancel this course
- Is Bookable : Check this if the course is open for booking
- Capacity: Center Admin can set how many people are allowed to join this course.
- Categories: Category created with status active will be displayed here. It's mandatory for every course to belong to at least 1 category.
- Click Submit to save the course.
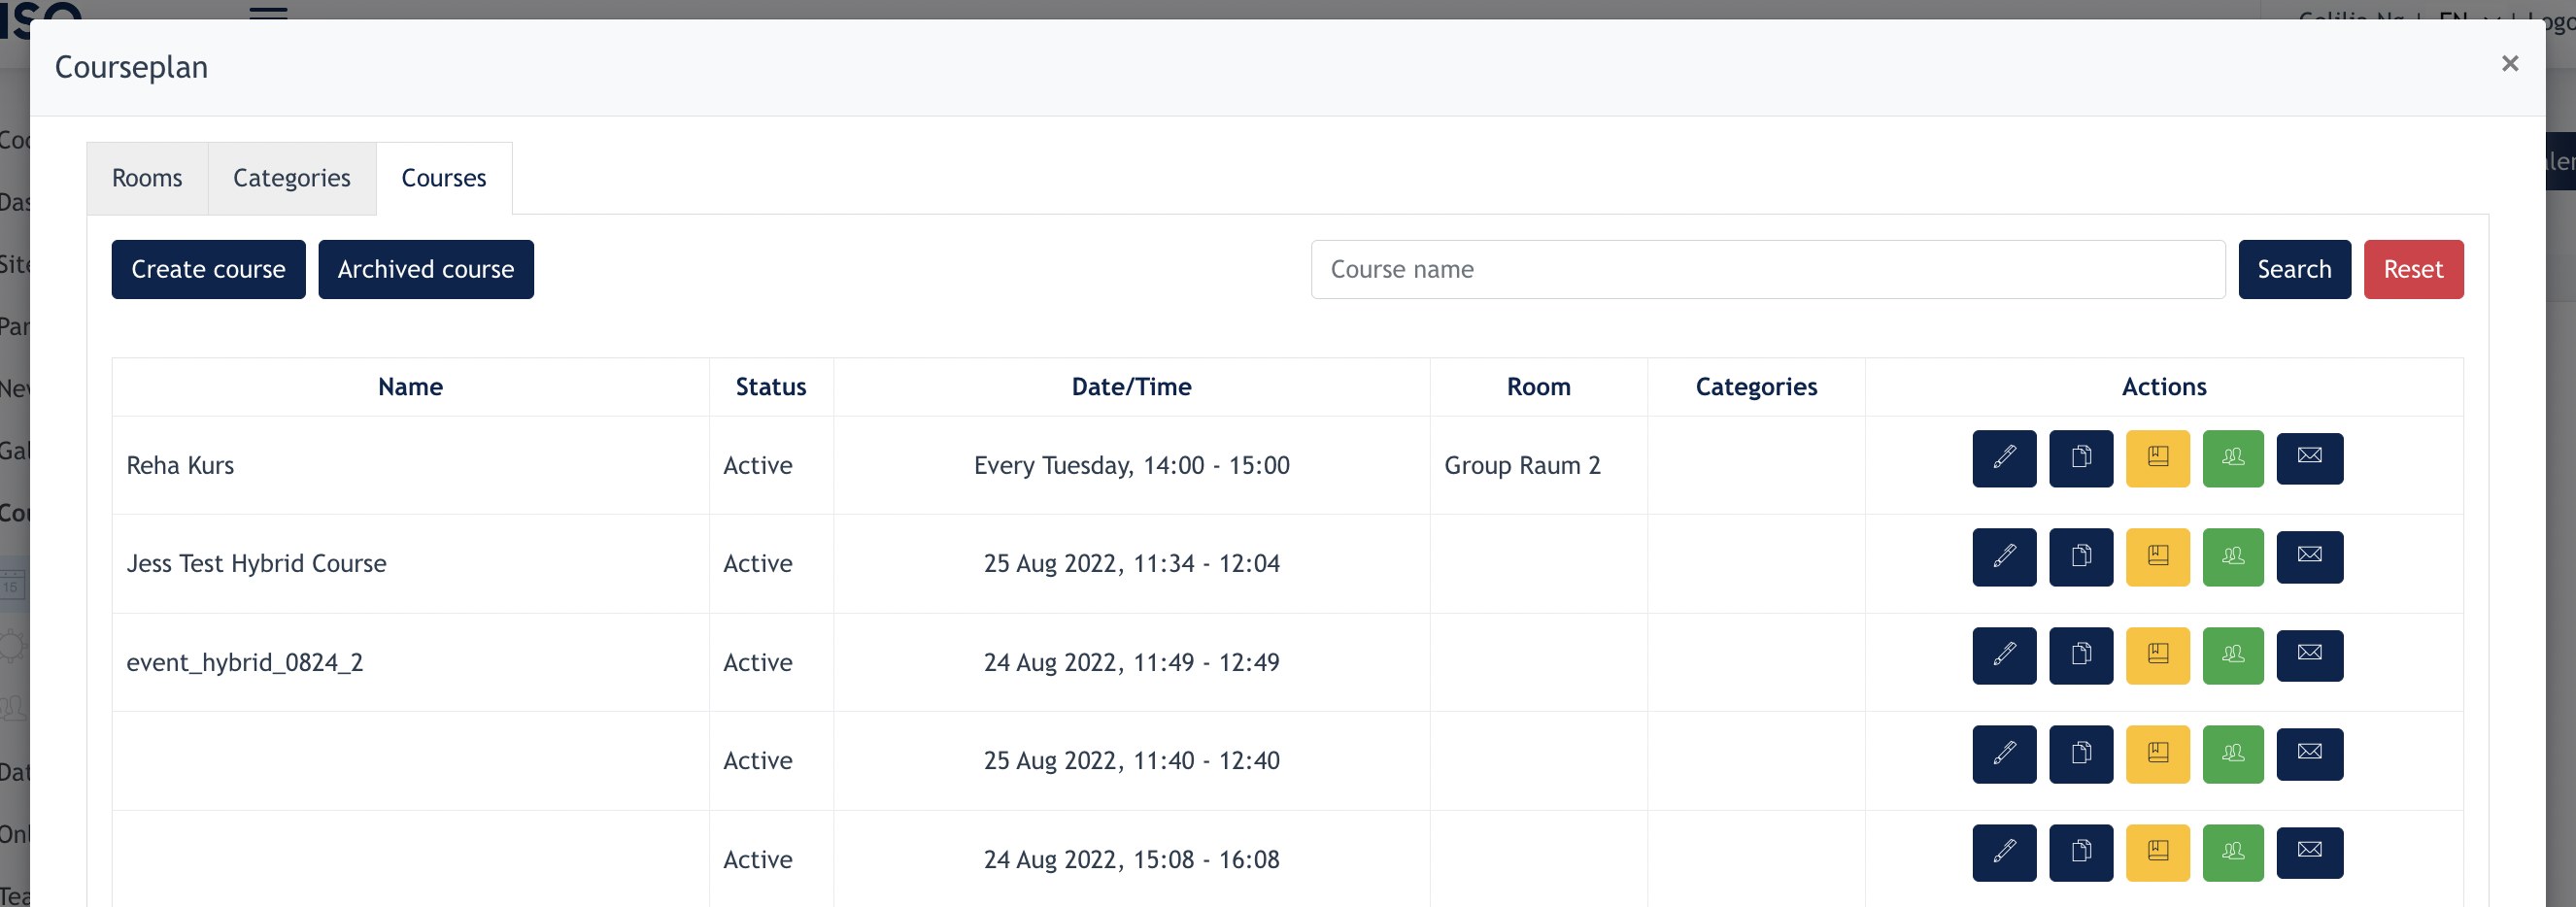
2. About Course Listing
Under the [ Calendar Setup ], Admin can review and manage the created course via this lisitng.
Under [ Action Column ]
- Edit - Center Admin may edit the course basic info, however, info such as Course date, and time are not allowed to change once there is joiner for the course.
- Duplicate - Center Admin may click this button to duplicate this course
- Archive - Center Admin may archive the course if it's no longer required
- Joiners - Center Admin may check who has join the courses
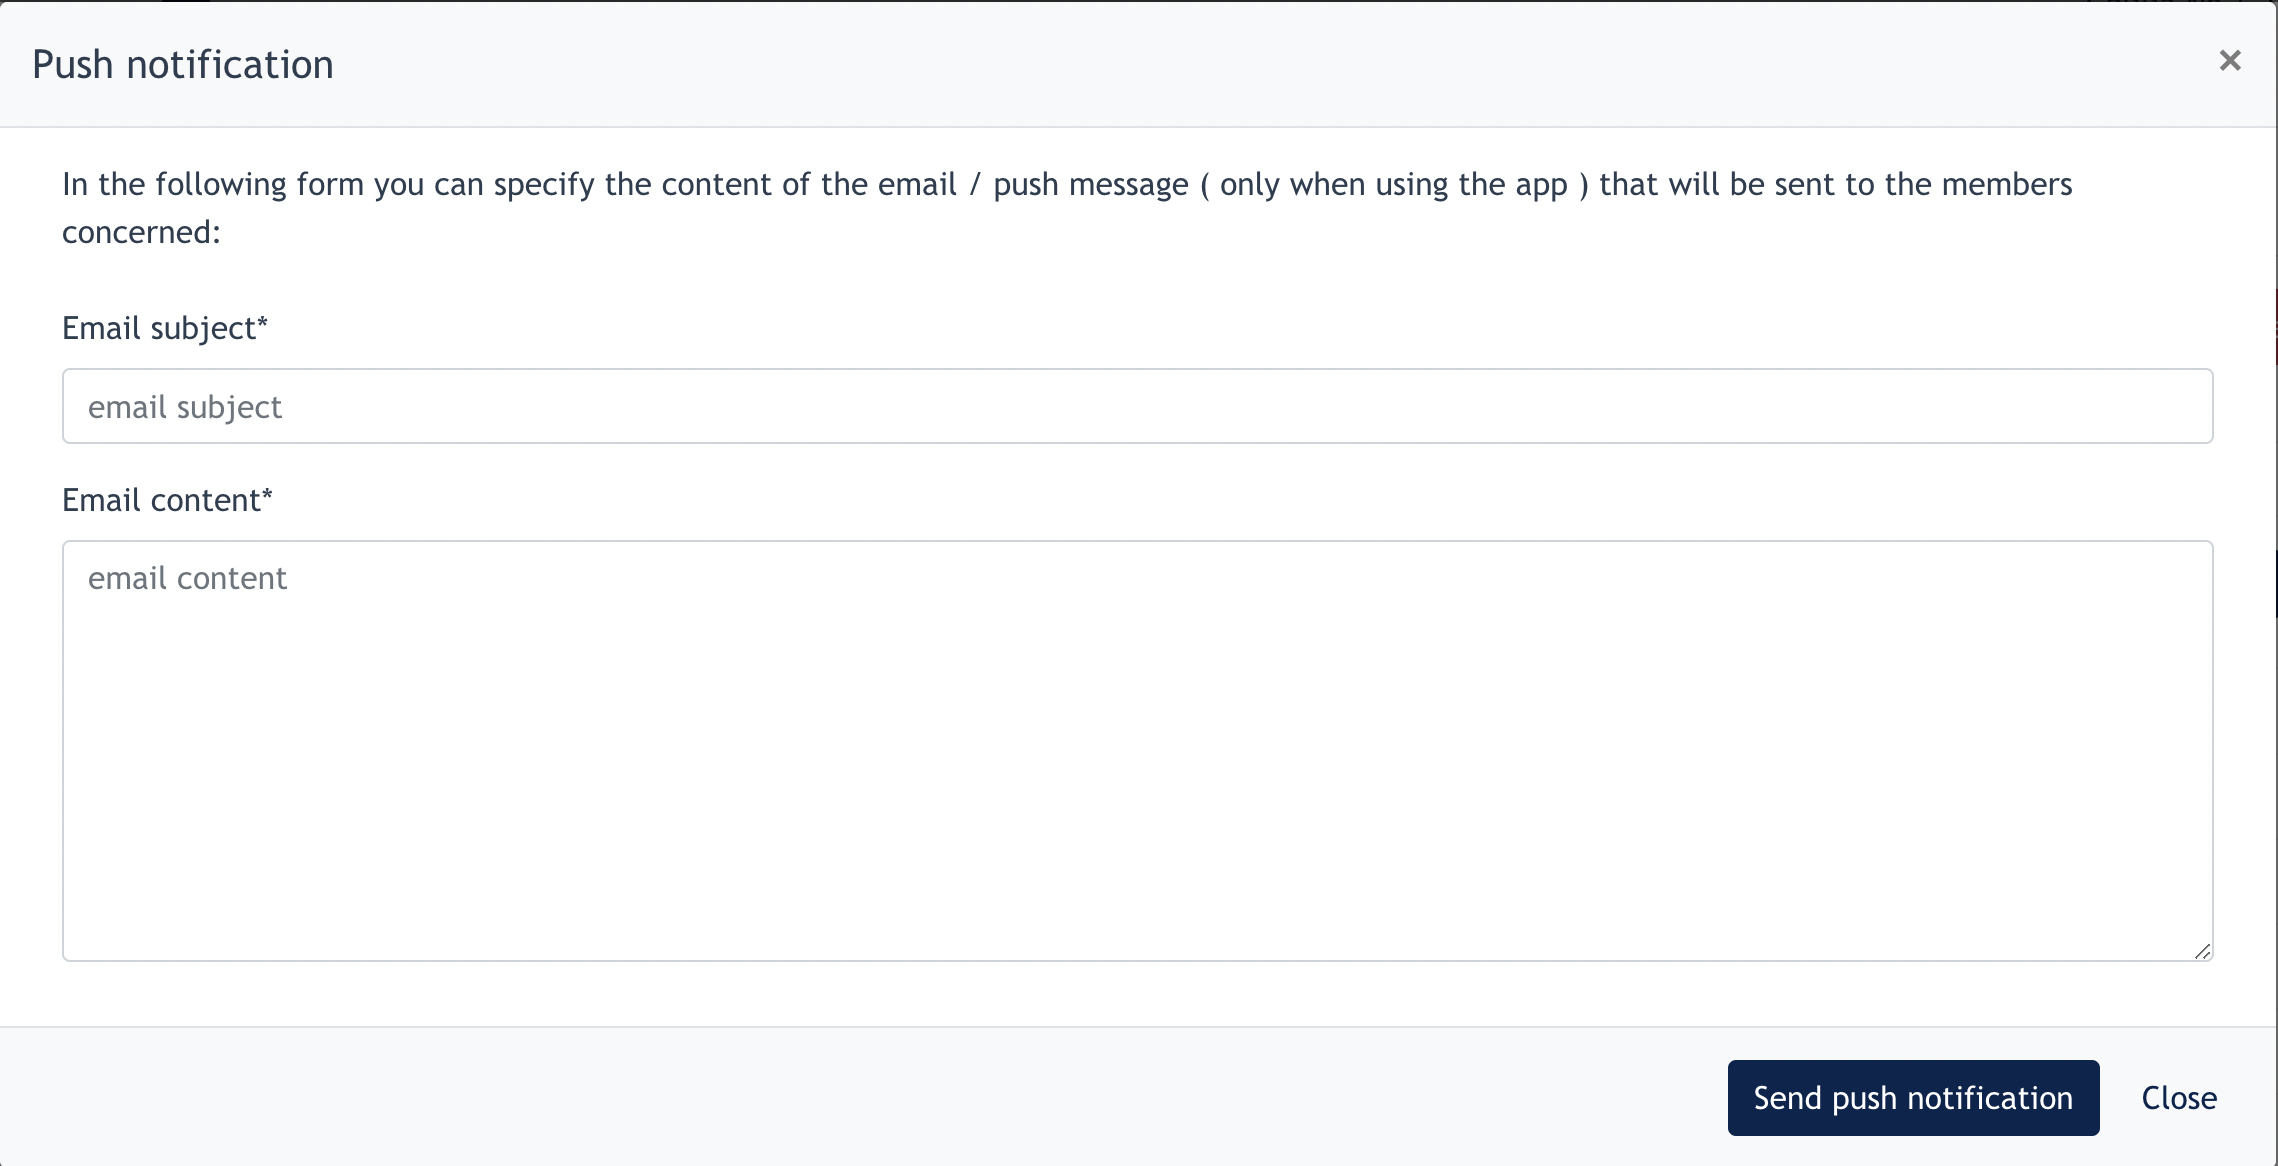
- Email - Center Admin may send message to joiners by configuring the following modal. Click "Send push notification" and this content will be emailed to Joiner's email account.
2.1. View Joiners
If you click on "View Joiners" under the Action column ( of a specific COURSE ), the following modal will be opened up:

Below show example of course i just created "Xmas course 2024"
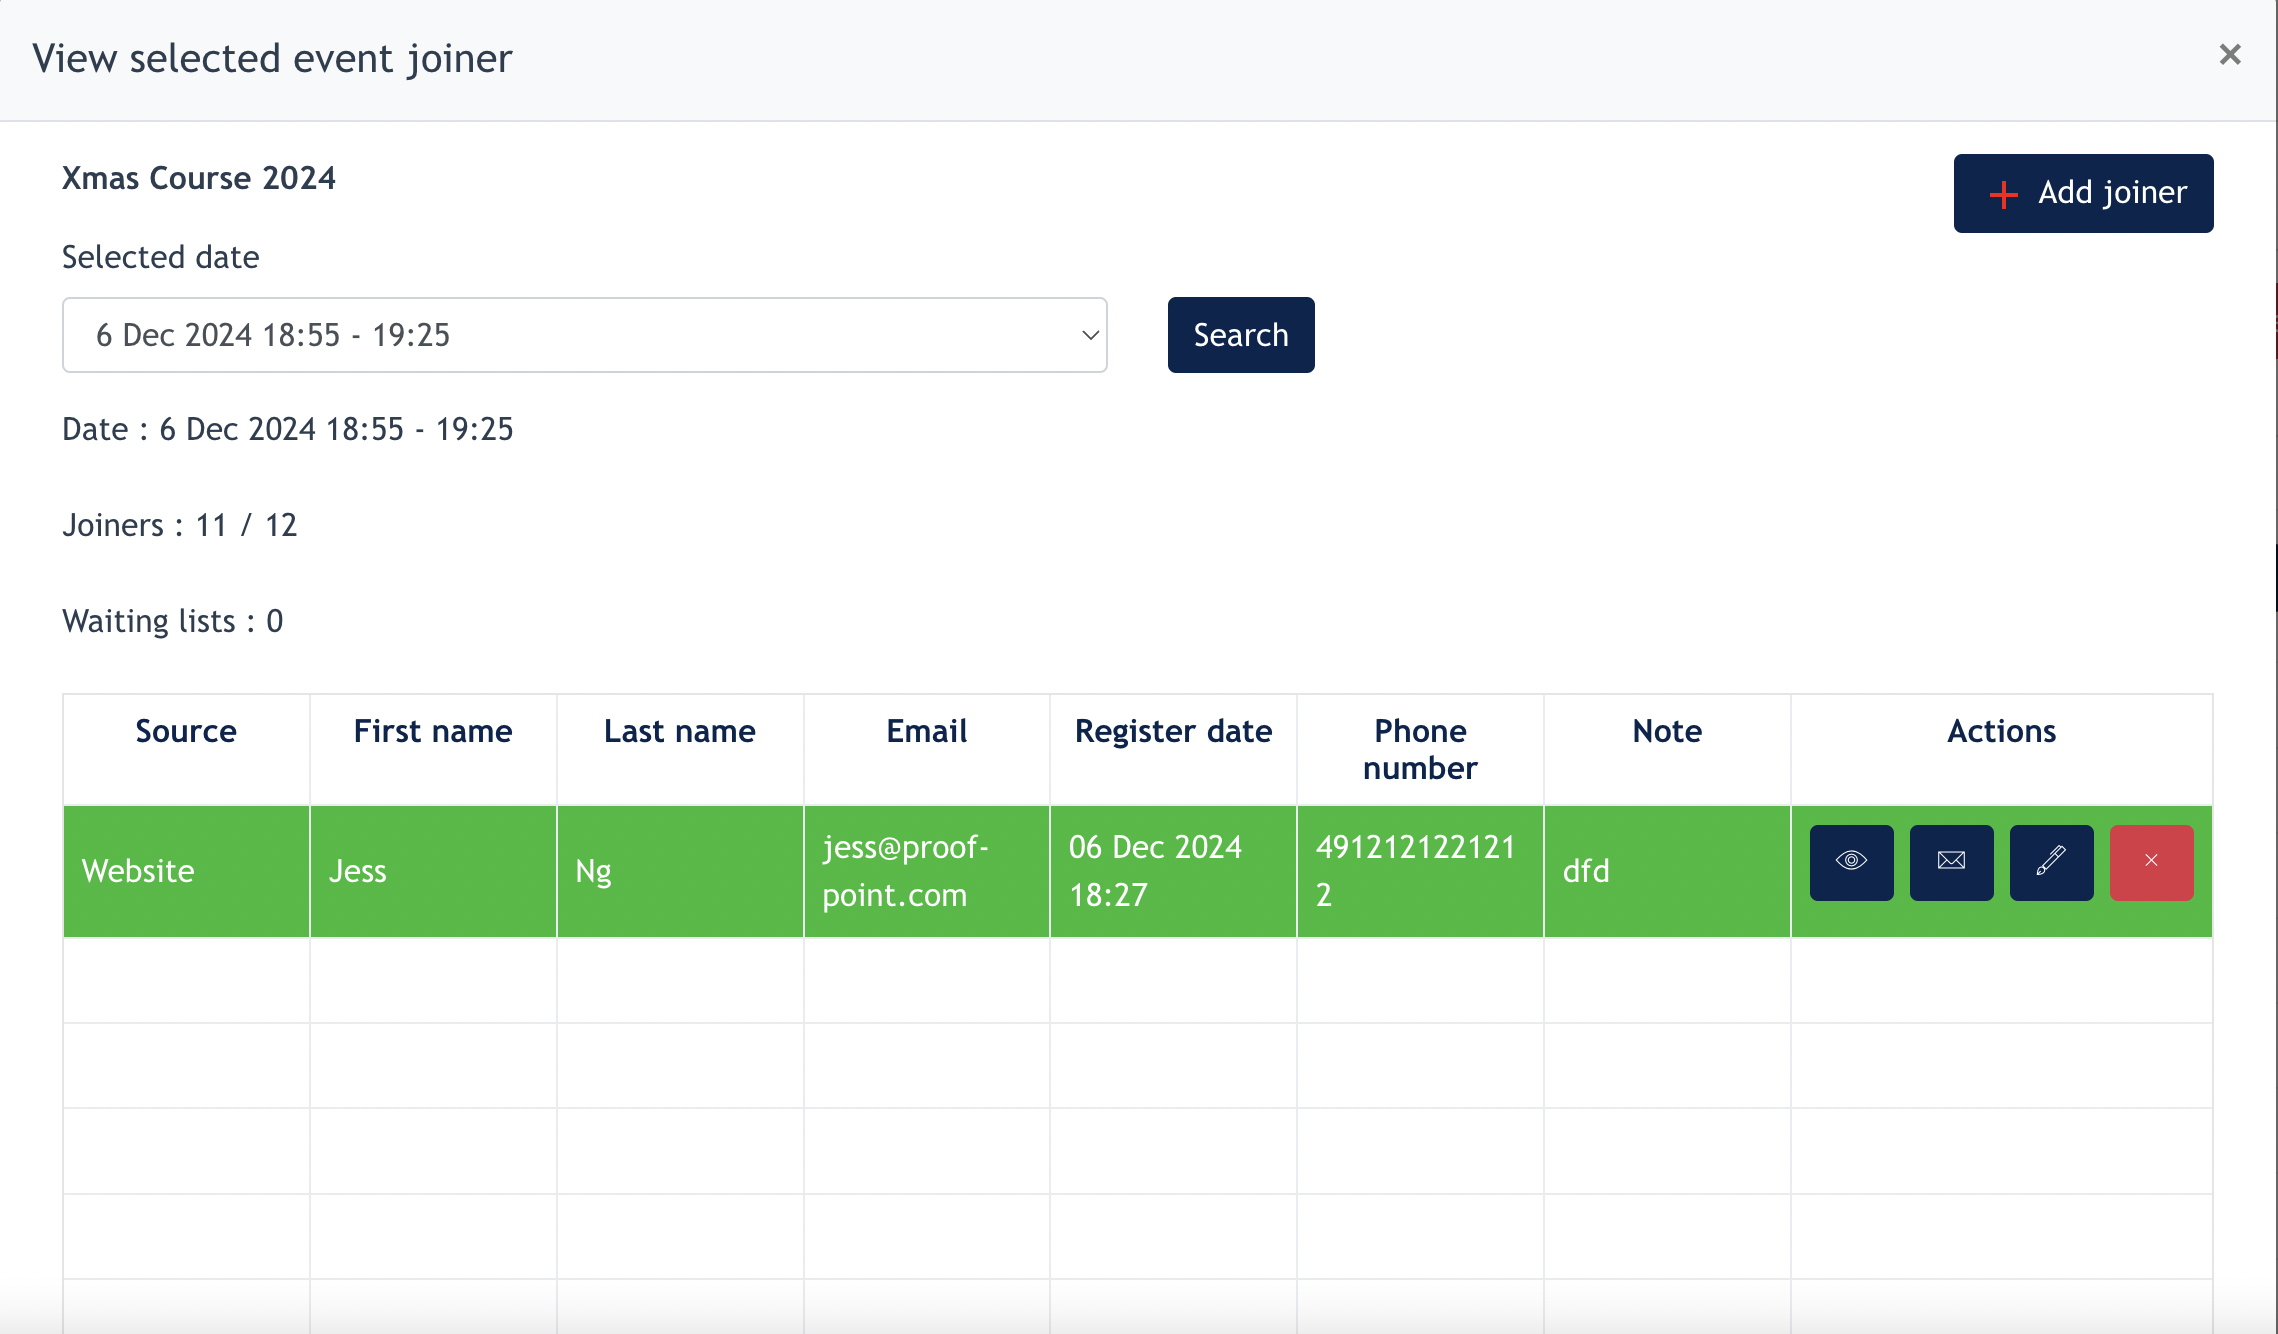
In the form :
- [ Selected date ] and [ Search ] : this is for Center Admin to pick a course date, click on Search to view the Joiners listing. This function is for Course that is Repeated weekly.
- [ Joiners ] : x / y - Here it means x out of y is still available for the booking. From the above example, there are 11 seats available for booking.
- Waiting List : If the Capacity is full, anybody that clicks on the Join button will be assigned under Waiting List
- Joiners Listing :
- View : view joiner's particular
- Email : send email to this joiner
- Edit : Admin to change any details of the joiner, if required
- Remove : Admin to remove this joiner
- [ Add Joiner ] button : Admin may add a joiner manually via here.
- updated 6 Dec -
1.5 How to add new course joiner
Here you can add in course joiners from the Admin Panel.
- Click on ‘Add joiner’
- Fill up the form.
- First Name: Joiner’s first name (mandatory)
- Last Name: Joiner’s last name/surname (mandatory)
- Email: Joiner’s email address
- Contact number: Joiner’s contact number
- Note: Joiner can leave a note or message if there’s any to the center
The user is allowed to view, email, update, and remove joiners by clicking on the action buttons.
1.6 Bulk Upload of Members
On the Courseplan Members, admin can upload bulk listing of members via the [ Bulk Upload ] button.
Once you click on the button, just follow the instruction given on the modal to create bulk upload. A message indicates if your uploads are successful or not successful.
1.7 How to send push notification to course joiners
The user is able to send push notification to course joiners. Push notification is an alert notifying the joiners of a new message or update on the course.
- Login to Admin Panel > Course Plan > Calendar > Setup Calendar
- Search for the course and click on the ‘mail’ icon
- Fill up the email content
- Click on ‘send push notification’, the joiners receive the notification via email
1.8 How to cancel a course
The admin is able to cancel the course via courseplan calendar.
- Login to Admin Panel > Course Plan > Calendar > Setup Calendar
- Search for the course and click on the ‘update course’ icon
- Check the box ‘is cancel’ under course property
- An email box will pop up, you may type a course cancellation email to the joiners.
- Click on ‘cancel and send’ once done typing the email.
- Joiners will receive the course cancellation email.
2. Live Page: Course Schedule
This is the place where members/audiences can view and join existing courses.
Image 1: Screenshot of the courseplan schedule page
Image 2: Screenshot of the course summary when audience click on the course
Image 3: Screenshot of the course details page
2.1 How to join a course
- Go to course schedule
- Click on the course that you want to join
- Click on ‘join this event’
- Fill up details and click on ‘book’
- Joiners will receive a confirmation email once the course is successfully booked.
- Joiners will receive a reminder email 1 day before the course takes place (TBC)
2.2 How to join the waiting list
Audience will join the waiting list if the number of joiners exceeds the course capacity. The user is able to set the capacity for every course while creating the course.
Example: If the capacity is set as two, the third joiner will have to join the waiting list once he/she fills up the form.
- Go to course schedule
- Click on the course that you want to join
- Click on ‘join waiting list’
- Fill up the details
- Joiner will receive a confirmation email once course is successfully booked
- Joiners from the waiting list will receive a confirmation email once he/she successfully joins the course.
Waiting list participants will join the course when:
- Existing joiner deregisters from the course
- Admin removes existing joiner from the course
2.3 How to deregister from the course
- Go to confirmation email
- Click on the hyperlinked ‘here’
- A new tab will open up once you deregister successfully
3. Site: Courseplan Settings
There the is able to do the following settings under General tab:
- Limit the course registration to only members
- Set how many hours in advance can participants join the course
- Set how many hours the course can be cancelled before the start time
Email addresses that are added under ‘Email’s tab will receive email notification whenever a new joiner participates in a course.
4. Site Panel: Courseplan Members
**This module is only available if the client subscribes to the member area module.
Here the user is able to create or bulk upload members here.
There are two ways to create member:
- Create -> to create one member at a time.
- Bulk upload -> to create more than one member at the same time.
Note: Excel template is available for users to download and fill up accordingly.
Currently, the members under Course Plan and Member Area are linked. Members that are created under courseplan will also become members under Member Area and vice versa.