Teilnehmer Portal
Plattform für Benutzer: Teilnehmer-Portal
Dieses Portal ist nur für registrierte Nutzer/Unternehmen.
Jeder Aussteller/Berater/Speaker mit dem Status „interessiert“ erhält vom System eine Zugangsberechtigung, mit der er sich in das Teilnehmerportal einloggen kann.
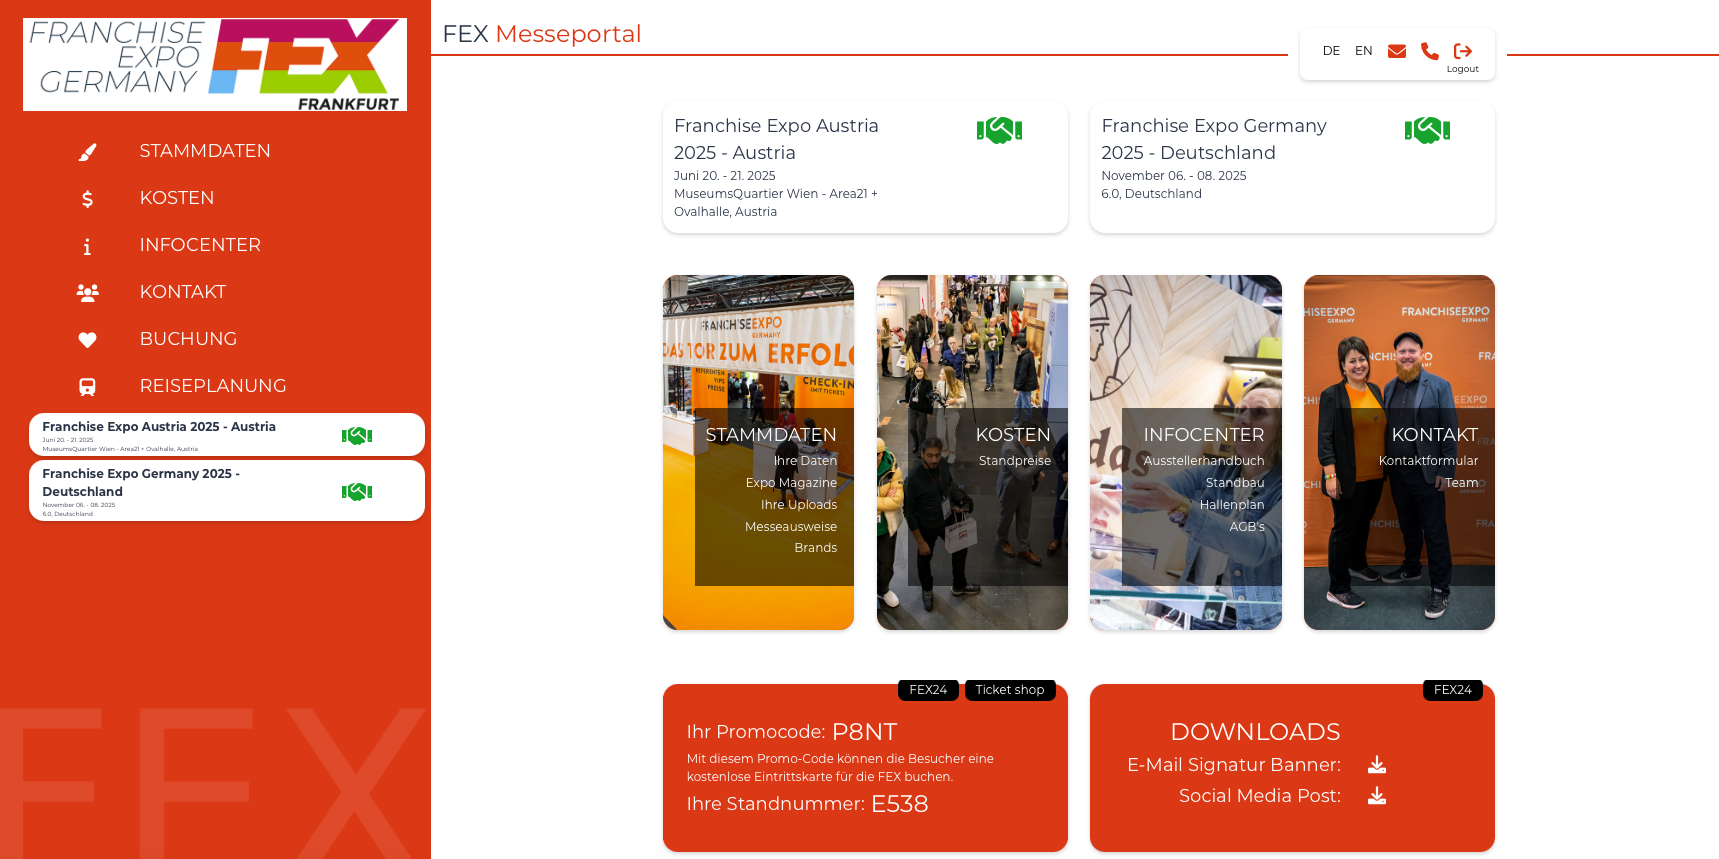
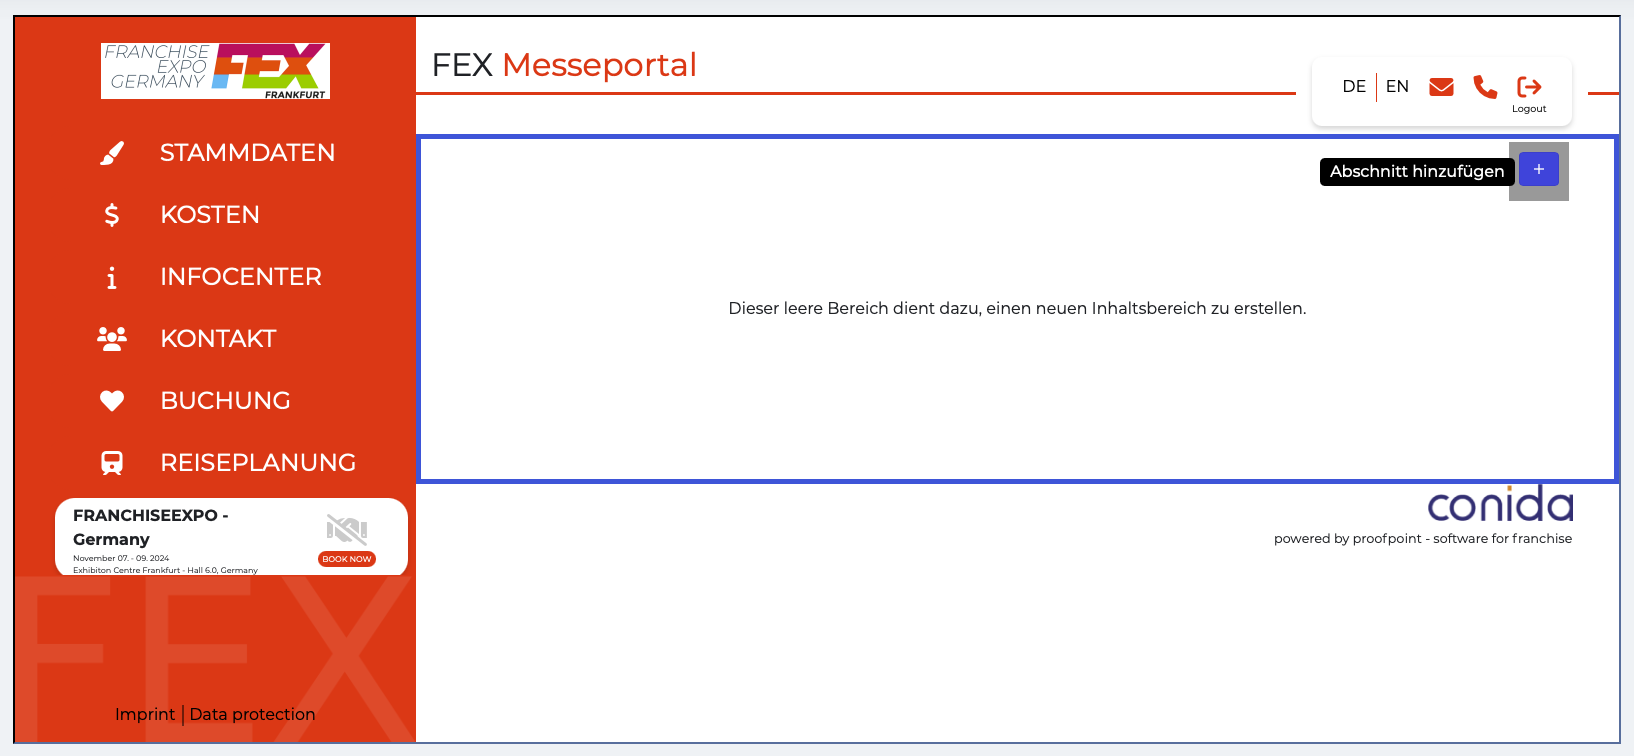
Ein Screenshot des Portals.Dieses Portal wird von allen Arche-Standorten unter demselben Mandanten gemeinsam genutzt.
(www.domain.com/portal)
Wenn ein Kunde unser Messemodul abonniert, werden alle conida Webseiten (Center) unter demselben Kunden auf dasselbe Teilnehmerportal (PP) zugreifen, die Daten werden zwischen Portal und Cockpit synchronisiert.
Die Inhalte des Teilnehmerportals werde unter dem Verwaltungsbereich der Website verwaltet.
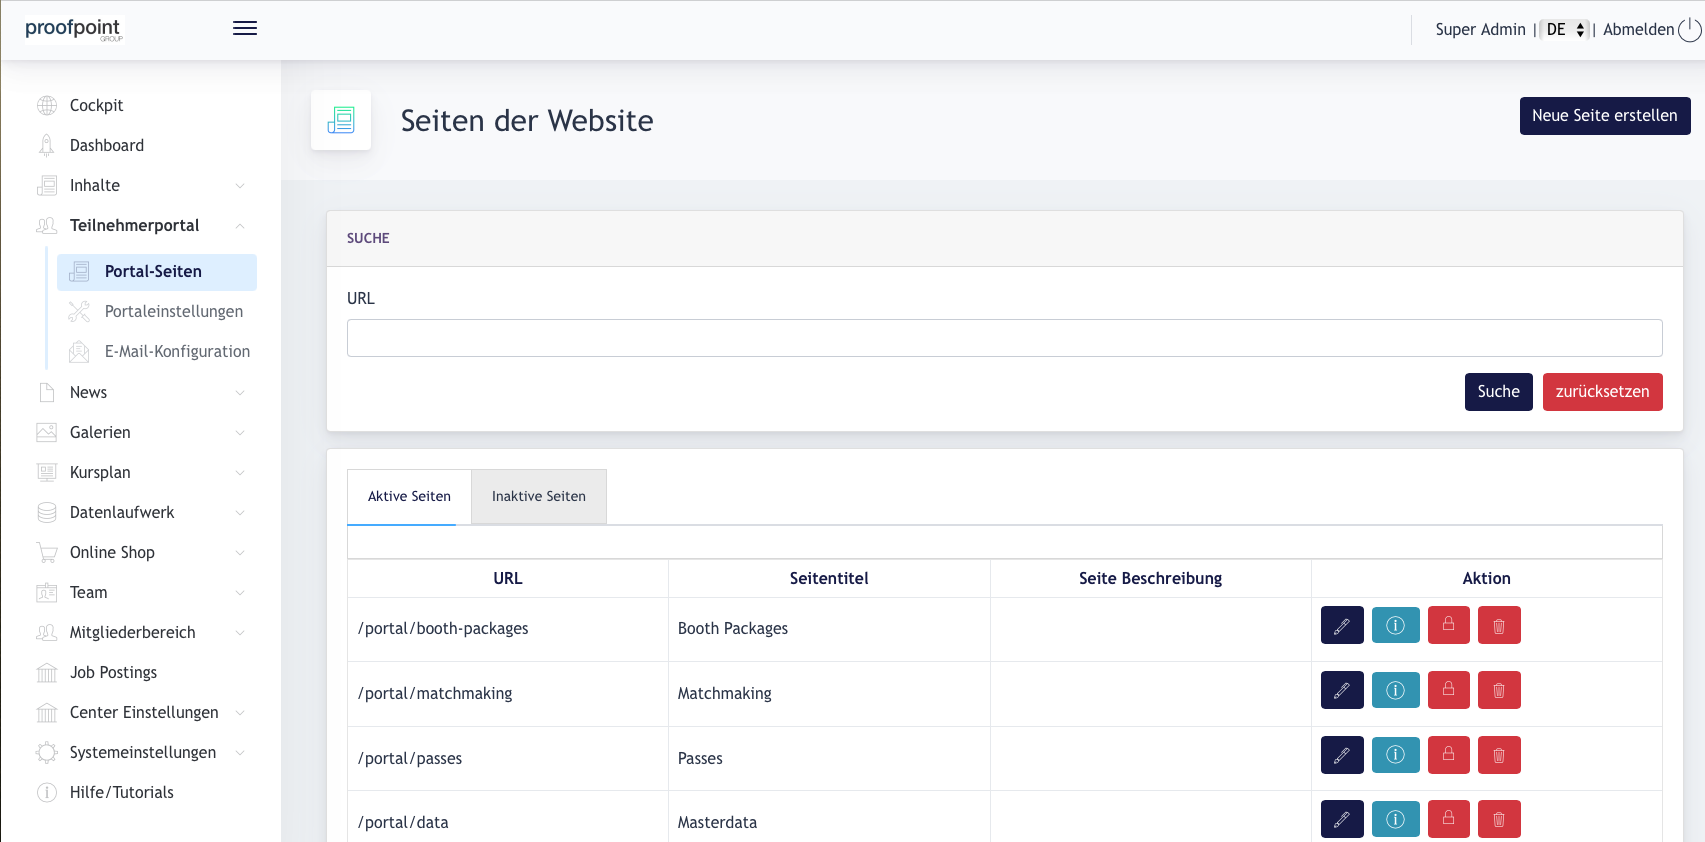
Unter dem Menüpunkt Teilnehmerportal gibt es 3 Untermenüpunkte:
- Portal-Seiten - hier kann der Administrator Inhalte des Portals erstellen und verwalten
- Portaleinstellungen - hier kann der Administrator die Einstellungen des Portals verwalten
- E-Mail-Konfiguration - hier kann der Administrator E-Mail-Inhalte für System-E-Mails erstellen.
1.0 Portal-Seiten
Alle Seiten innerhalb der Portale können hier bearbeitet oder erstellt werden.
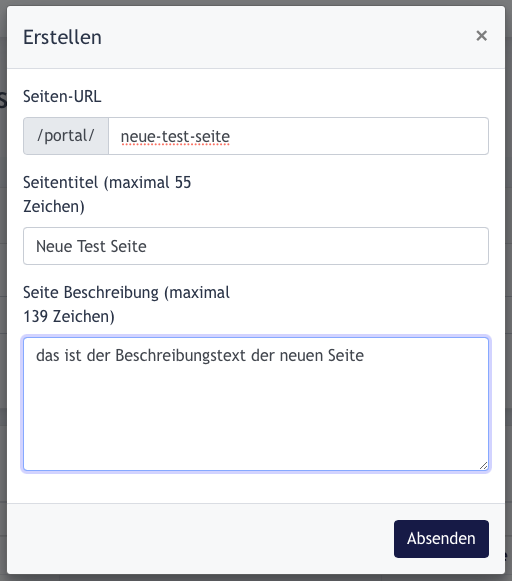
1.1 Seite erstellen
Klicken Sie auf die Schaltfläche Seite erstellen, und geben Sie die erforderlichen Informationen ein. Klicken Sie auf „Senden“. Die Seite wird erstellt und in der Seitenliste angezeigt.
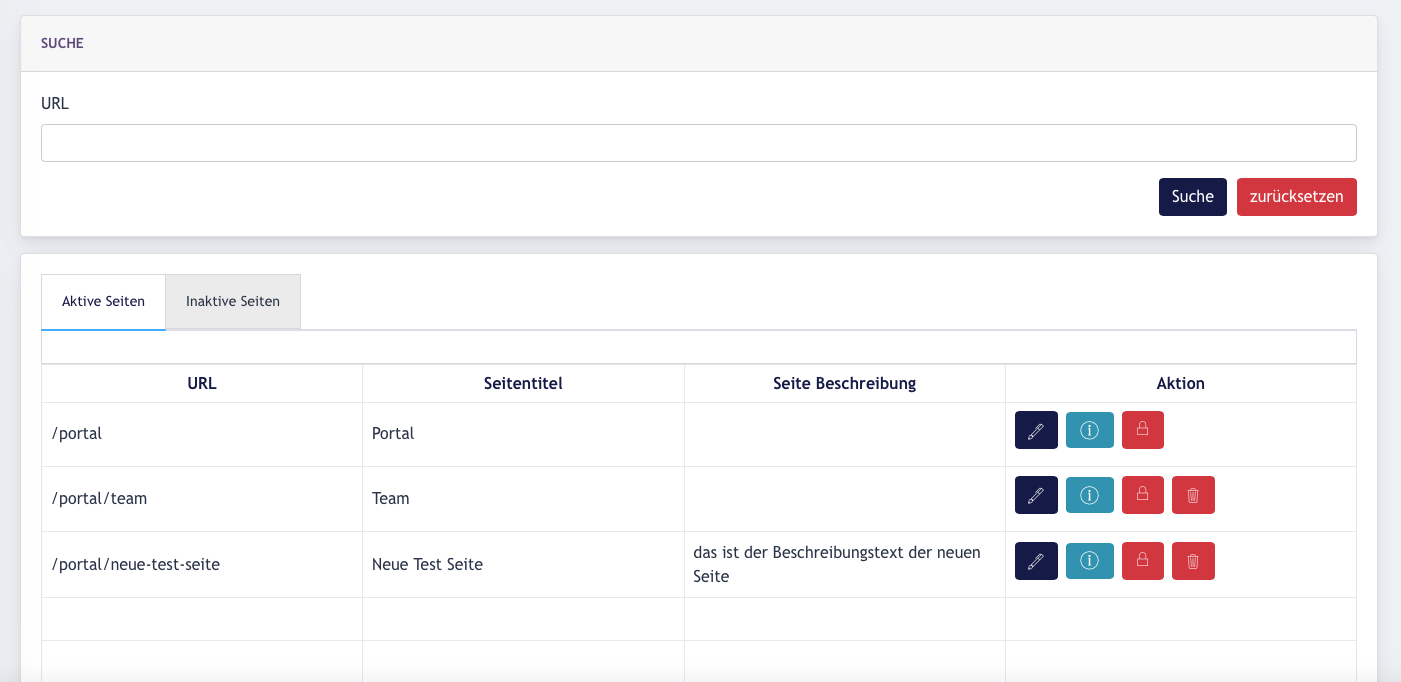
Example screenshot : Eine neue Seite mit dem Titel Neue Test Seite und der URL neue-test-seite wurde erstellt und ist danach in der Liste der aktiven Seite aufgelistet:
1.2. Seiteninhalt erstellen
Klicken Sie auf die Schaltfläche [ Bearbeiten ], um Seiteninhalte zu erstellen.
Die Bearbeitung der Seite funktionier exakt wie der Page Editor im conida Websitesystem. Der Admin kann die Seite füllen, indem er neue Abschnittsvorlagen (Sektionen) auf der Seite hinzufügt.
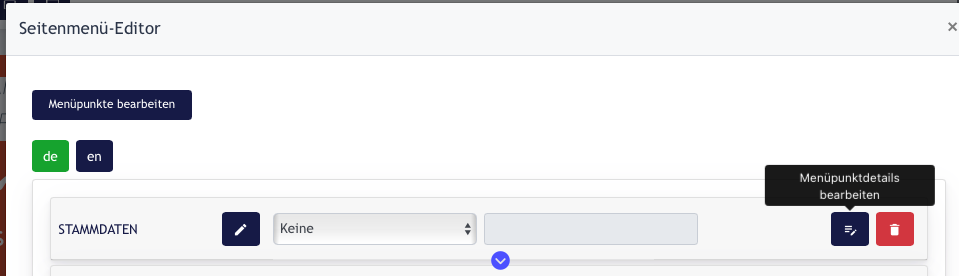
1.3. Seitenmenü konfigurieren
Klicken Sie auf die Einstellung, um den [ Seitenmenü-Editor ] zu öffnen.
Klicken Sie auf den 【 Seitenmenü-Editor und ein Fenster wird geöffnet.
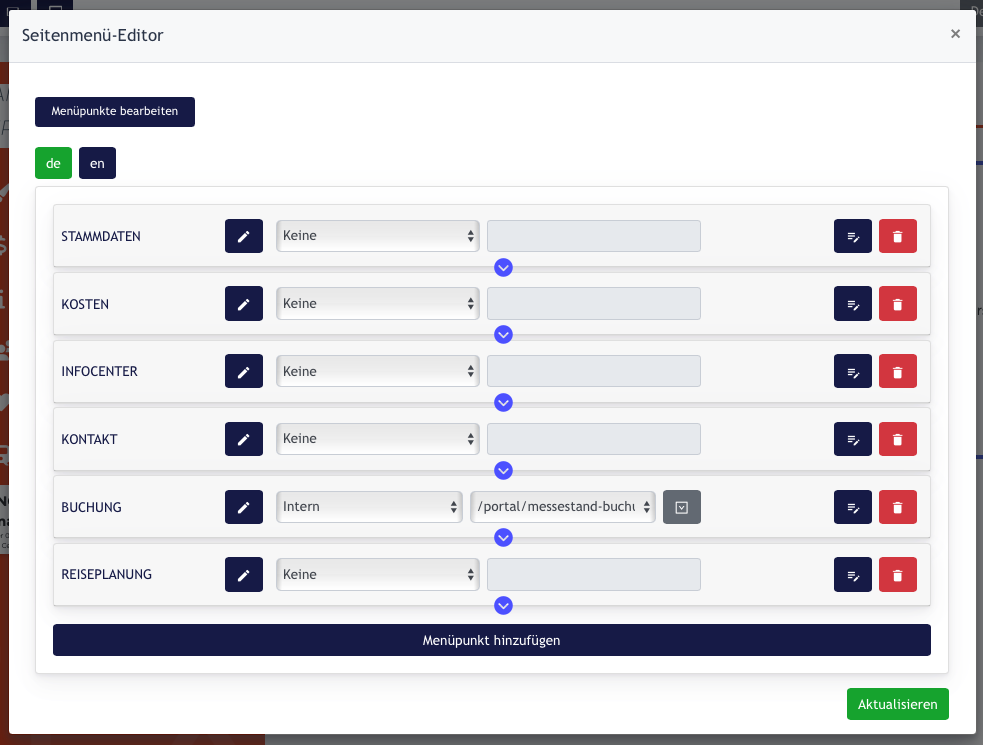
Sie können Menüpunkte über diese Liste konfigurieren. Dies funktioniert genauso wie der conida Seitenmenü Editor.
1.4. Konfigurieren Sie die Rollenberechtigung für jede Seite
So sieht das Formular aus:
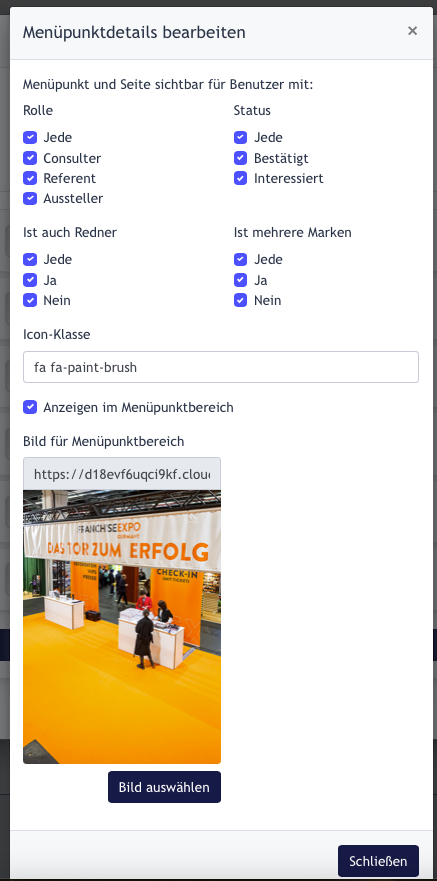
- Rollenberechtigungen: Hier bearbeitet der Administrator welche Inhalte (Seiten) welchem User auf Basis der zugeteilten Rolle angezeigt werden.
- Icons : Ermöglicht dem Administrator die Konfiguration der Icons der einzelnen Menüpunkte, die im Seitenmenü angezeigt werden (Icons auf der linken Seite)
- Bild : Dies ist der Bildhintergrund für jede Kachel, die auf dem Dashboard erscheint.
Dies sind alle grundlegenden Funktionen im Zusammenhang mit der Erstellung und dem Aufbau von Inhalten für die Seiten des Teilnehmerportals.
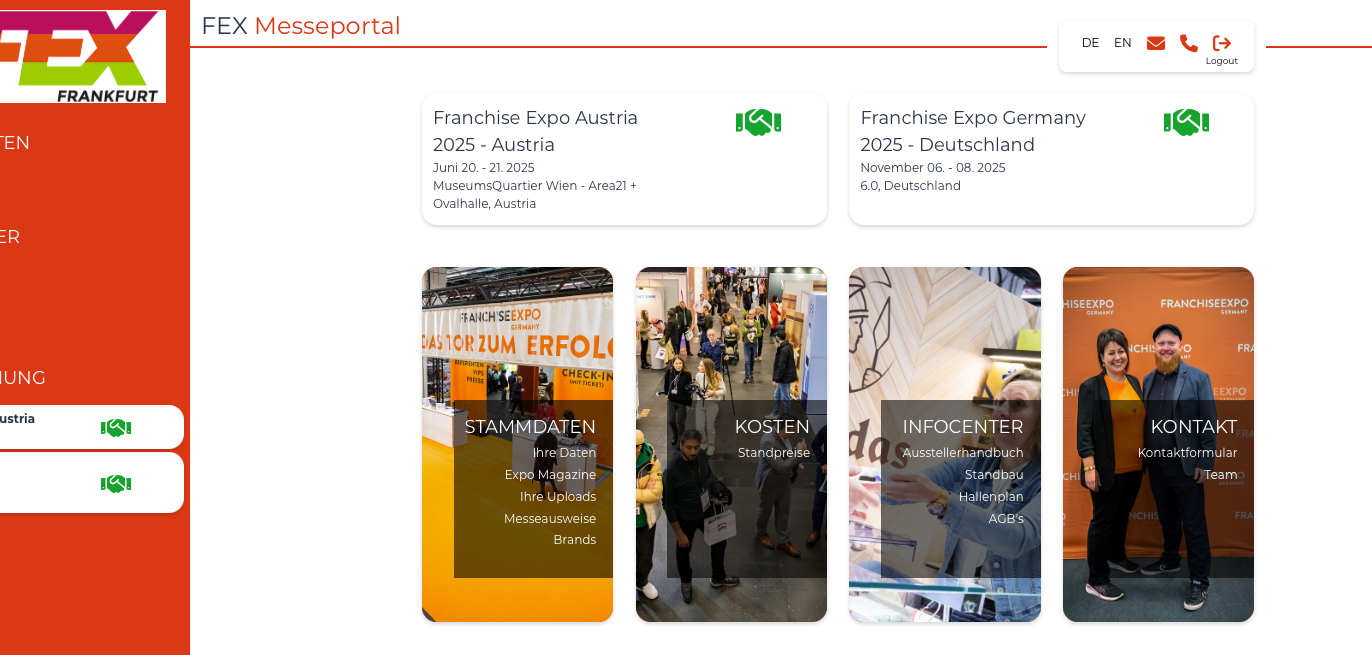
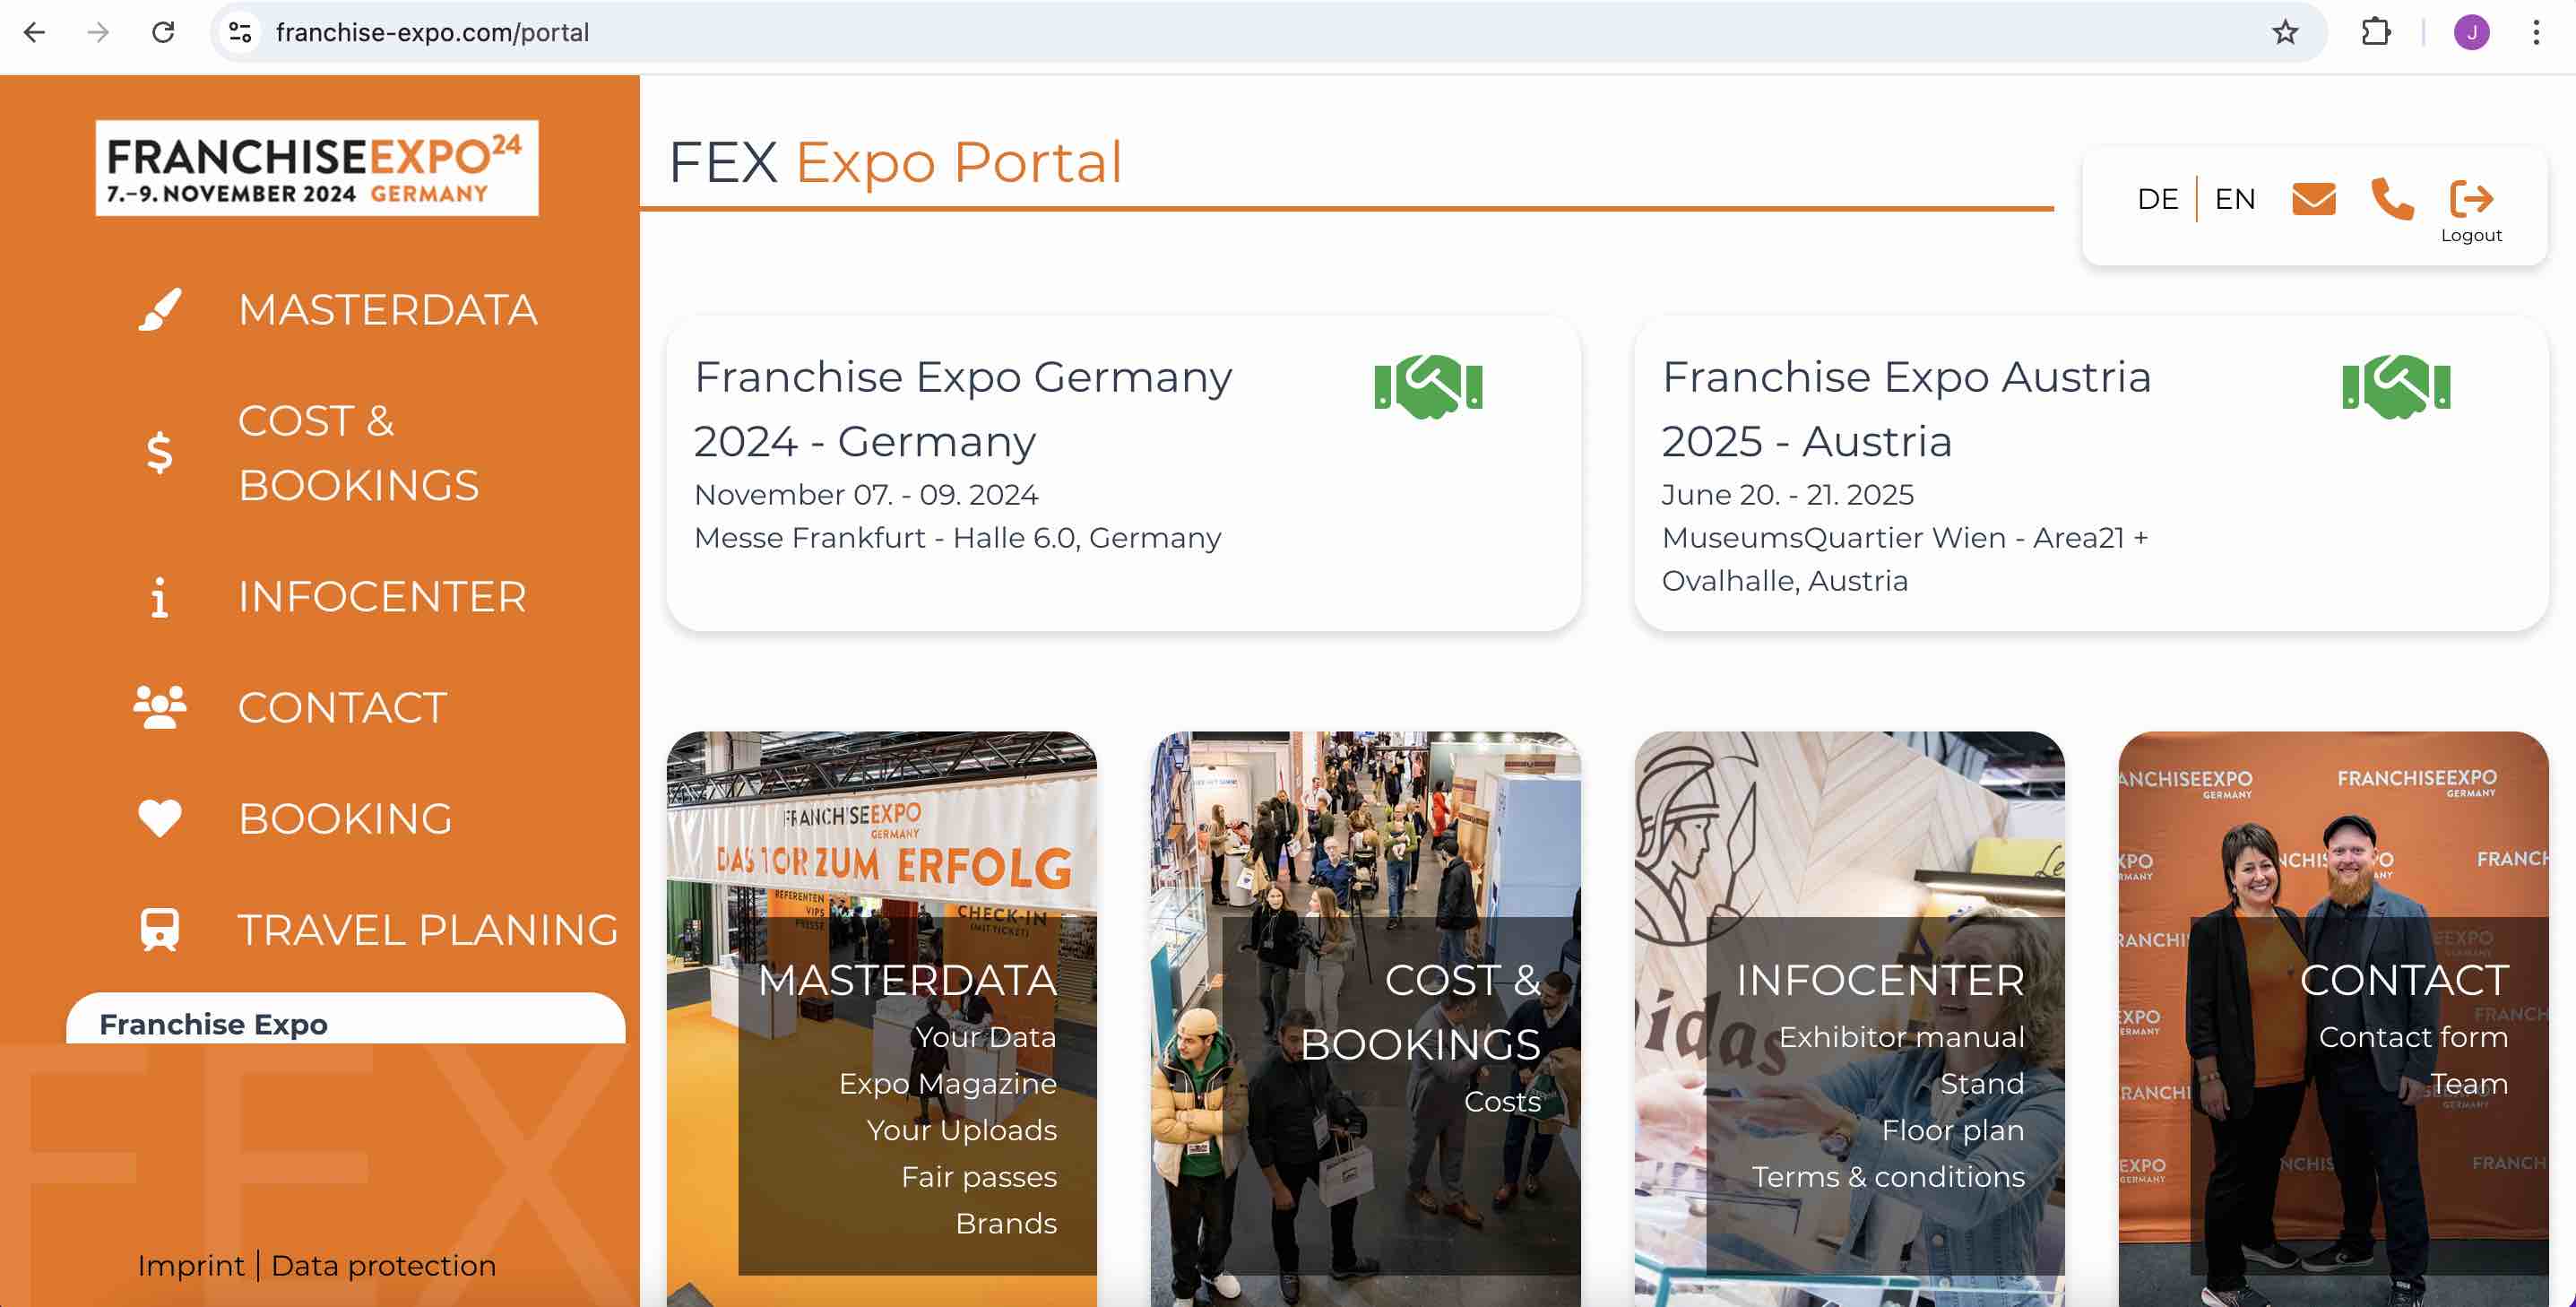
2.0 Portal Dashboard
Dashboard is the landing page of the portal. When user first login to this portal, Dashboard is the first page he/she will see.
Here i will explain where does this data coming from, and how admin configure them.
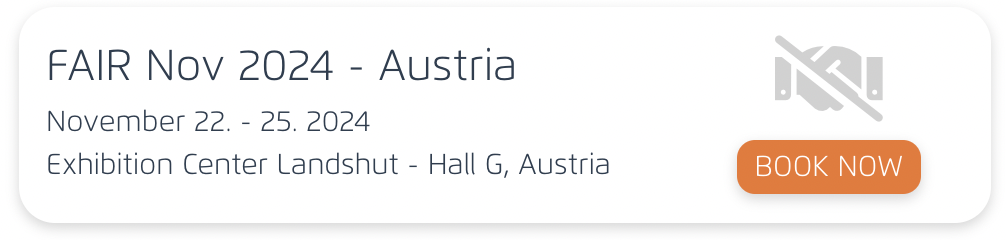
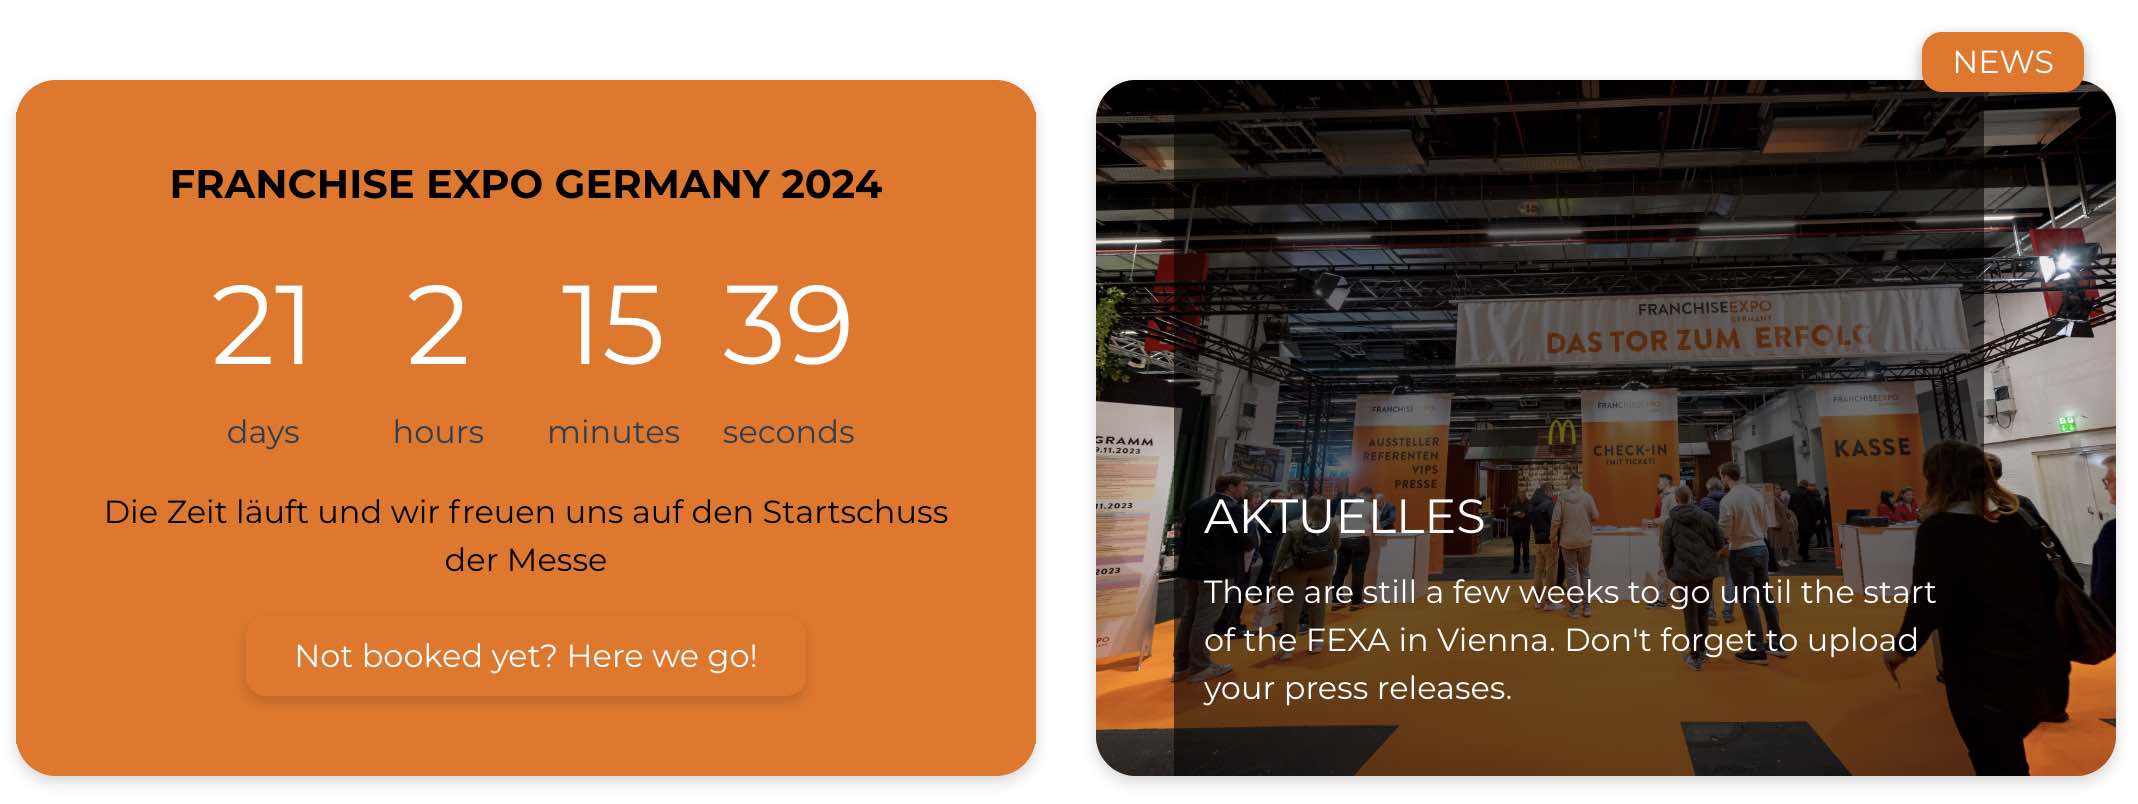
2.1 EXPO Banner

If the fair is unbooked, this is what we will see.
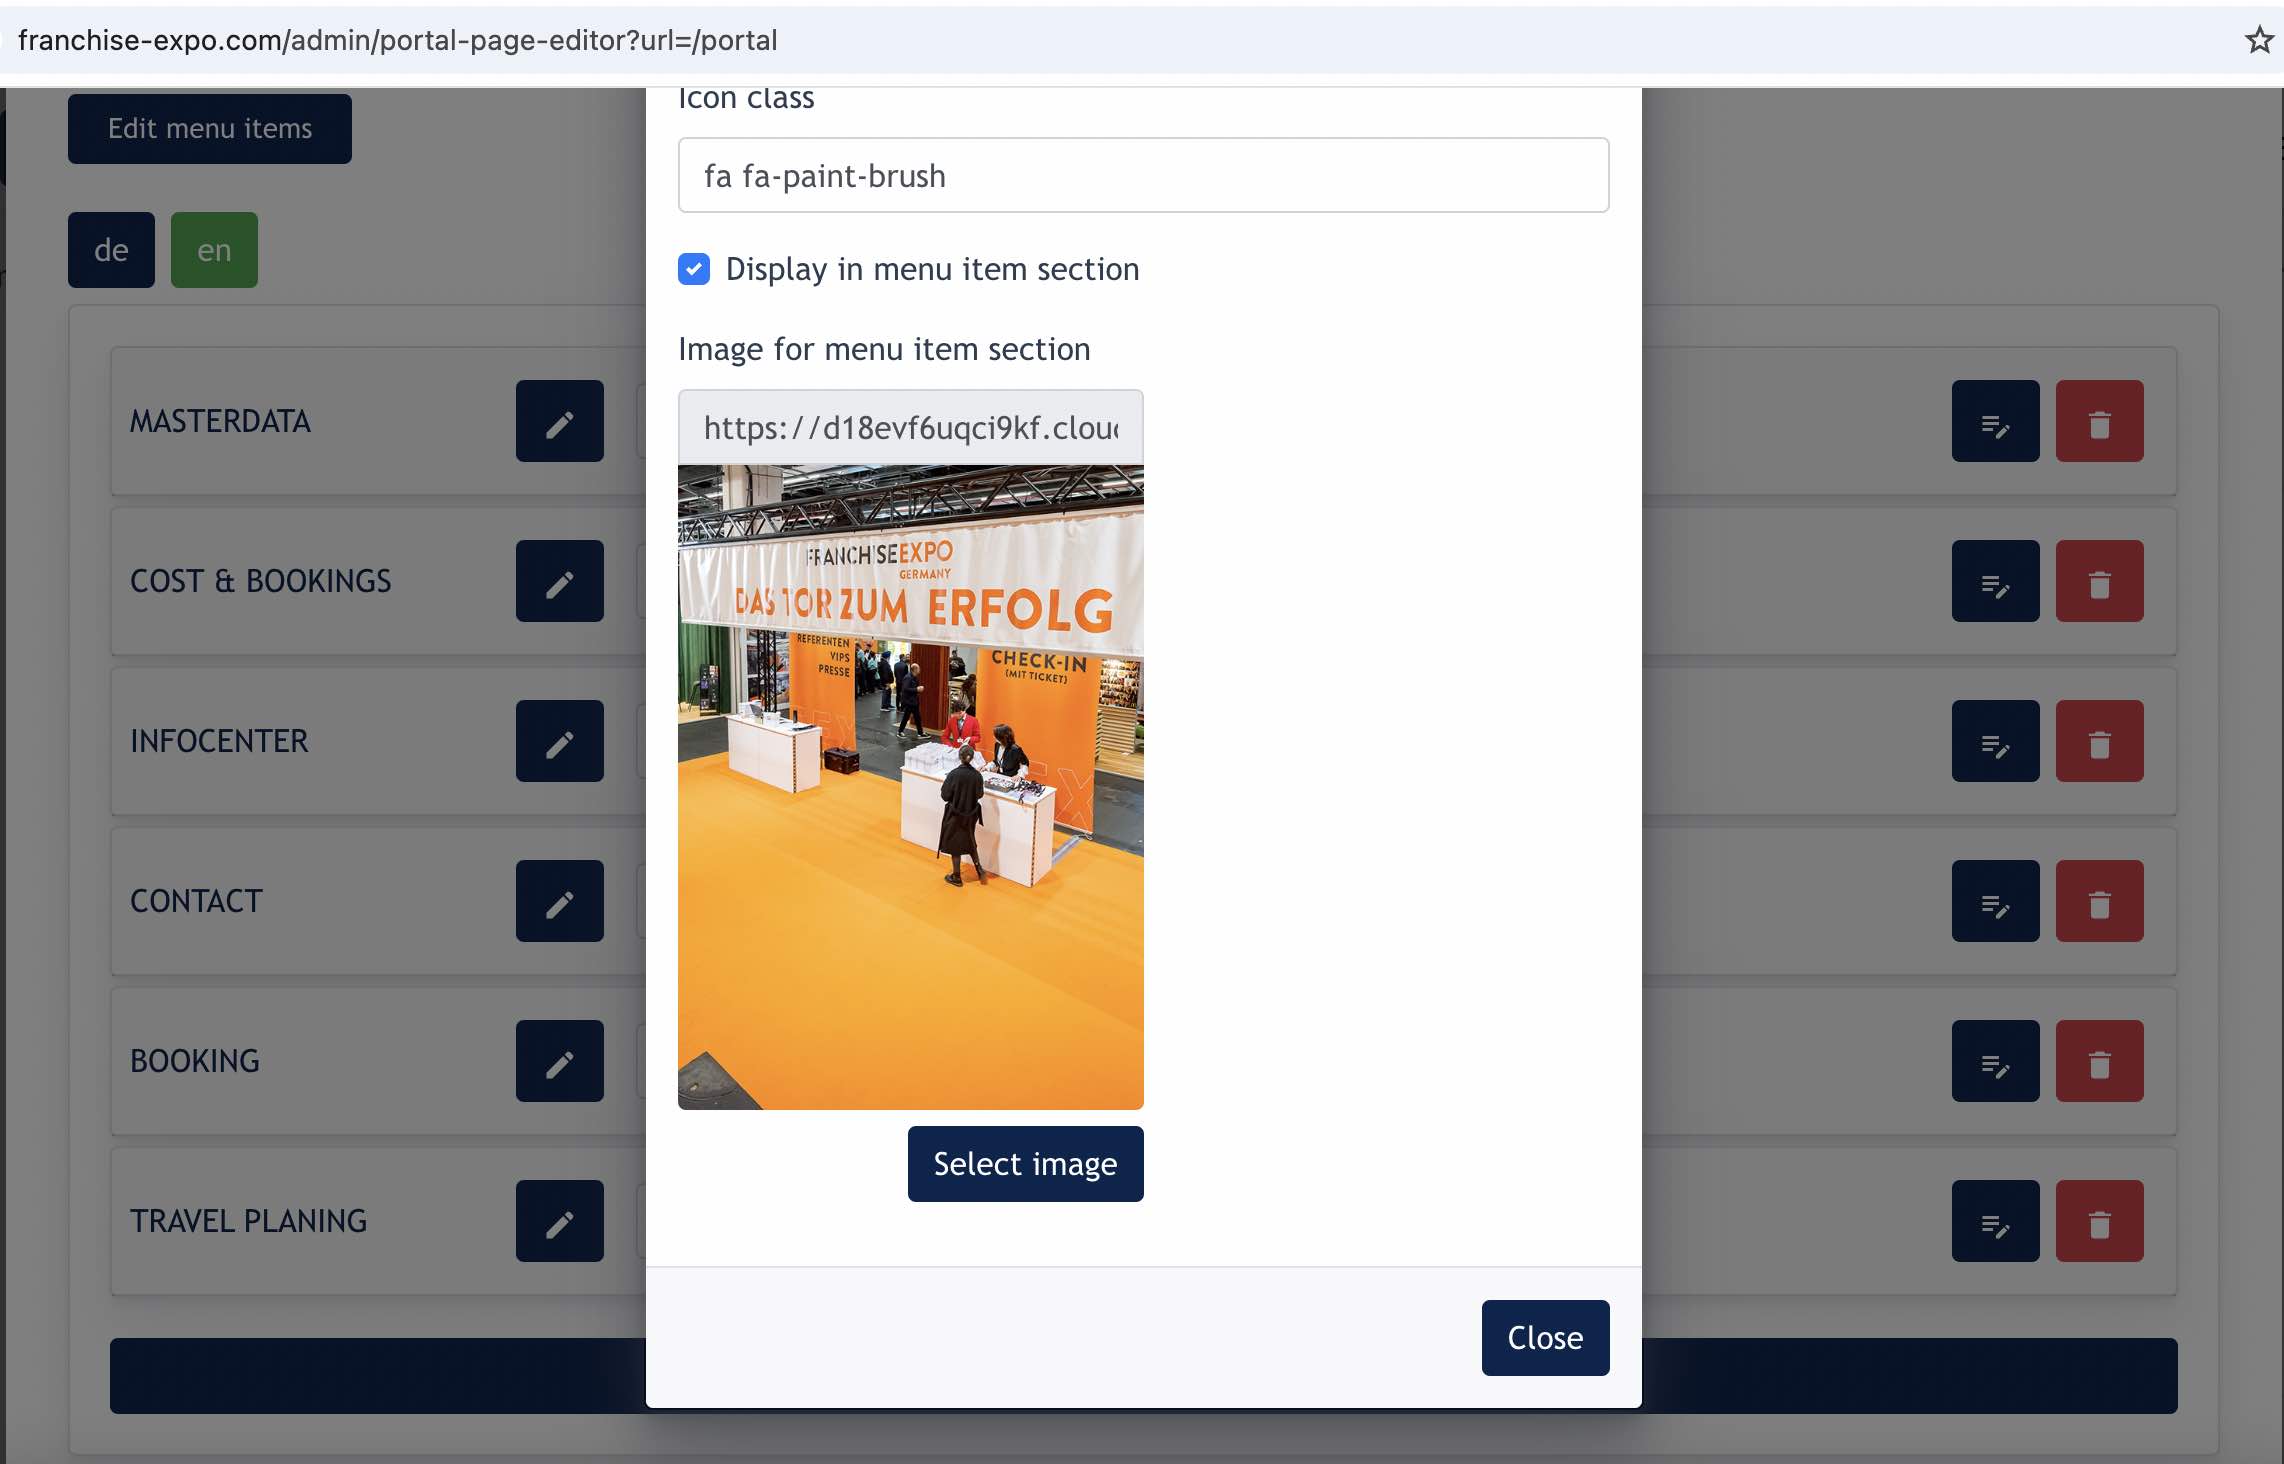
2.3 Menu item section
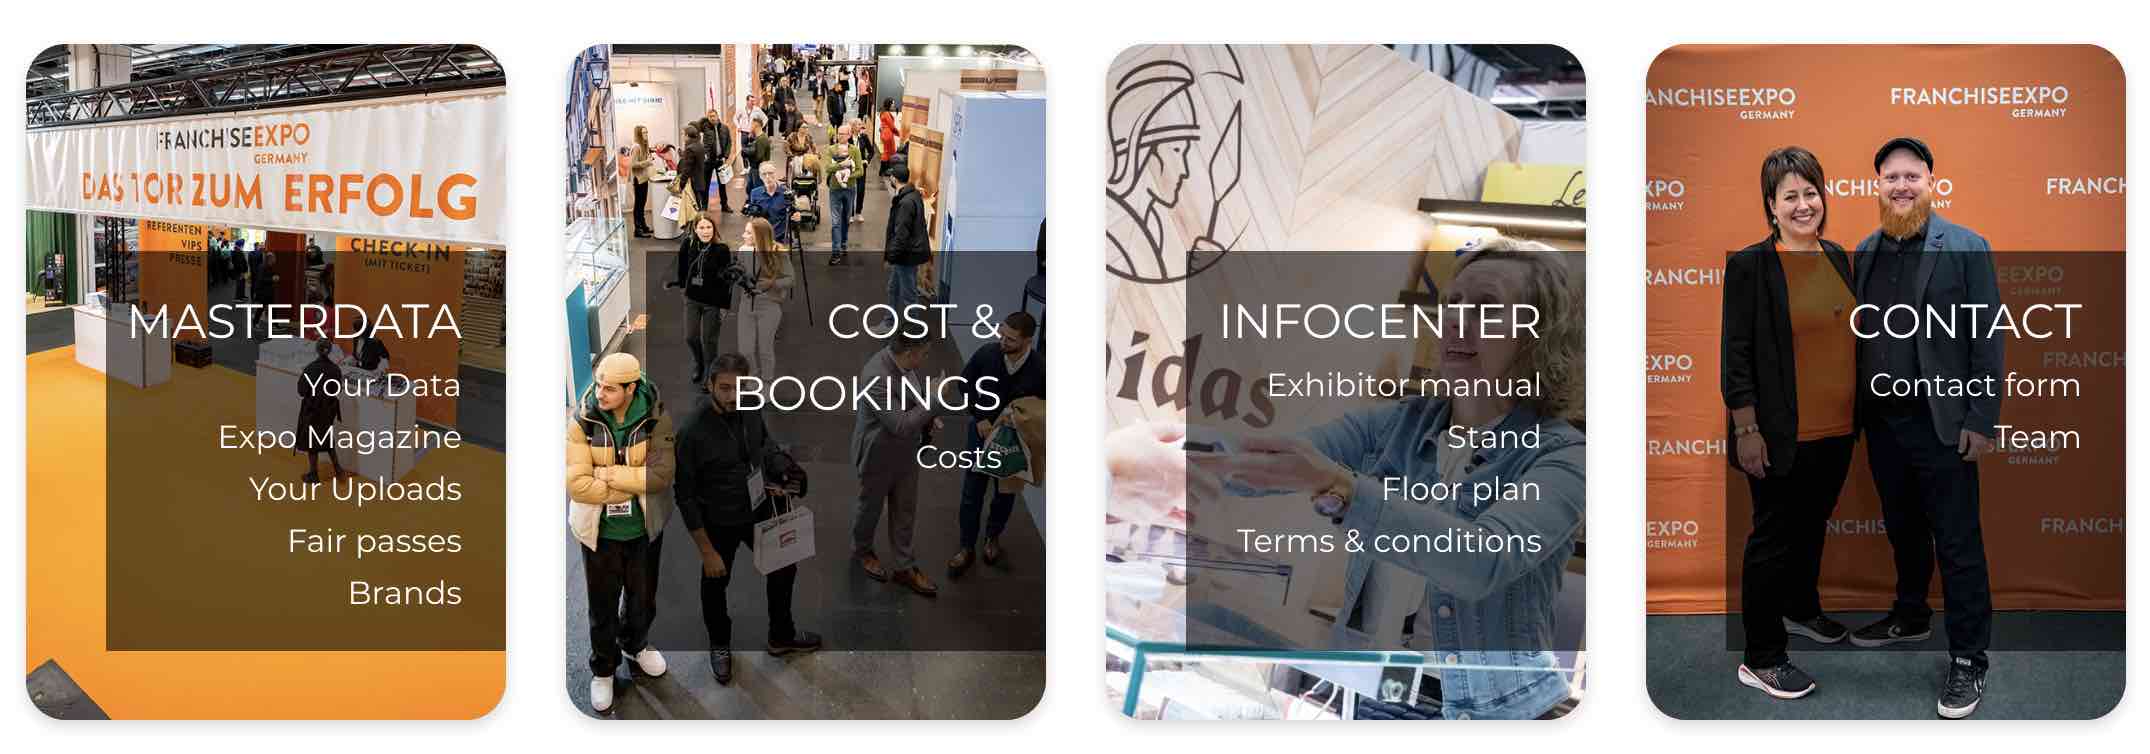
This is how the image are configured :
Check "Display in menu item section" if you want this menu item and all sub-menu item to appear as a card like this on Dashboard. This card serves as a second menu with image background for visitors.
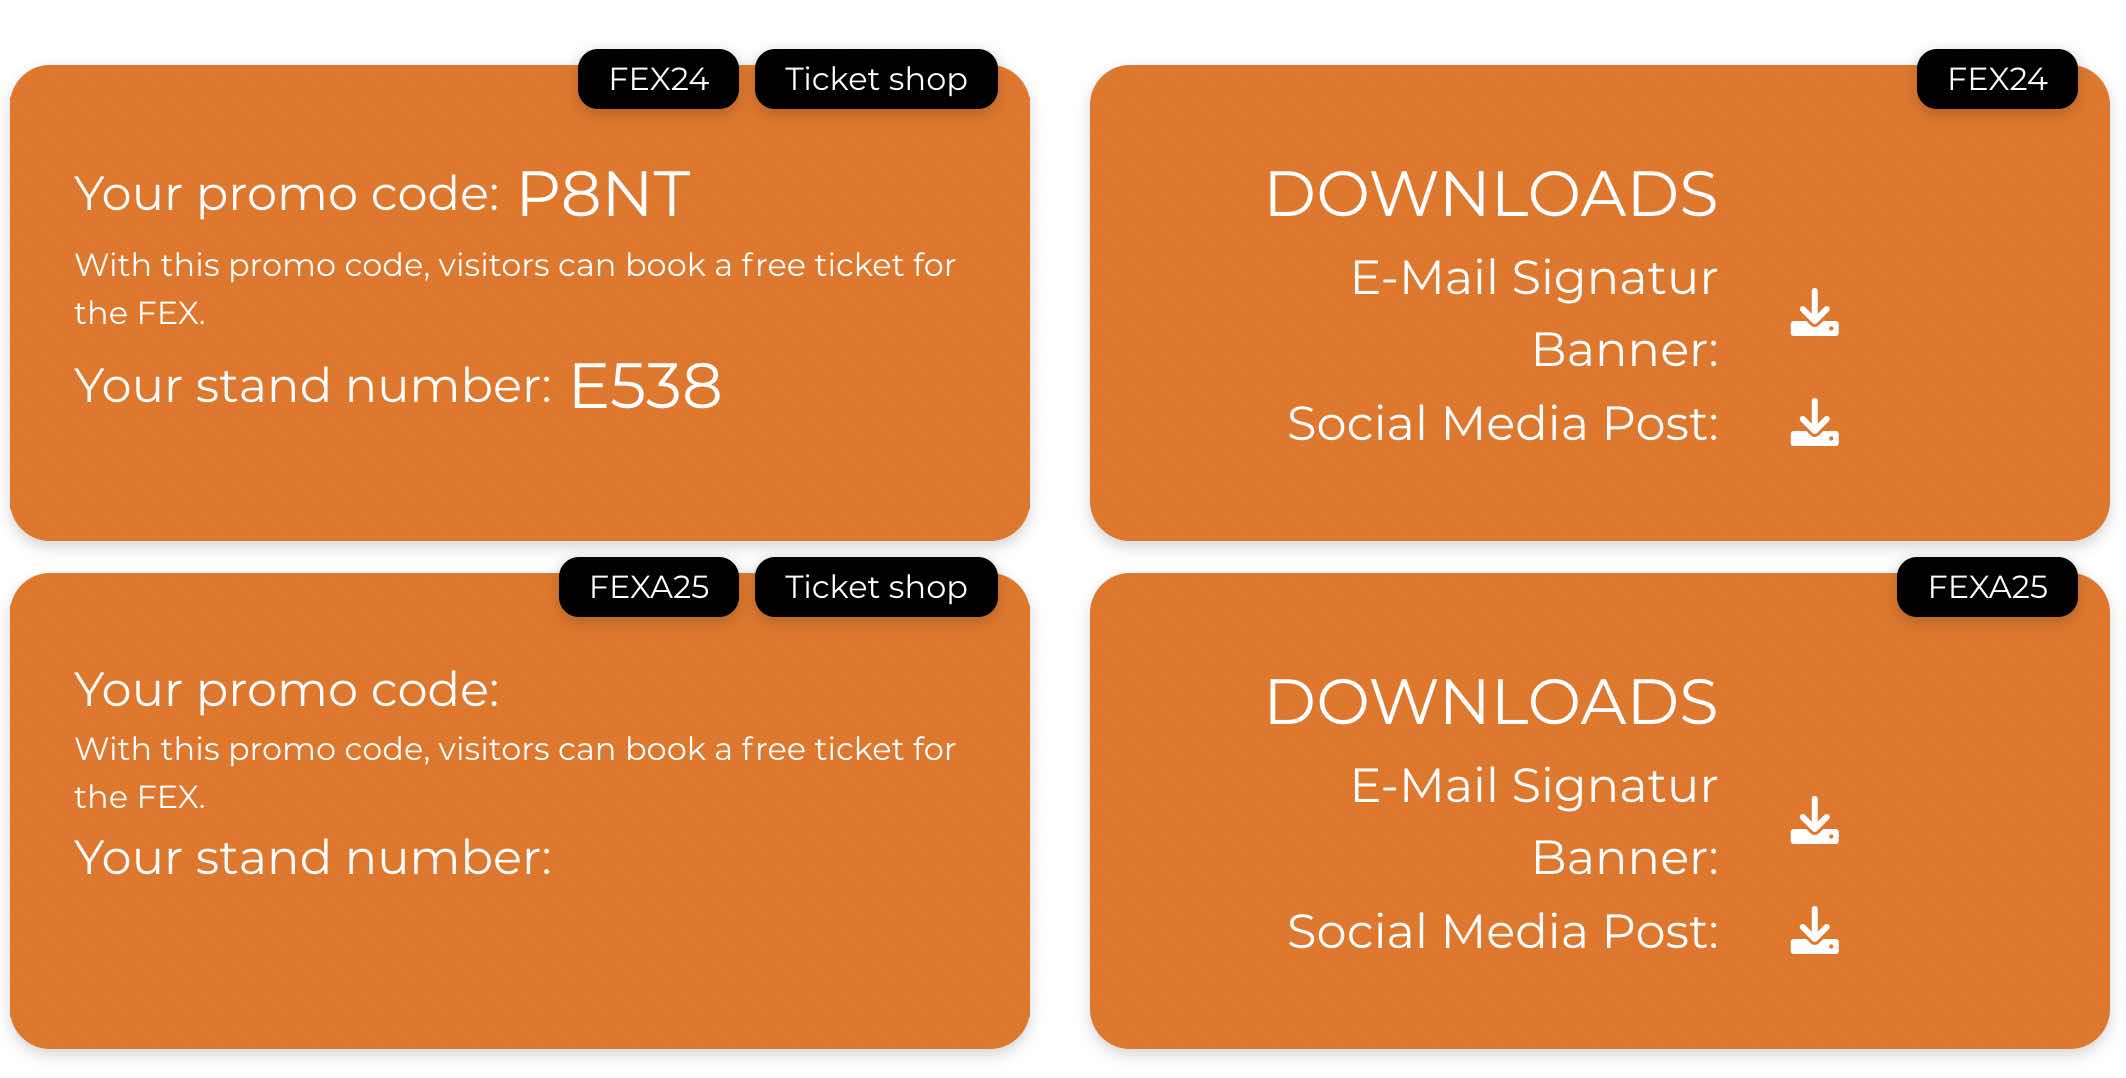
2.4 Promo Code, Stand Number and Downloads
- Promo Code and Stand number is configured via Cockpit > Exhibitor/Consultant Listing > Fair column ( click on Fair name)
- Above data is unique for each fair, thus, you will see the Fair short name on top of the banner.
- Ticket Shop - this link to a third party site to allow user to purchase ticket. 3rd party URL : https://ticket.franchise-expo.com/event/franchise-expo-germany-2024-qaw7pc
- Download - Both [ Email signature banner ] and [ social media post ] file is uploaded from Cockpit > Exhibitor/Consultant/Speaker > Fair column
Screenshot example of Upload Modal on Cockpit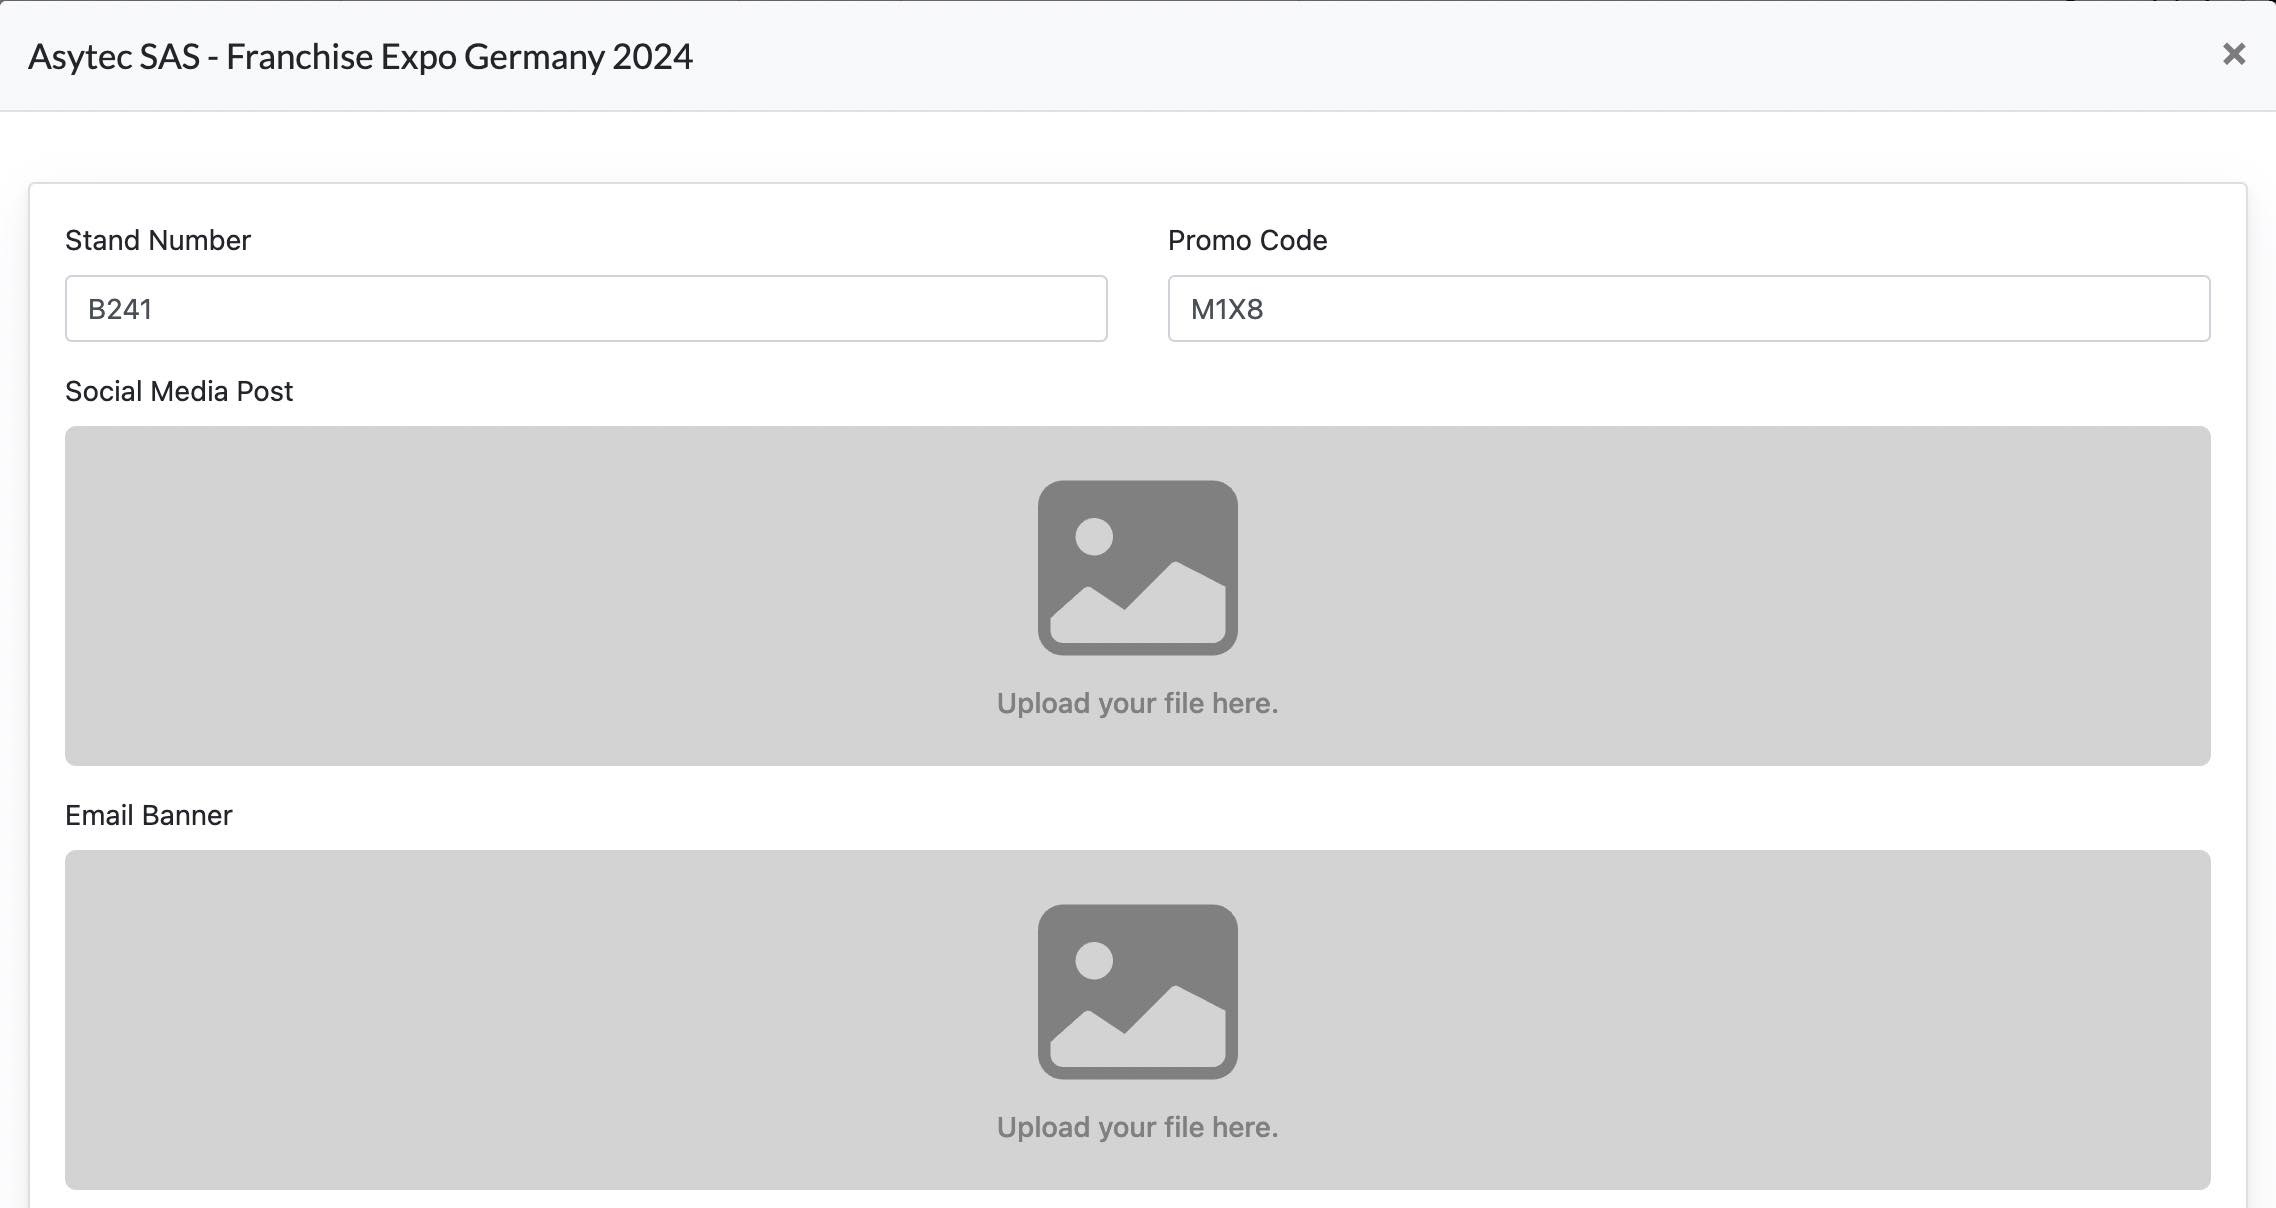
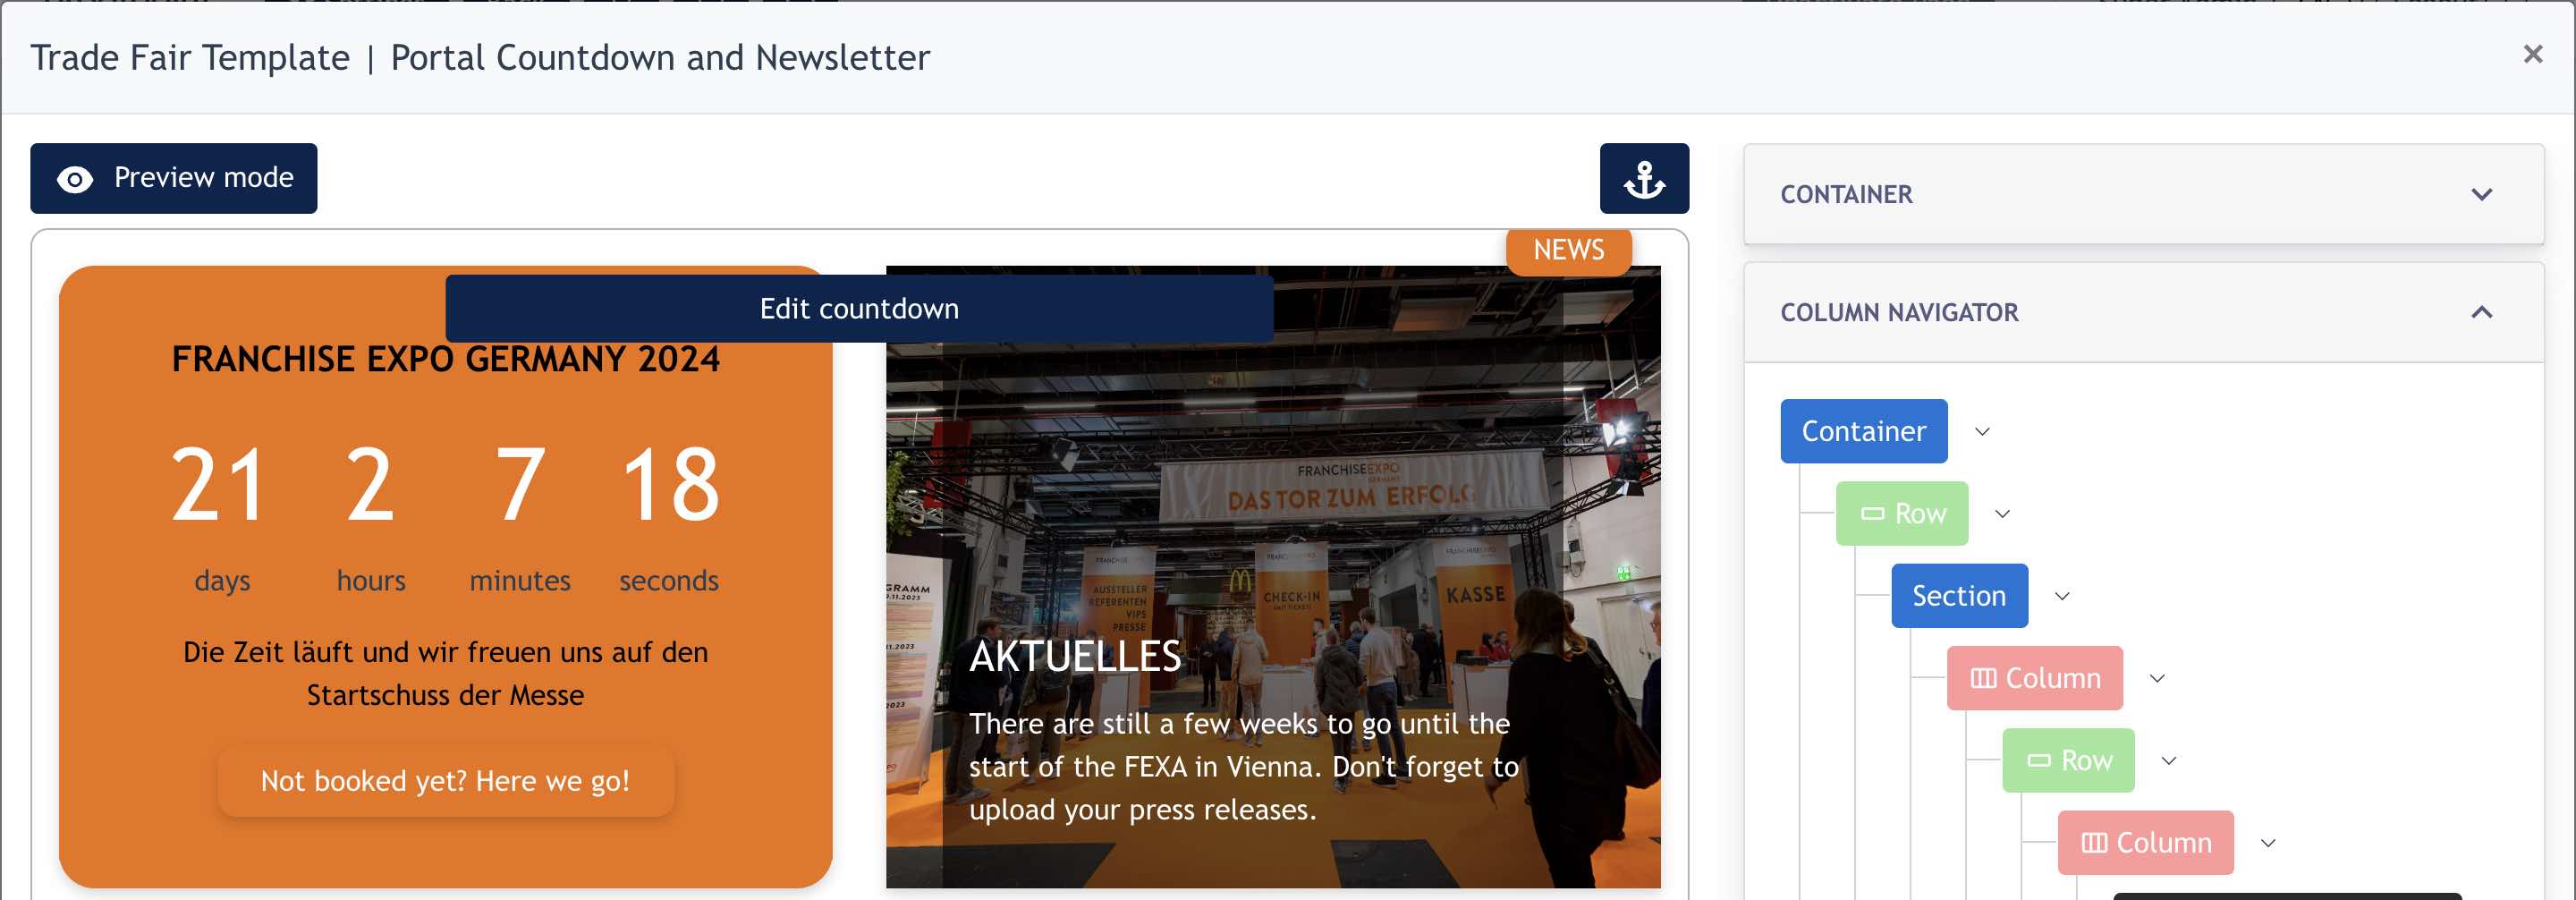
2.5 Countdown and News Banner
For Setting configuration, go to the portal page listing. Click [ Edit ] on :/portal page then click [ Edit ] on the section.
Click on "Edit Countdown" or click on the "News" and edit the data of the banner.
3.0 System Forms
There are a few system forms in the Participants Portal needed to be filled up by users. These forms data is sync and the same with data input in Cockpit.
On the Cockpit, we allow FEX Admin to input/edit/remove data for every participants.
On the Portal, it is the participants who input/edit/remove data for themselves.
List of Forms ( under menu item Masterdata )
- Your Data ( For all interested users )
- Match-making (Only for confirmed Exhibitors and Consultants)
- Expo Magazine (Only for confirmed Exhibitors and Consultants)
- Your Uploads (Only for confirmed Exhibitors and Consultants)
- Speakers (Only for Speakers and Exhibitors/Consultant with 'is also speaker' is checked)
- Brand (Only for confirmed Exhibitors and Consultants with 'has multiple brands' is checked)
- Fair Passes (for all confirmed Exhibitors/Consultants/Speakers)
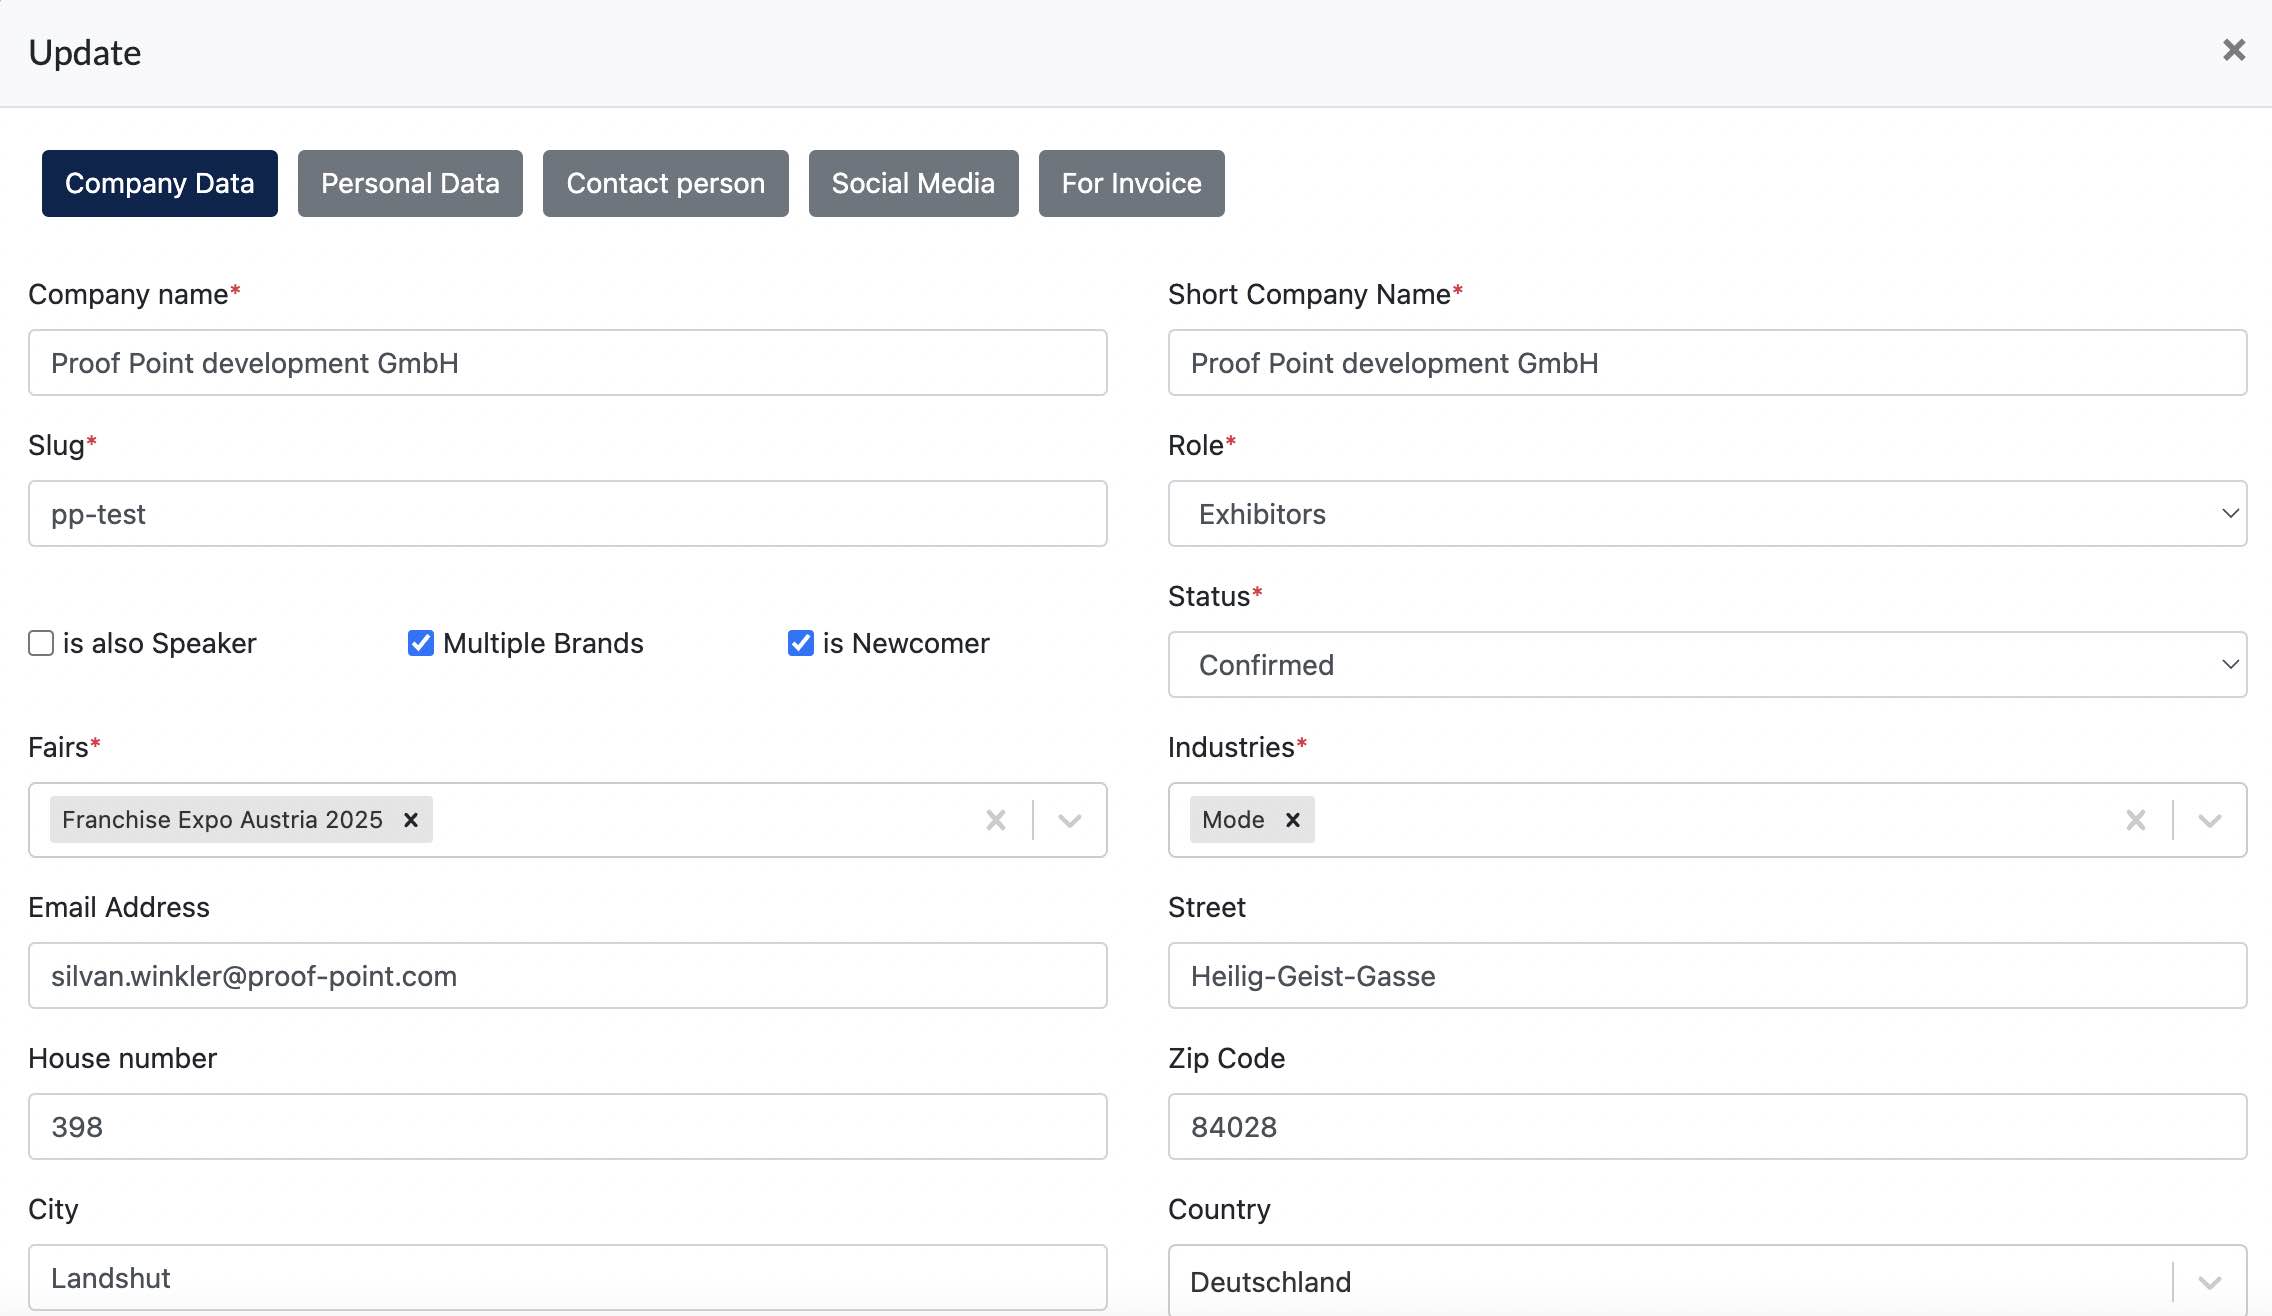
3.1 Your Data
Every participants (interested or confirmed) are required to fill in this form.
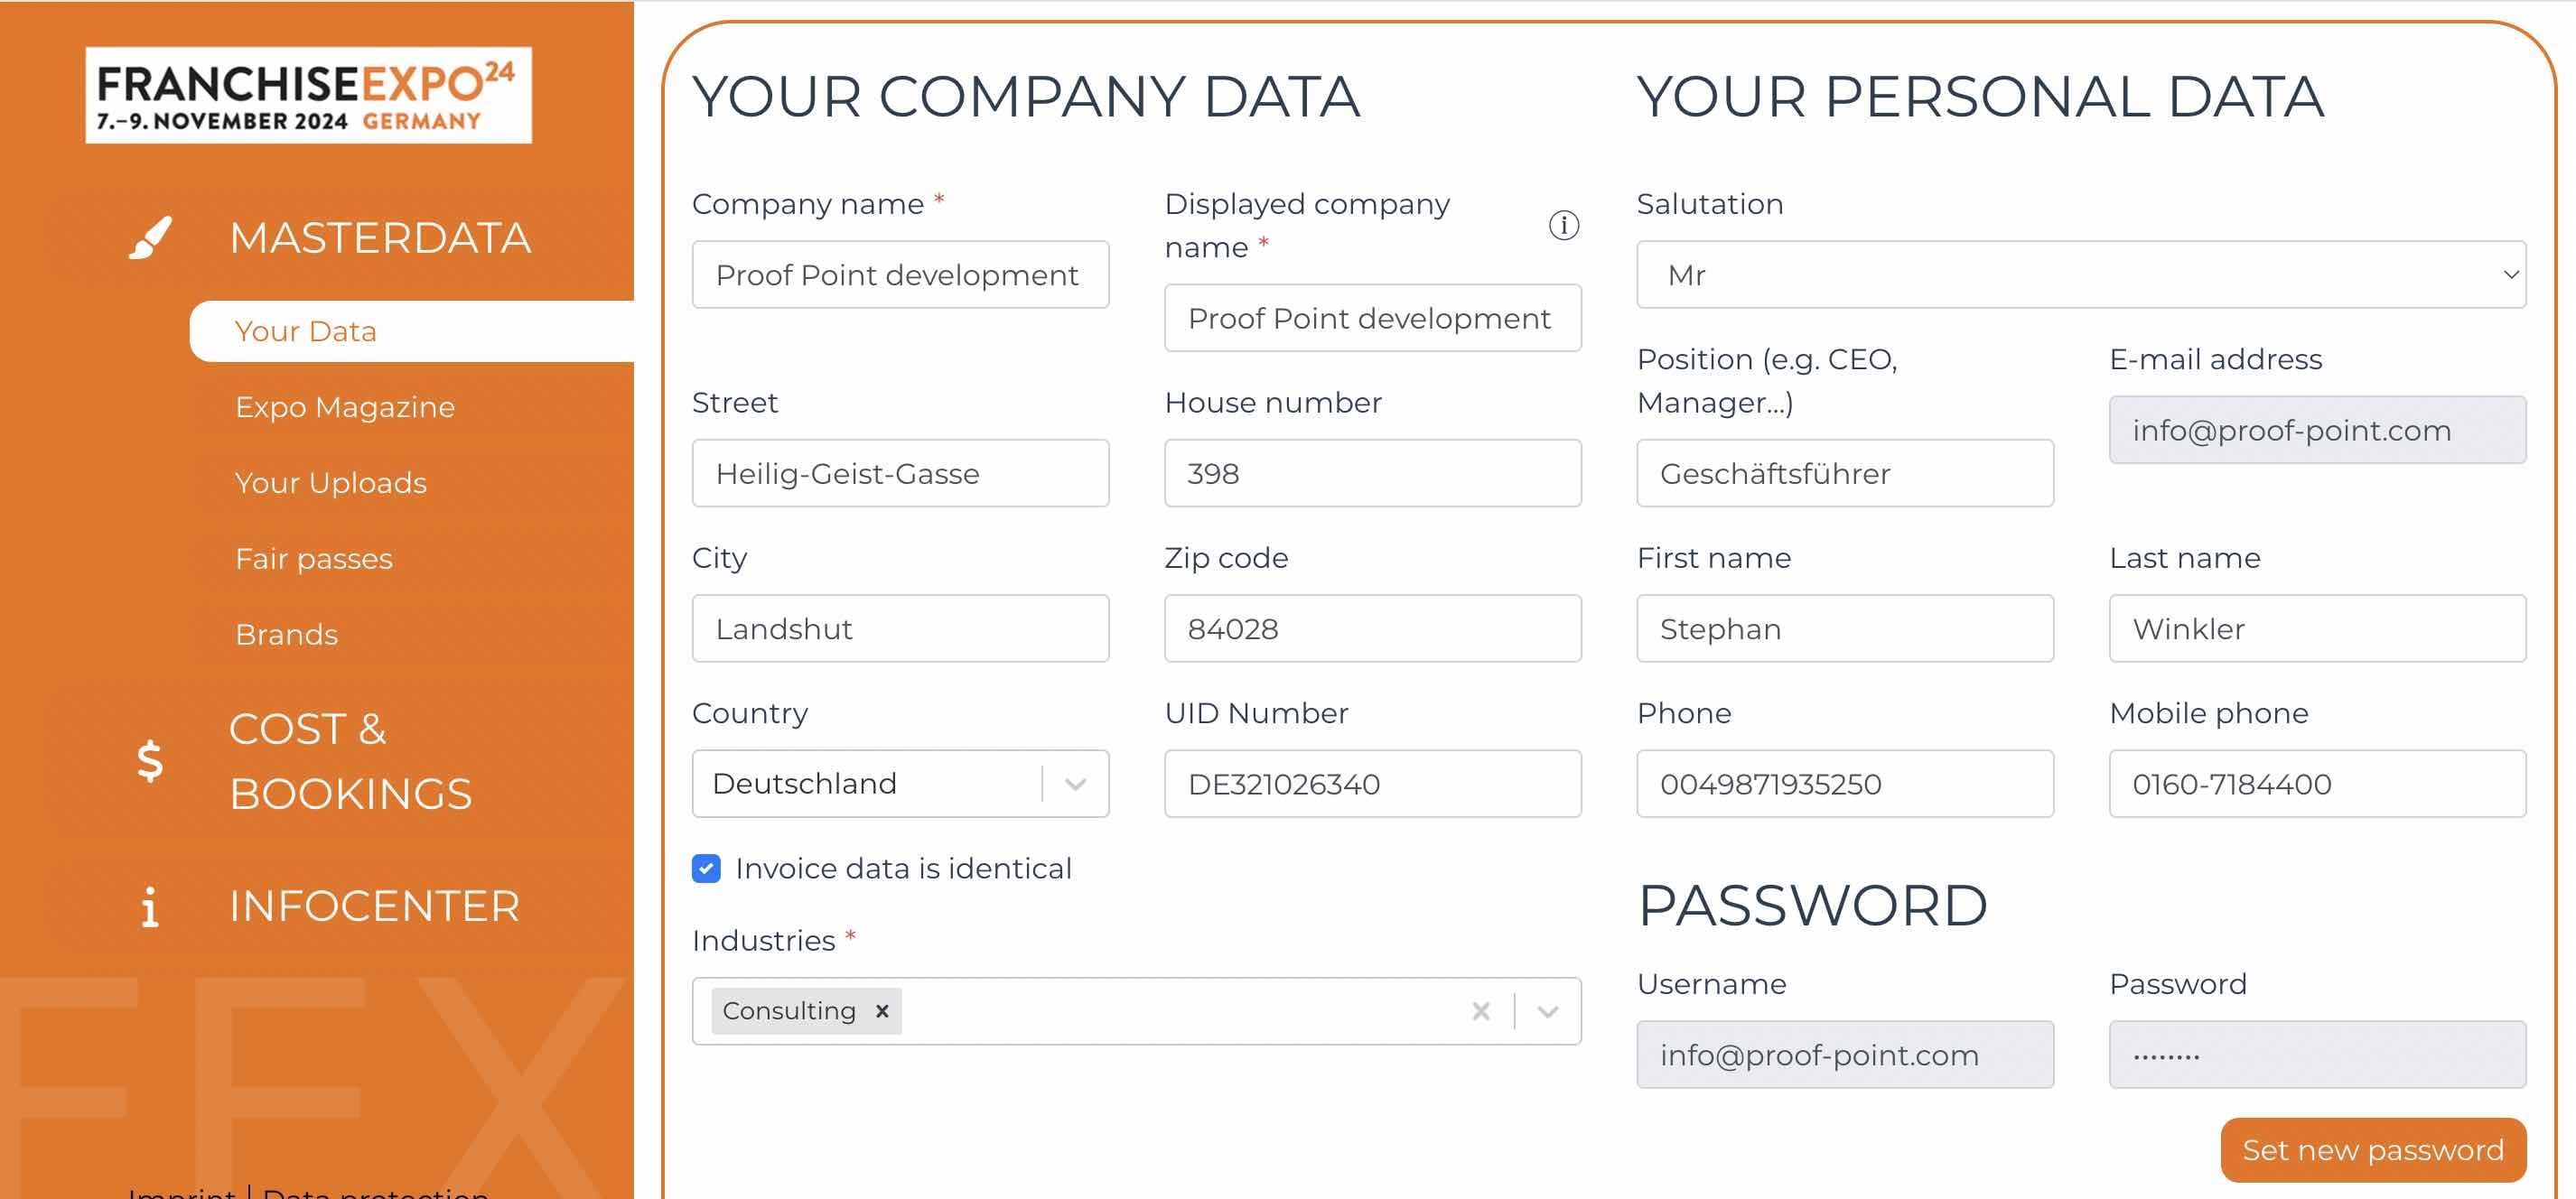
The data in this form is the same/sync with the Company Data on Cockpit.
3.2 Match-Making
Confirmed participants are required to fill in the Match-making form. 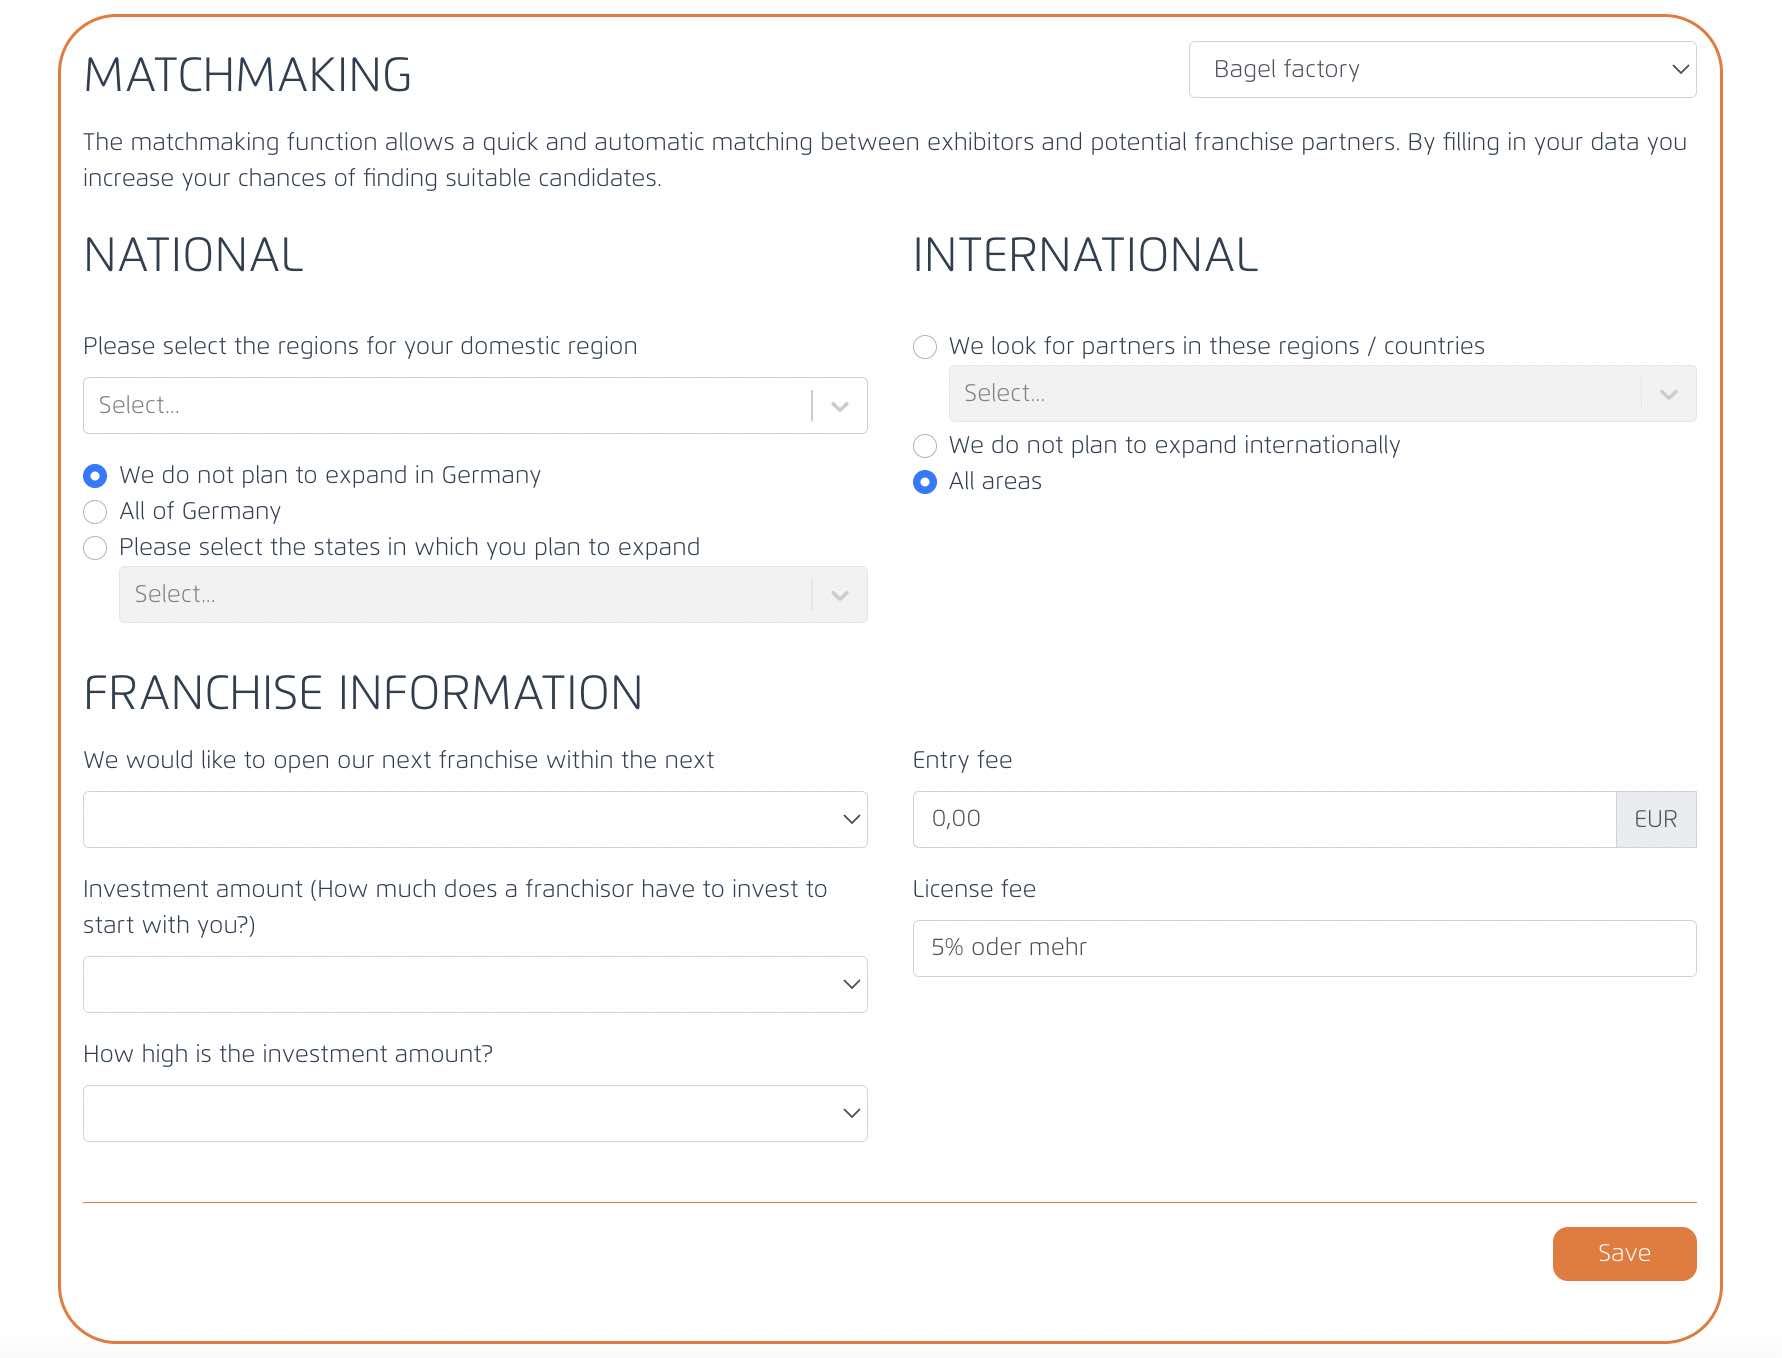
This match-making form captures data from participants and display the results for visitors when they search via the "match-making filter" on the Trade Fairs site.
This is how the match-making filter looks like on the official site.
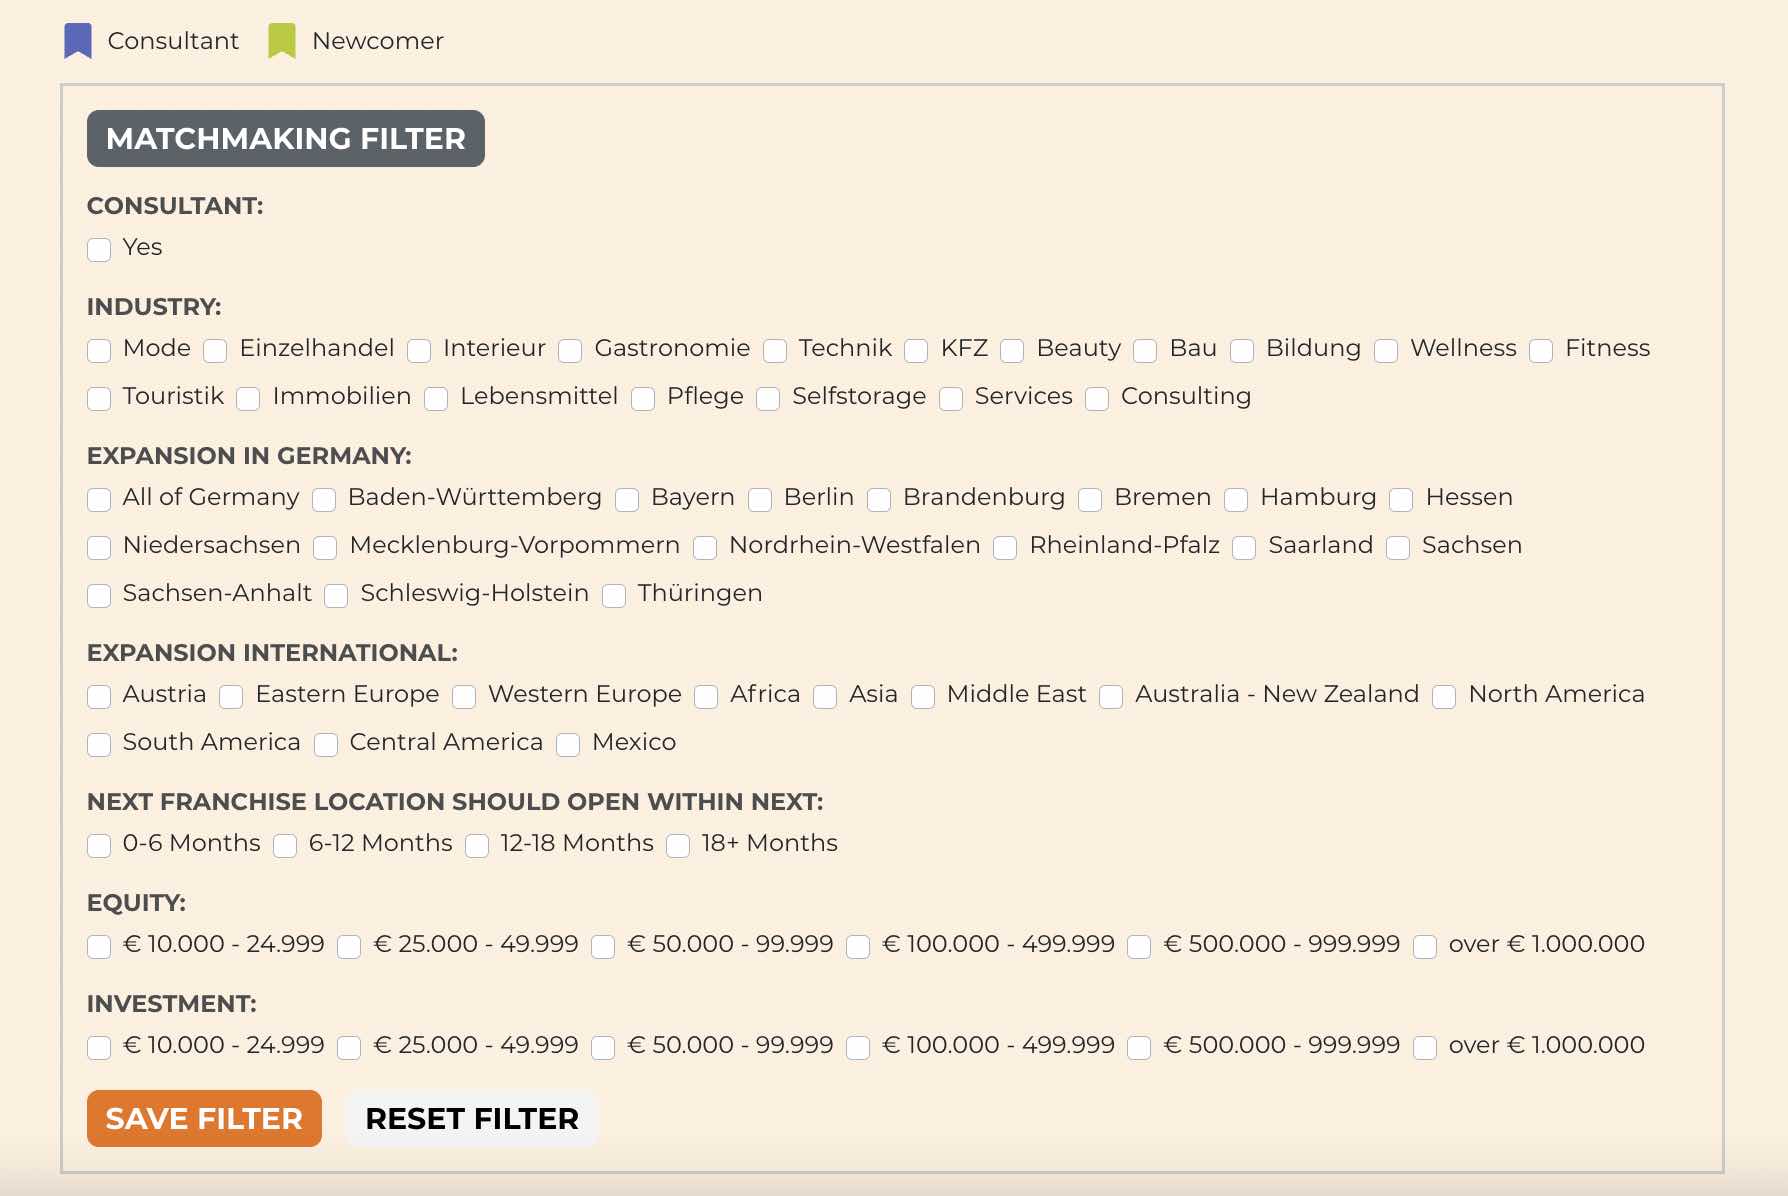
Visitors fill in the above form to search for Franchise business they are interested to invest in on the Franchise Expo Official site.
https://www.franchise-expo.com/en-gb/exhibitor-overview
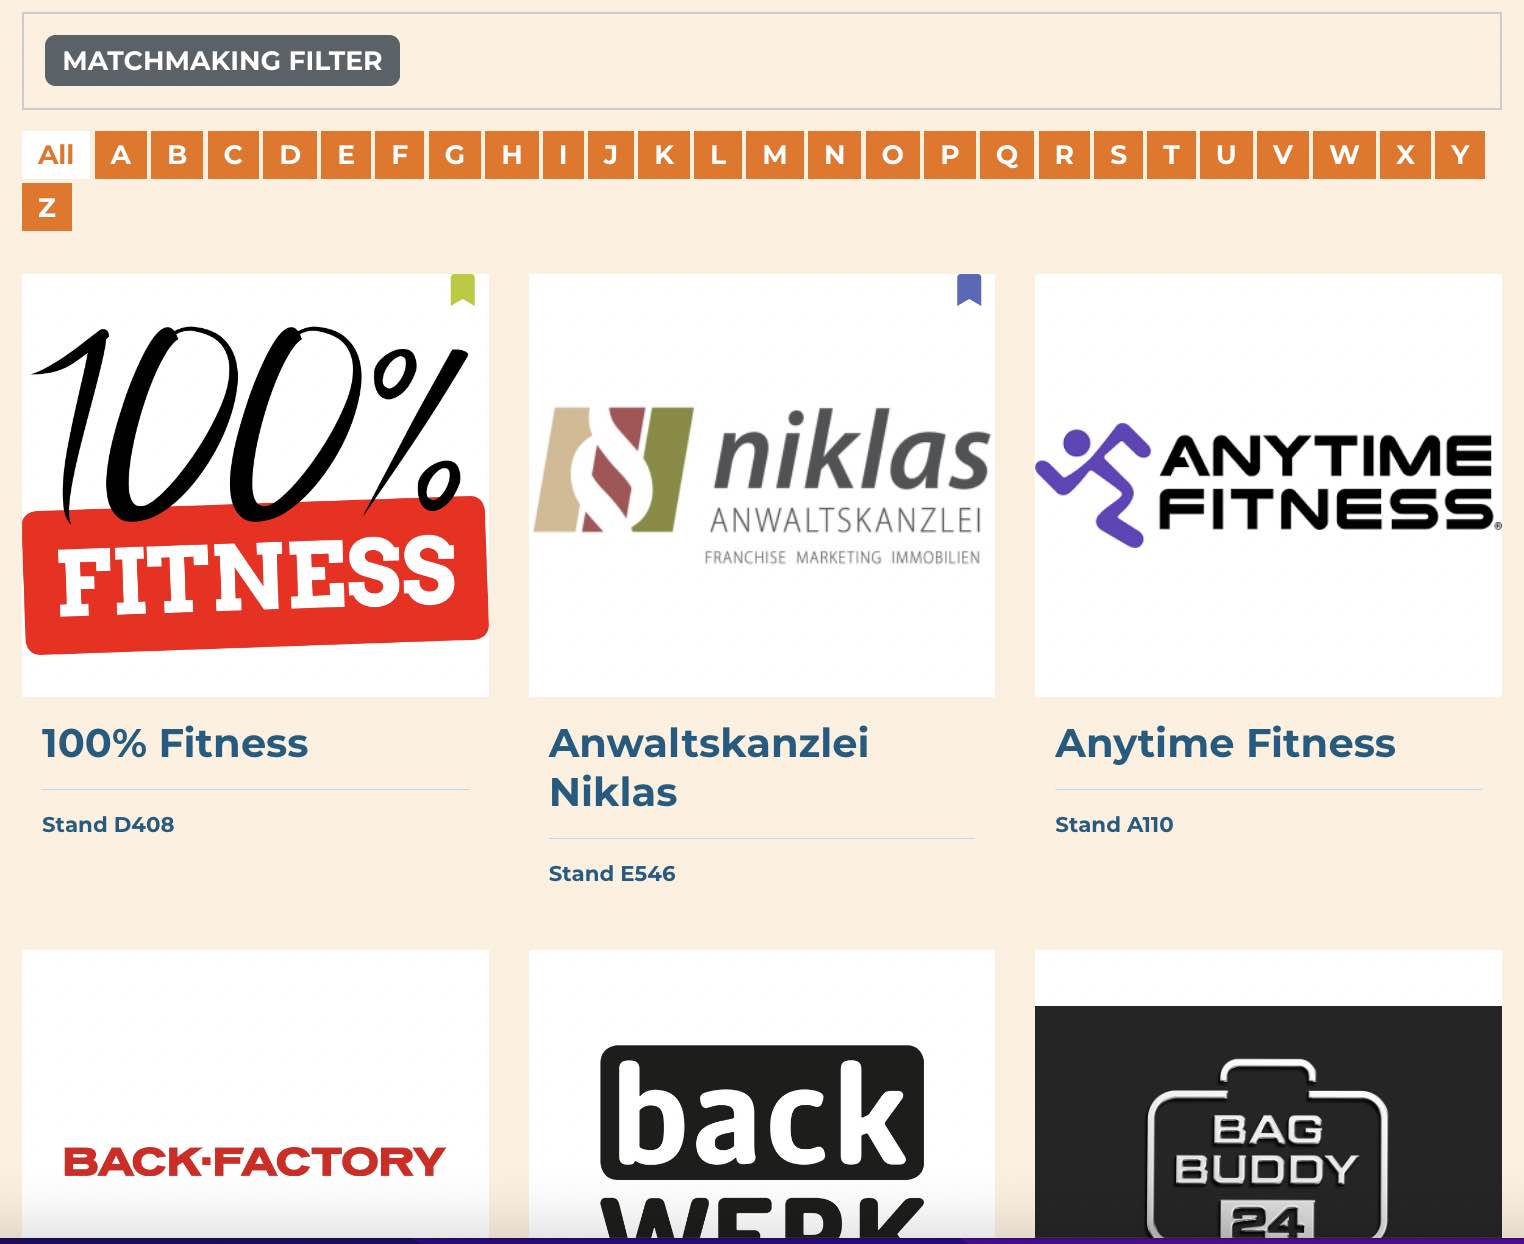
After they click "Save filter", system will start to search those data filled in by Exhibitor/Consultant ( on the Portal Match-making's form). Data which matches the search criteria perform by visitor, will be displayed like below.
3.3 EXPO Magazine
Confirmed participants (Exhibitors/consultants) are required to fill in the EXPO Magazine form.
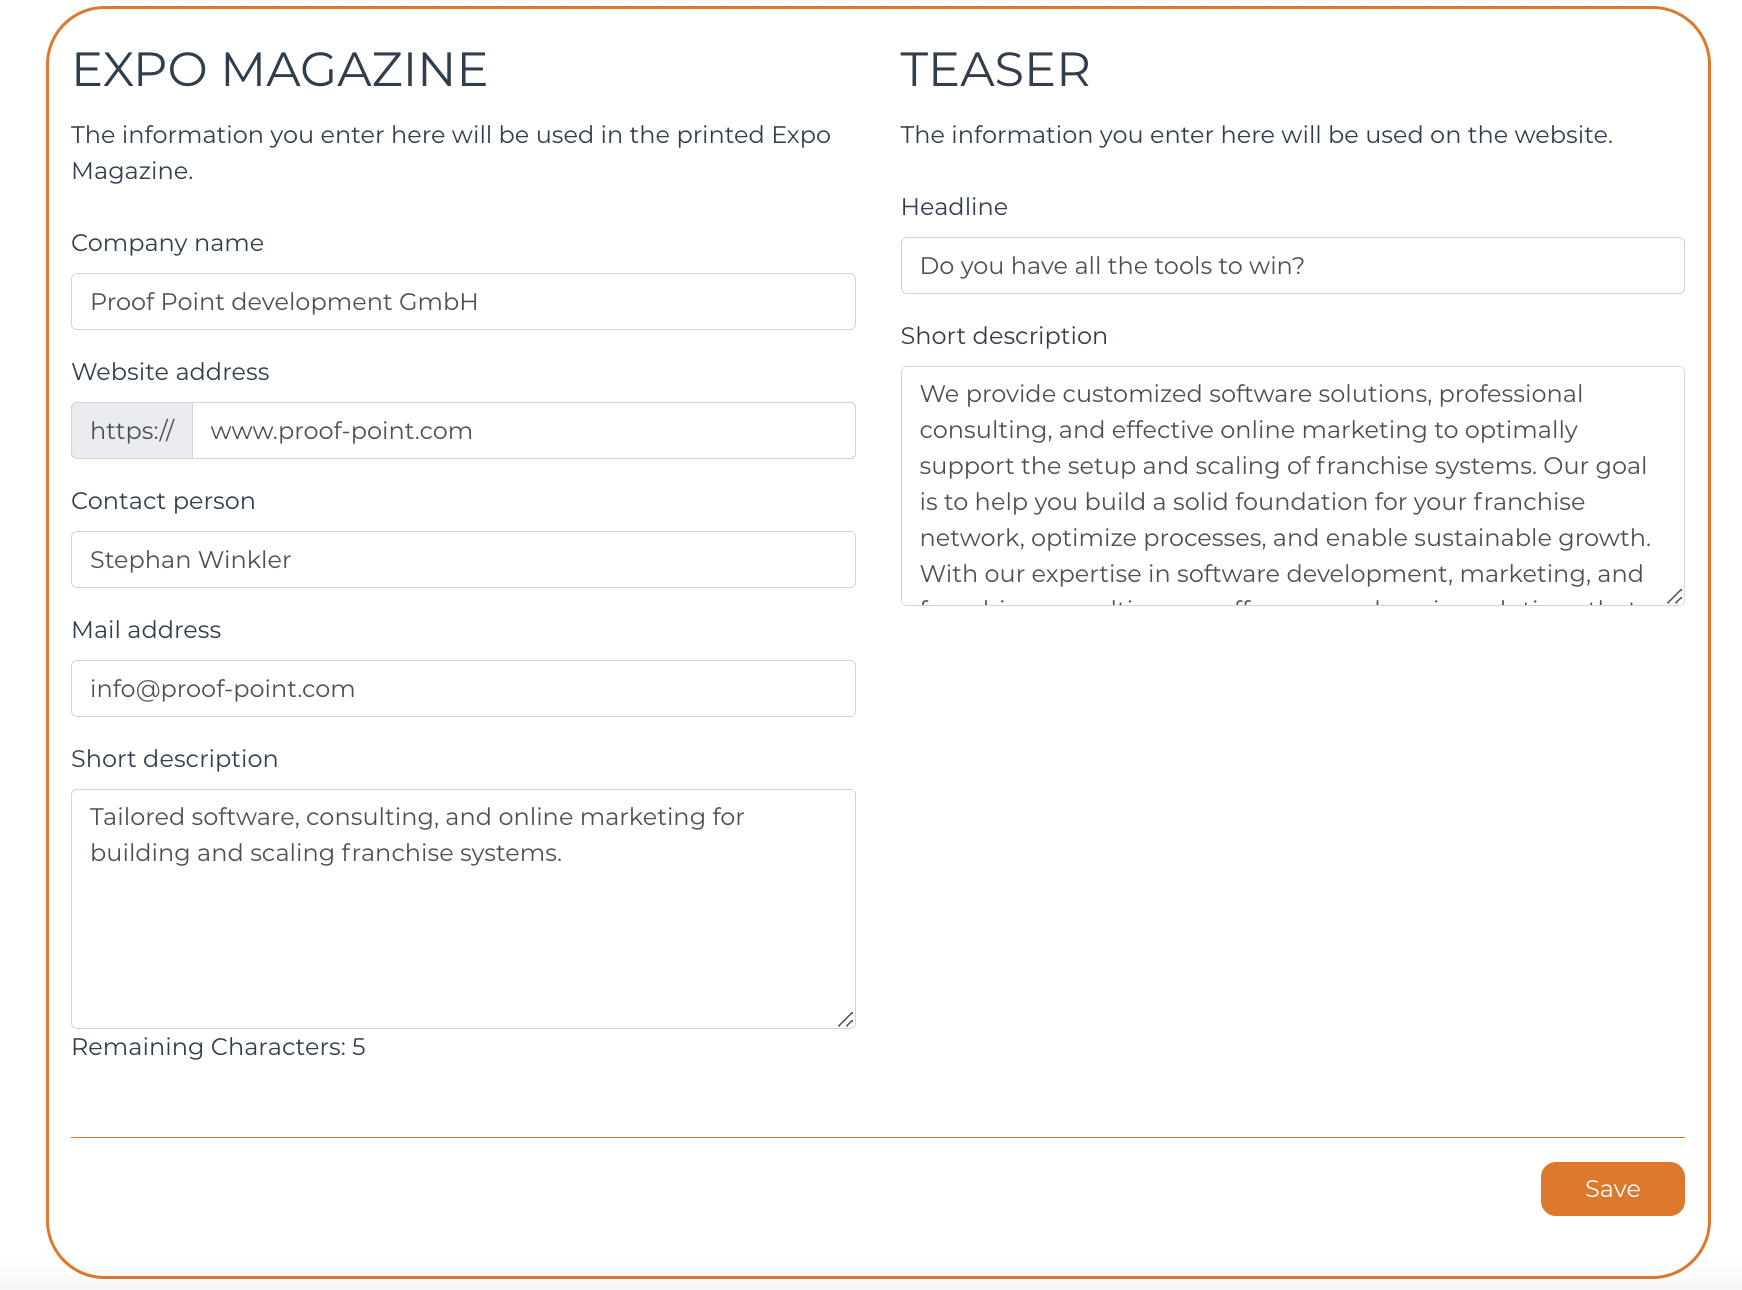
- Expo Magazine : The info filled in here is used for the printed magazine
- Teaser: The info filled in here is used for the website. It will be displayed as part of the info under Exhibitor Listing.
The data in this form is the same/sync with the [Expo Magazine] on Cockpit > Exhibitor/Consultant listing > Upload button
3.4 Your Uploads
Confirmed participants (Exhibitors/consultants) are required to fill in the Your Uploads form.
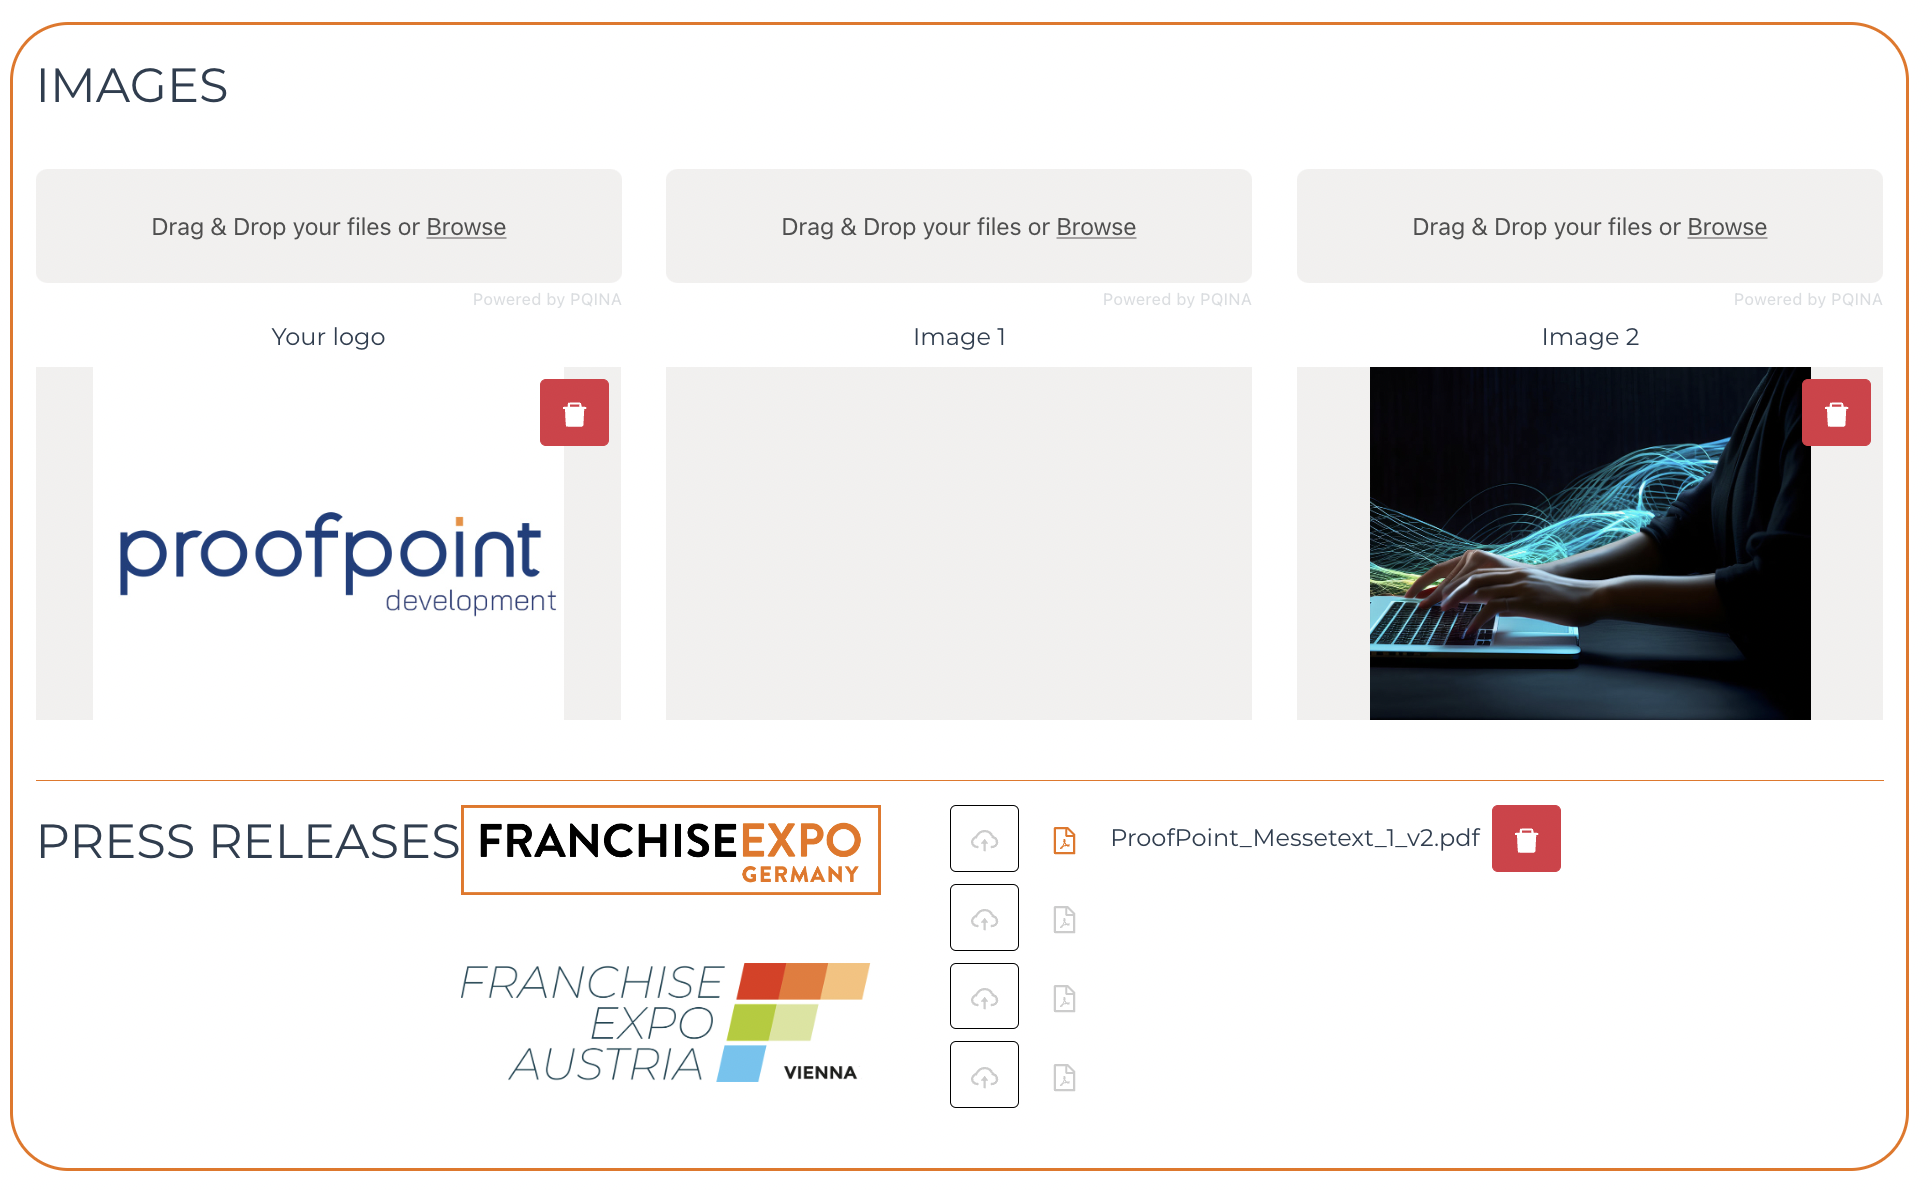
- Your logo, image 1 & image 2 : This will be used on the Website under Exhibitor/Consultant listing
Example screenshot of application: Logo image
Logo image, image 1 & 2
- Press Release : Allow confirmed exhibitor/consultant to upload their PDF here.

Every joined fair needs to upload 2 Press Release. If a user joined 2 fair, the logo of the 2 fairs appear on the left ( example from screenshot ) and allow user to upload 2 PDFs for each fair joined.
The data in this form is the same/sync with the [Press Release] on Cockpit > Exhibitor/Consultant listing > Fair
3.5 Speakers
Speakers who speaks during the fair, and exhibitor/consultant whose "is also speaker" is checked, needs to fill up the Speakers form.
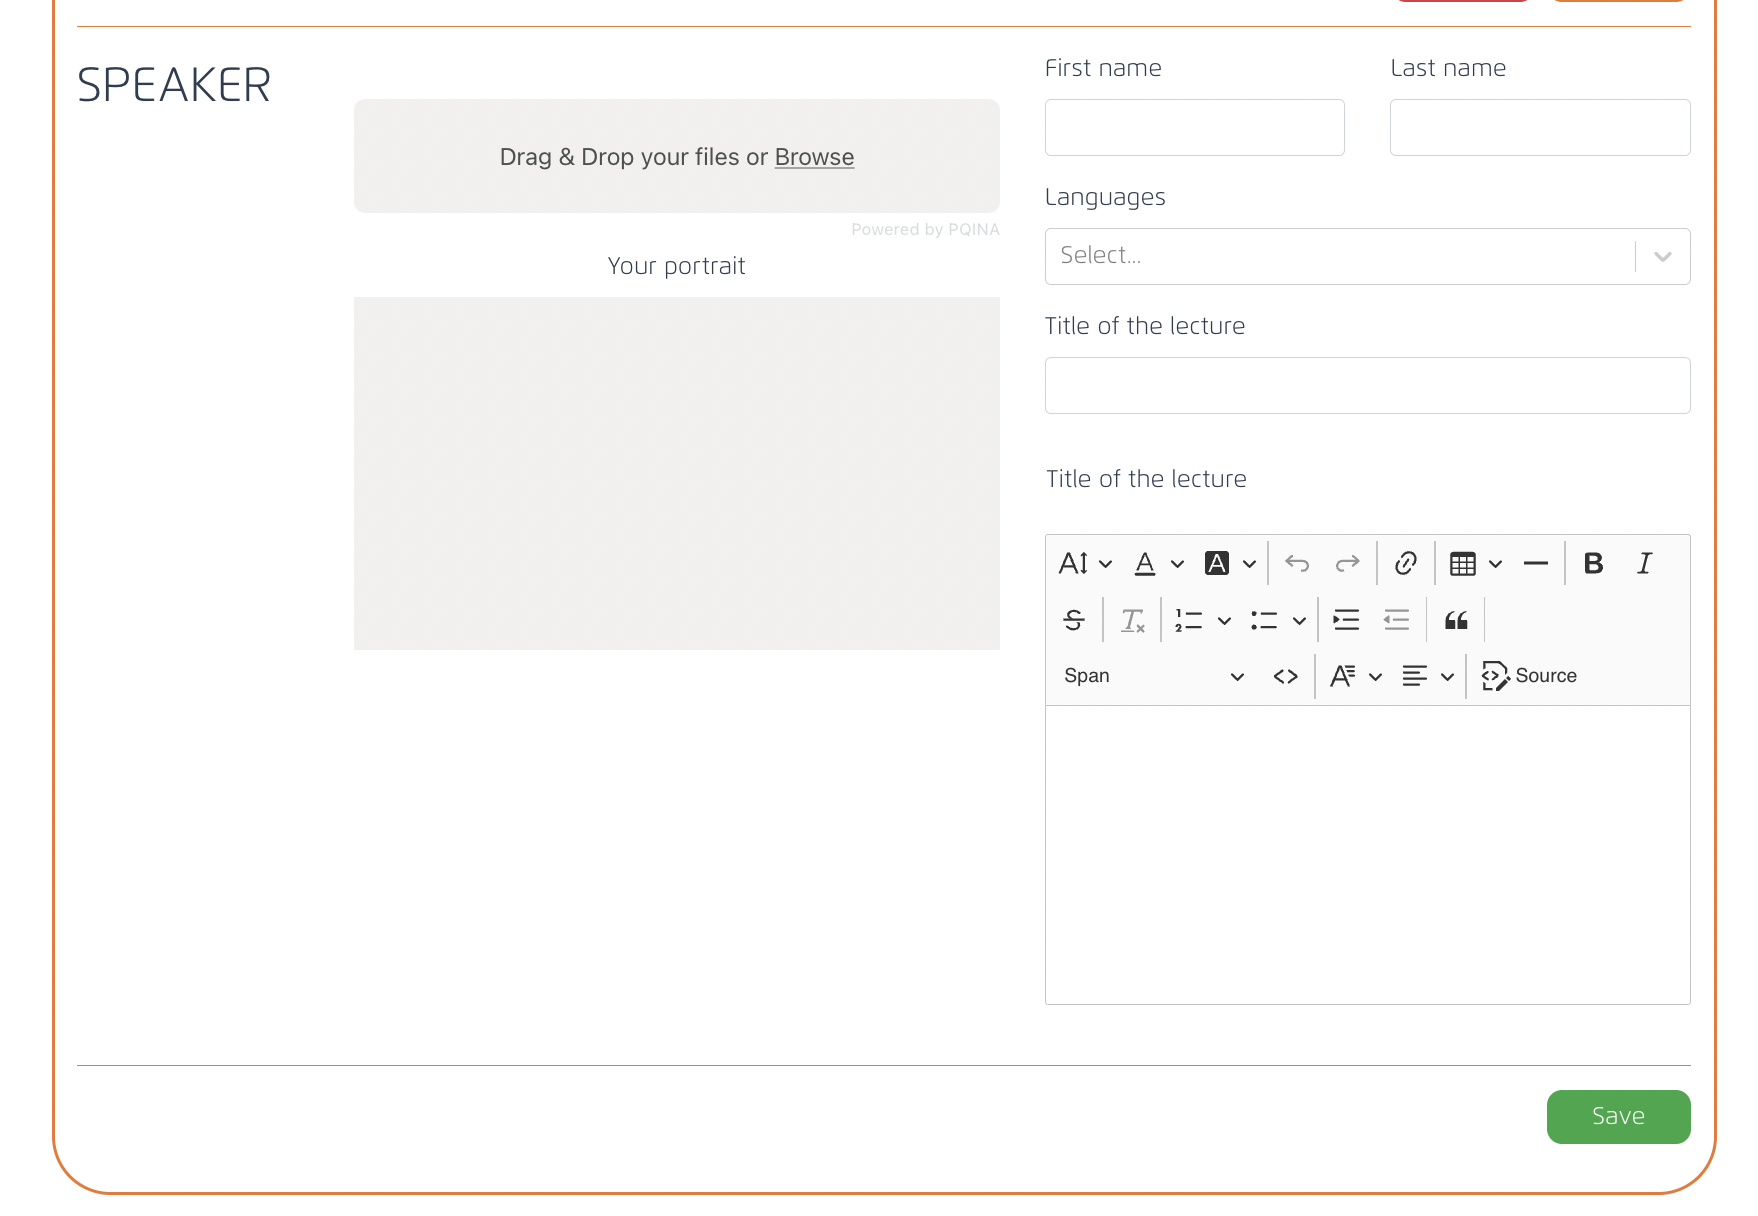
This data will be used in the Cockpit to create Program during the fair.
3.6 Brands
Confirmed Exhibitor/Consultant with "has multiple brands" checked, need to fill up the Brands form.
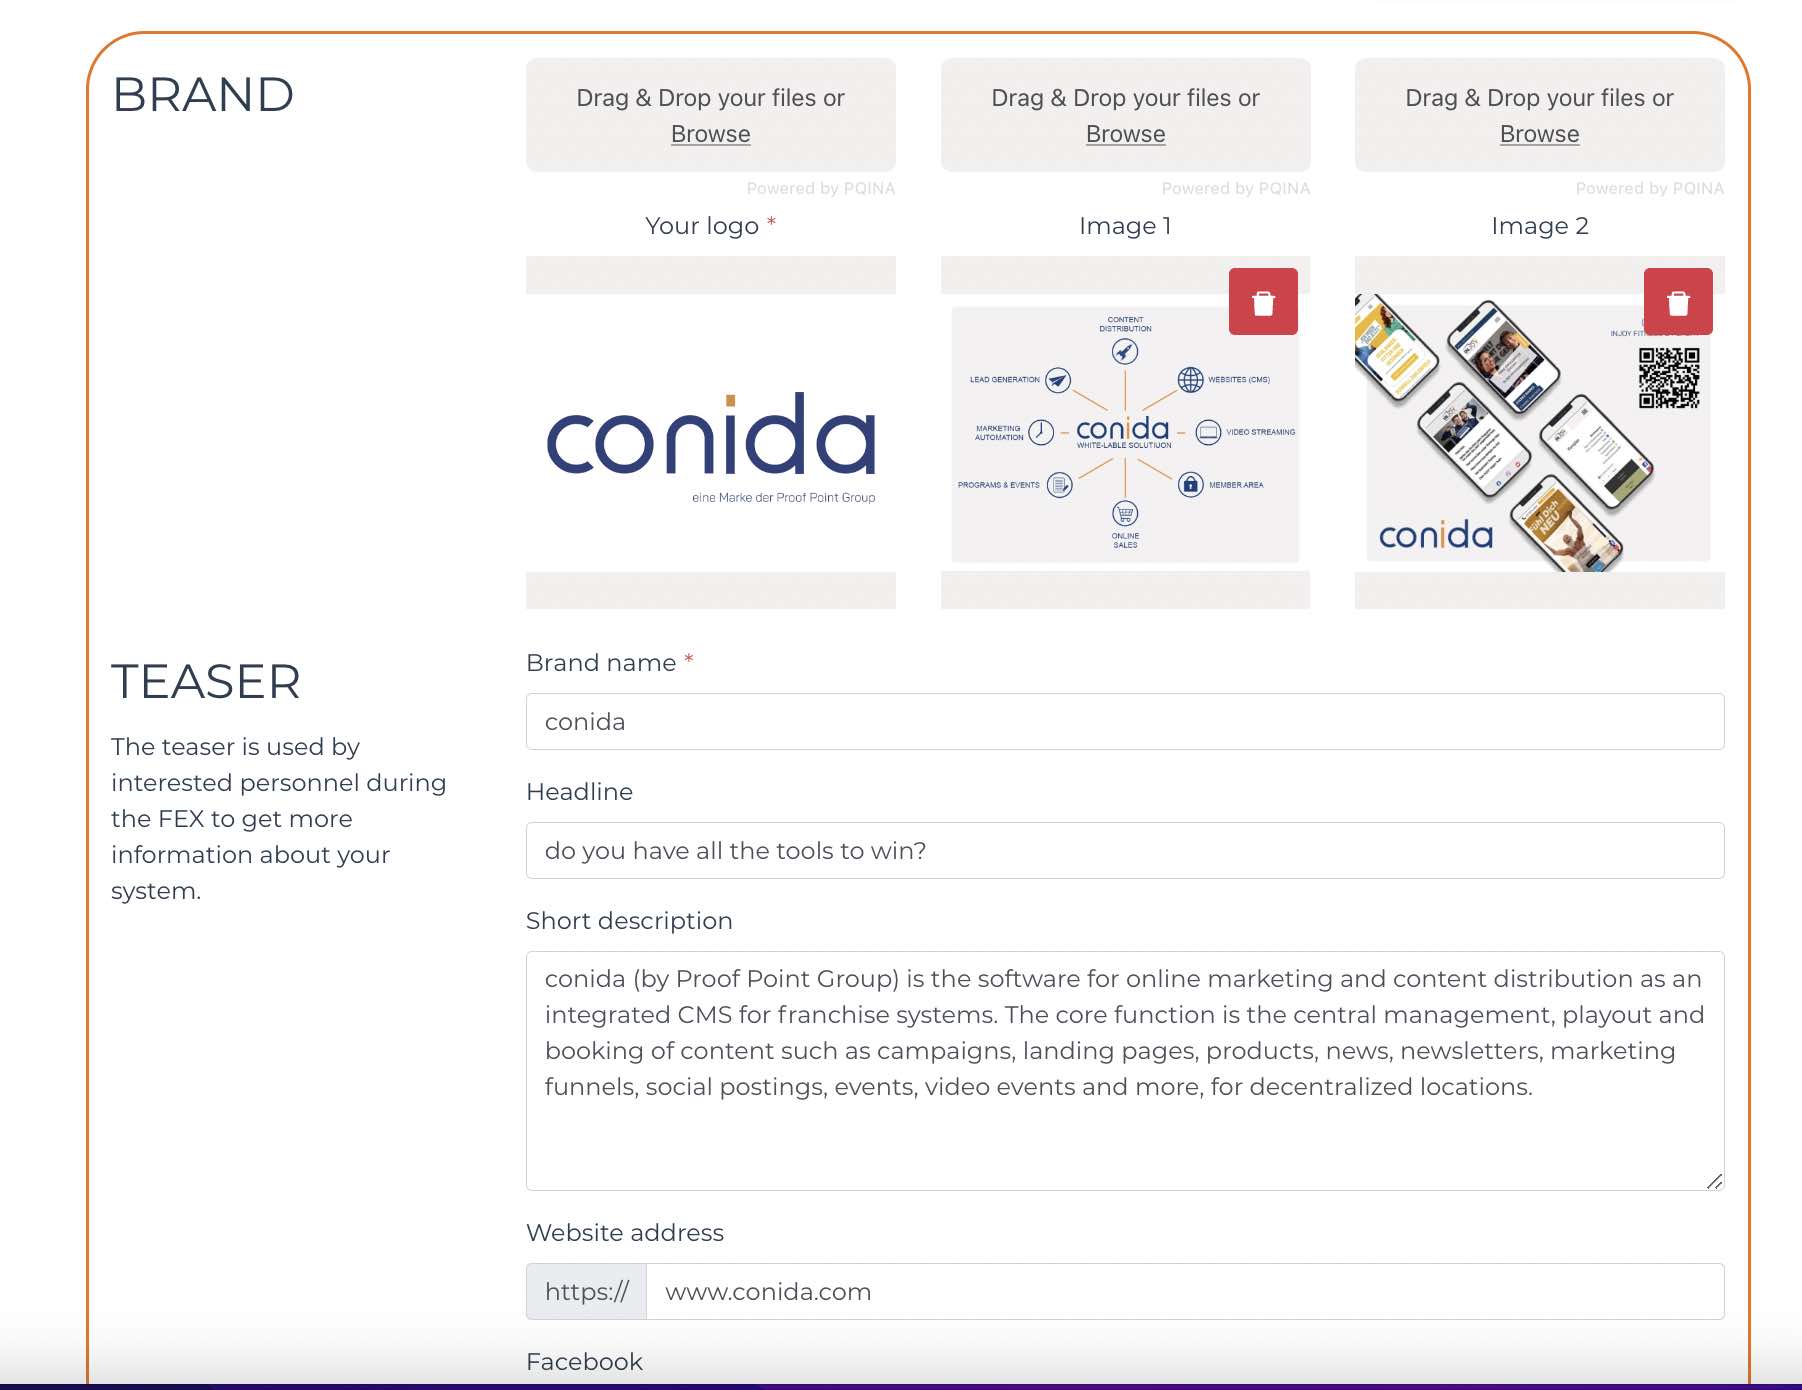
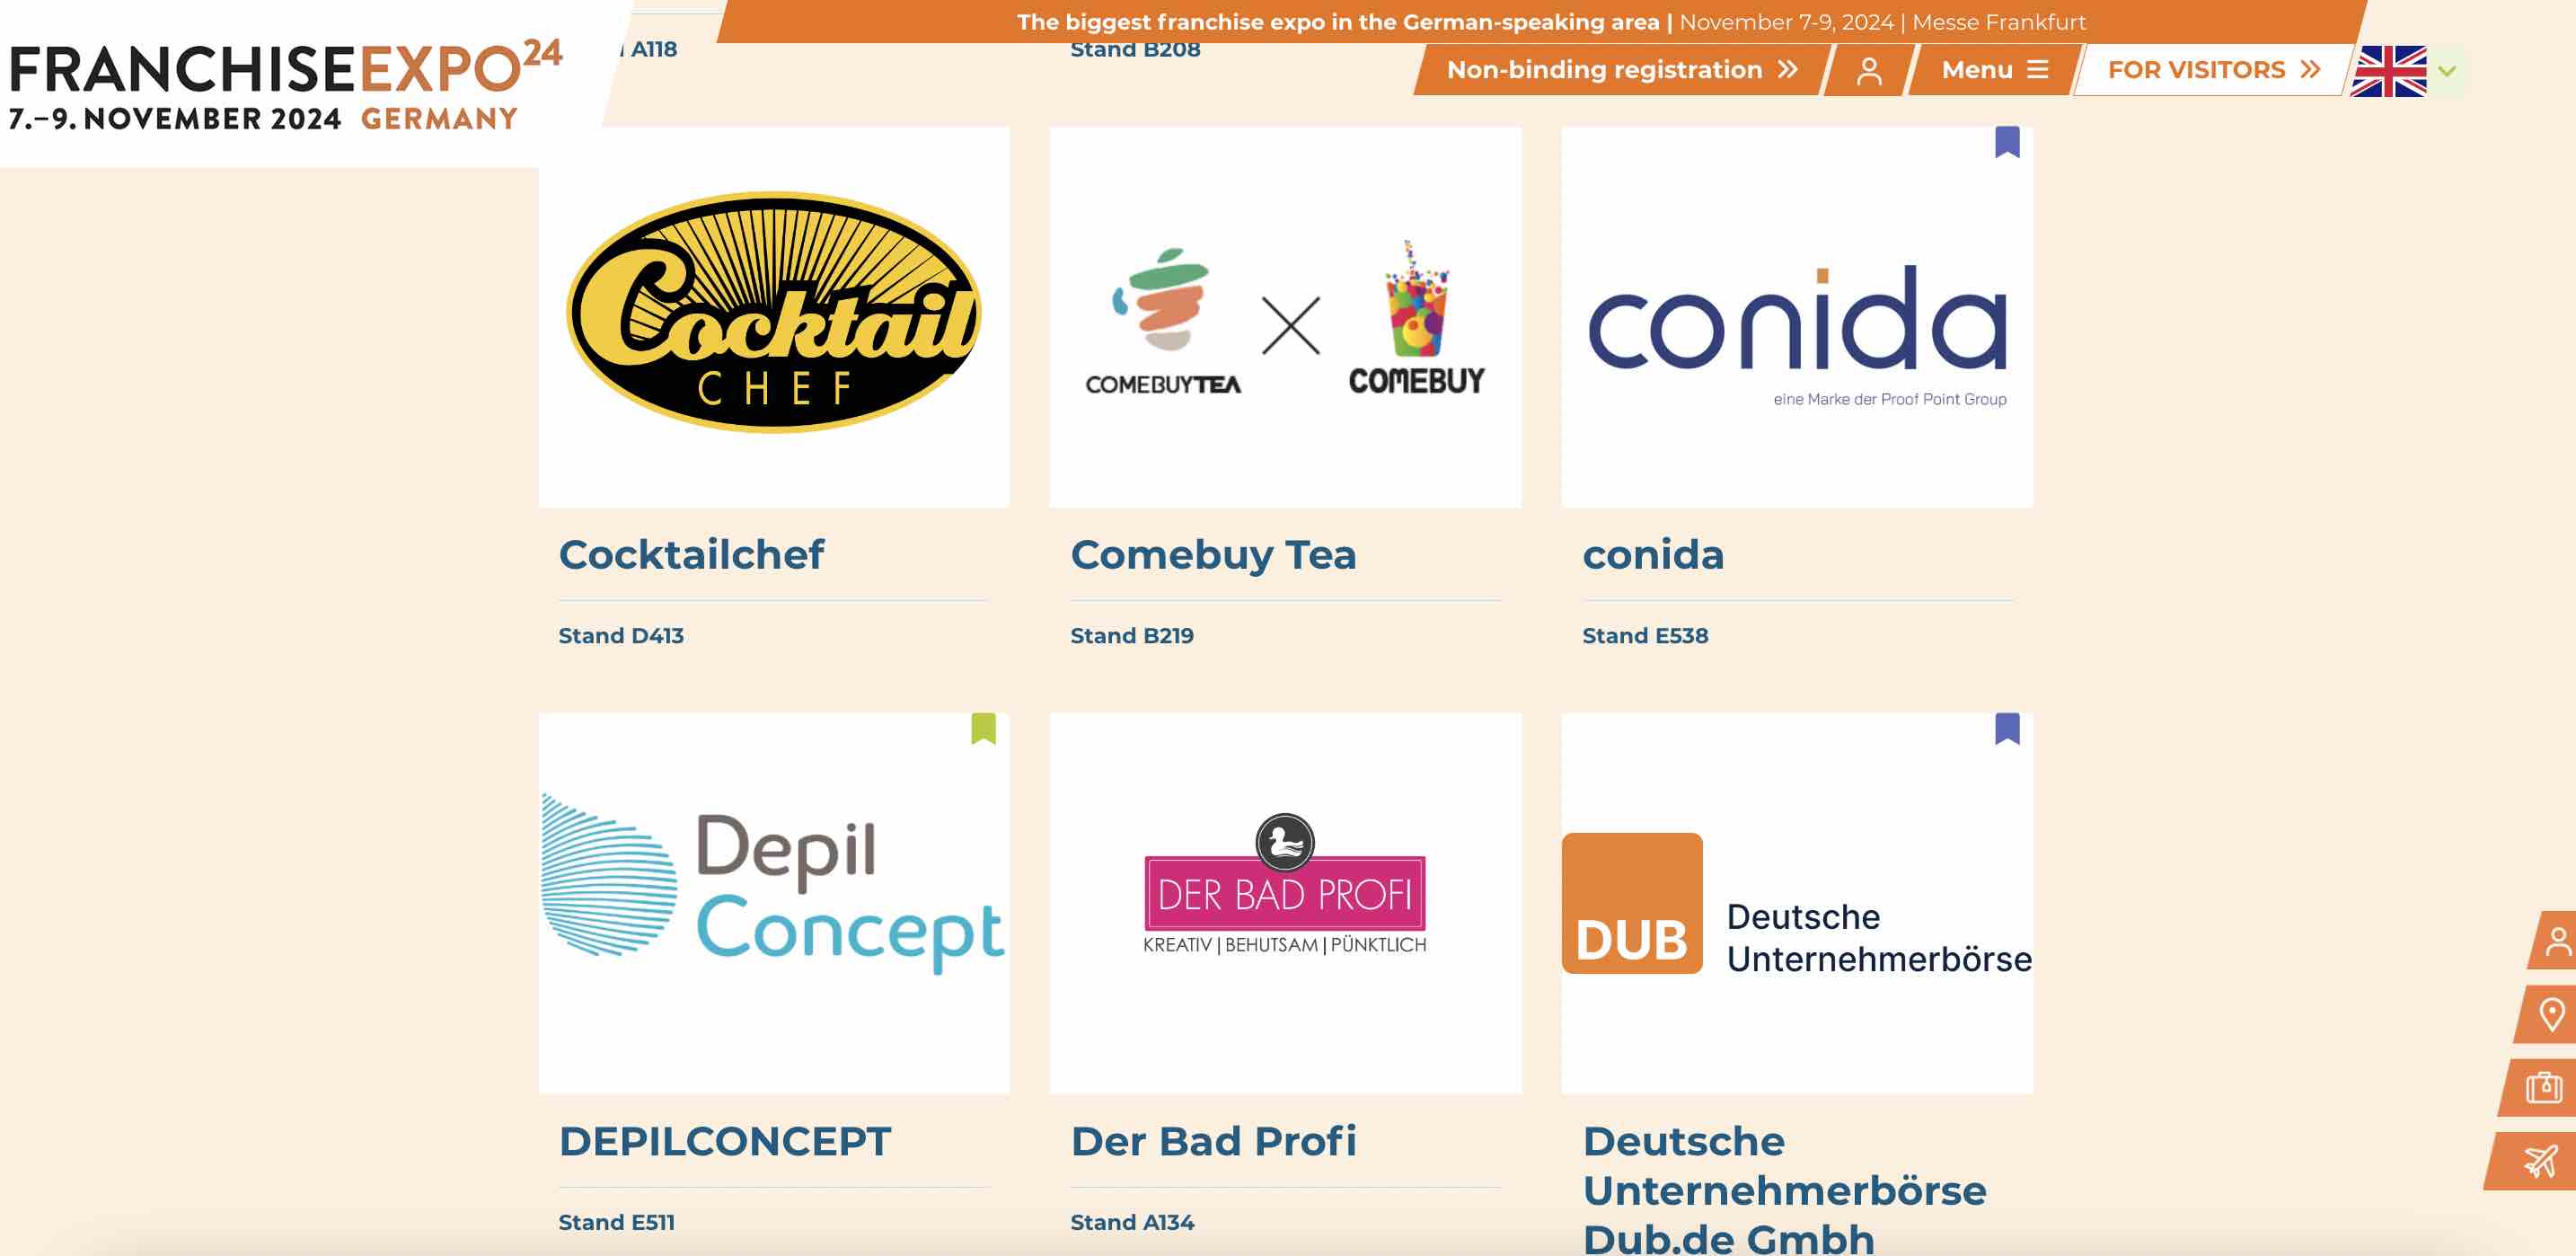
Data filled under the Brand's form will be used on the website, under Exhibitor Listing ( Brands )
3.7 Fair Passes
Confirmed participants (exhibitor/consultant/speaker) need to fill up this form.
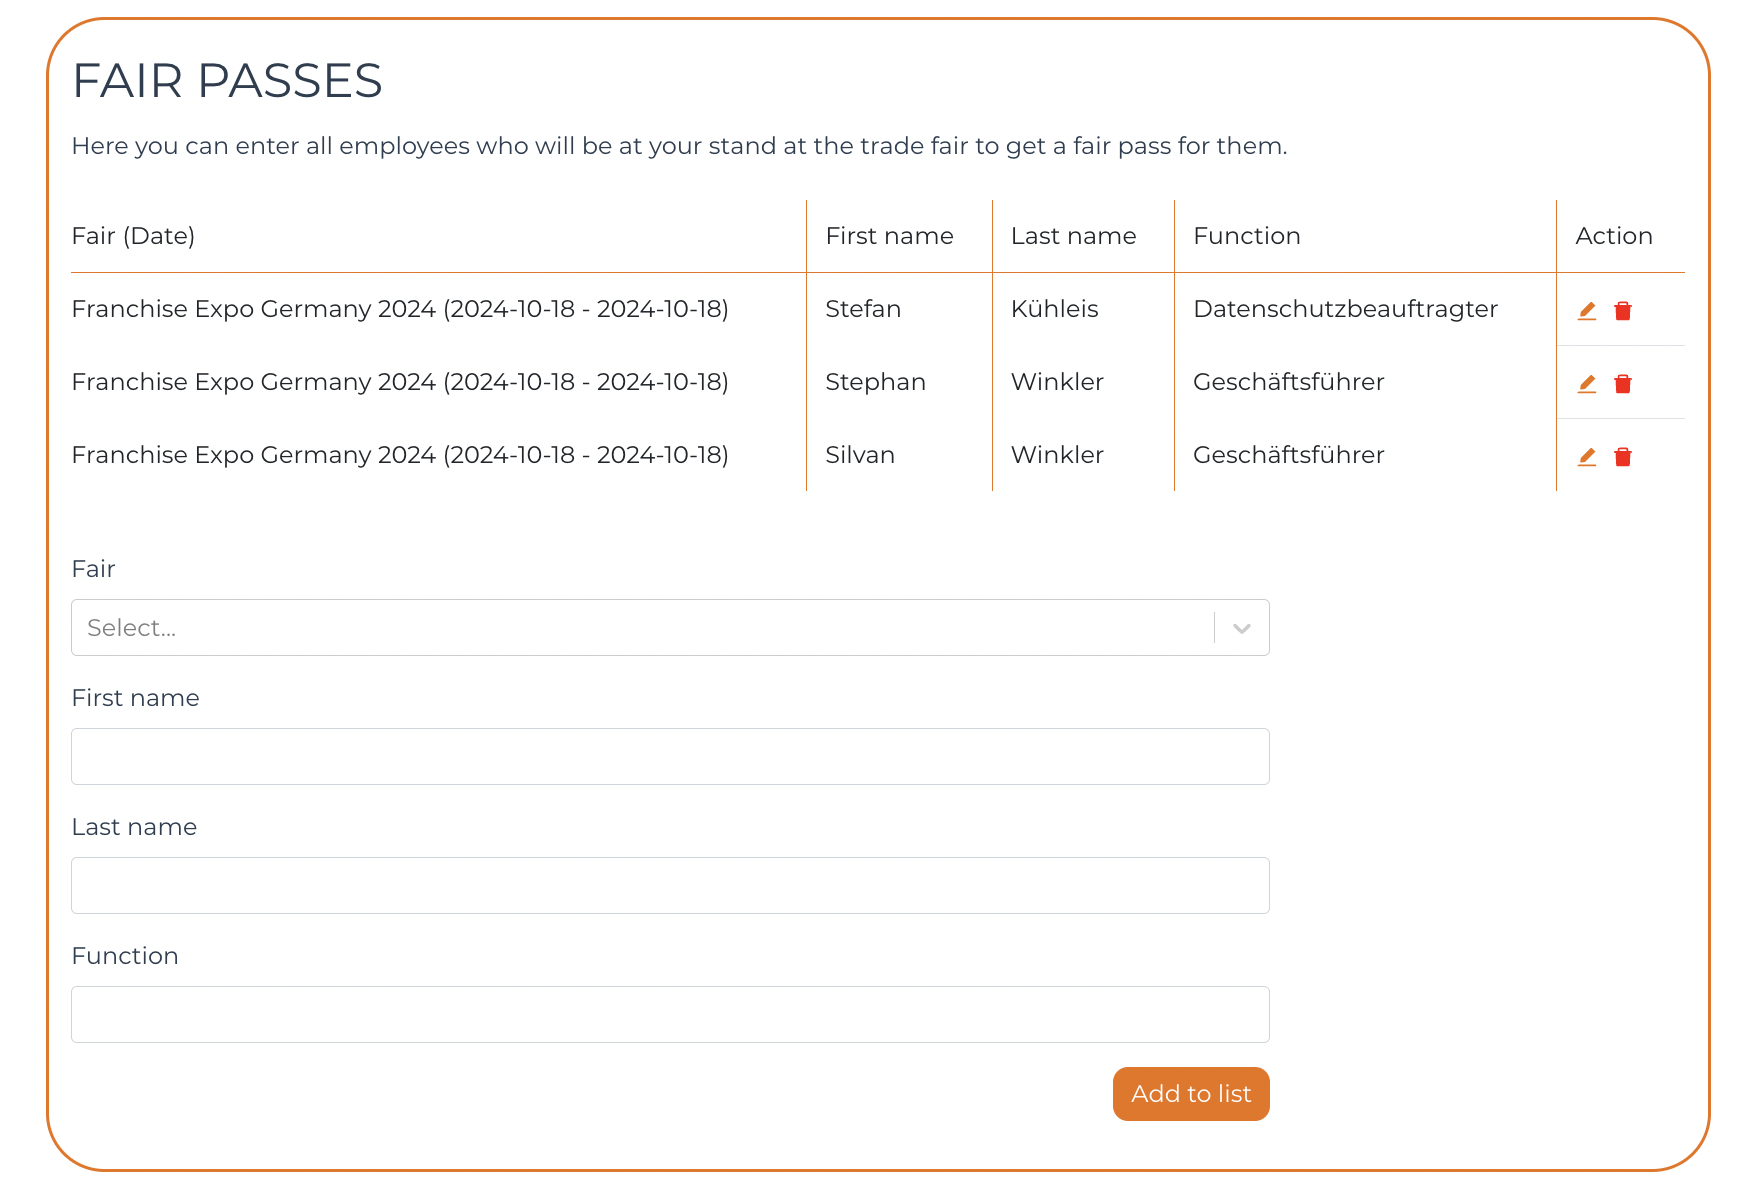
The data filled will be used by FEX Admin to print and create physical fair passes for the participants.
This data is the same/sync with Cockpit under Fair > Fair passes