Teilnehmer Portal
Users’Plattform Platform:für ParticipantsBenutzer: Teilnehmer-Portal
ThisDieses portalPortal isist fornur registeredfür users/companiesregistrierte only.Nutzer/Unternehmen.
AnyJeder exhibitor/consultant/speakerAussteller/Berater/Speaker withmit statusdem ‘interested’Status will„interessiert“ receiveerhält avom loginSystem credentialeine fromZugangsberechtigung, themit system,der forer themsich toin logindas toTeilnehmerportal theeinloggen Participants Portal.kann.
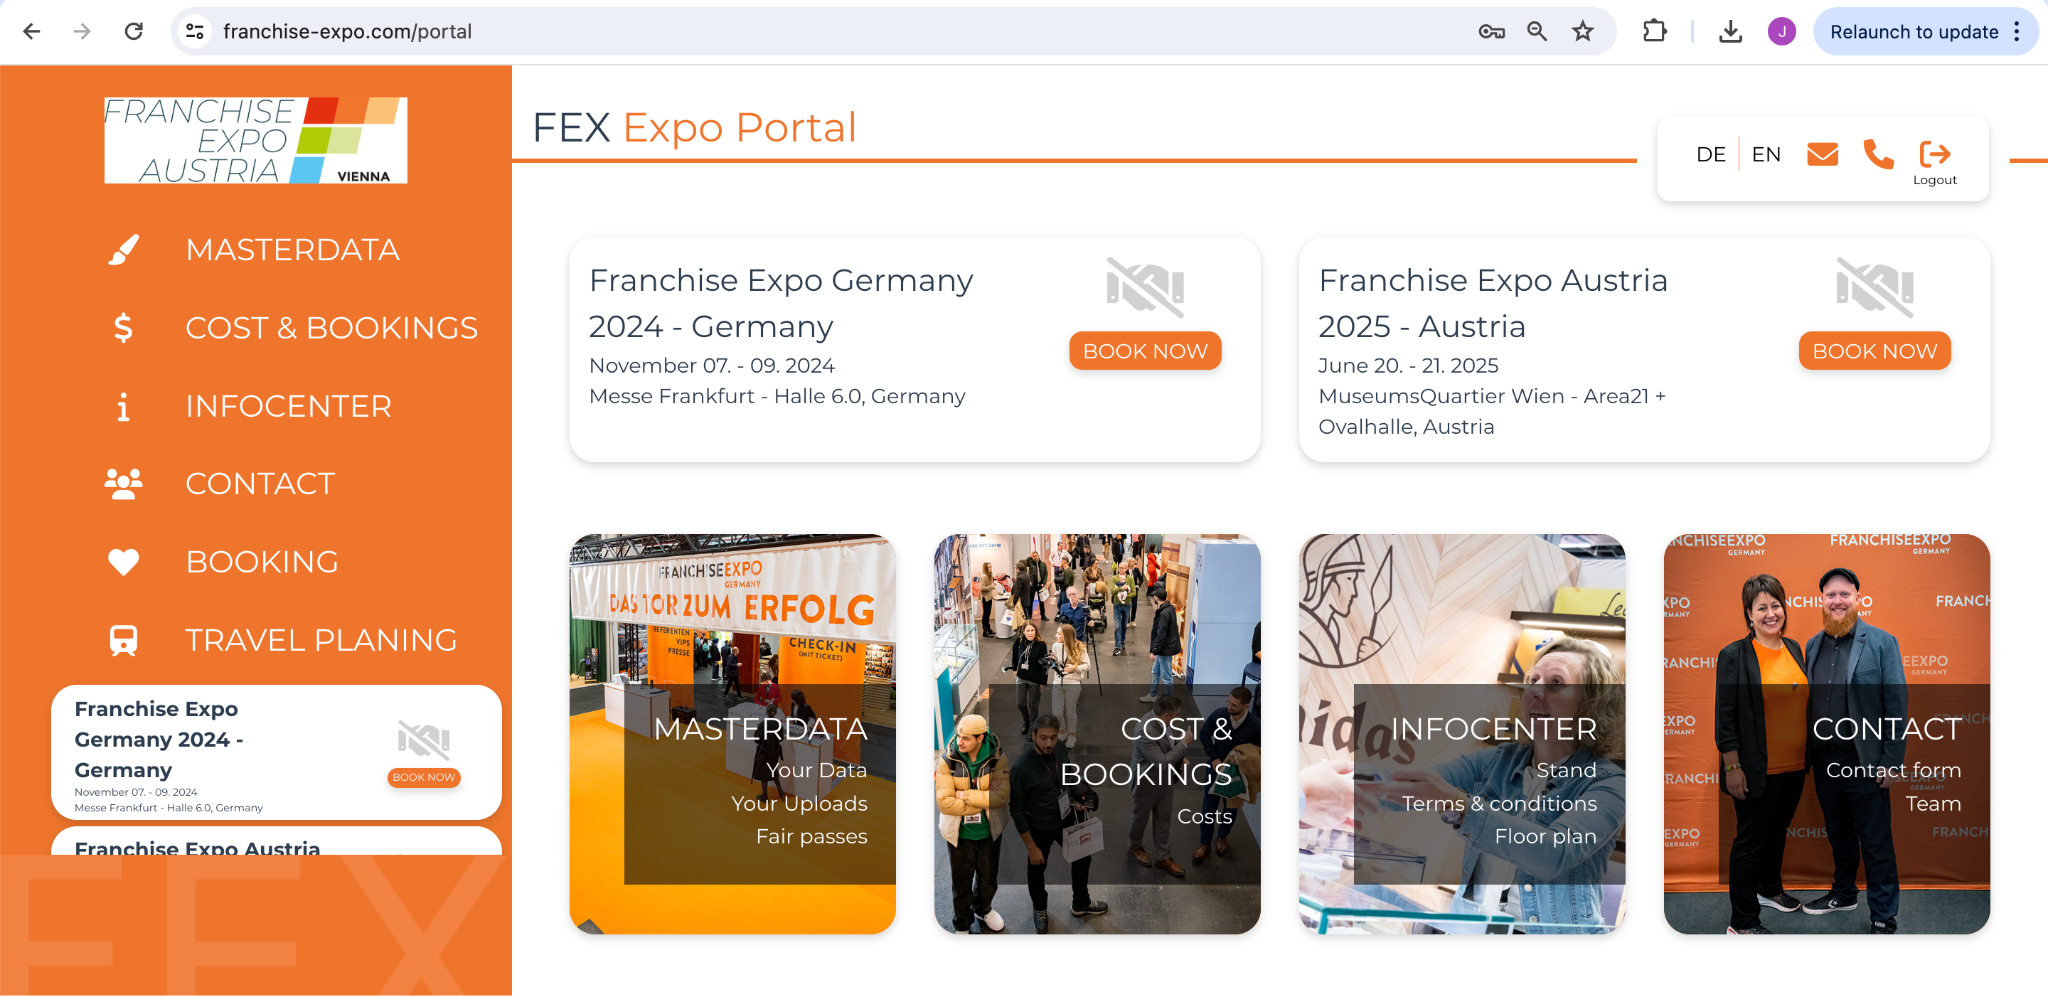
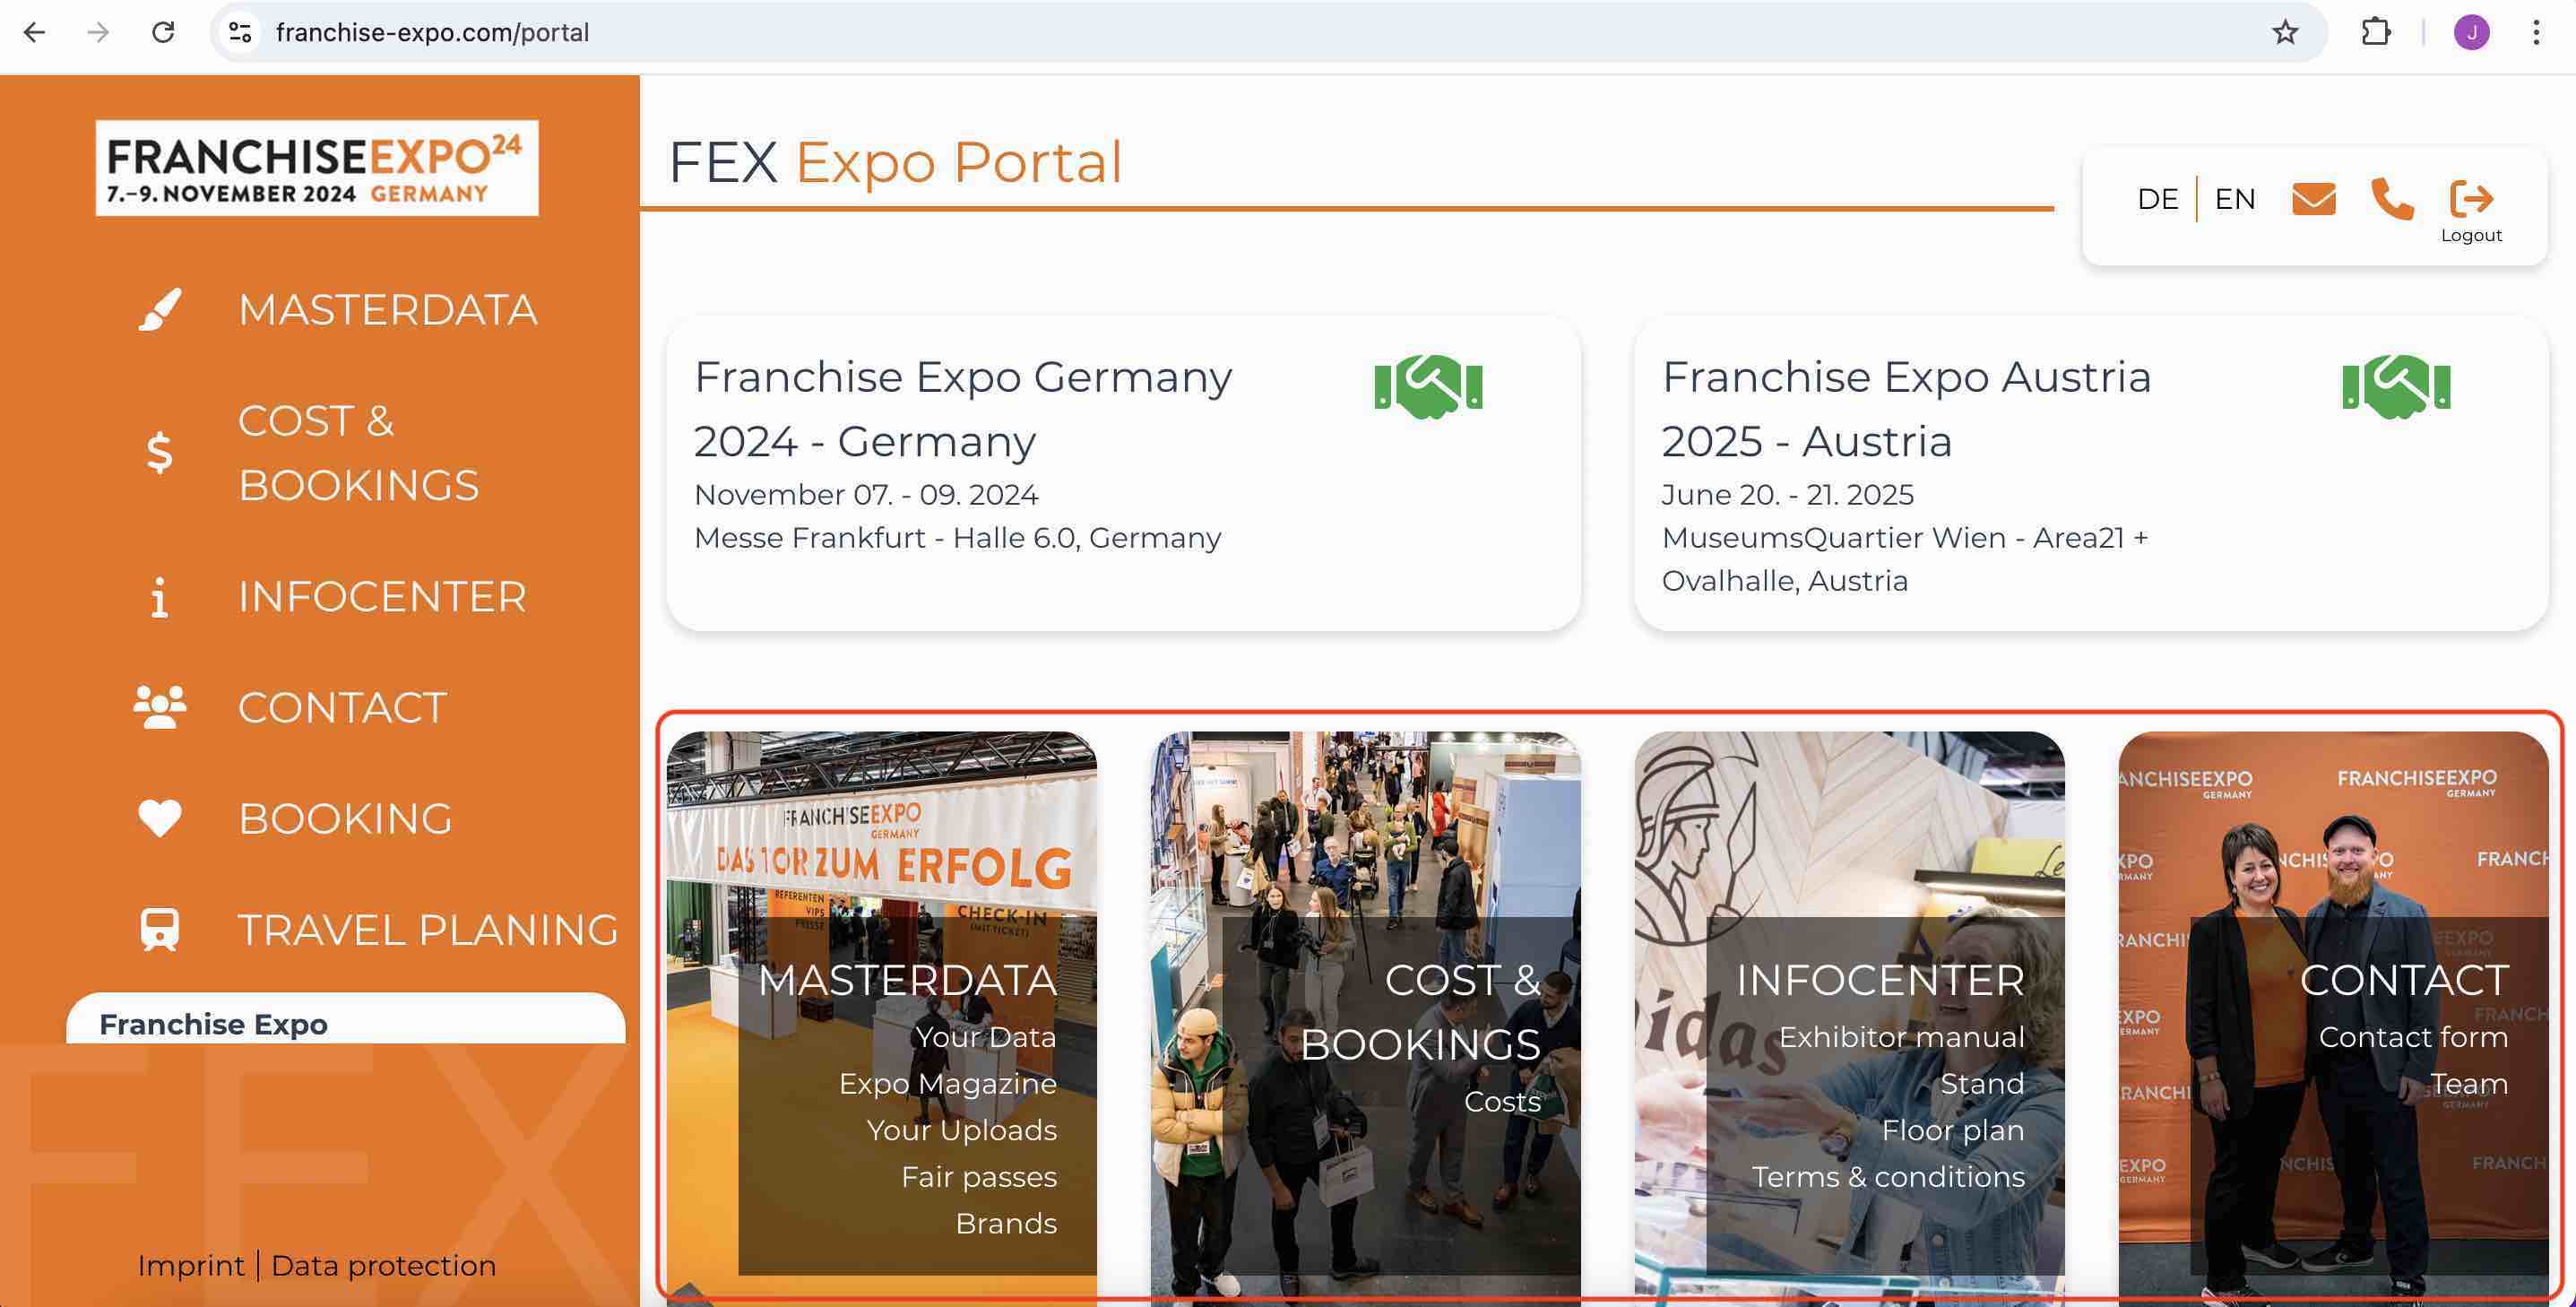
AEin screenshotScreenshot ofdes thePortals.Dieses Portal.Portal https://www.franchise-expo.com/portalwird von allen Arche-Standorten unter demselben Mandanten gemeinsam genutzt.
( ://www.centerurl.domain.com/portal )portal)
If a Client subscribe our Fair Module, all ark site ( center ) under the same client will access the same Participants Portal (PP), the data is synced between Portal and Cockpit.
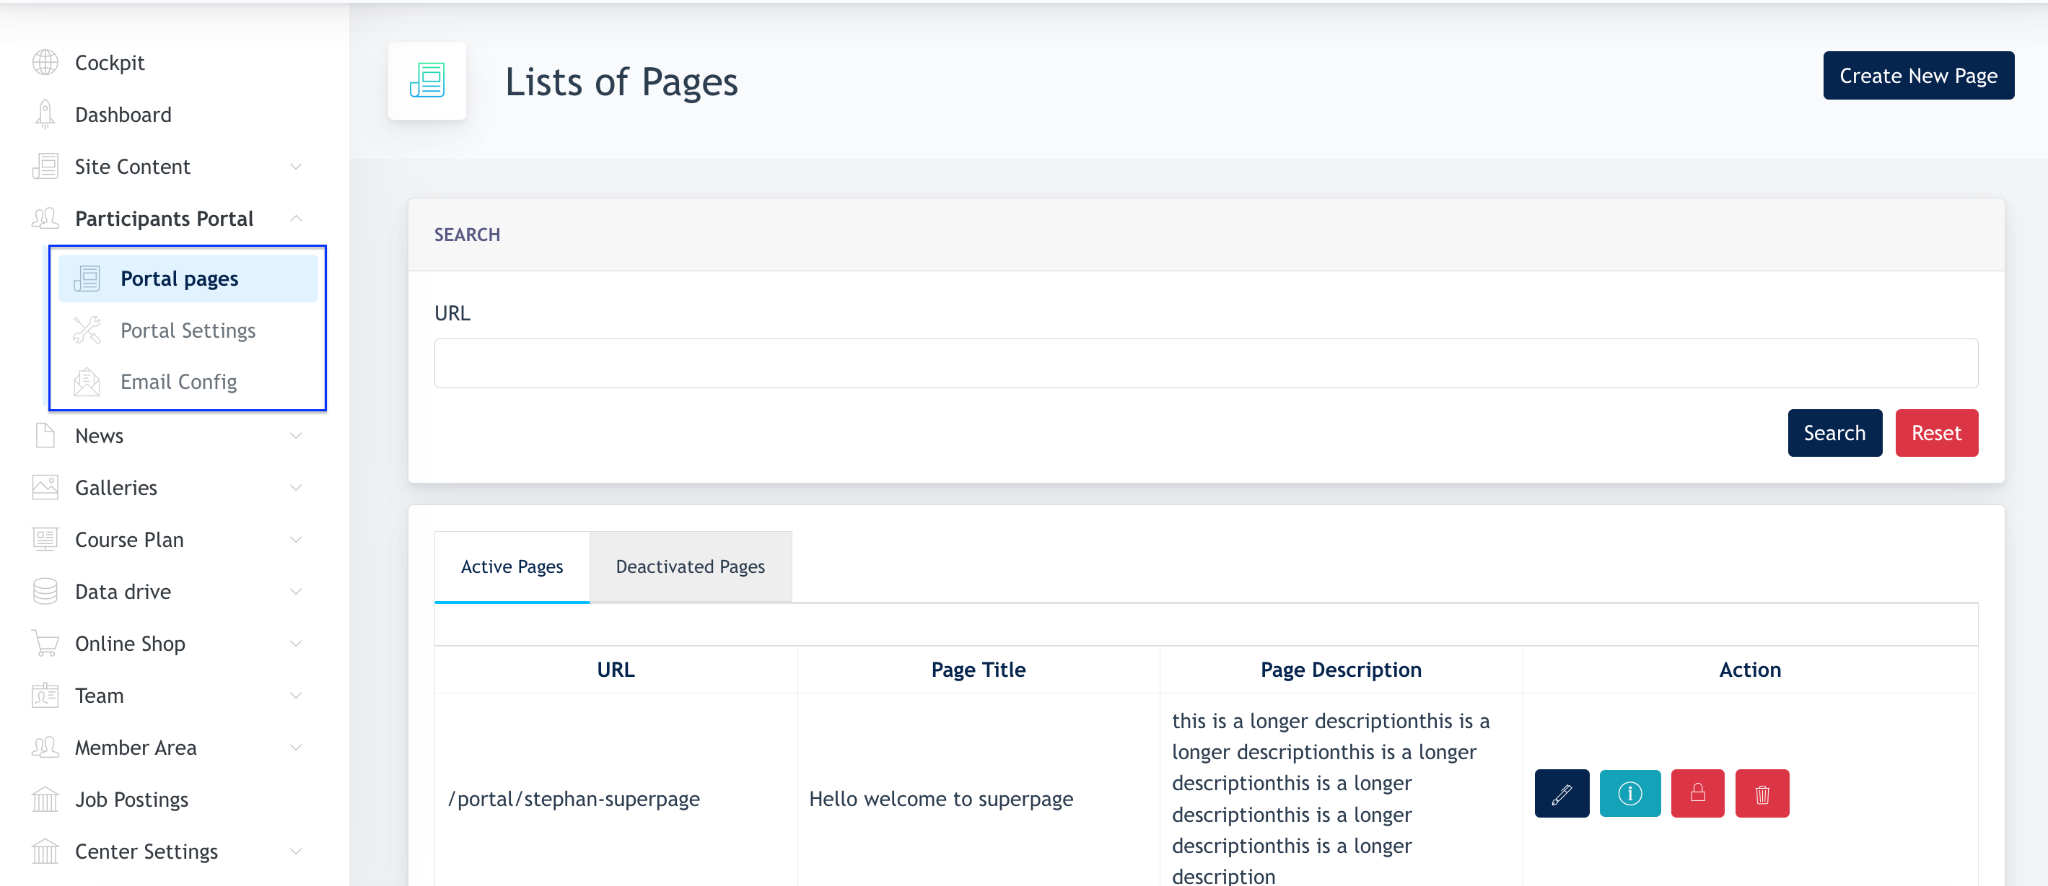
Participant's Portal is managed under center’s ark site admin panel.
Staging URL : https://kws.jaramdo.de/admin/site-content/portal-pages
UnderWenn theein ParticipantsKunde unser Messemodul abonniert, werden alle conida Webseiten (Center) unter demselben Kunden auf dasselbe Teilnehmerportal (PP) zugreifen, die Daten werden zwischen Portal menuund item,Cockpit theresynchronisiert.
Die Inhalte des Teilnehmerportals werde unter dem Verwaltungsbereich der Website verwaltet.
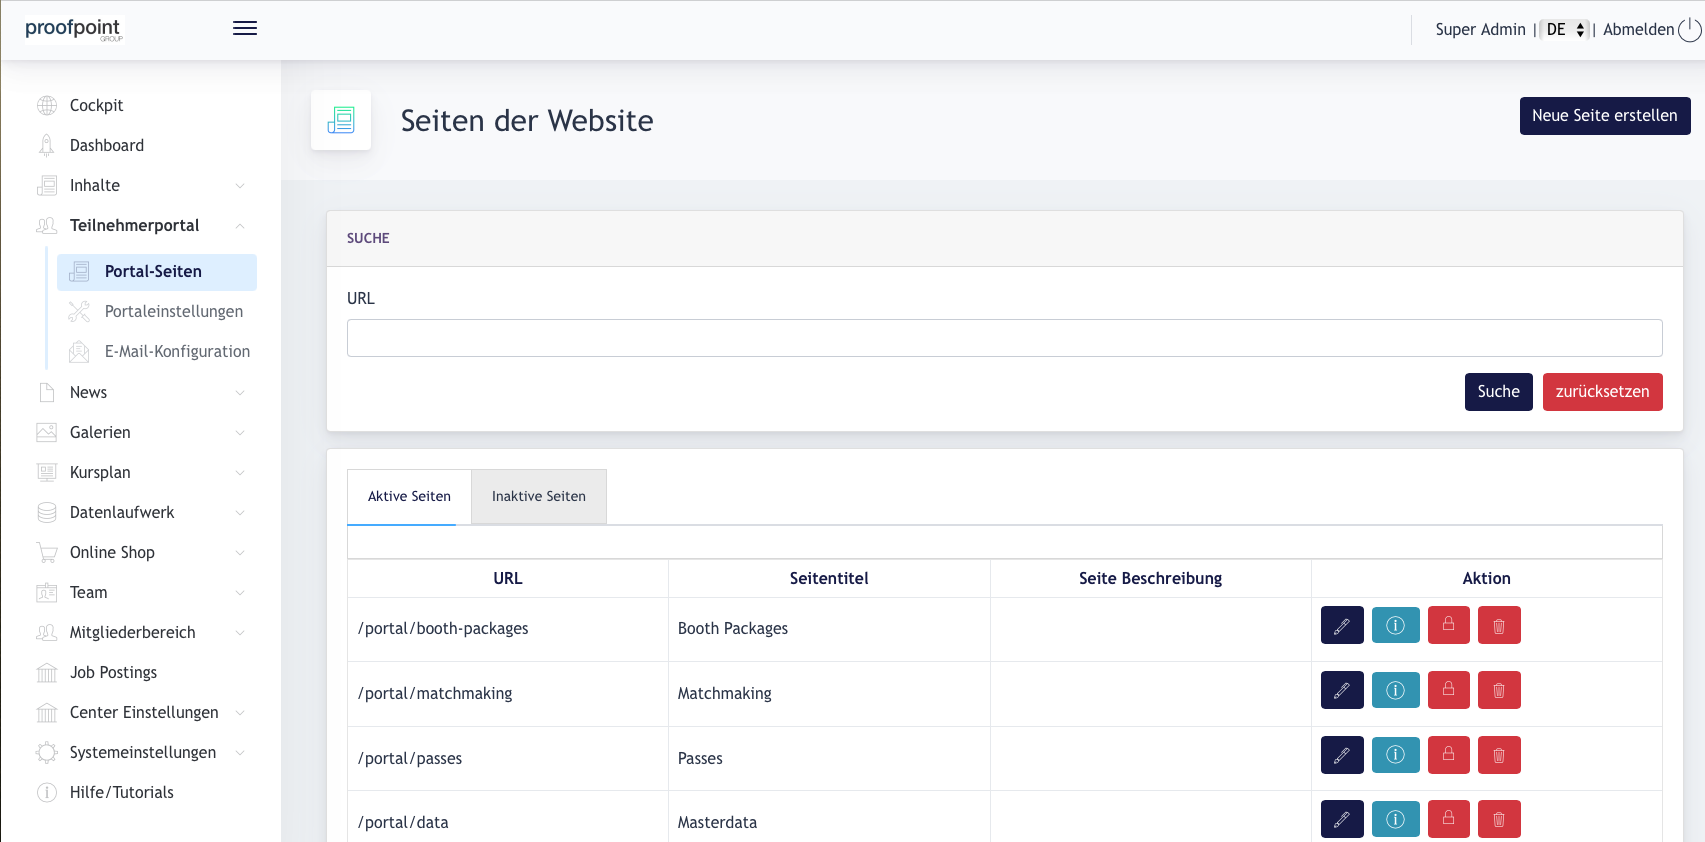
Unter dem Menüpunkt Teilnehmerportal gibt es 3 sub-menu items:Untermenüpunkte:
Portal pagesPortal-Seiten -thishieriskannwherederAdminAdministratorcreateInhalte&desmanagePortalscontenterstellenofundthe PortalverwaltenPortal settingsPortaleinstellungen -thishieriskannwherederAdminAdministratormanagedietheEinstellungenPortal’sdesidentityPortals verwaltenEmailE-Mail-KonfigurationConfig-thishieriskannwherederAdminAdministratorcreatesE-Mail-InhalteemailfürcontentSystem-E-Mailsfor specific system emails.erstellen.
1.0 Portal PagesPortal-Seiten
AllAlle pagesSeiten withininnerhalb theder portalsPortale cankönnen behier editedbearbeitet oroder createderstellt here.werden.
1.1 CreateSeite Pageerstellen
ClickKlicken onSie theauf Createdie PageSchaltfläche button,Seite anderstellen, fillund geben Sie die erforderlichen Informationen ein. Klicken Sie auf „Senden“. Die Seite wird erstellt und in theder requiredSeitenliste info.angezeigt.
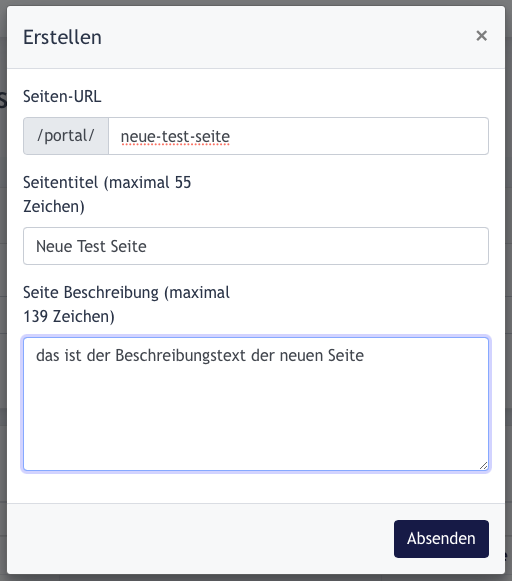
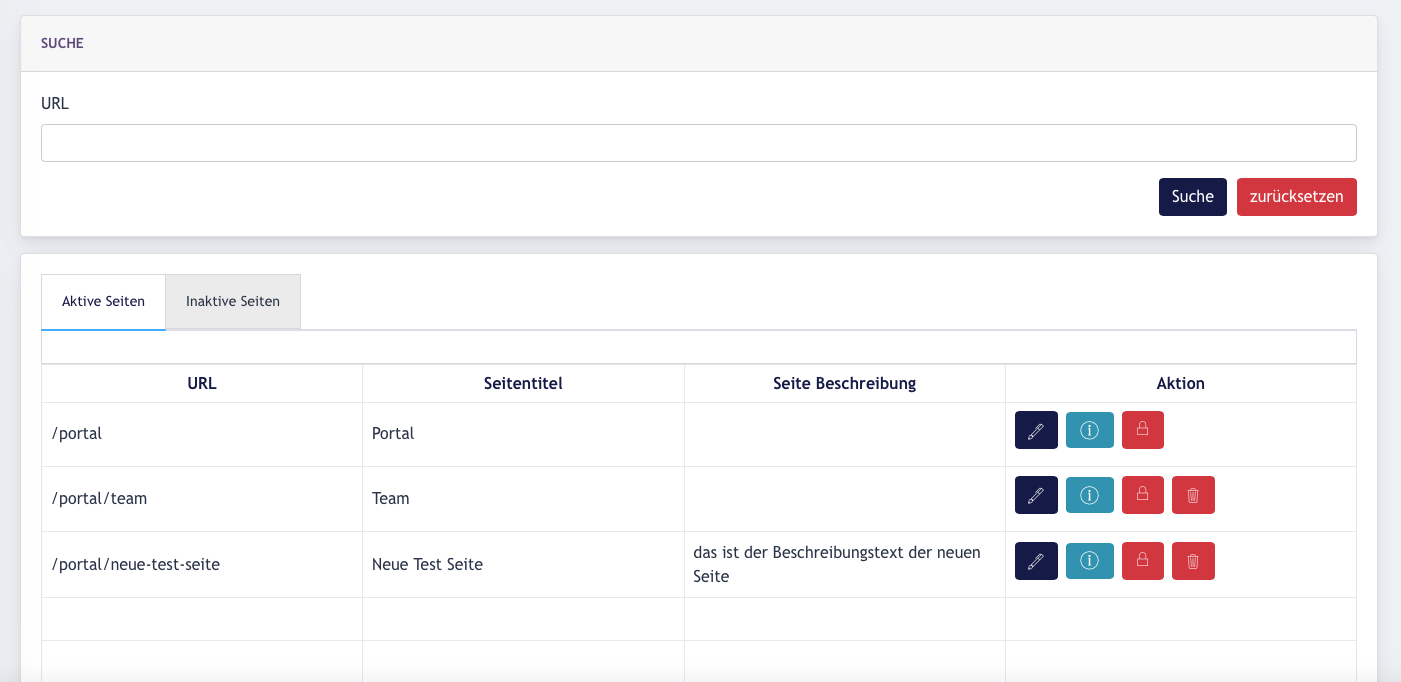
Example screenshot : IEine haveneue createdSeite amit newdem pageTitel calledNeue :/portal/new-Test Seite und der URL neue-test-pageseite wurde erstellt und ist danach in der Liste der aktiven Seite aufgelistet:
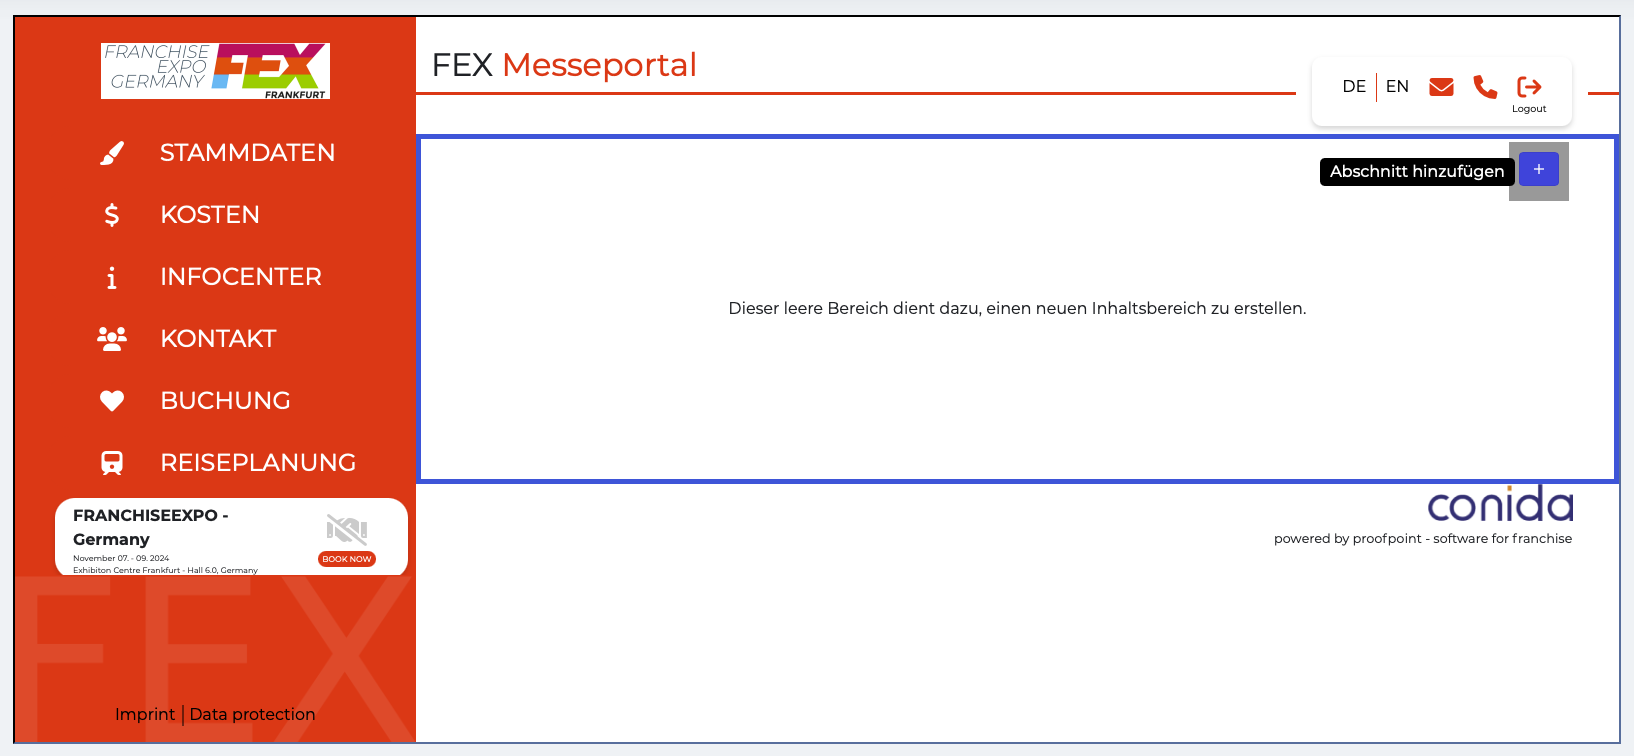
1.2. BuildSeiteninhalt Page Content erstellen
ClickKlicken onSie theauf die Schaltfläche [ Edit ButtonBearbeiten ], toum createSeiteninhalte pagezu content.erstellen.
Here,Die itBearbeitung worksder exactlySeite likefunktionier ourexakt sectionwie editor.der Page Editor mayim fillconida upWebsitesystem. theDer pageAdmin bykann addingdie newSeite sectionfüllen, templatesindem ontoer theneue page.Abschnittsvorlagen (Sektionen) auf der Seite hinzufügt.
1.3. ConfigureSeitenmenü Side Menukonfigurieren
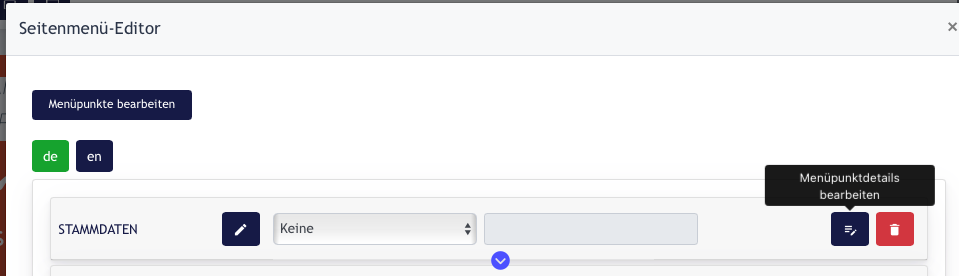
ClickKlicken onSie theauf Settingdie willEinstellung, openum upden [ Side menu editorSeitenmenü-Editor ] zu öffnen.
ClickKlicken onSie theauf den 【 SideSeitenmenü-Editor menuund editorein 】Fenster andwird a modal will be opened up.geöffnet.
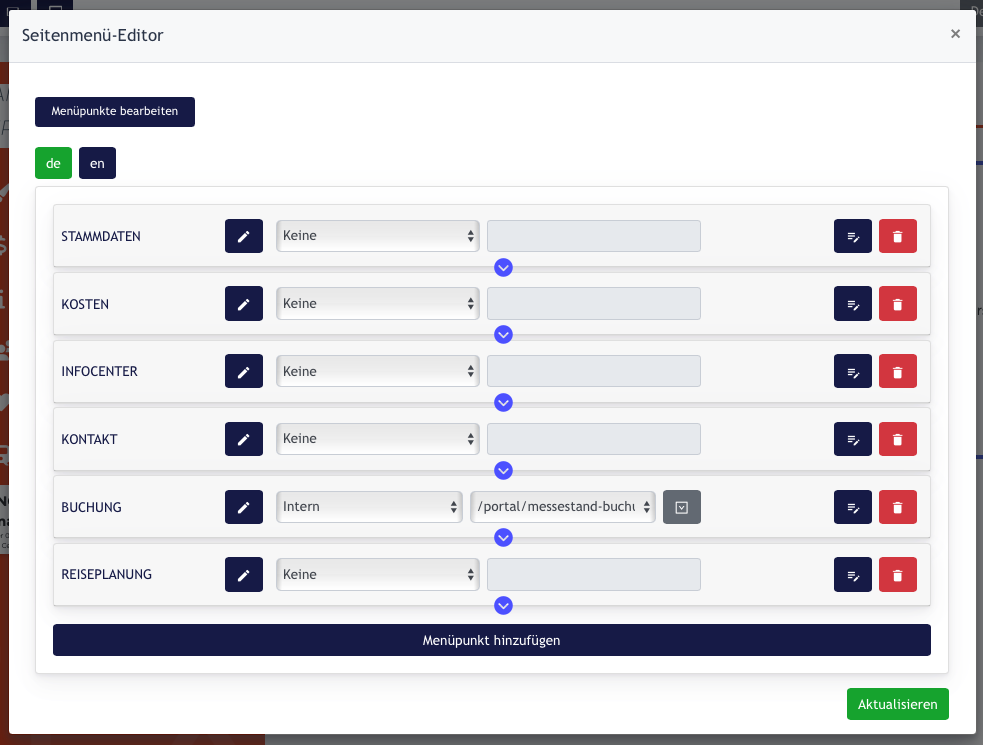
YouSie maykönnen configureMenüpunkte menuüber itemdiese viaListe thiskonfigurieren. listing.Dies Thisfunktioniert worksgenauso thewie sameder asconida ArkSeitenmenü Site Menu editor.Editor.
1.4. ConfigureKonfigurieren RolesSie Permissiondie forRollenberechtigung everyfür pagejede Seite
ThisSo issieht howdas theFormular form looks like:aus:
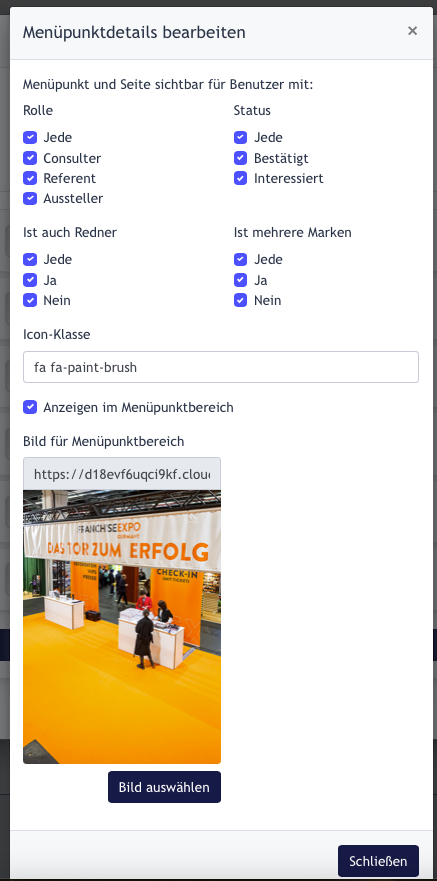
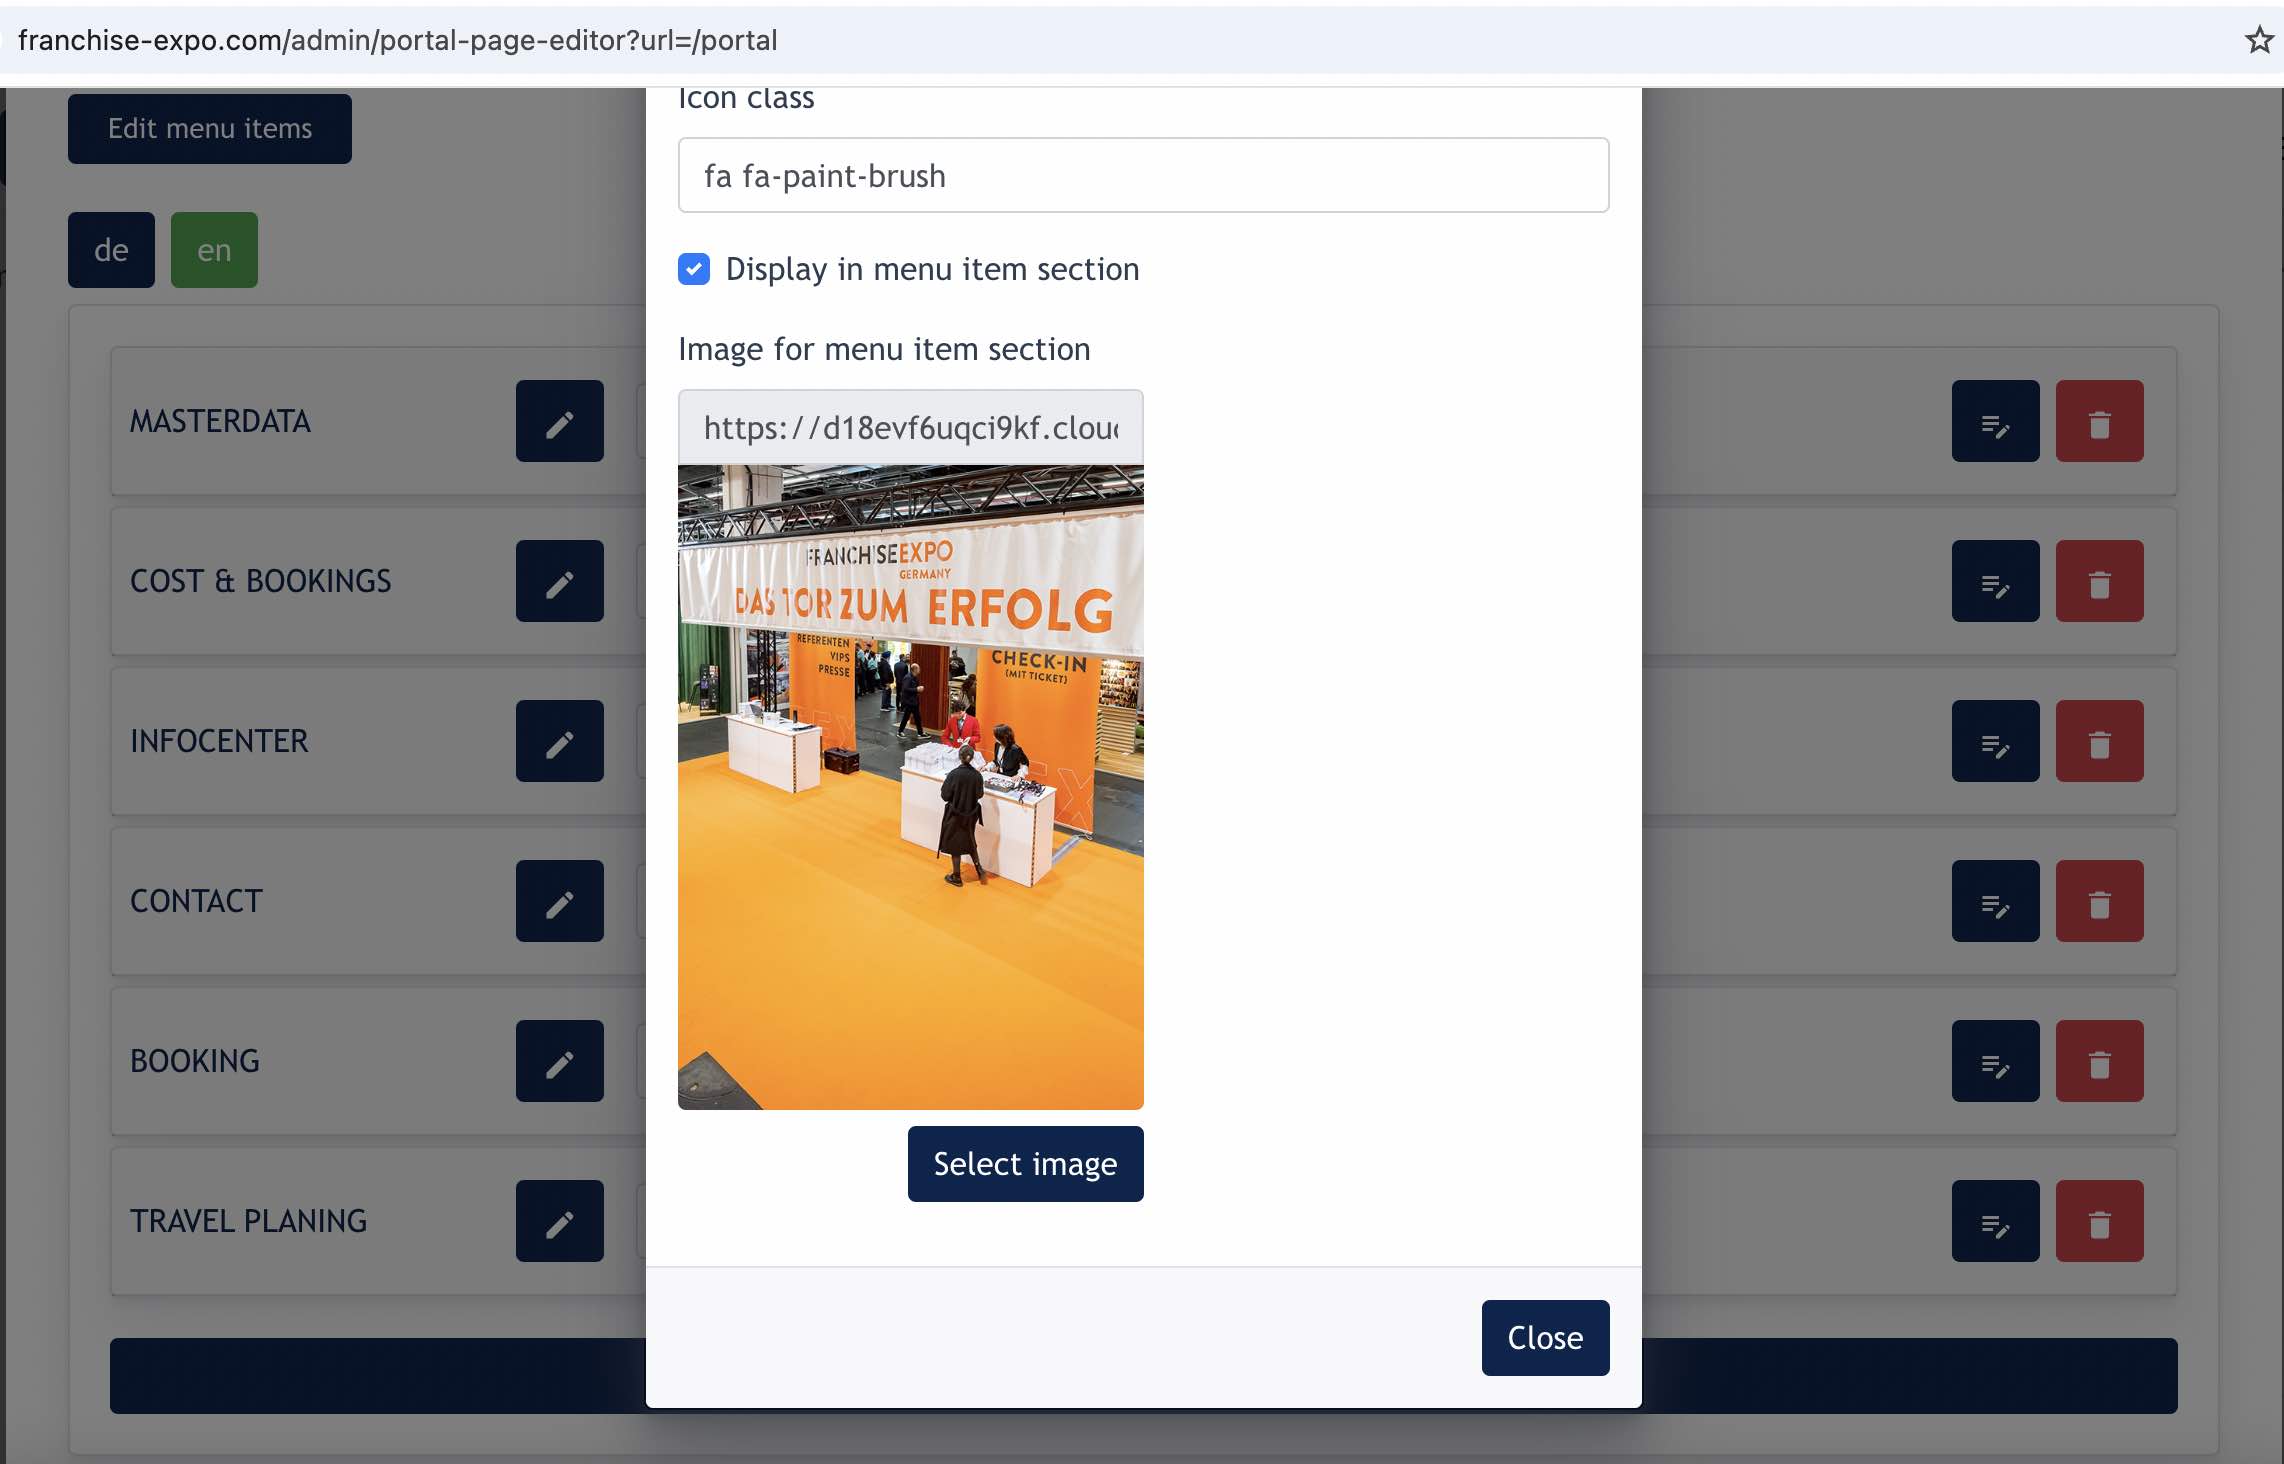
Roles permissionRollenberechtigungen:WhichHier{Role},bearbeitetwhichder{Status},AdministratordoeswelcheitInhaltealso(Seiten)havewelchem{UserIsaufalsoBasisSpeaker}derandzugeteilten{RolleIsangezeigtMultiple Brands } can access the set page.werden.Icon classIcons :AllowErmöglichtadmindemtoAdministratorconfiguredieeachKonfigurationmenuderitem'sIconsiconderdisplayedeinzelnenonMenüpunkte,thediesideimmenuSeitenmenü angezeigt werden (IconsiconsaufonderthelinkenleftSeite)- Bild : Dies ist der Bildhintergrund für jede Kachel, die auf dem Dashboard erscheint.
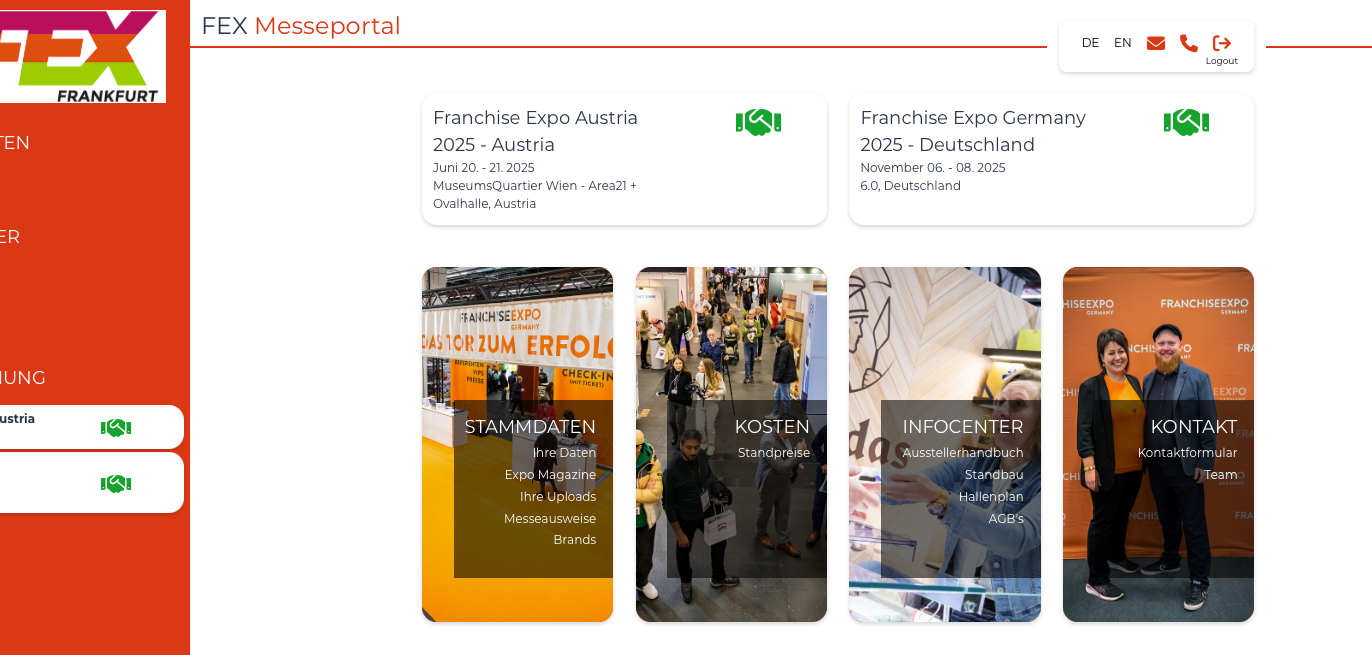
Image :This is the image background for each menu item appearing on Dashboard. (Highlighted in red at below screenshot)
TheseDies aresind allalle thegrundlegenden basicFunktionen functionsim relatedZusammenhang tomit creatingder andErstellung buildingund contentdem forAufbau thevon Participant'sInhalten Portalfür pages.die Seiten des Teilnehmerportals.
2.0 Portal Dashboard
Dashboard is the landing page of the portal. When user first login to this portal, Dashboard is the first page he/she will see.

Here i will explain where does this data coming from, and how admin configure them.
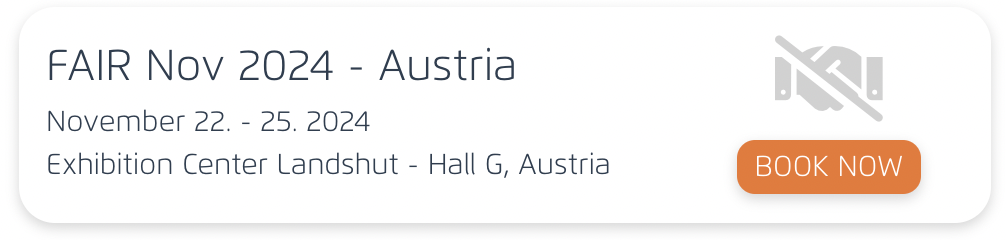
2.1 EXPO Banner

If the fair is unbooked, this is what we will see.
2.3 Menu item section
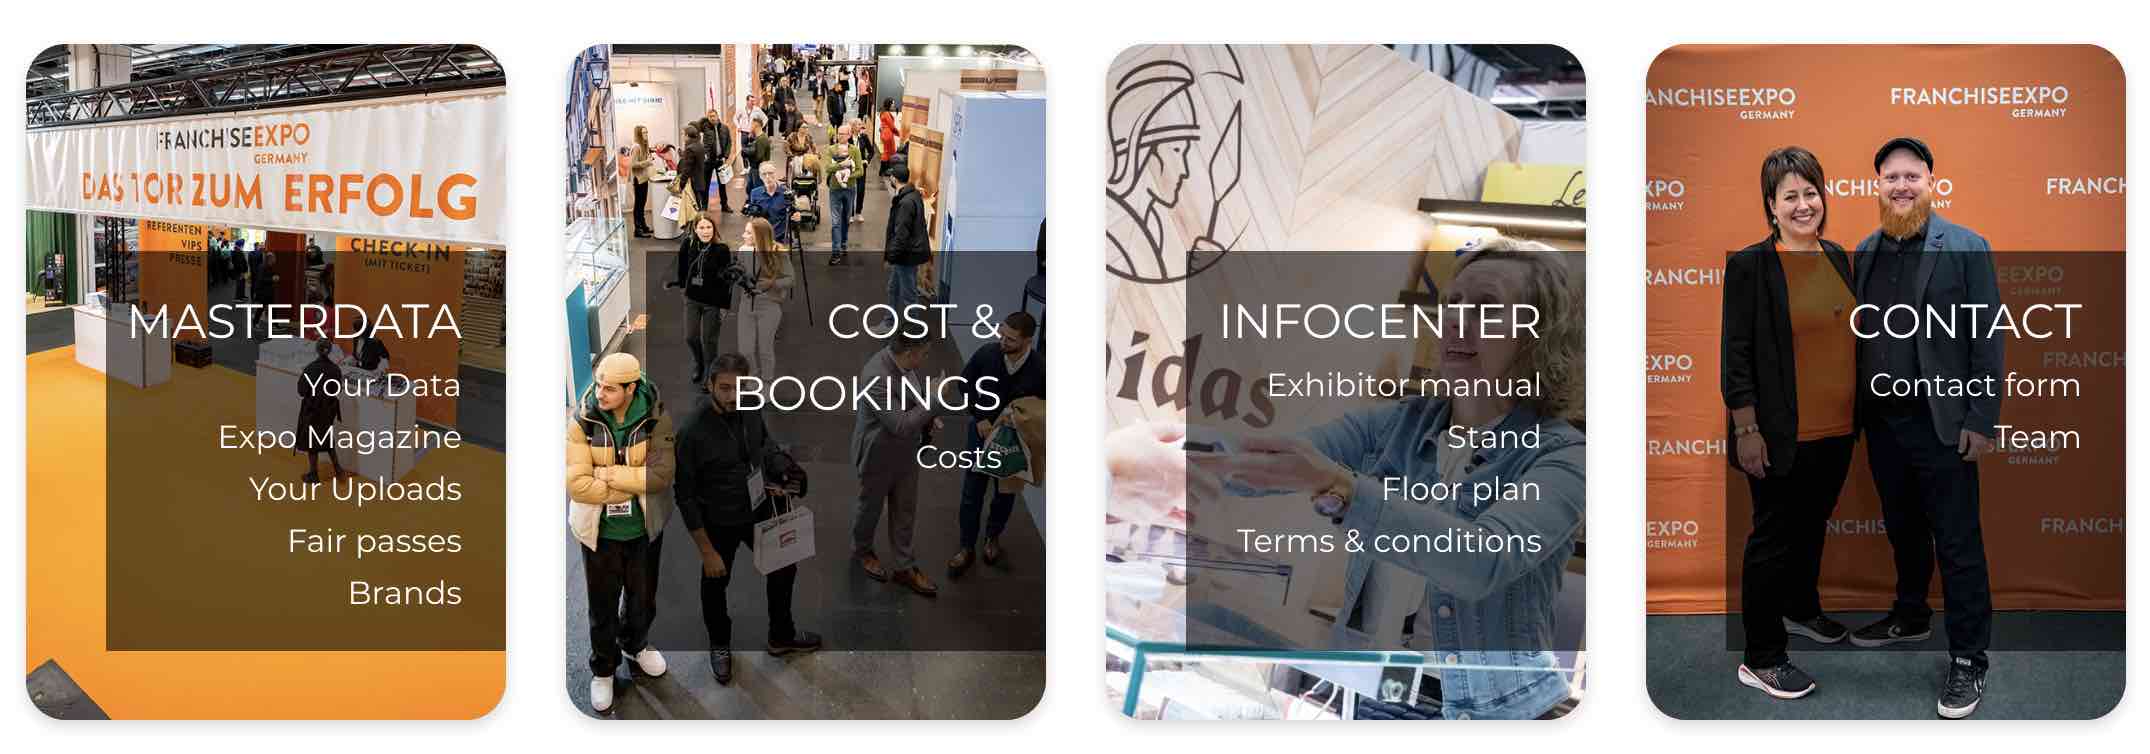
This is how the image are configured :
Check "Display in menu item section" if you want this menu item and all sub-menu item to appear as a card like this on Dashboard. This card serves as a second menu with image background for visitors.
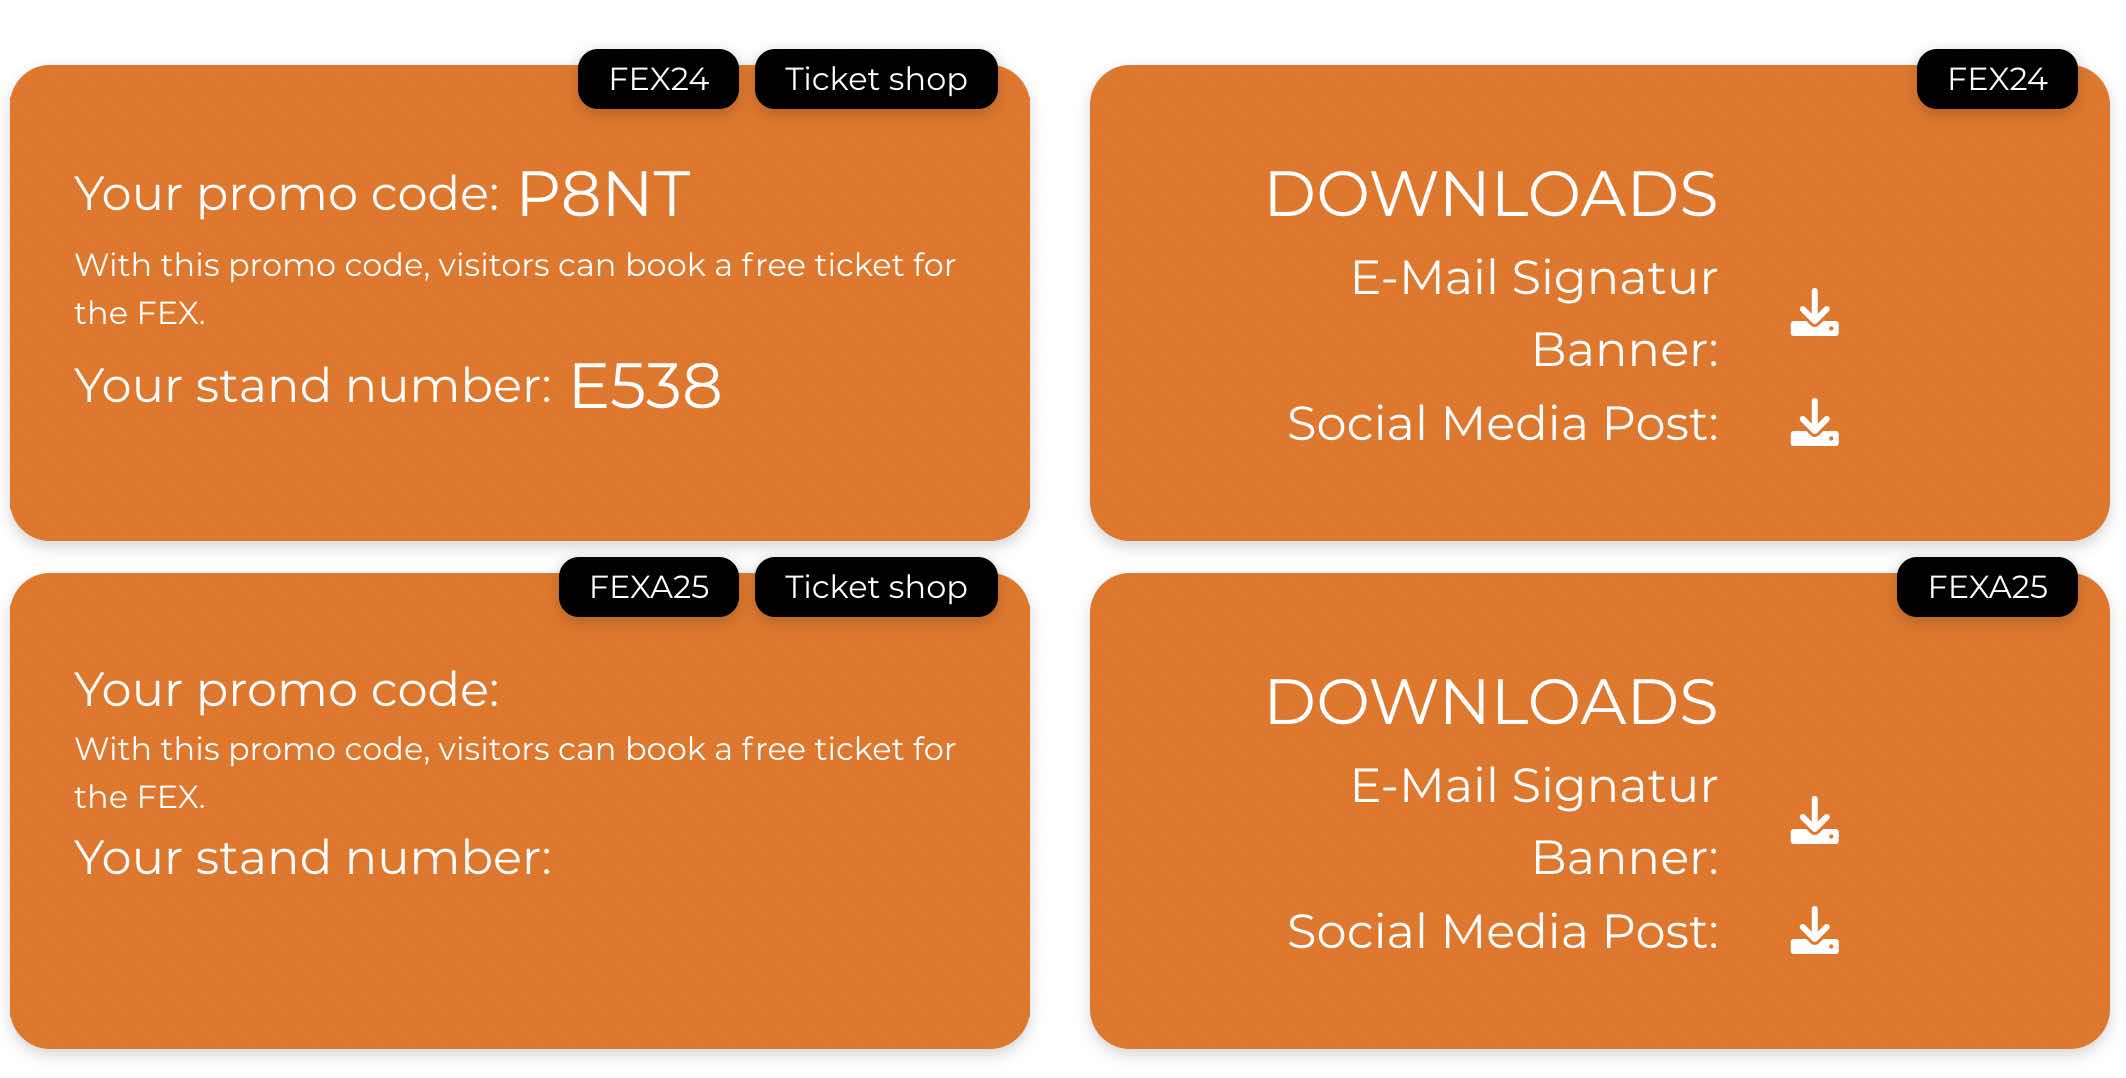
2.4 Promo Code, Stand Number and Downloads
- Promo Code and Stand number is configured via Cockpit > Exhibitor/Consultant Listing > Fair column ( click on Fair name)
- Above data is unique for each fair, thus, you will see the Fair short name on top of the banner.
- Ticket Shop - this link to a third party site to allow user to purchase ticket. 3rd party URL : https://ticket.franchise-expo.com/event/franchise-expo-germany-2024-qaw7pc
- Download - Both [ Email signature banner ] and [ social media post ] file is uploaded from Cockpit > Exhibitor/Consultant/Speaker > Fair column
Screenshot example of Upload Modal on Cockpit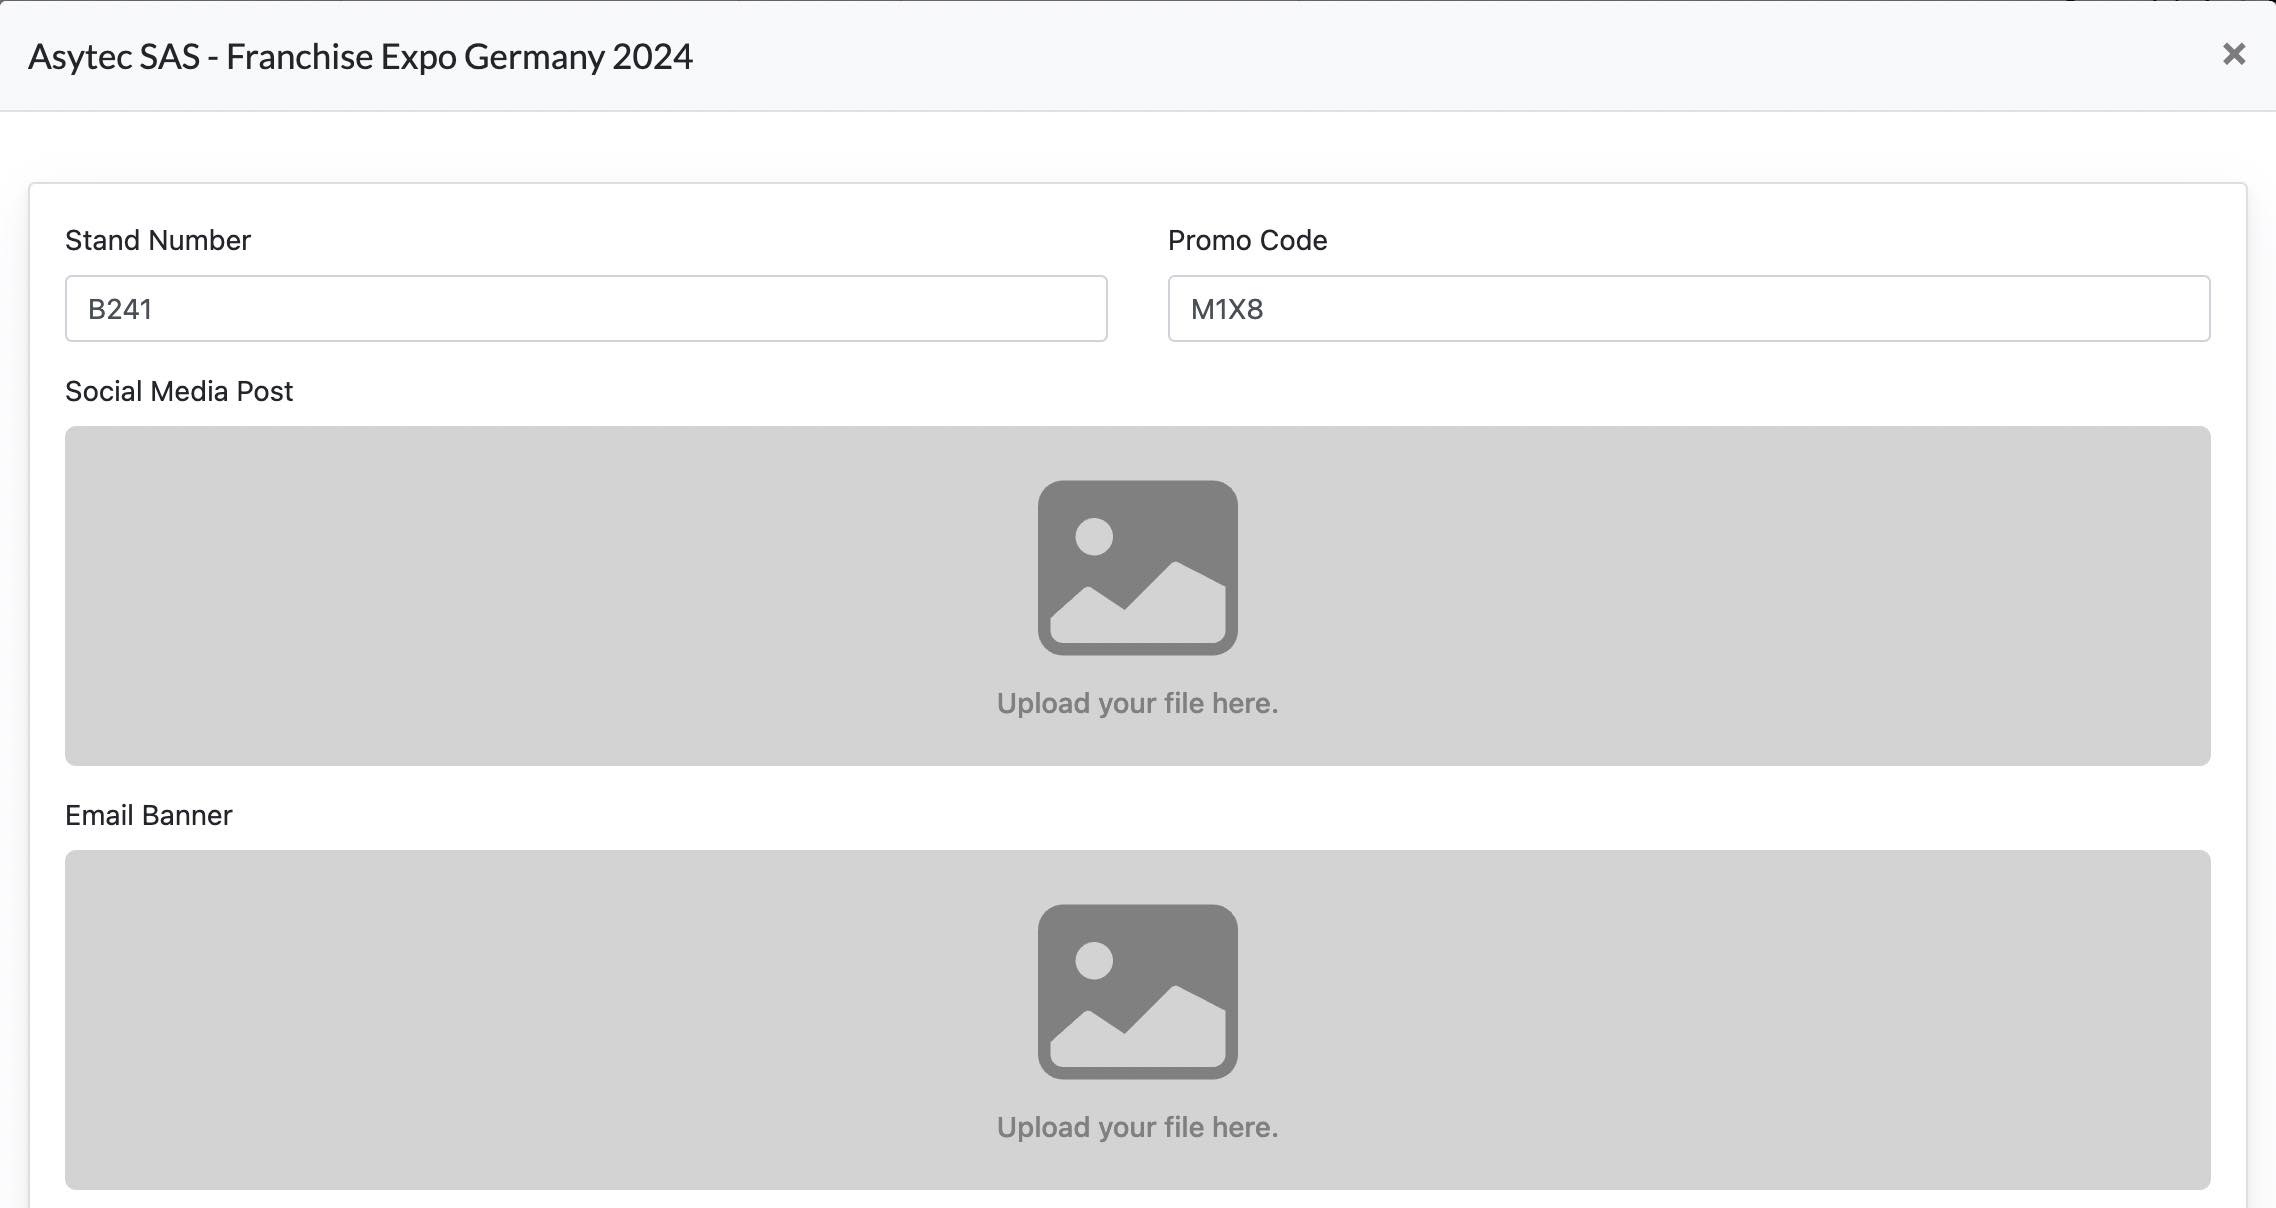
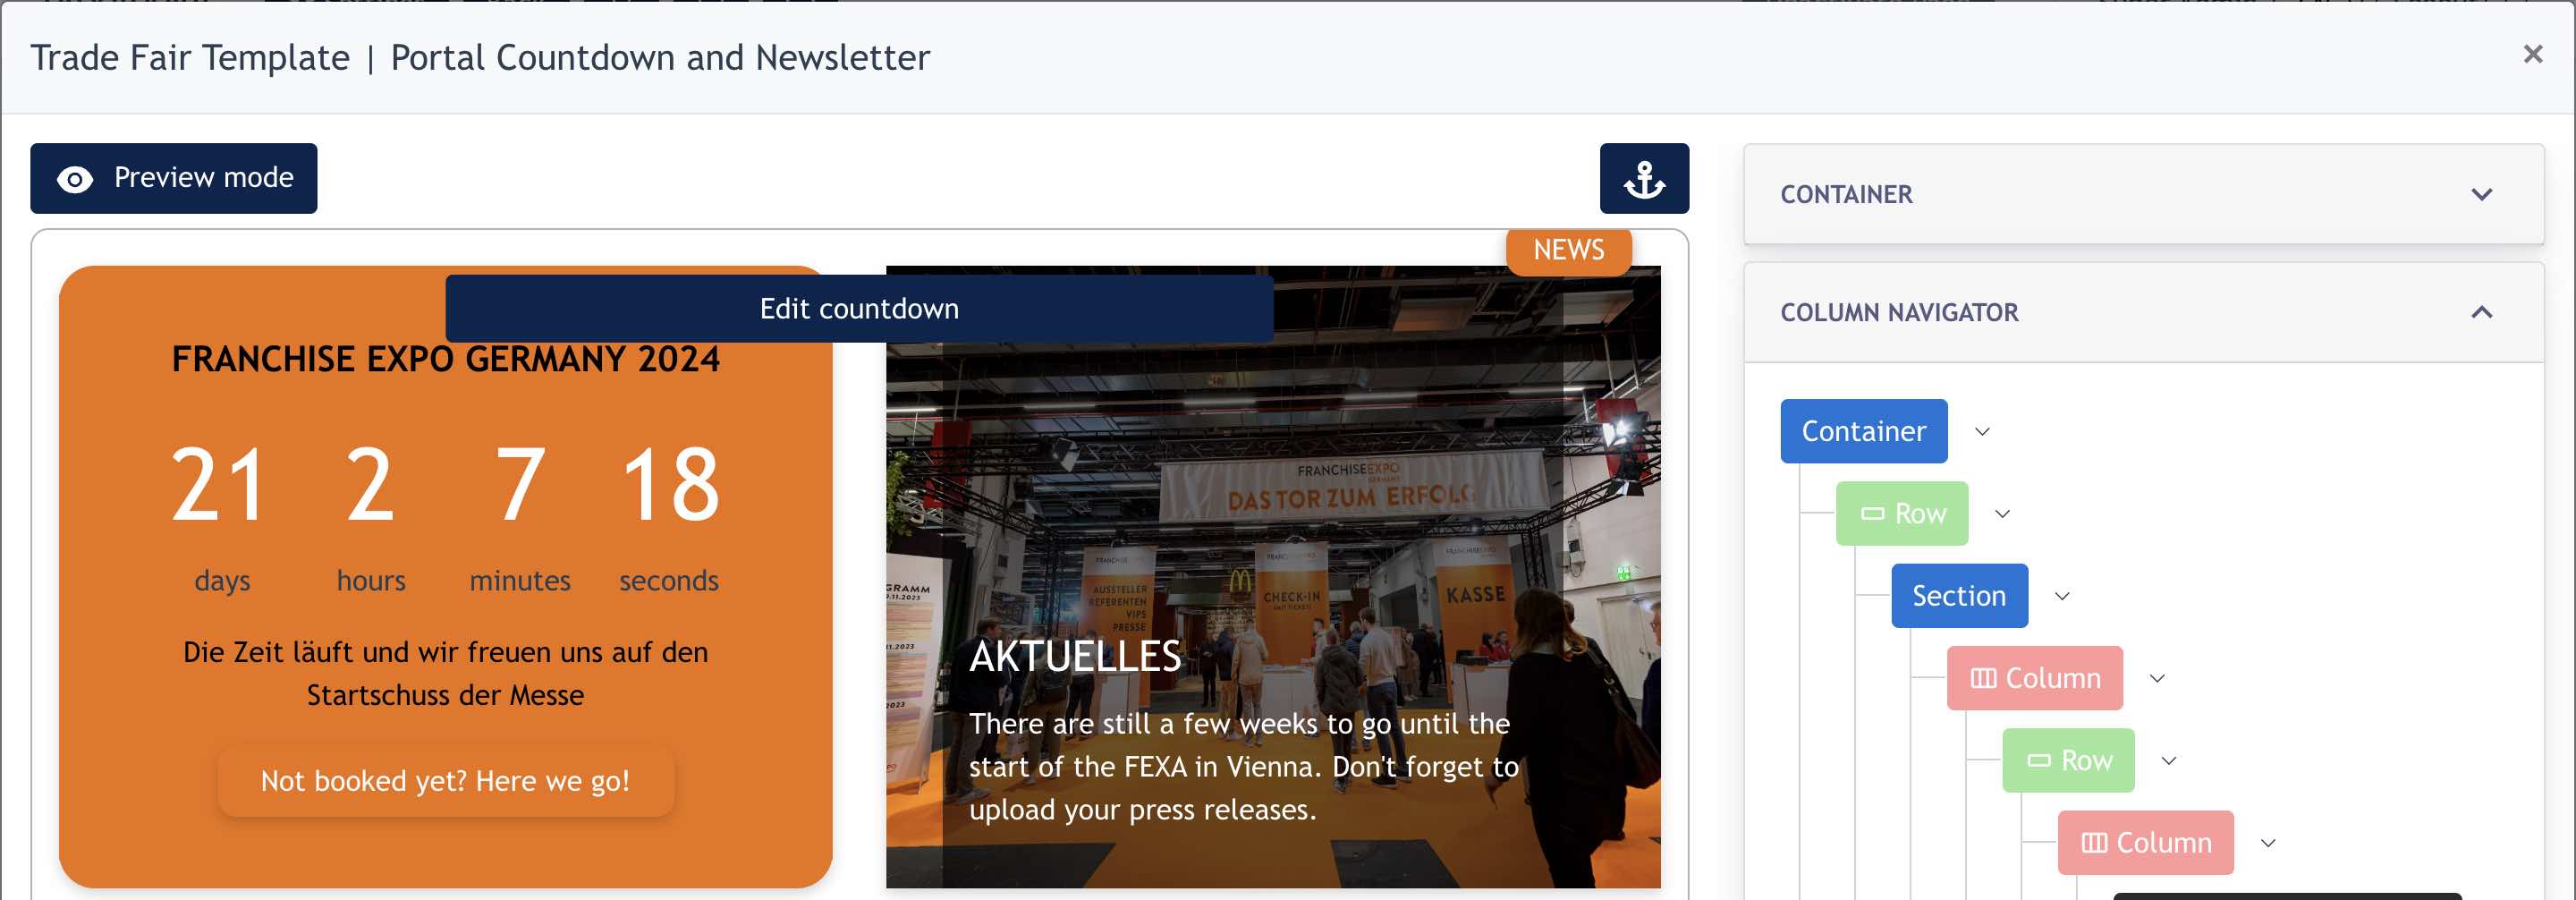
2.5 Countdown and News Banner
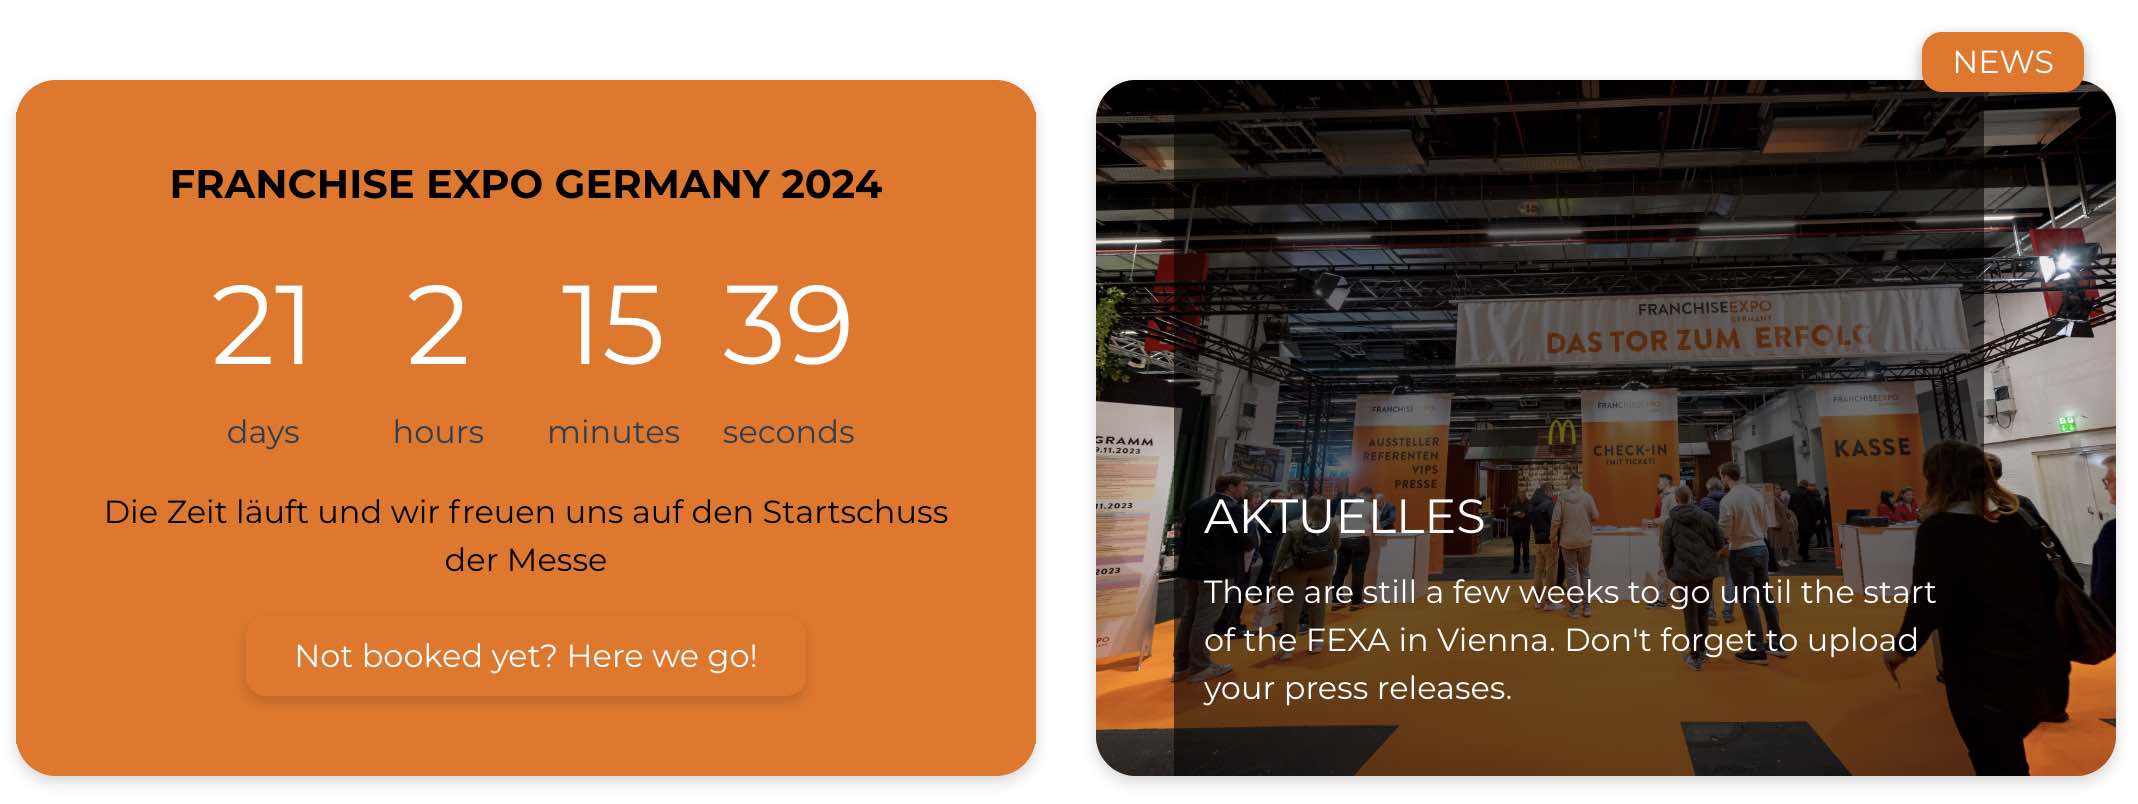
For Setting configuration, go to the portal page listing. Click [ Edit ] on :/portal page then click [ Edit ] on the section.
Click on "Edit Countdown" or click on the "News" and edit the data of the banner.
3.0 System Forms
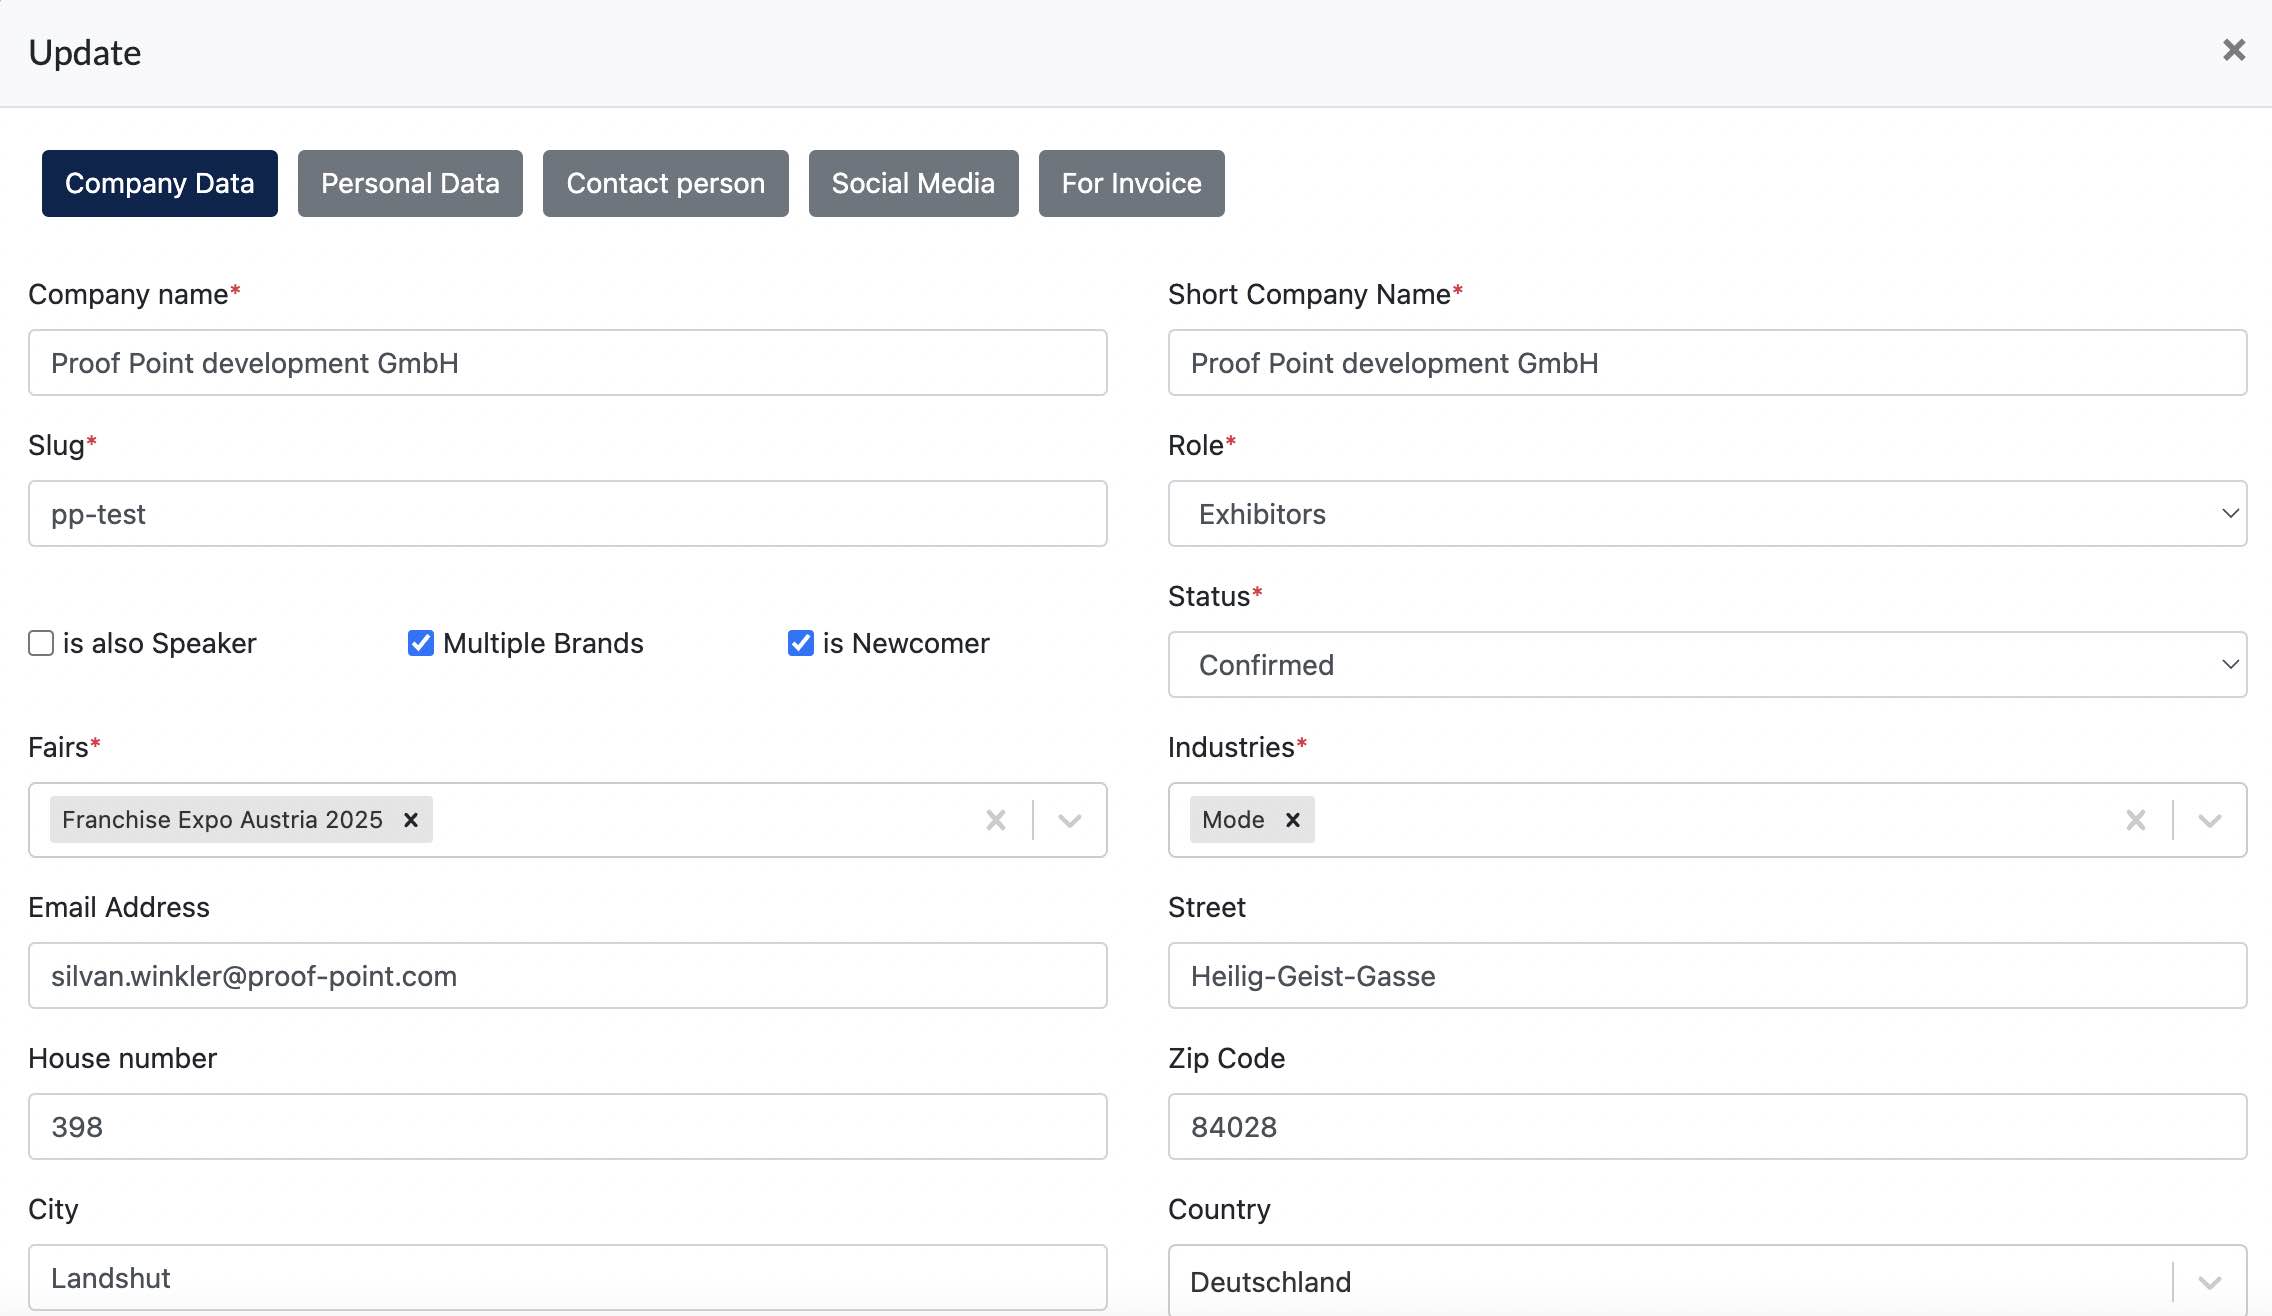
There are a few system forms in the Participants Portal needed to be filled up by users. These forms data is sync and the same with data input in Cockpit.
On the Cockpit, we allow FEX Admin to input/edit/remove data for every participants.
On the Portal, it is the participants who input/edit/remove data for themselves.
List of Forms ( under menu item Masterdata )
- Your Data ( For all interested users )
- Match-making (Only for confirmed Exhibitors and Consultants)
- Expo Magazine (Only for confirmed Exhibitors and Consultants)
- Your Uploads (Only for confirmed Exhibitors and Consultants)
- Speakers (Only for Speakers and Exhibitors/Consultant with 'is also speaker' is checked)
- Brand (Only for confirmed Exhibitors and Consultants with 'has multiple brands' is checked)
- Fair Passes (for all confirmed Exhibitors/Consultants/Speakers)
3.1 Your Data
Every participants (interested or confirmed) are required to fill in this form.
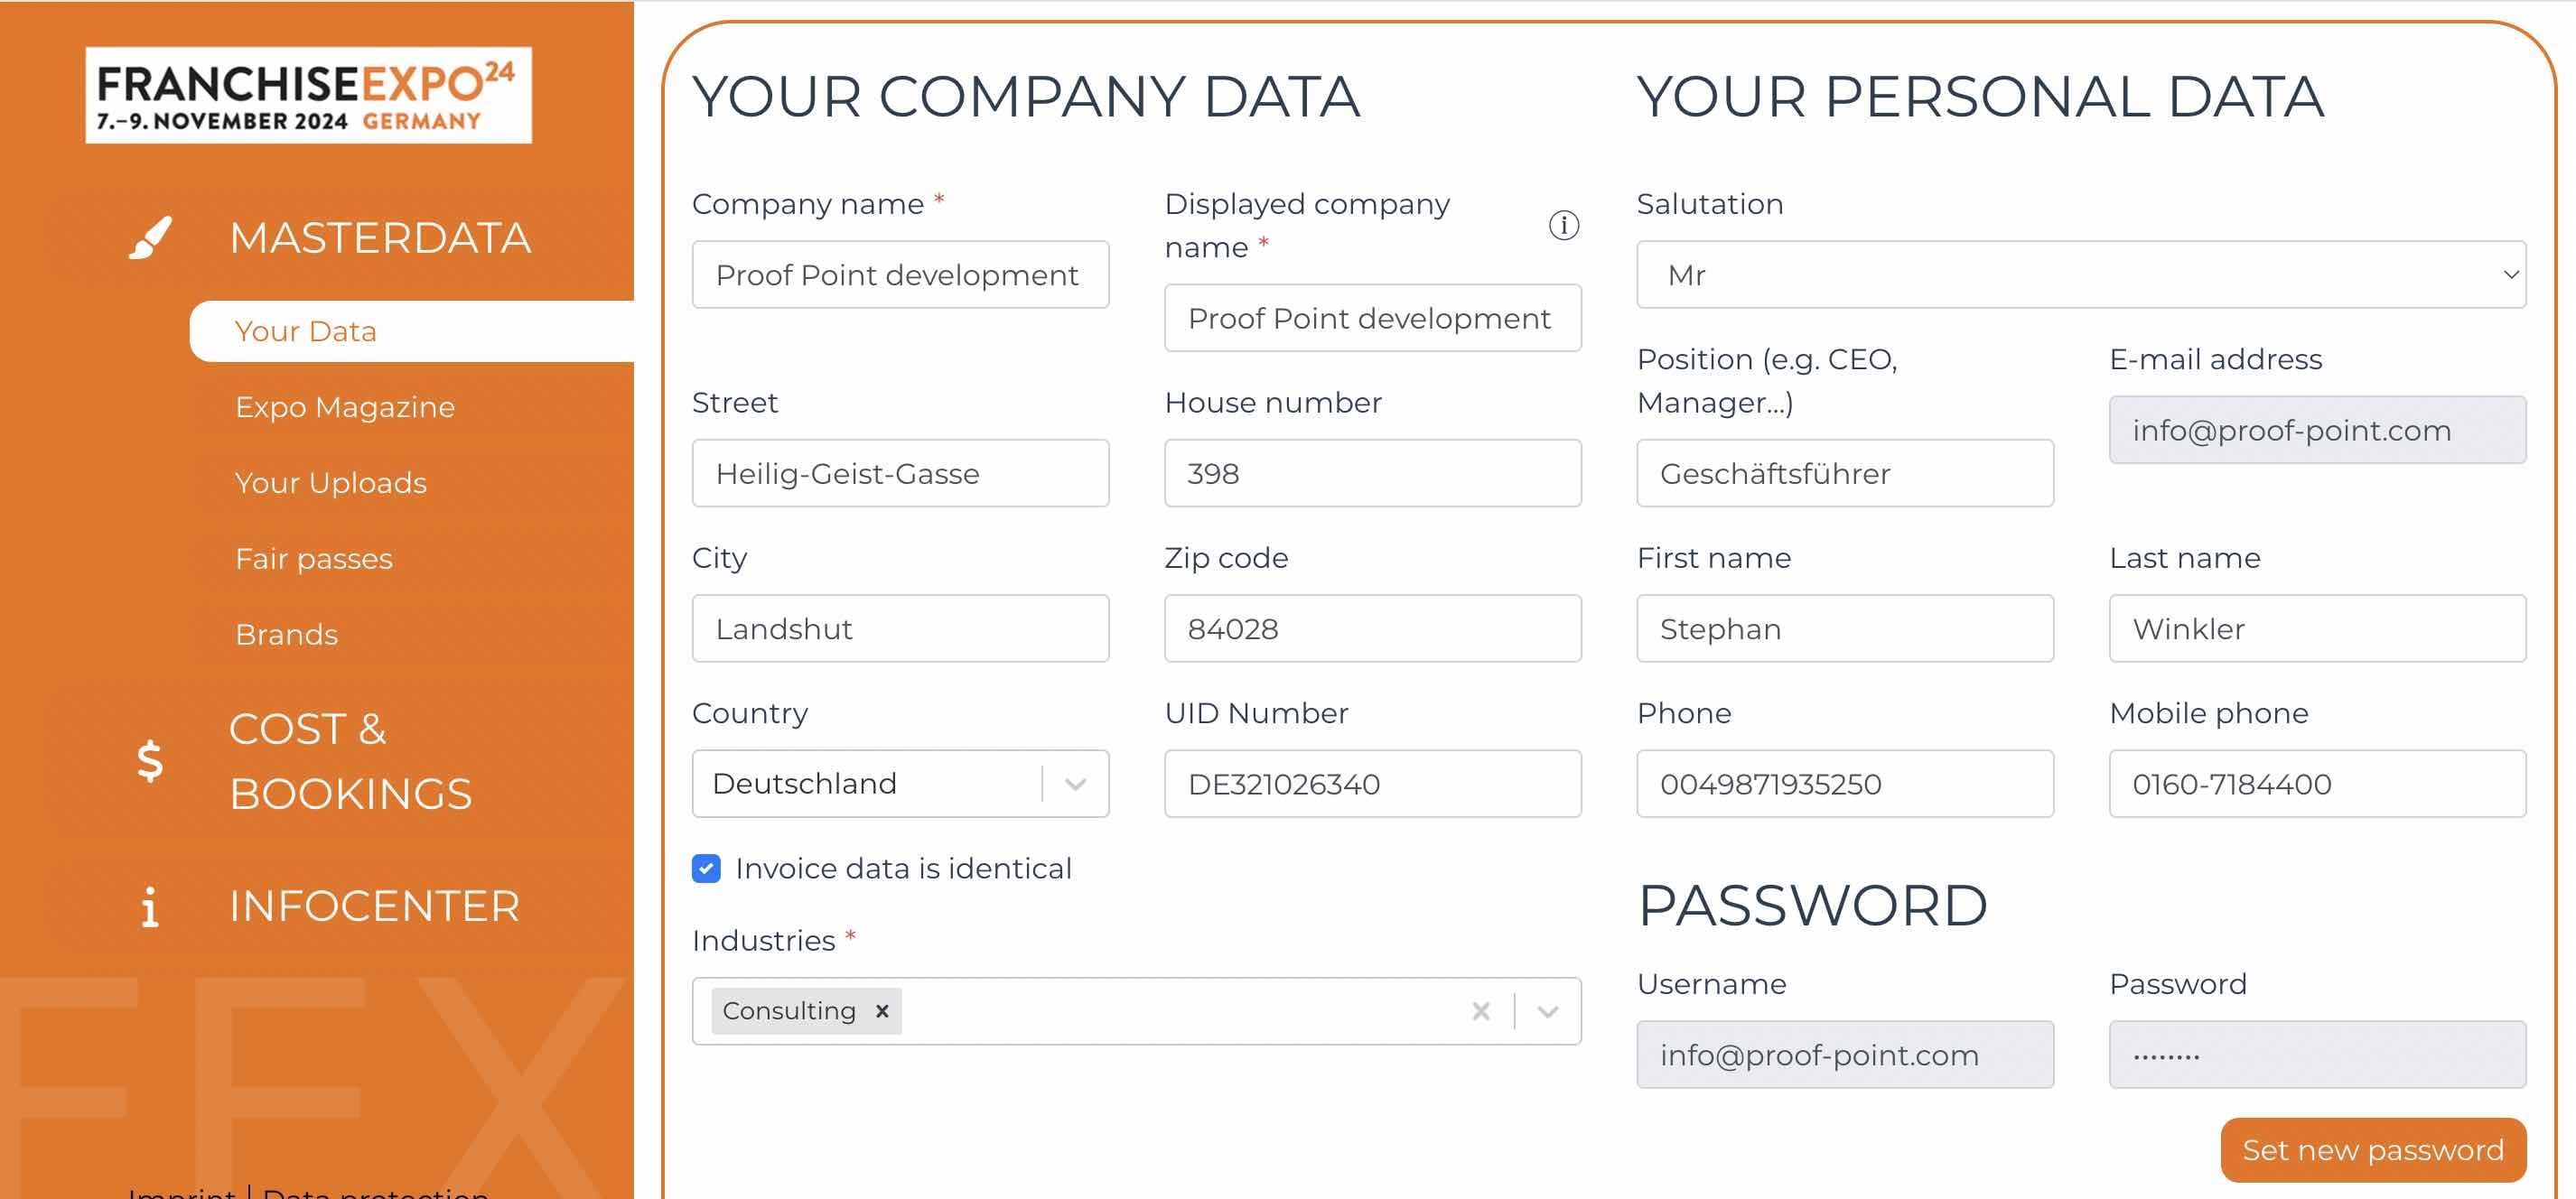
The data in this form is the same/sync with the Company Data on Cockpit.
3.2 Match-Making
Confirmed participants are required to fill in the Match-making form. 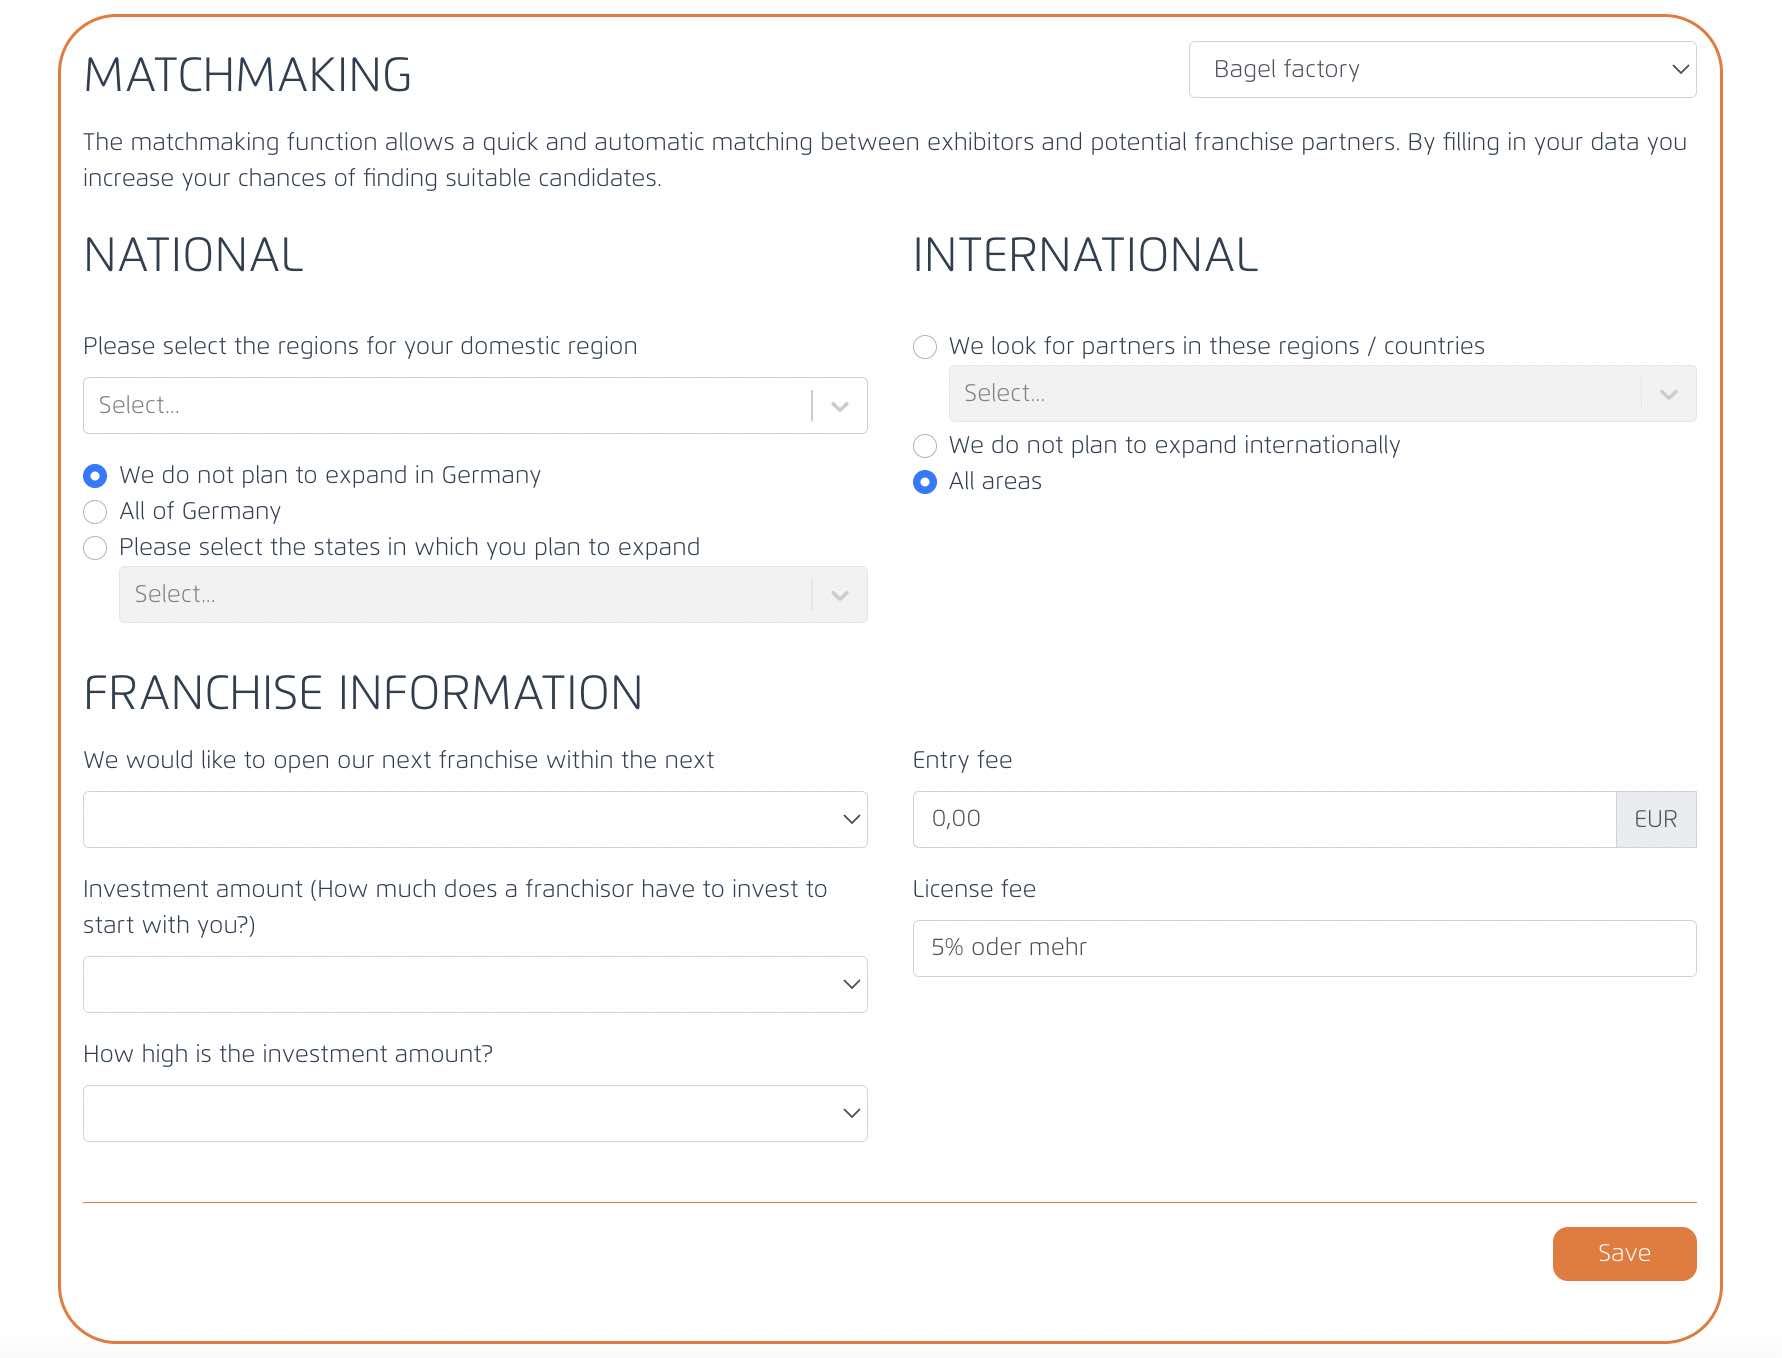
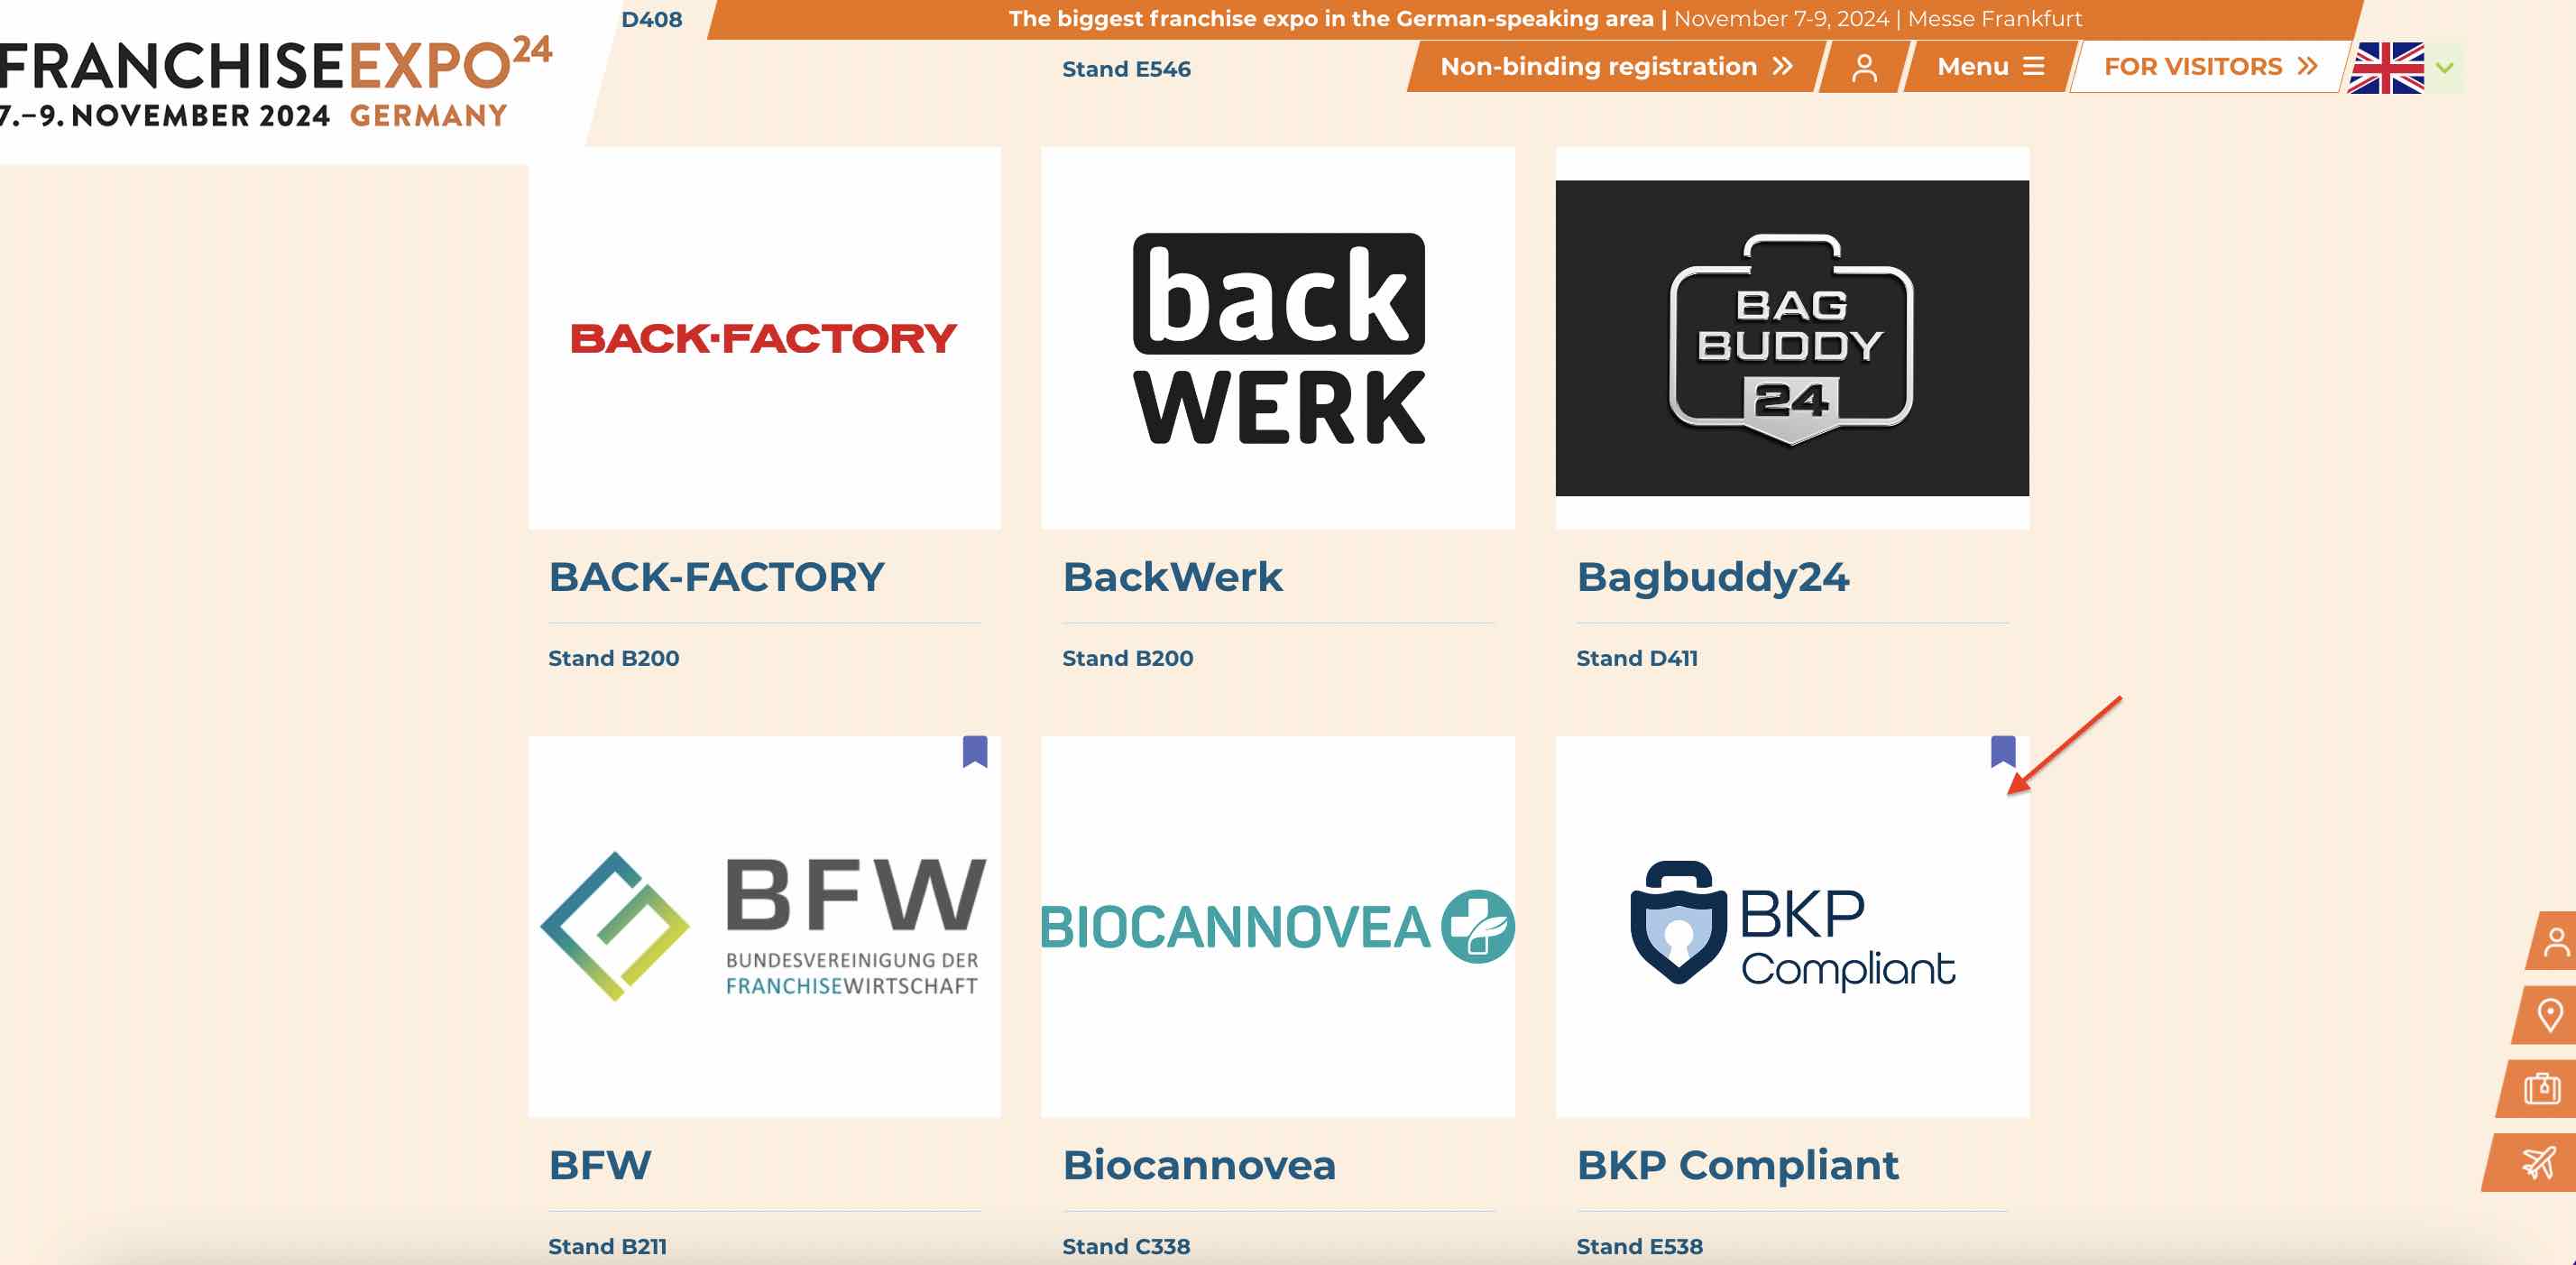
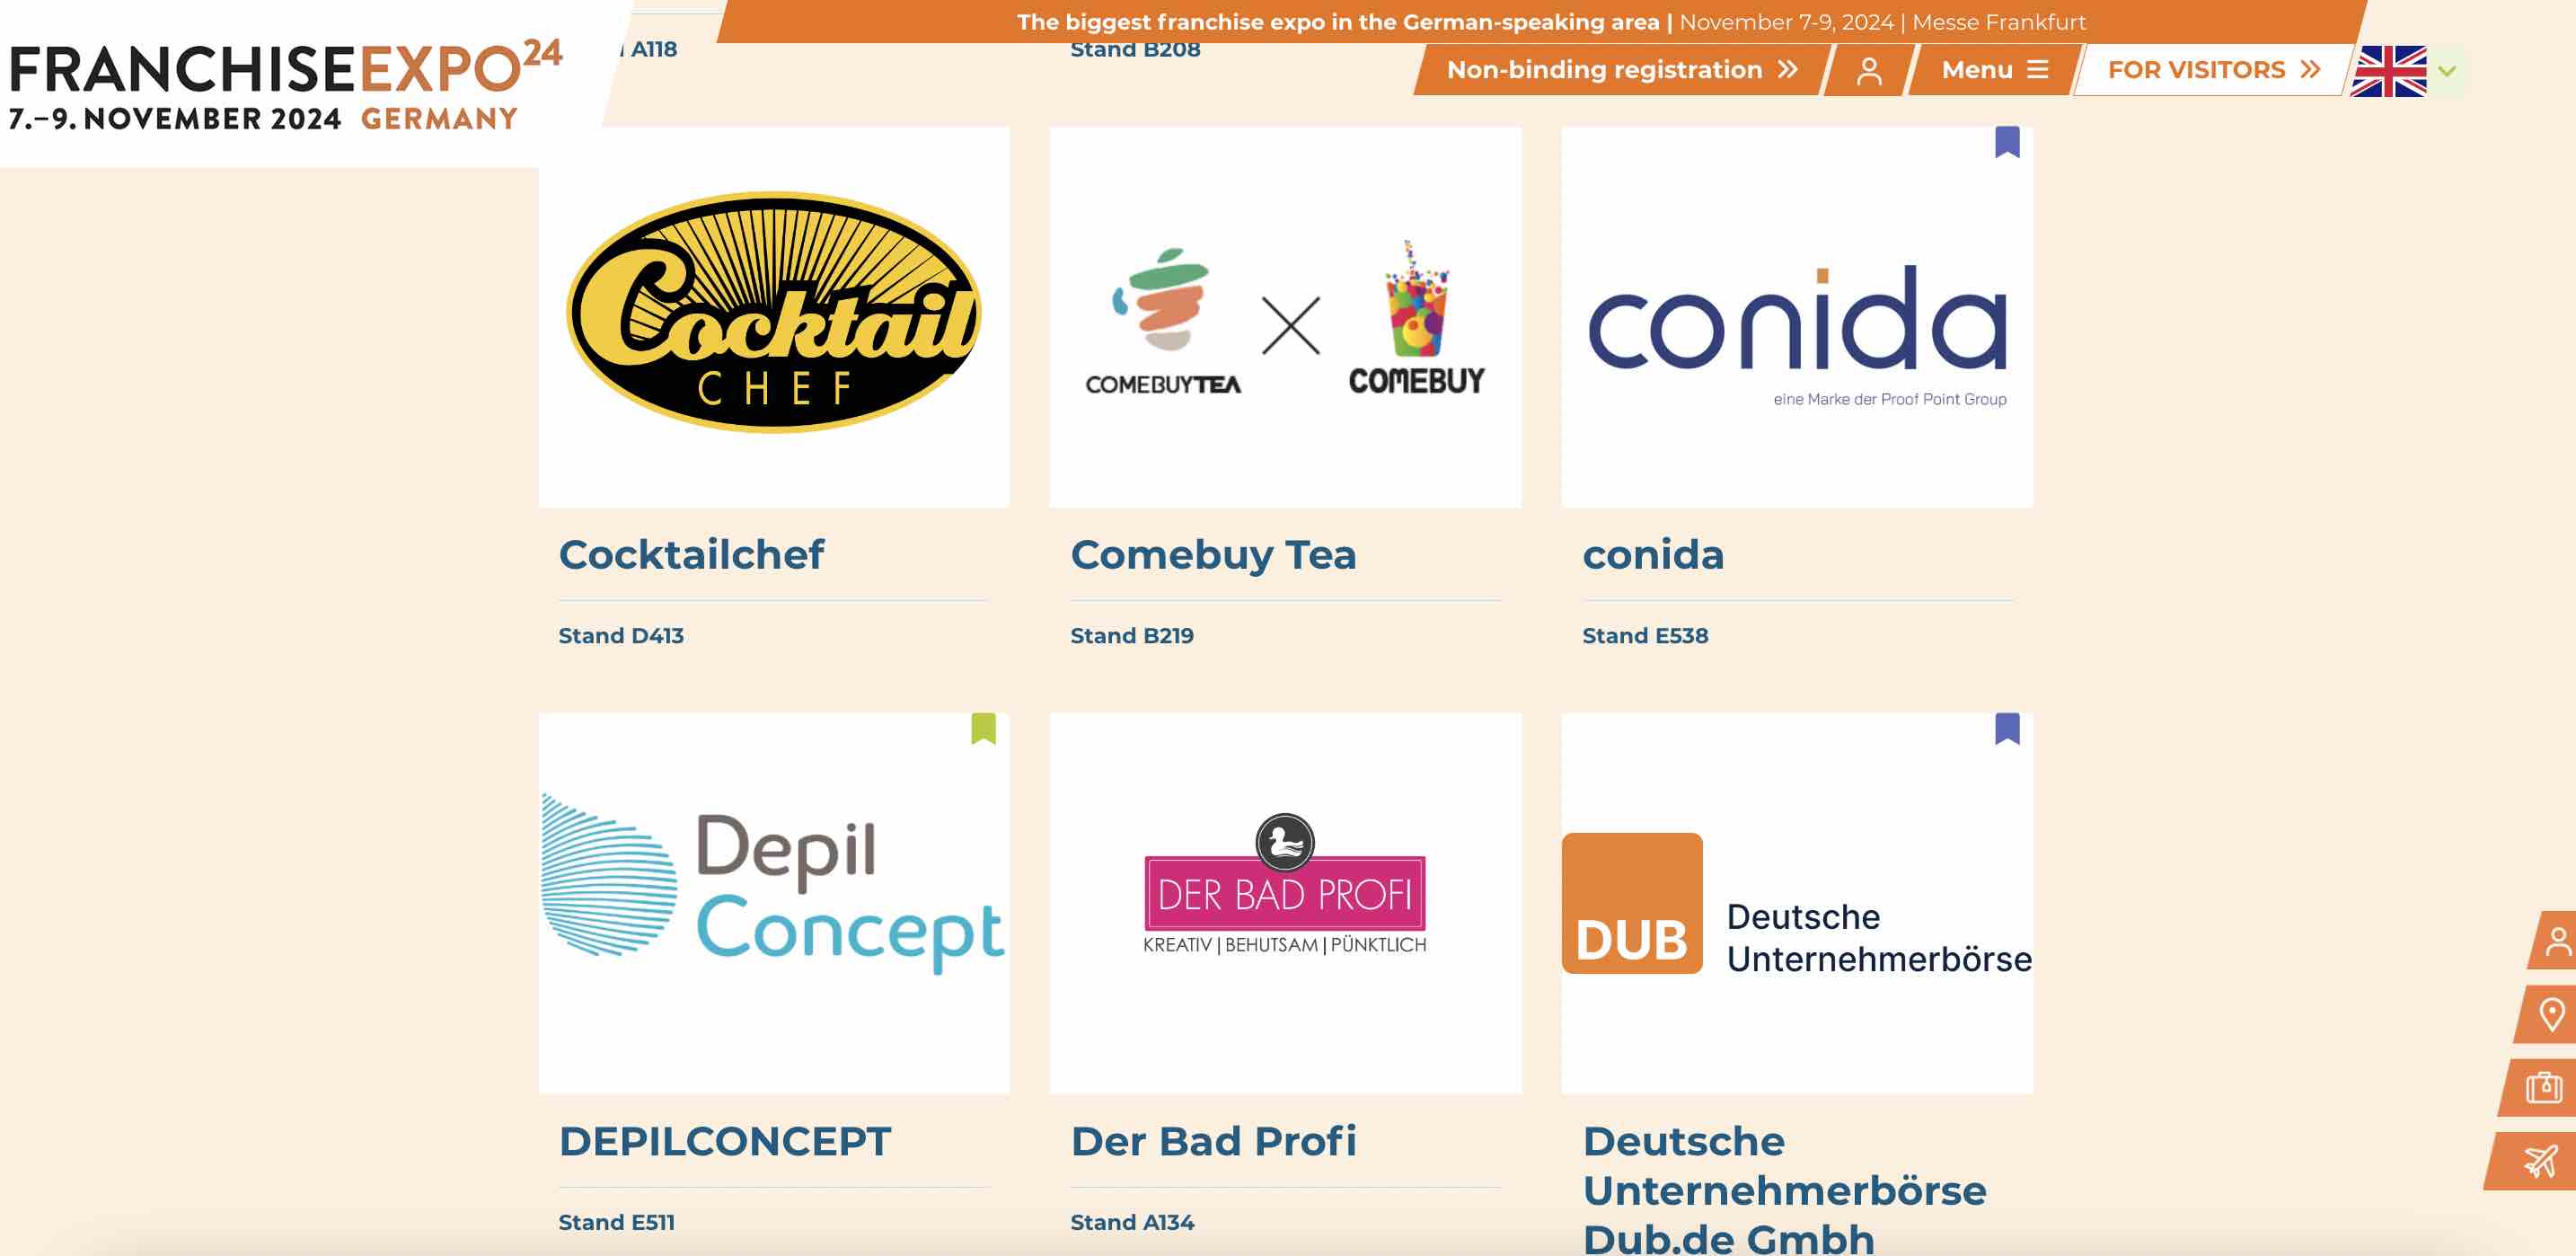
This match-making form captures data from participants and display the results for visitors when they search via the "match-making filter" on the Trade Fairs site.
This is how the match-making filter looks like on the official site.
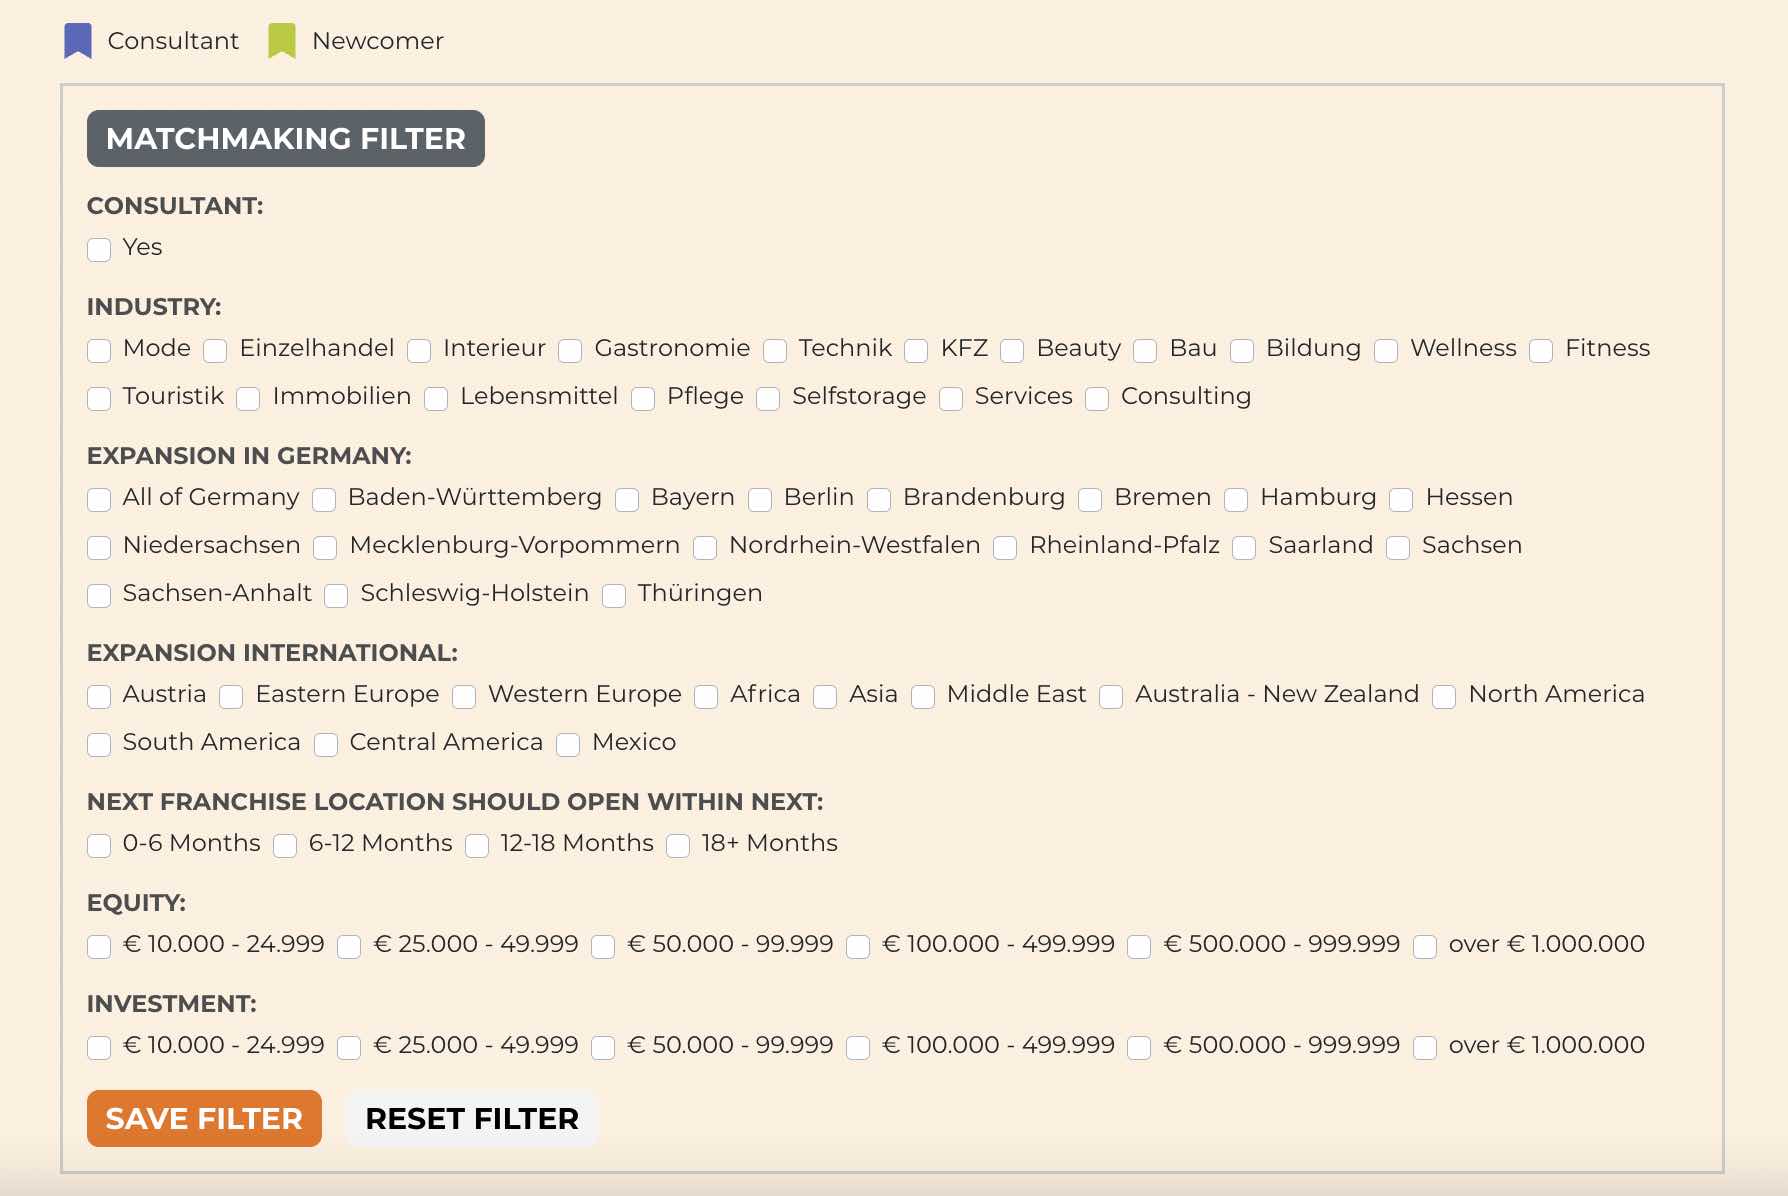
Visitors fill in the above form to search for Franchise business they are interested to invest in on the Franchise Expo Official site.
https://www.franchise-expo.com/en-gb/exhibitor-overview
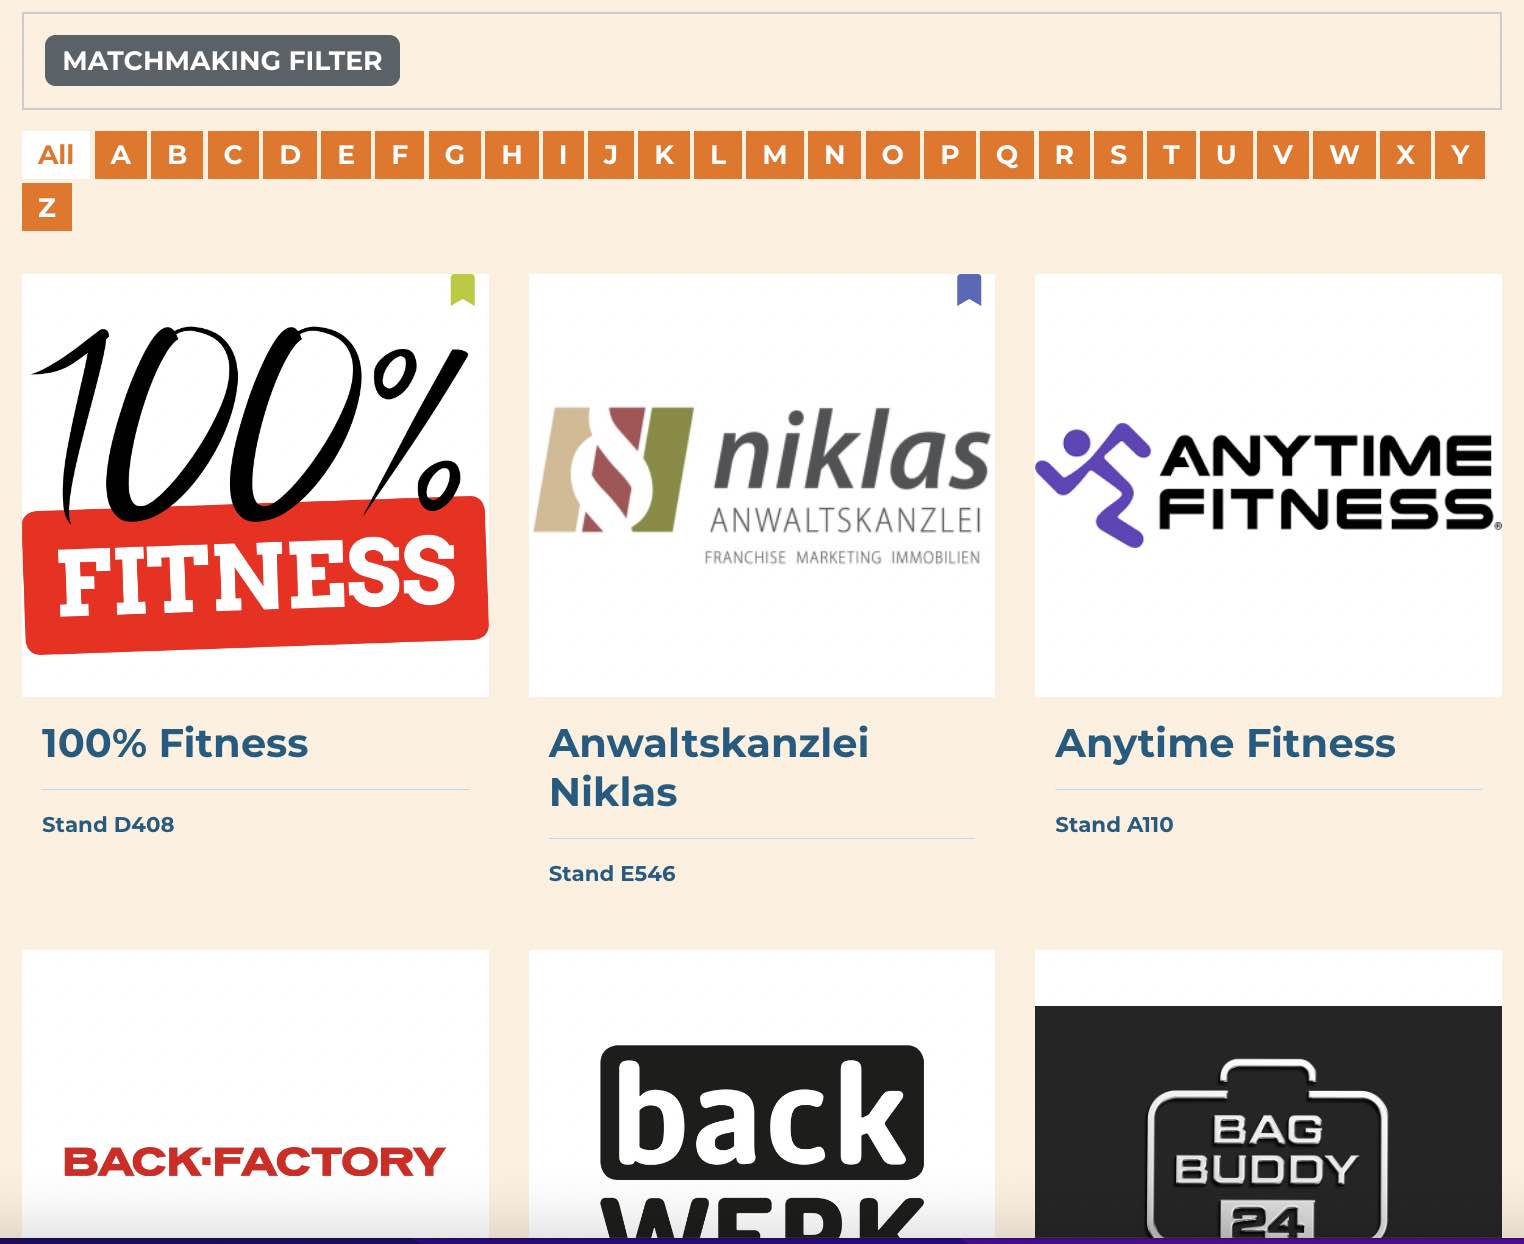
After they click "Save filter", system will start to search those data filled in by Exhibitor/Consultant ( on the Portal Match-making's form). Data which matches the search criteria perform by visitor, will be displayed like below.
3.3 EXPO Magazine
Confirmed participants (Exhibitors/consultants) are required to fill in the EXPO Magazine form.
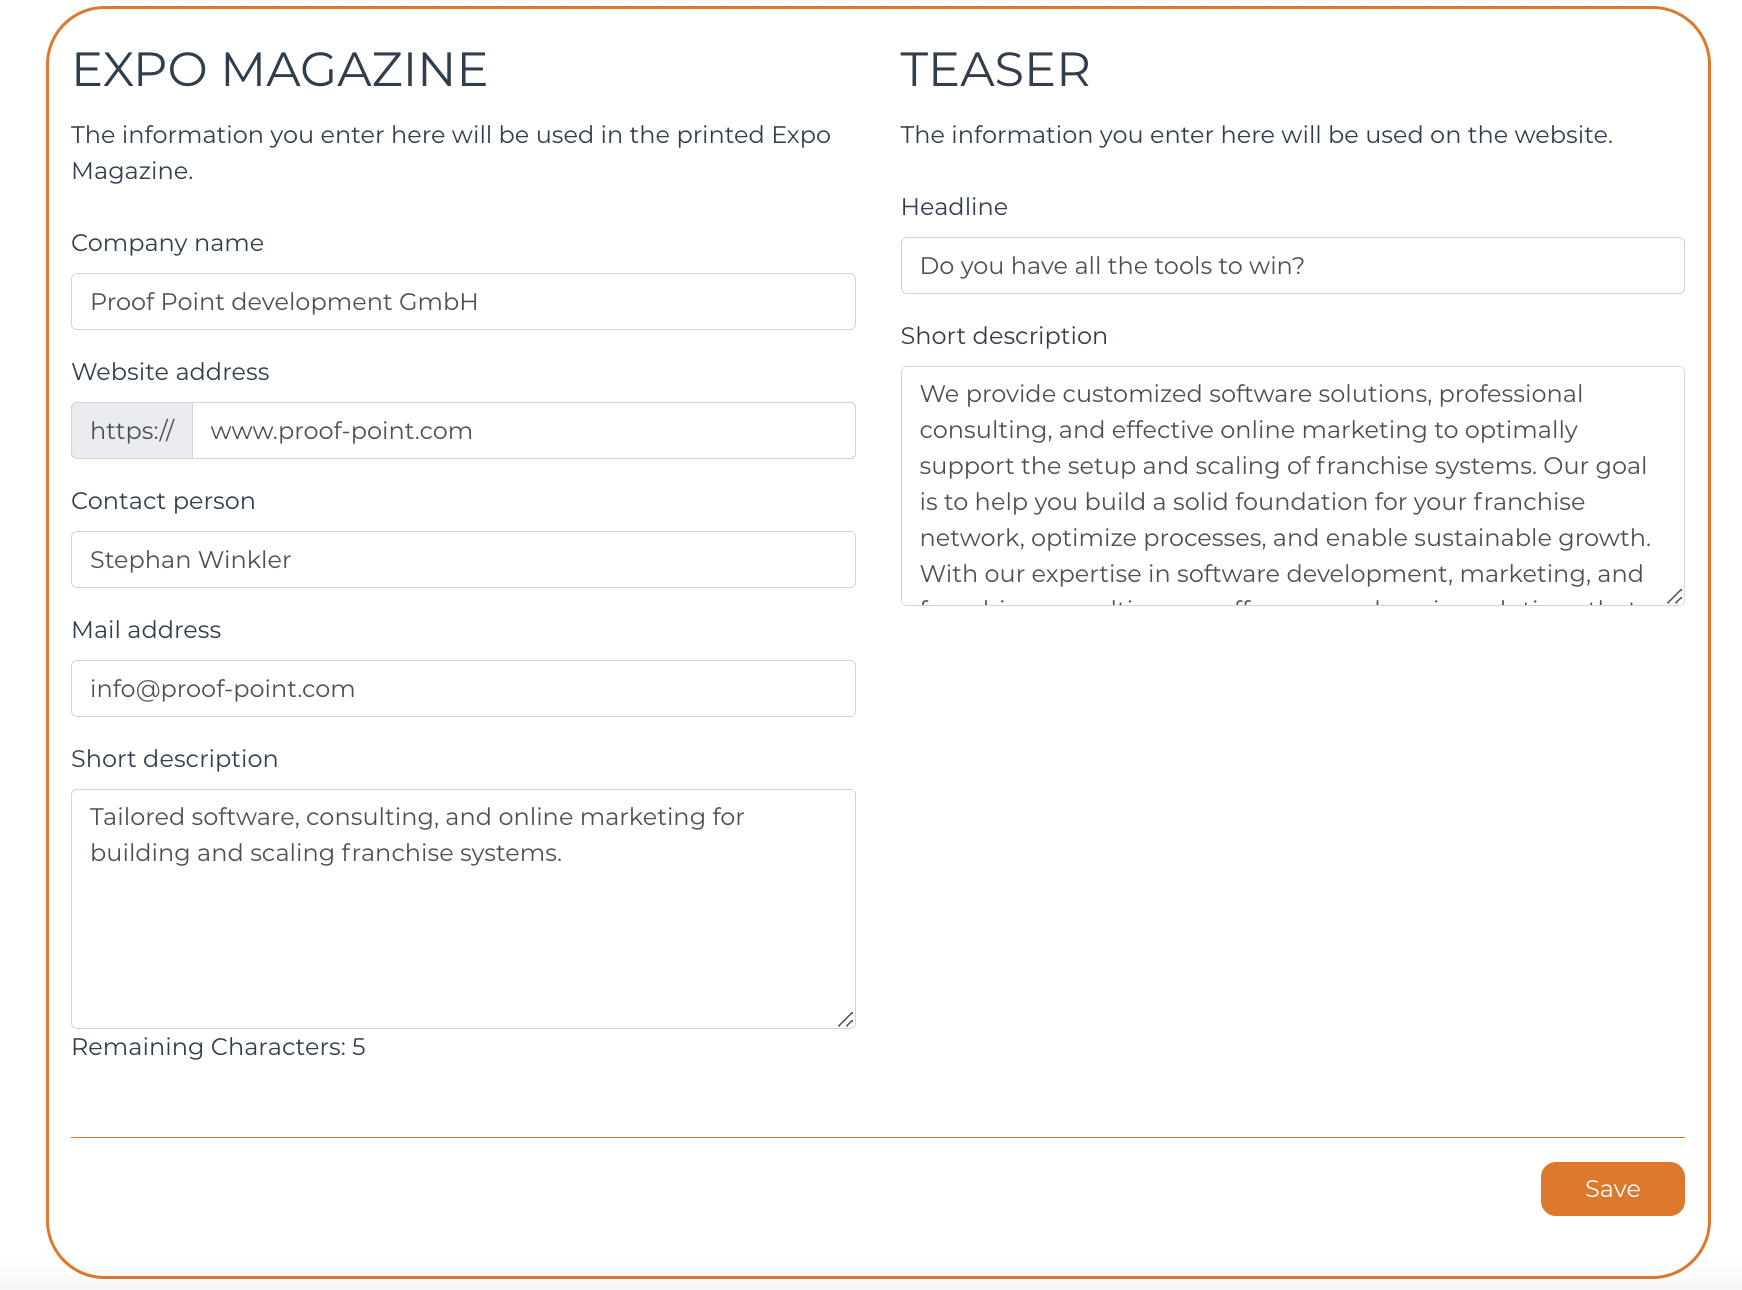
- Expo Magazine : The info filled in here is used for the printed magazine
- Teaser: The info filled in here is used for the website. It will be displayed as part of the info under Exhibitor Listing.
The data in this form is the same/sync with the [Expo Magazine] on Cockpit > Exhibitor/Consultant listing > Upload button
3.4 Your Uploads
Confirmed participants (Exhibitors/consultants) are required to fill in the Your Uploads form.
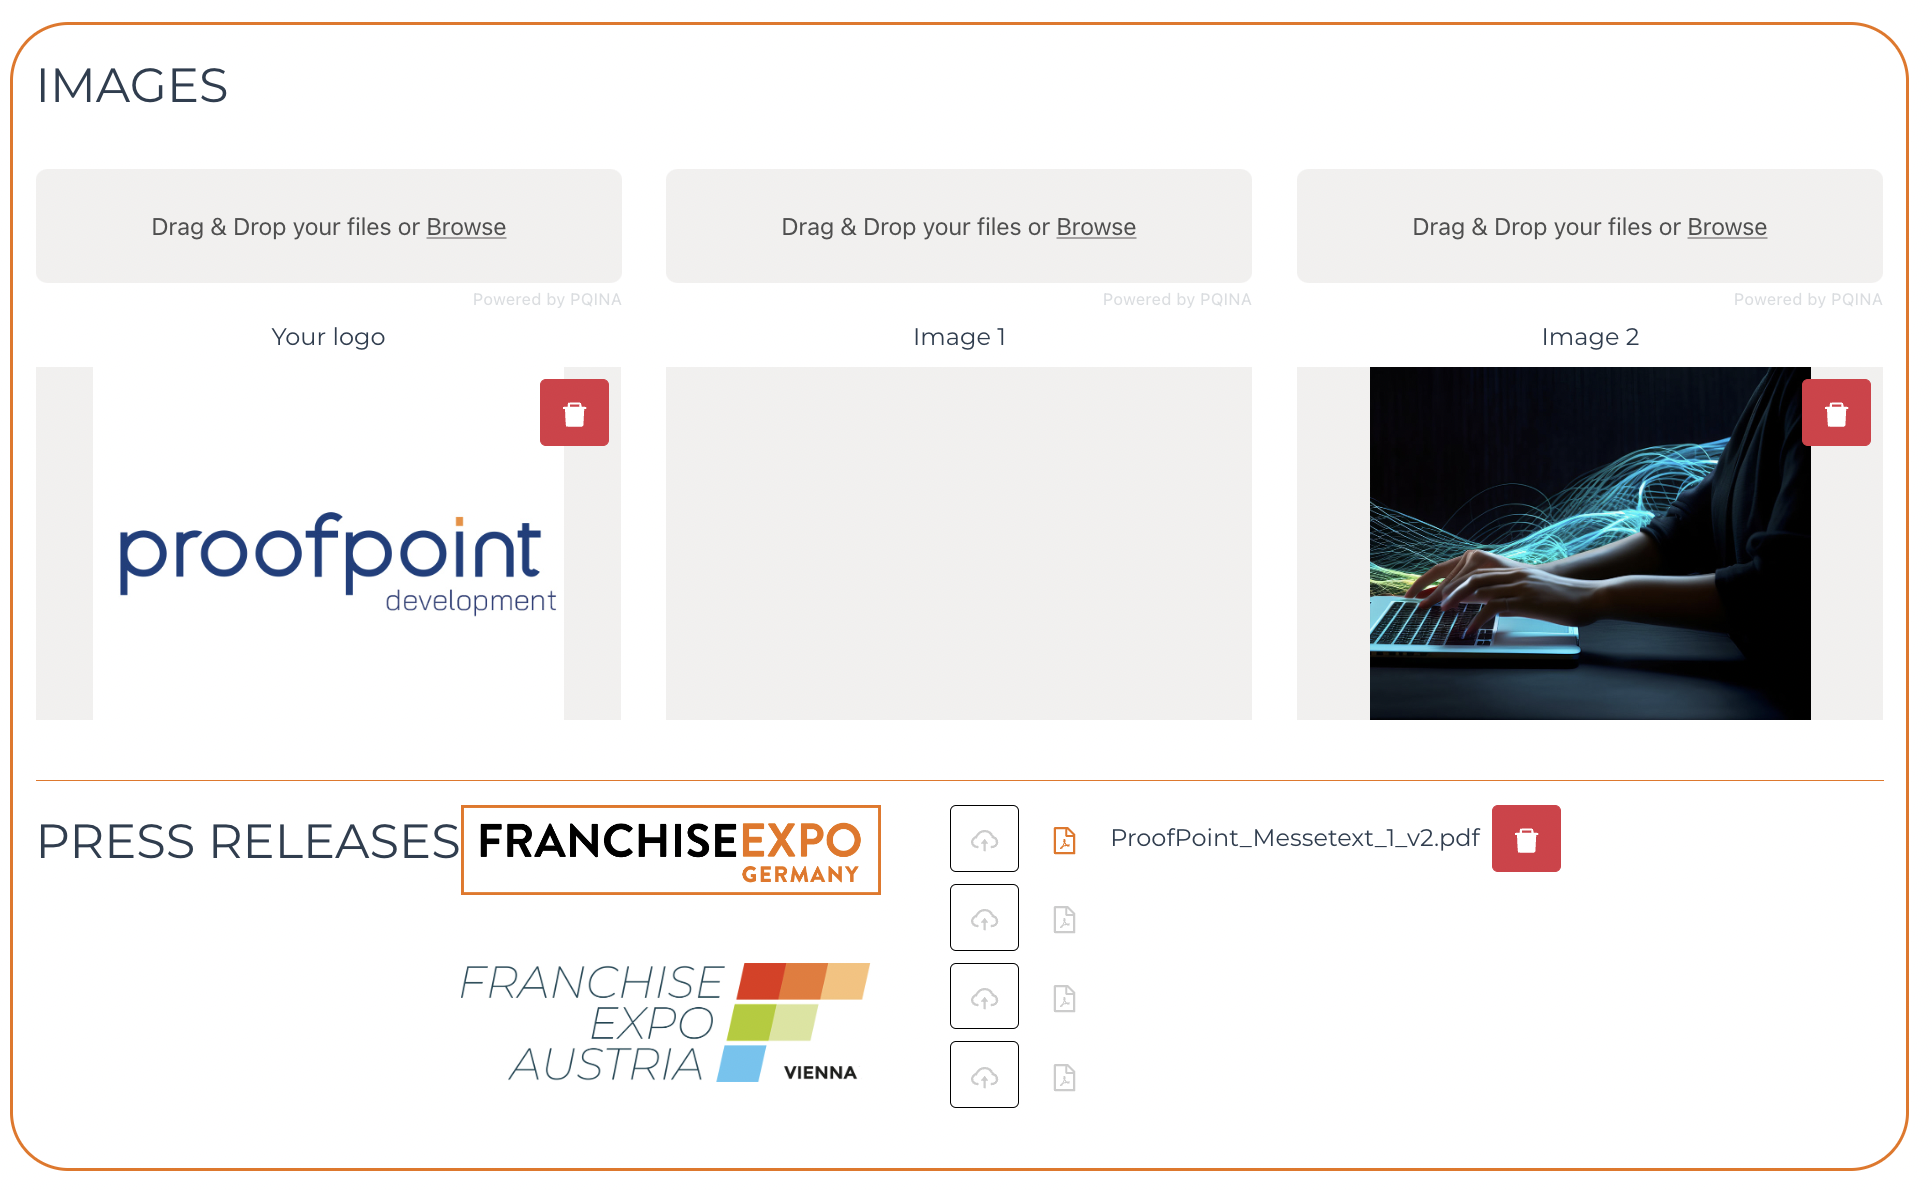
- Your logo, image 1 & image 2 : This will be used on the Website under Exhibitor/Consultant listing
Example screenshot of application: Logo image
Logo image, image 1 & 2

- Press Release : Allow confirmed exhibitor/consultant to upload their PDF here.

Every joined fair needs to upload 2 Press Release. If a user joined 2 fair, the logo of the 2 fairs appear on the left ( example from screenshot ) and allow user to upload 2 PDFs for each fair joined.
The data in this form is the same/sync with the [Press Release] on Cockpit > Exhibitor/Consultant listing > Fair
3.5 Speakers
Speakers who speaks during the fair, and exhibitor/consultant whose "is also speaker" is checked, needs to fill up the Speakers form.
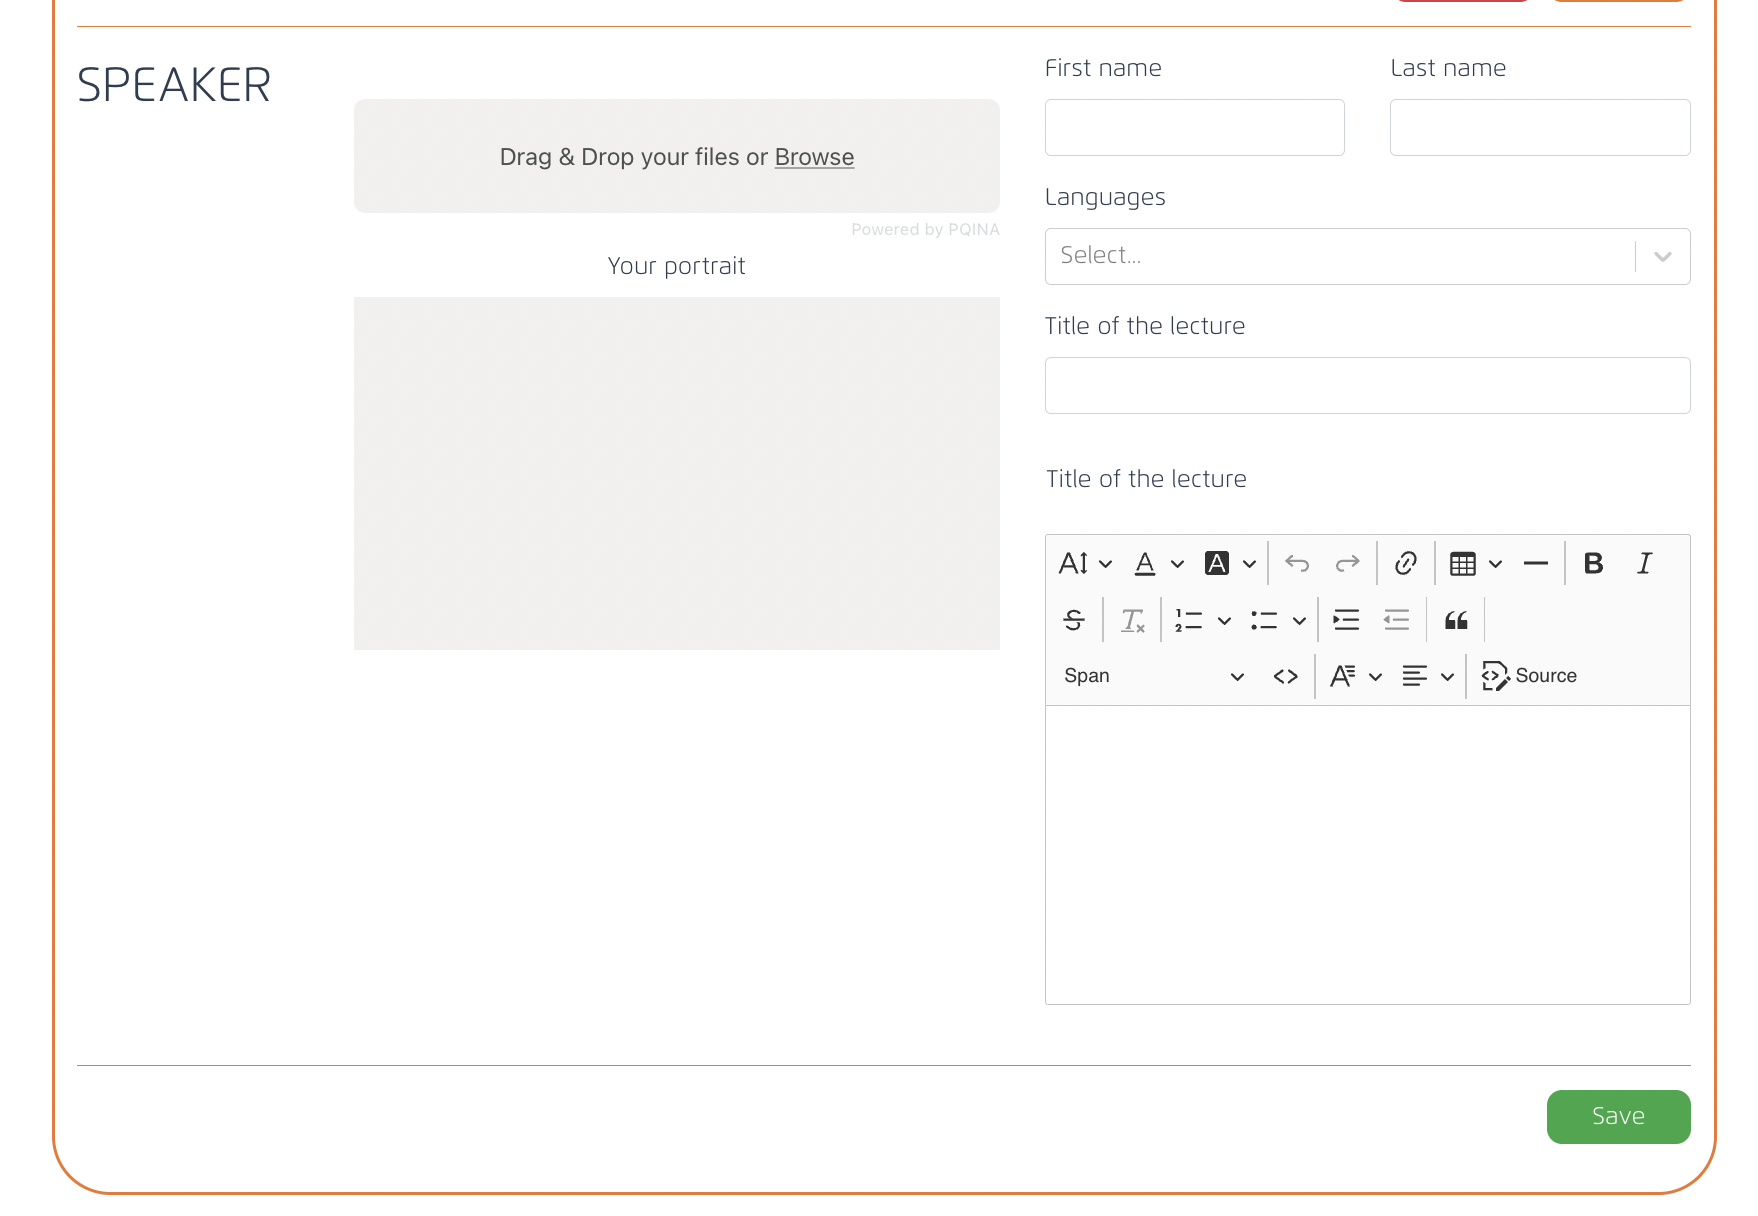
This data will be used in the Cockpit to create Program during the fair.
3.6 Brands
Confirmed Exhibitor/Consultant with "has multiple brands" checked, need to fill up the Brands form.
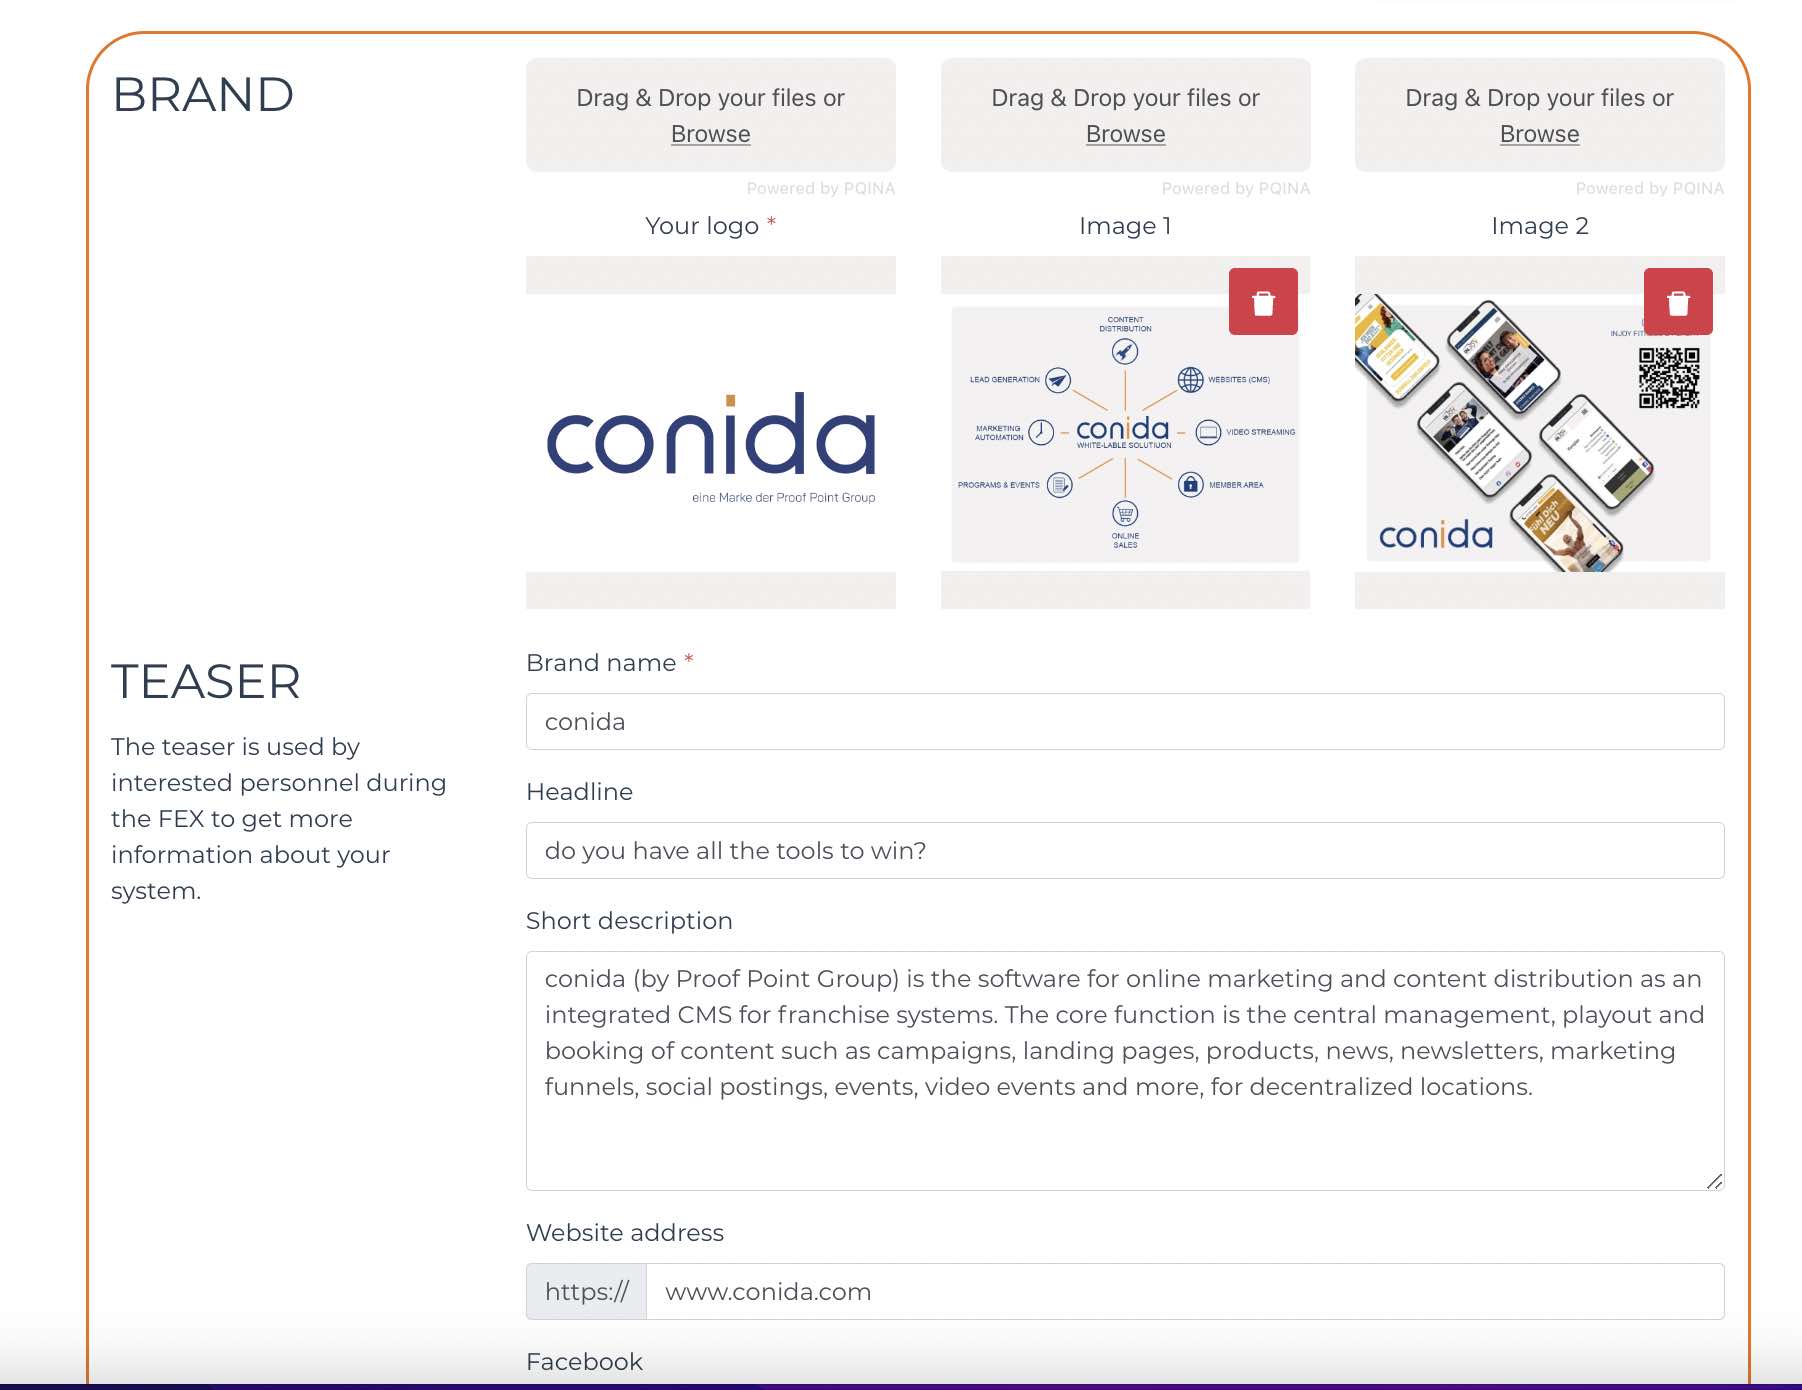
Data filled under the Brand's form will be used on the website, under Exhibitor Listing ( Brands )
3.7 Fair Passes
Confirmed participants (exhibitor/consultant/speaker) need to fill up this form.
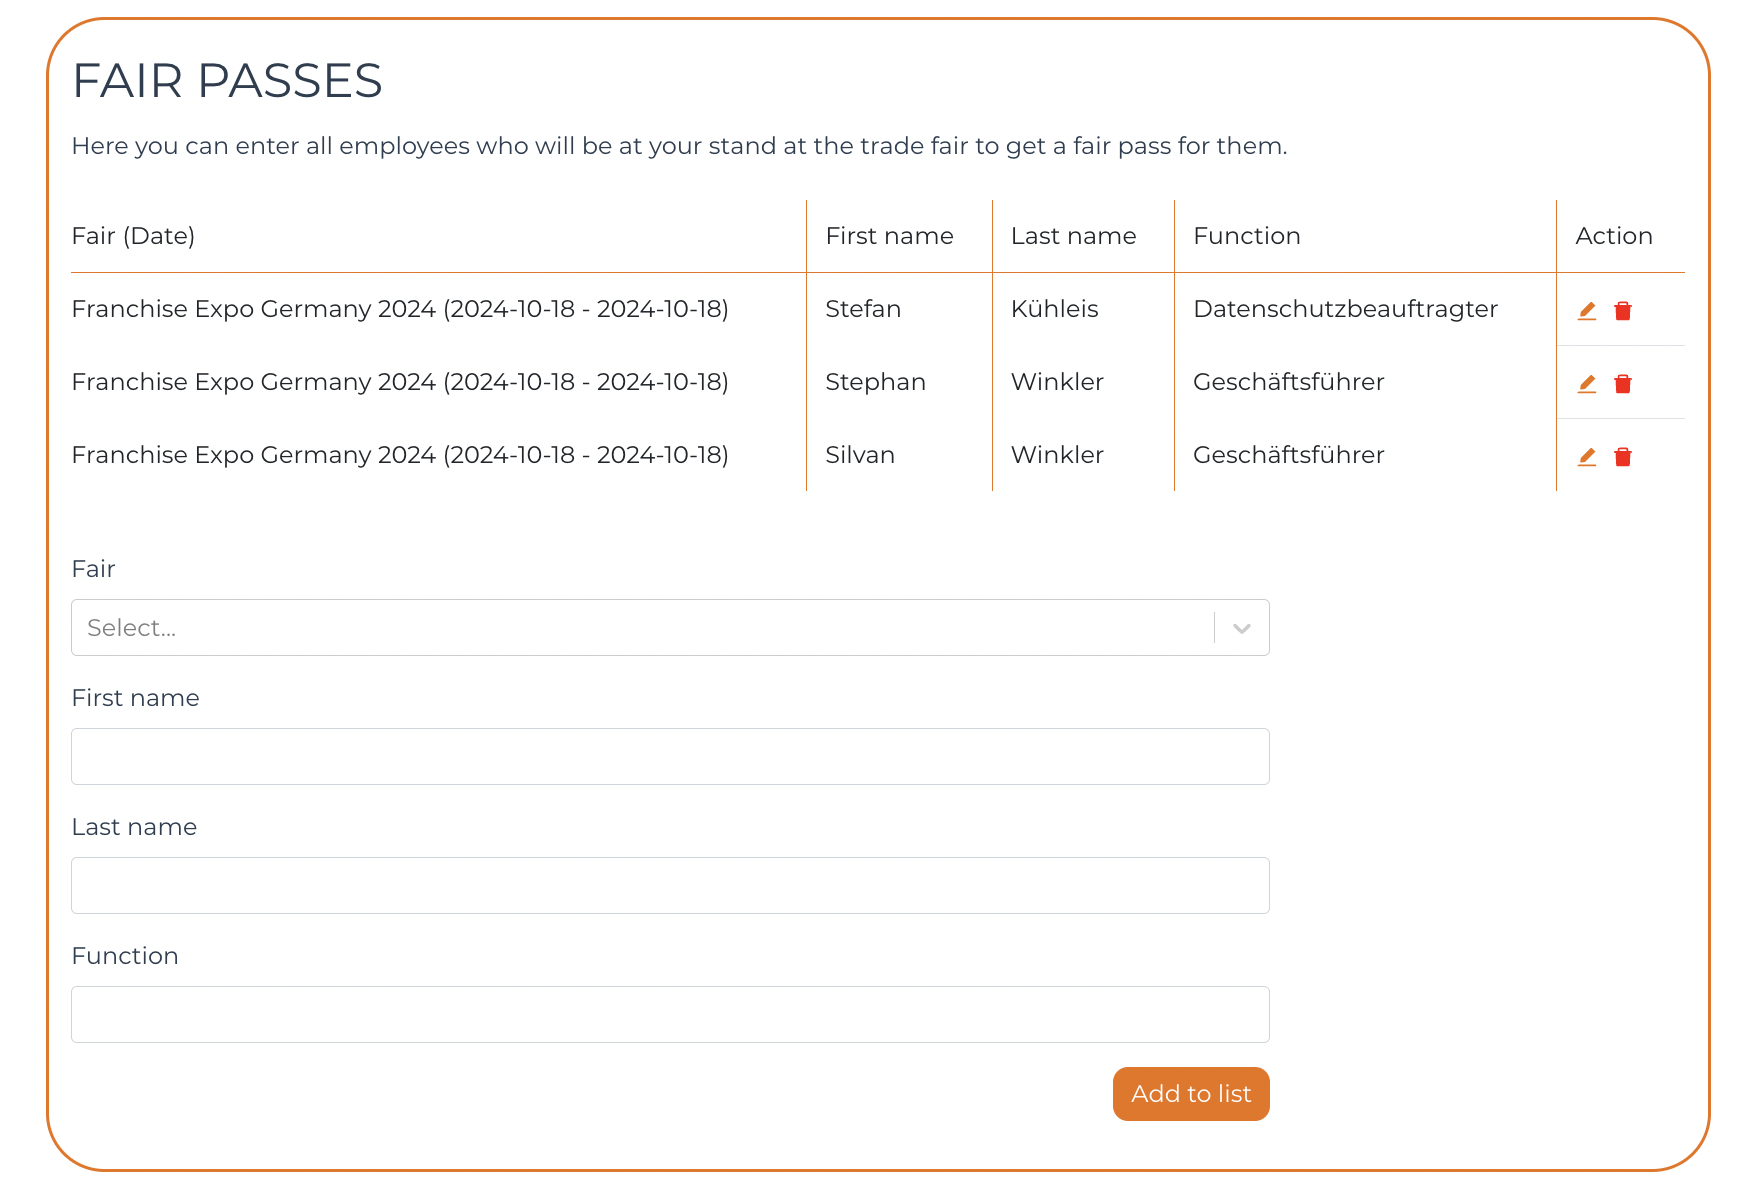
The data filled will be used by FEX Admin to print and create physical fair passes for the participants.
This data is the same/sync with Cockpit under Fair > Fair passes