
Admin Panel : Courseplan
Overview
The Courseplan is a paid Ark module for creating and managing course schedules for a fitness center.
Once activated, Admin can set up courses and manage their schedules through the Courseplan Calendar.
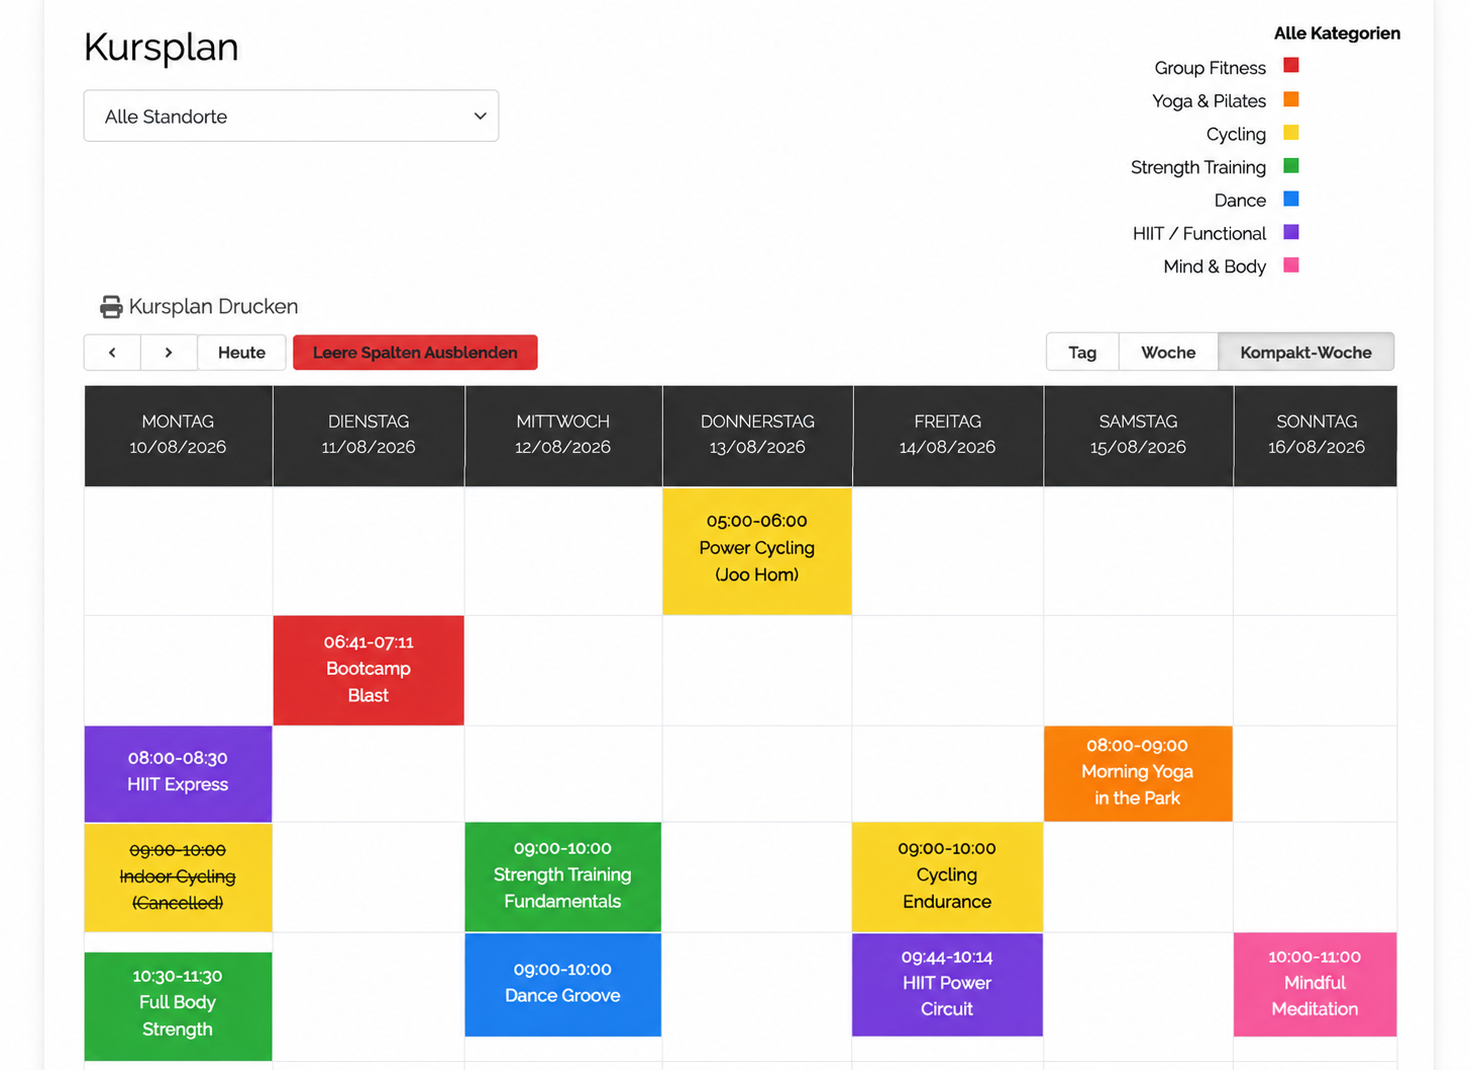
Live View of the Course Calendar
Rooms and Categories
Before creating a course, set up the relevant Rooms and Categories under Setup Calendar.
| Setting | Description |
|---|---|
| Rooms | Defines the room within a fitness center where a course takes place. When creating a room, select the Location it belongs to and enter the room details. |
| Categories | Groups courses by type, such as Cycling, Yoga, or Functional Training. |
1. Creating a Course
Go to Courseplan → Setup Calendar → Courses and click Create course.
Enter the course information and configure its schedule and properties as required.
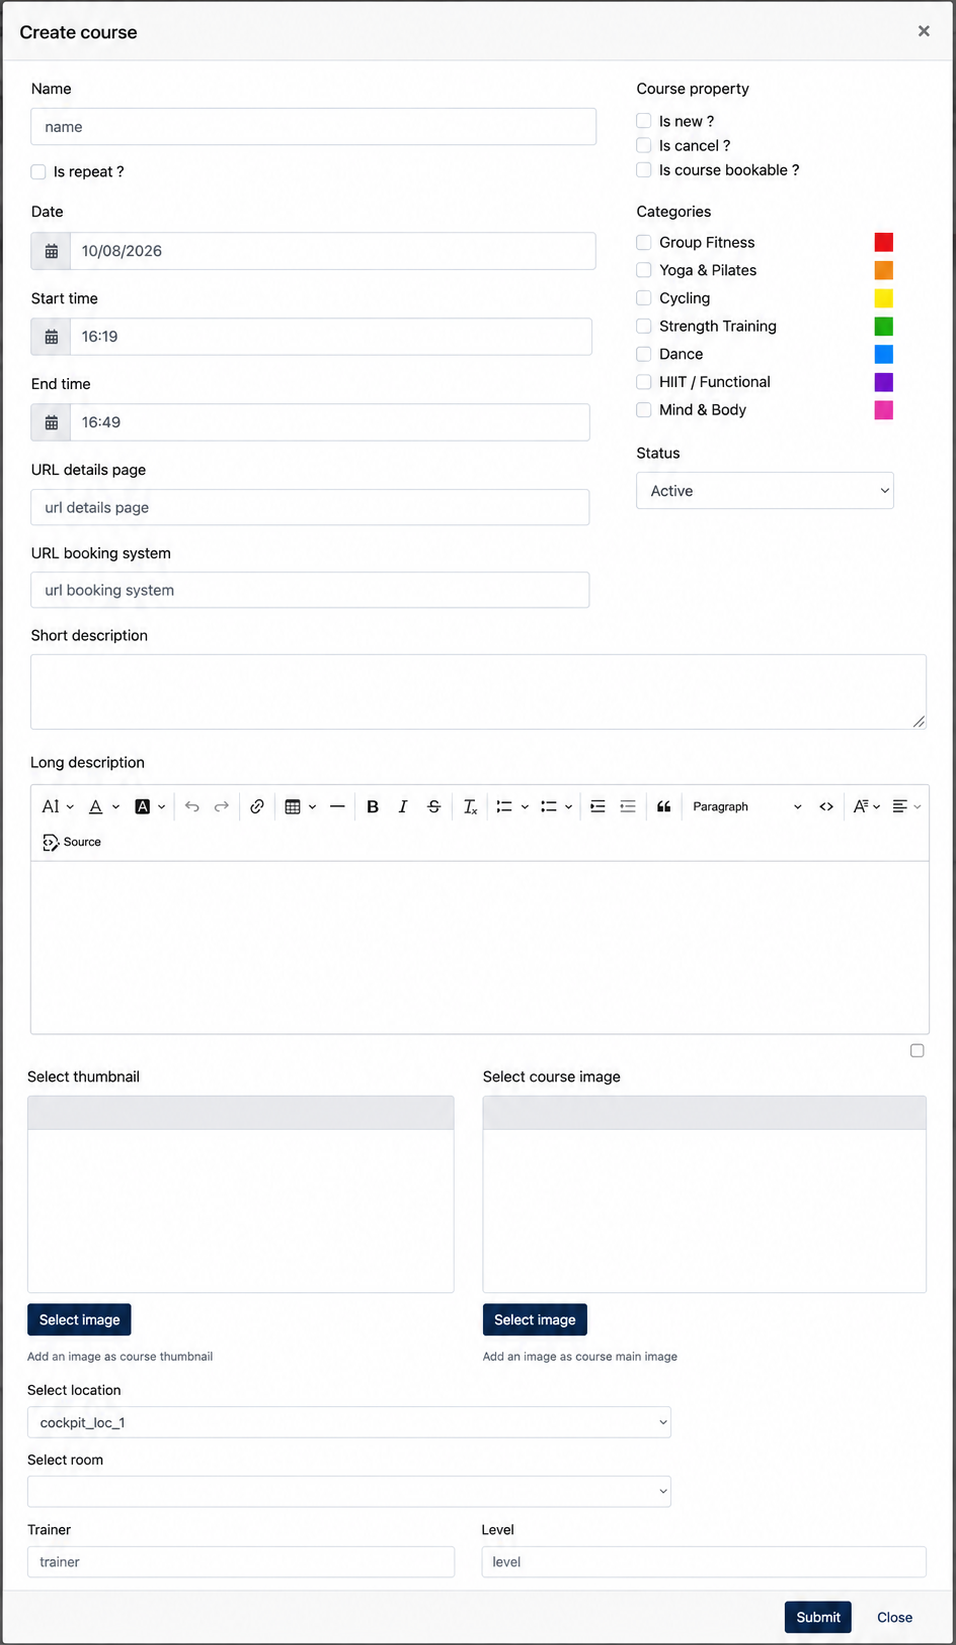
| Field | Description |
|---|---|
| Name | Enter the name of the course. |
| Is repeat? | Enable this option if the course should repeat according to a recurring schedule. |
| Date | Select the date of the course. |
| Start time / End time | Define when the course starts and ends. |
| URL details page | Optional URL linking to a page with additional information about the course. |
| URL booking system | Optional URL to an external booking system for the course. |
| Short description | Enter a brief description of the course. |
| Long description | Enter a detailed description of the course. |
| Select Thumbnail | Add an image as course thumbnail |
| Select Course Image | Add an image to represent the course |
| Course property | Select the applicable properties for the course. See below. |
| Categories | Assign one or more previously configured categories to the course. |
| Status | Set whether the course is Active or Inactive. |
Course Properties
The following properties can be applied where required:
- Is new? – Marks if the course is new.
- Is cancel? – Marks the course as cancelled.
- Is course bookable? – Indicates that booking is available for the course.
After completing the course information, save the course to add it to the Courseplan Calendar.
2. Course Listing
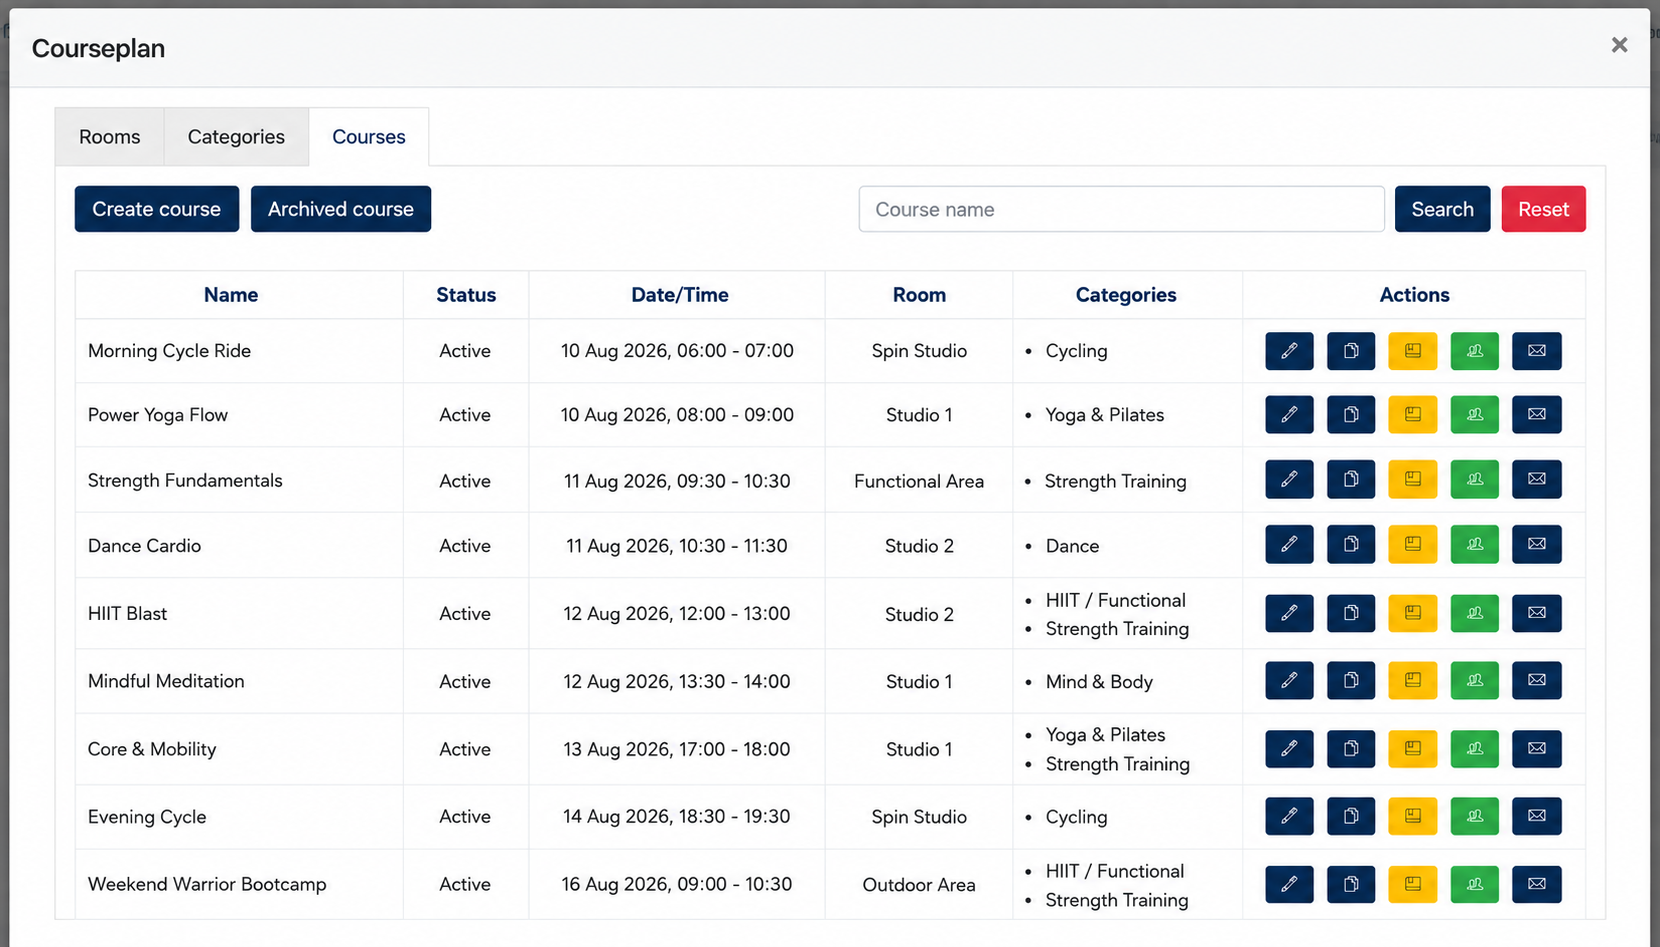
Once a course is created, it will appear in the Courses listing. This page provides an overview of the existing courses and allows Admins to manage each course using the available options under the Actions column.
Under the [ Calendar Setup ], Admin can review and manage the created course via this lisitng.
Waiting List Logic
When a course reaches its maximum capacity, any additional registrations will automatically be placed on the Waiting List. If a confirmed joiner cancels their registration, the first person on the waiting list will automatically take the available seat and become a confirmed joiner.
Joiners Log
The Joiners Log provides a history of registration activities for a course. Admin can use the log to check how a joiner was added to or removed from the course, including registrations or cancellations made through the website, app, email unsubscribe link, or manually through the Admin Panel.
3. Courseplan Setting
The Courseplan Settings allow Center Admin to configure the general registration and cancellation rules for courses, as well as email notifications for course registration activities.
The settings are divided into two tabs:
3.1 General Tab
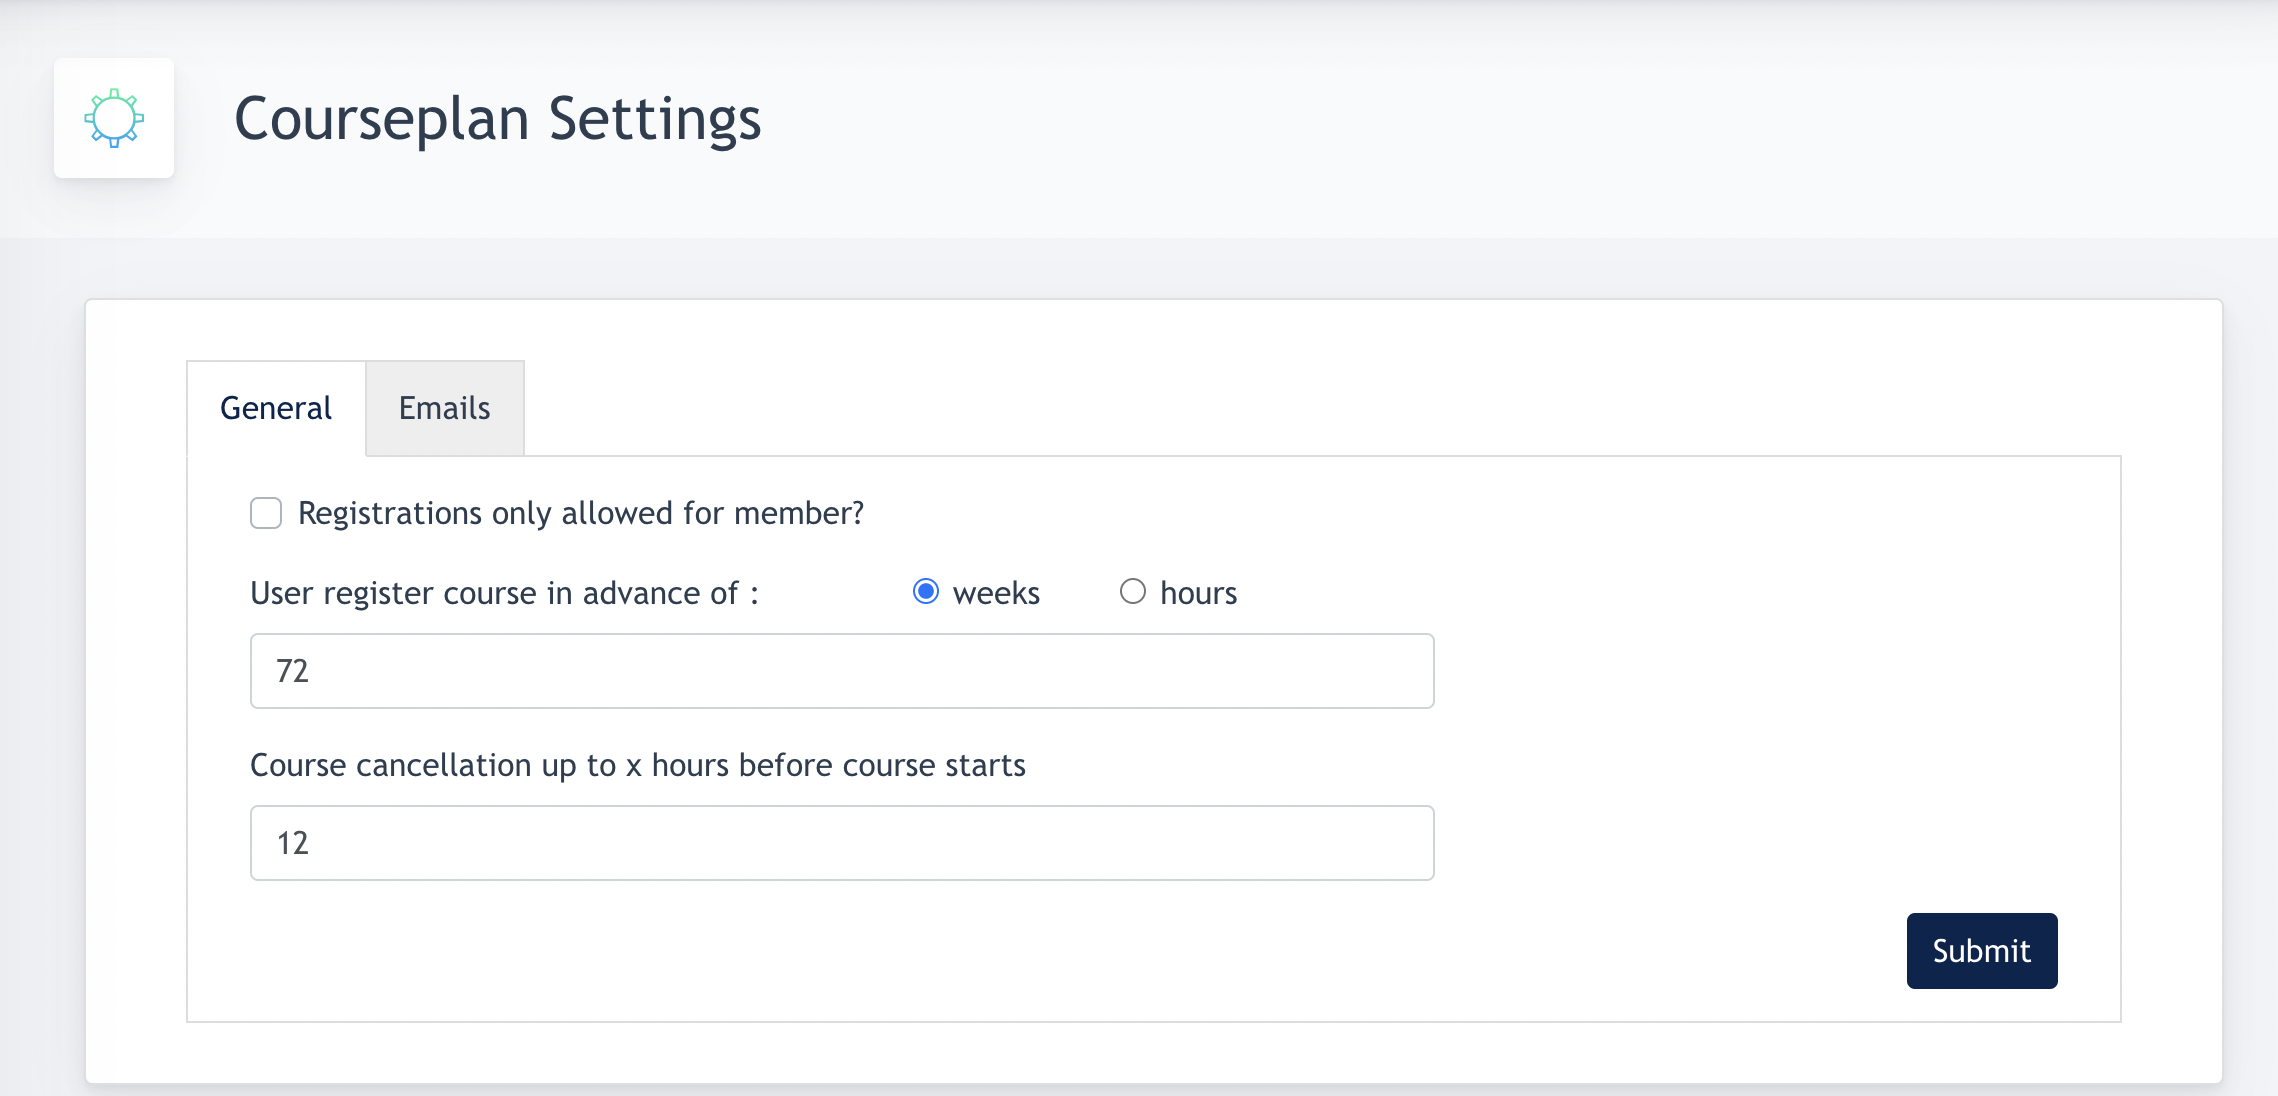
The General tab defines the rules that apply when users register for or cancel a course.
| Setting | Description |
|---|---|
| Registrations only allowed for member? | When enabled, only registered club members are allowed to register for courses. |
| User register course in advance of | Defines how far in advance a course becomes available for registration. Enter a value and select Weeks or Hours as the time unit. |
| Course cancellation up to x hours before course starts | Defines the latest time a joiner is allowed to cancel their registration before the course starts. |
Example: If the cancellation period is set to 12 hours, joiners may cancel their registration until 12 hours before the scheduled course start time.
3.2 Emails Tab
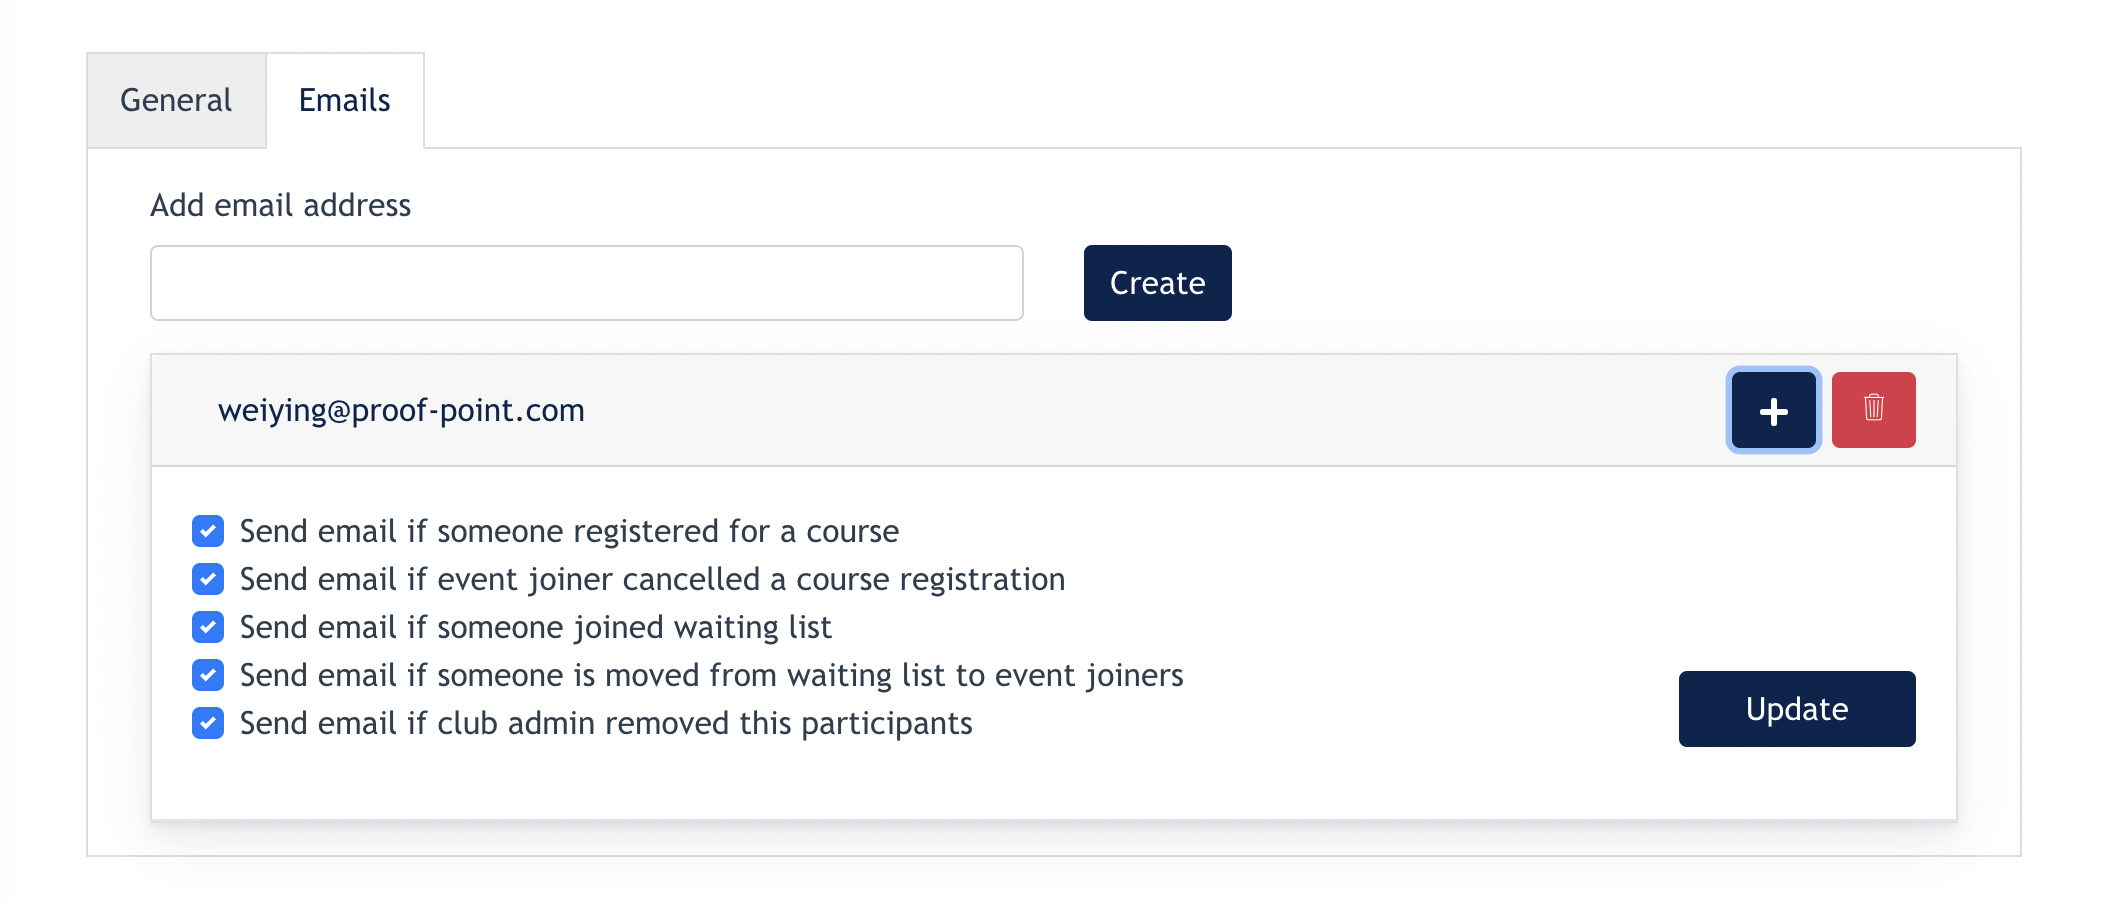
The Emails tab allows Center Admin to configure internal email notifications for course registration activities.
Admin can add one or more email addresses and select which activities should trigger a notification for each recipient, such as when:
- someone registers for a course;
- a joiner cancels a course registration;
- someone joins the waiting list;
- someone is moved from the waiting list to the confirmed joiner list; or
- a participant is manually removed by a Club Admin.
This allows different employees to receive notifications based on the course activities relevant to them.
4. Configuration of Courseplan View
There are 4 types of views Center Admin can choose to display kursplan on their website (Desktop/Mobile) :
- Day View
- Week View
- Compact Day
- Compact Week
Center Admin goes to : Site Pages > System page > Kursplan
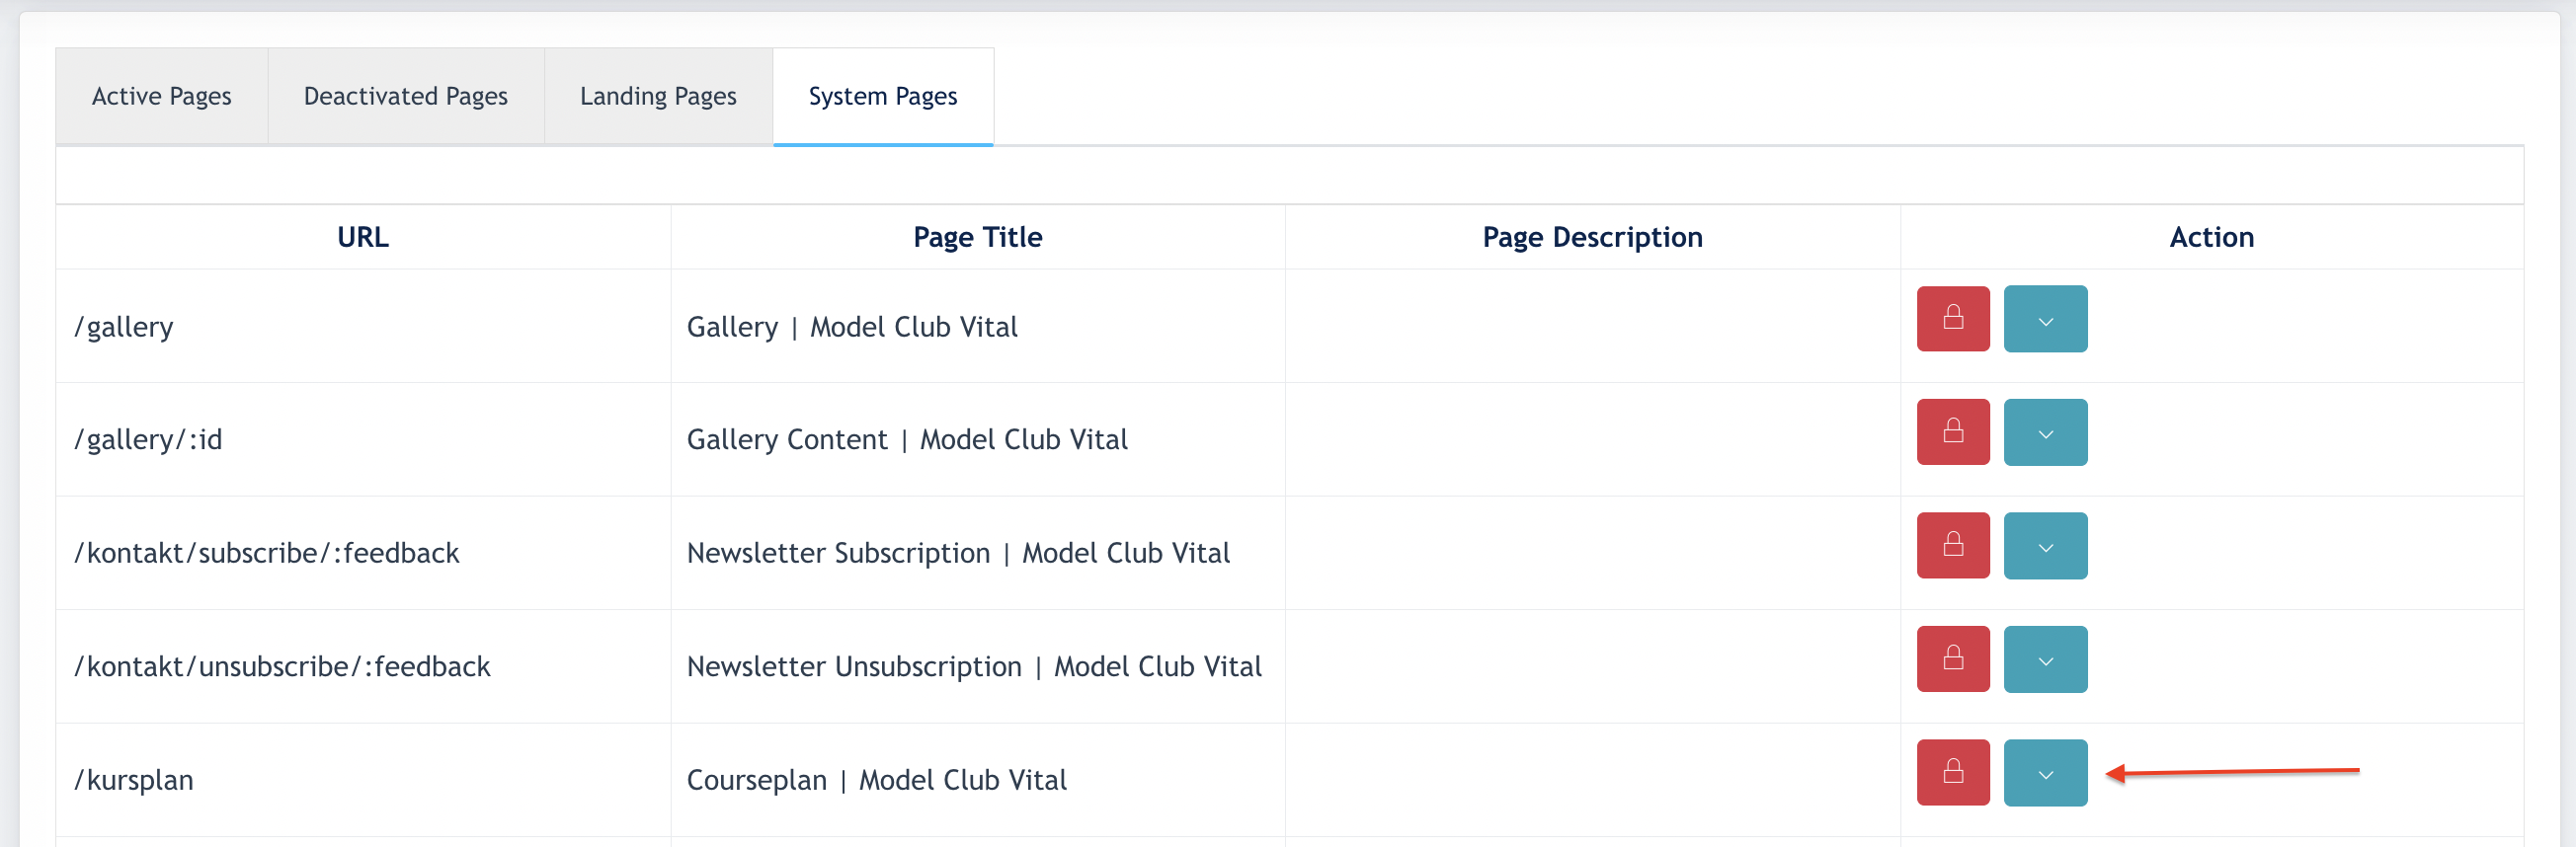
Click [ Edit ] on any language page :

Enter the Editor View of Courseplan > Click on [ Edit ]
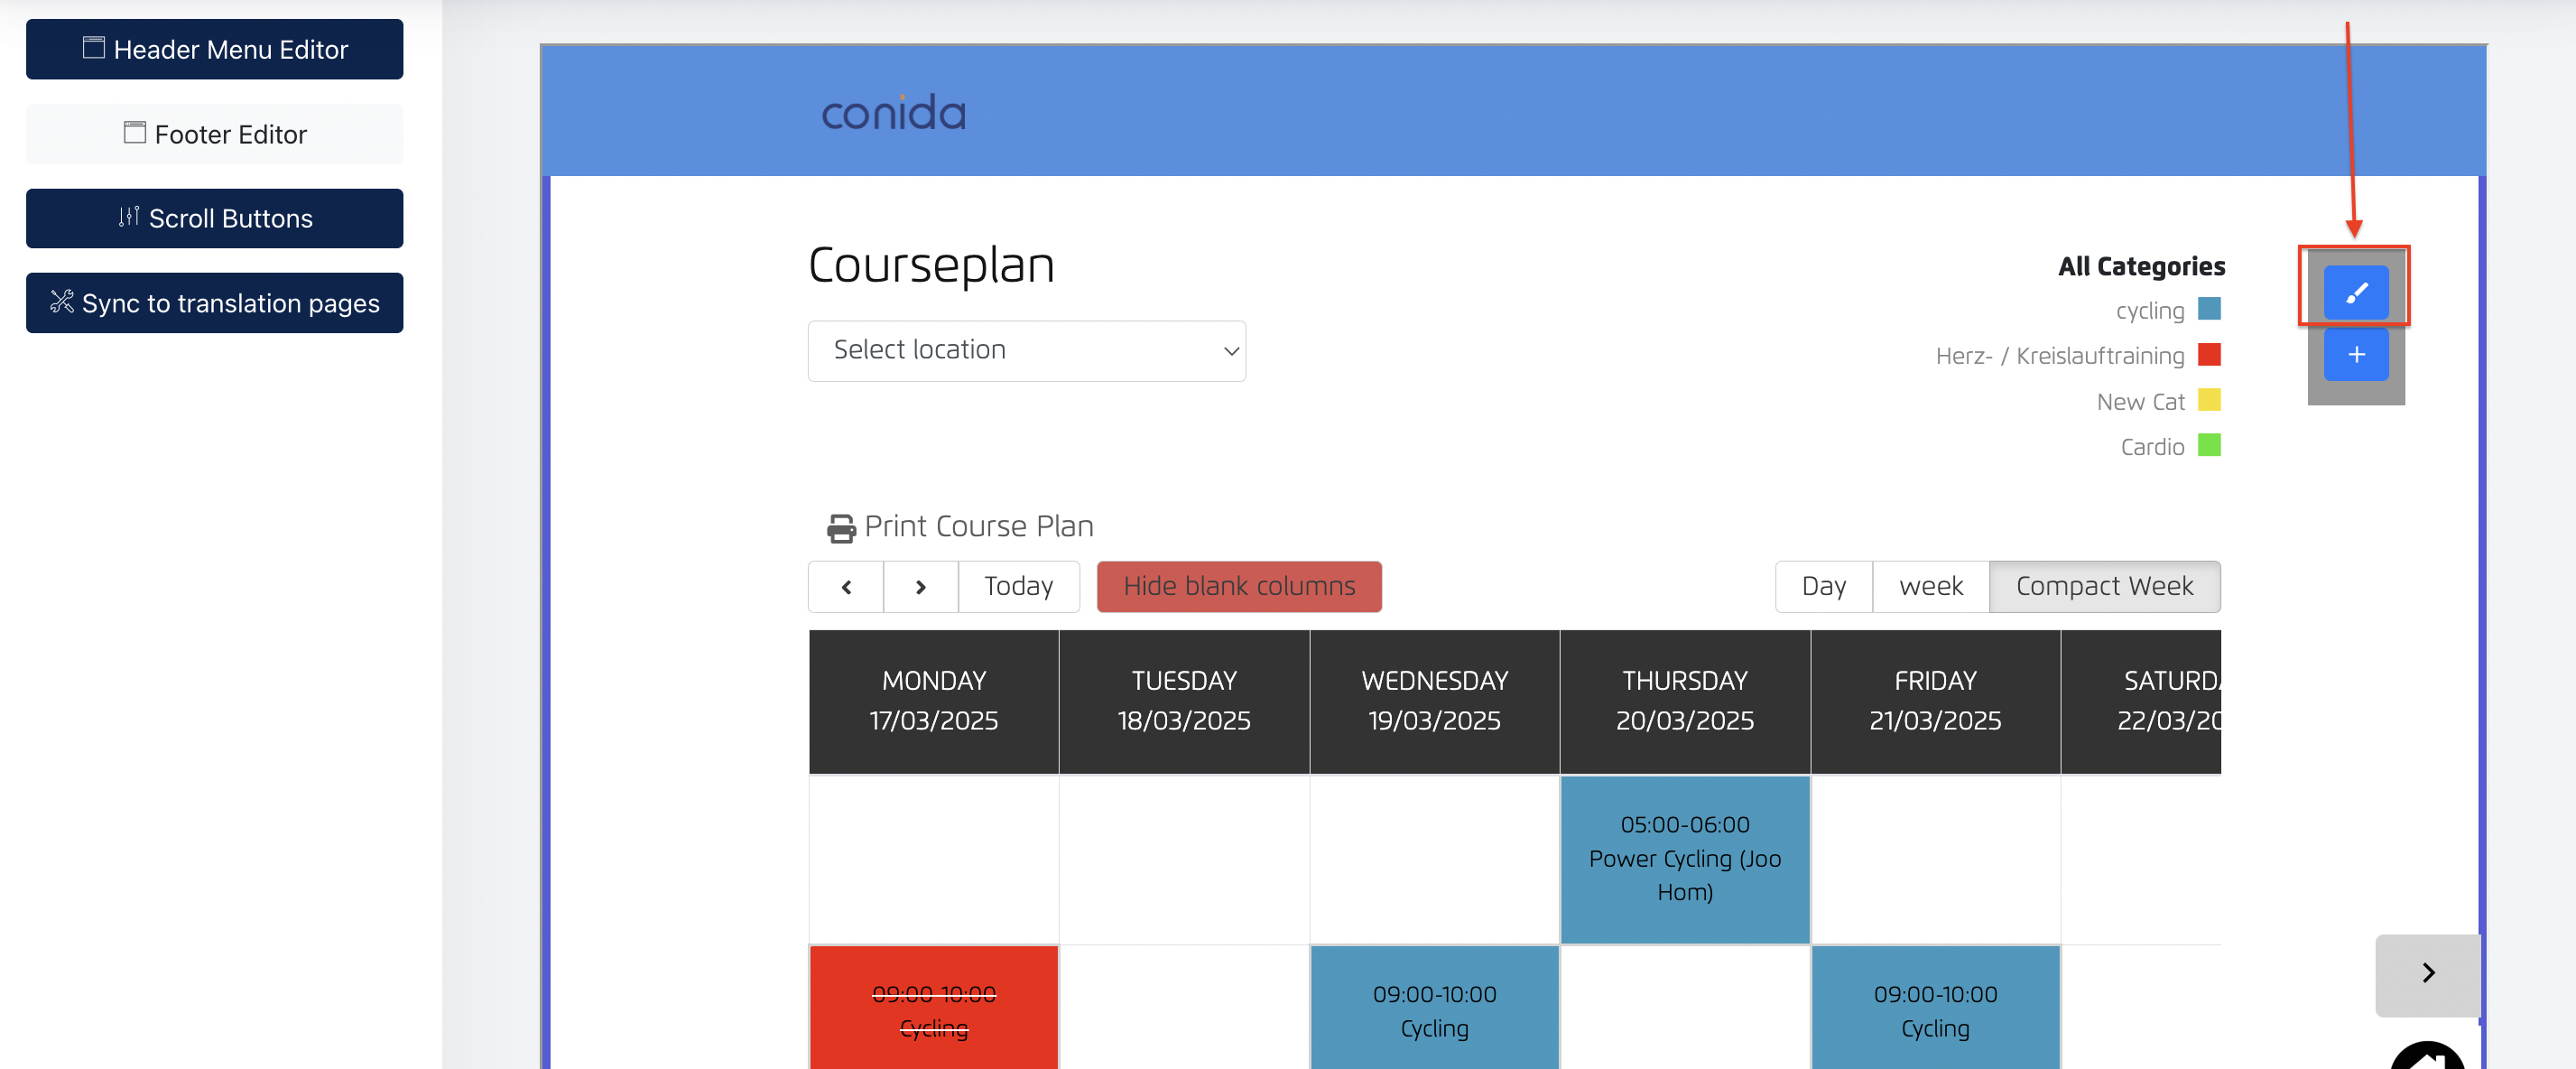
From this modal, Admin can configure Kursplan view on Website/Mobile.
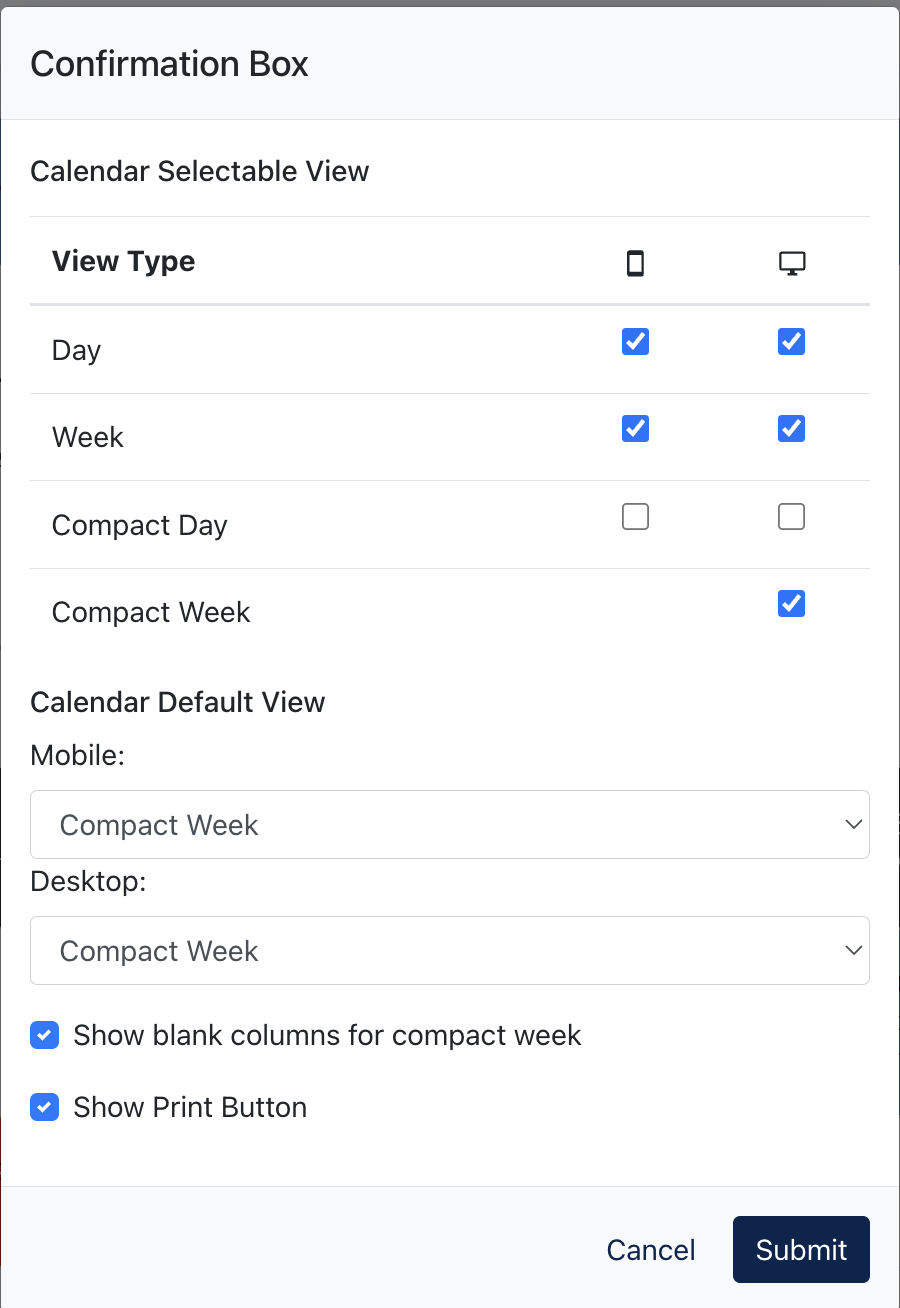
- View Type : Admin may configure different view types which is available on the Website :/kursplan
- Based on the above configuration, Desktop will display [ Day ], [ Week ] and [ Compact Week ]
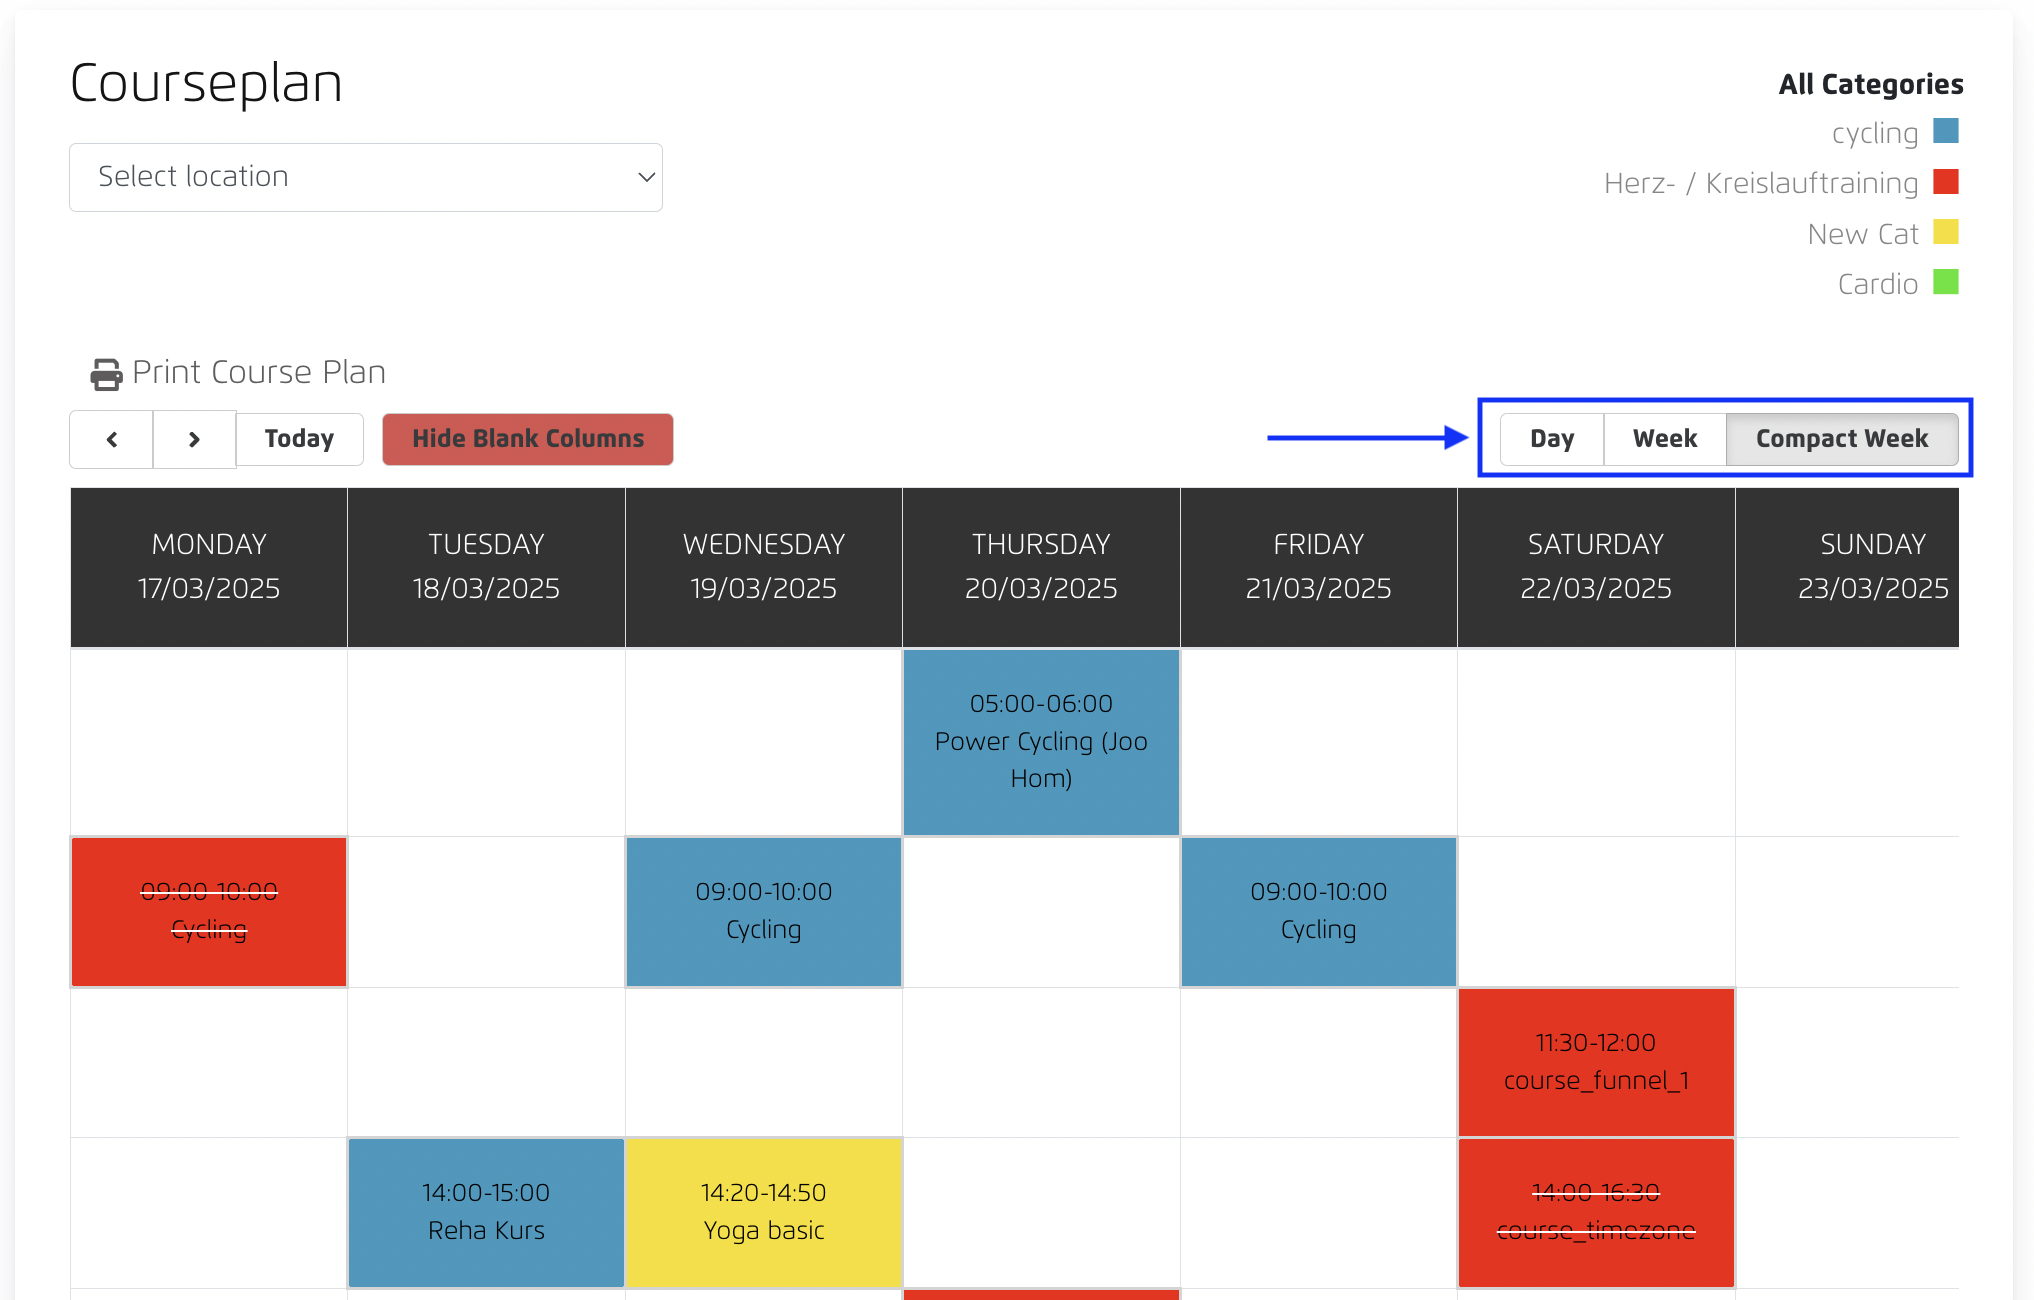
- Calendar Default View : Admin can configure the default view of the calendar when a visitor first logon to this page.
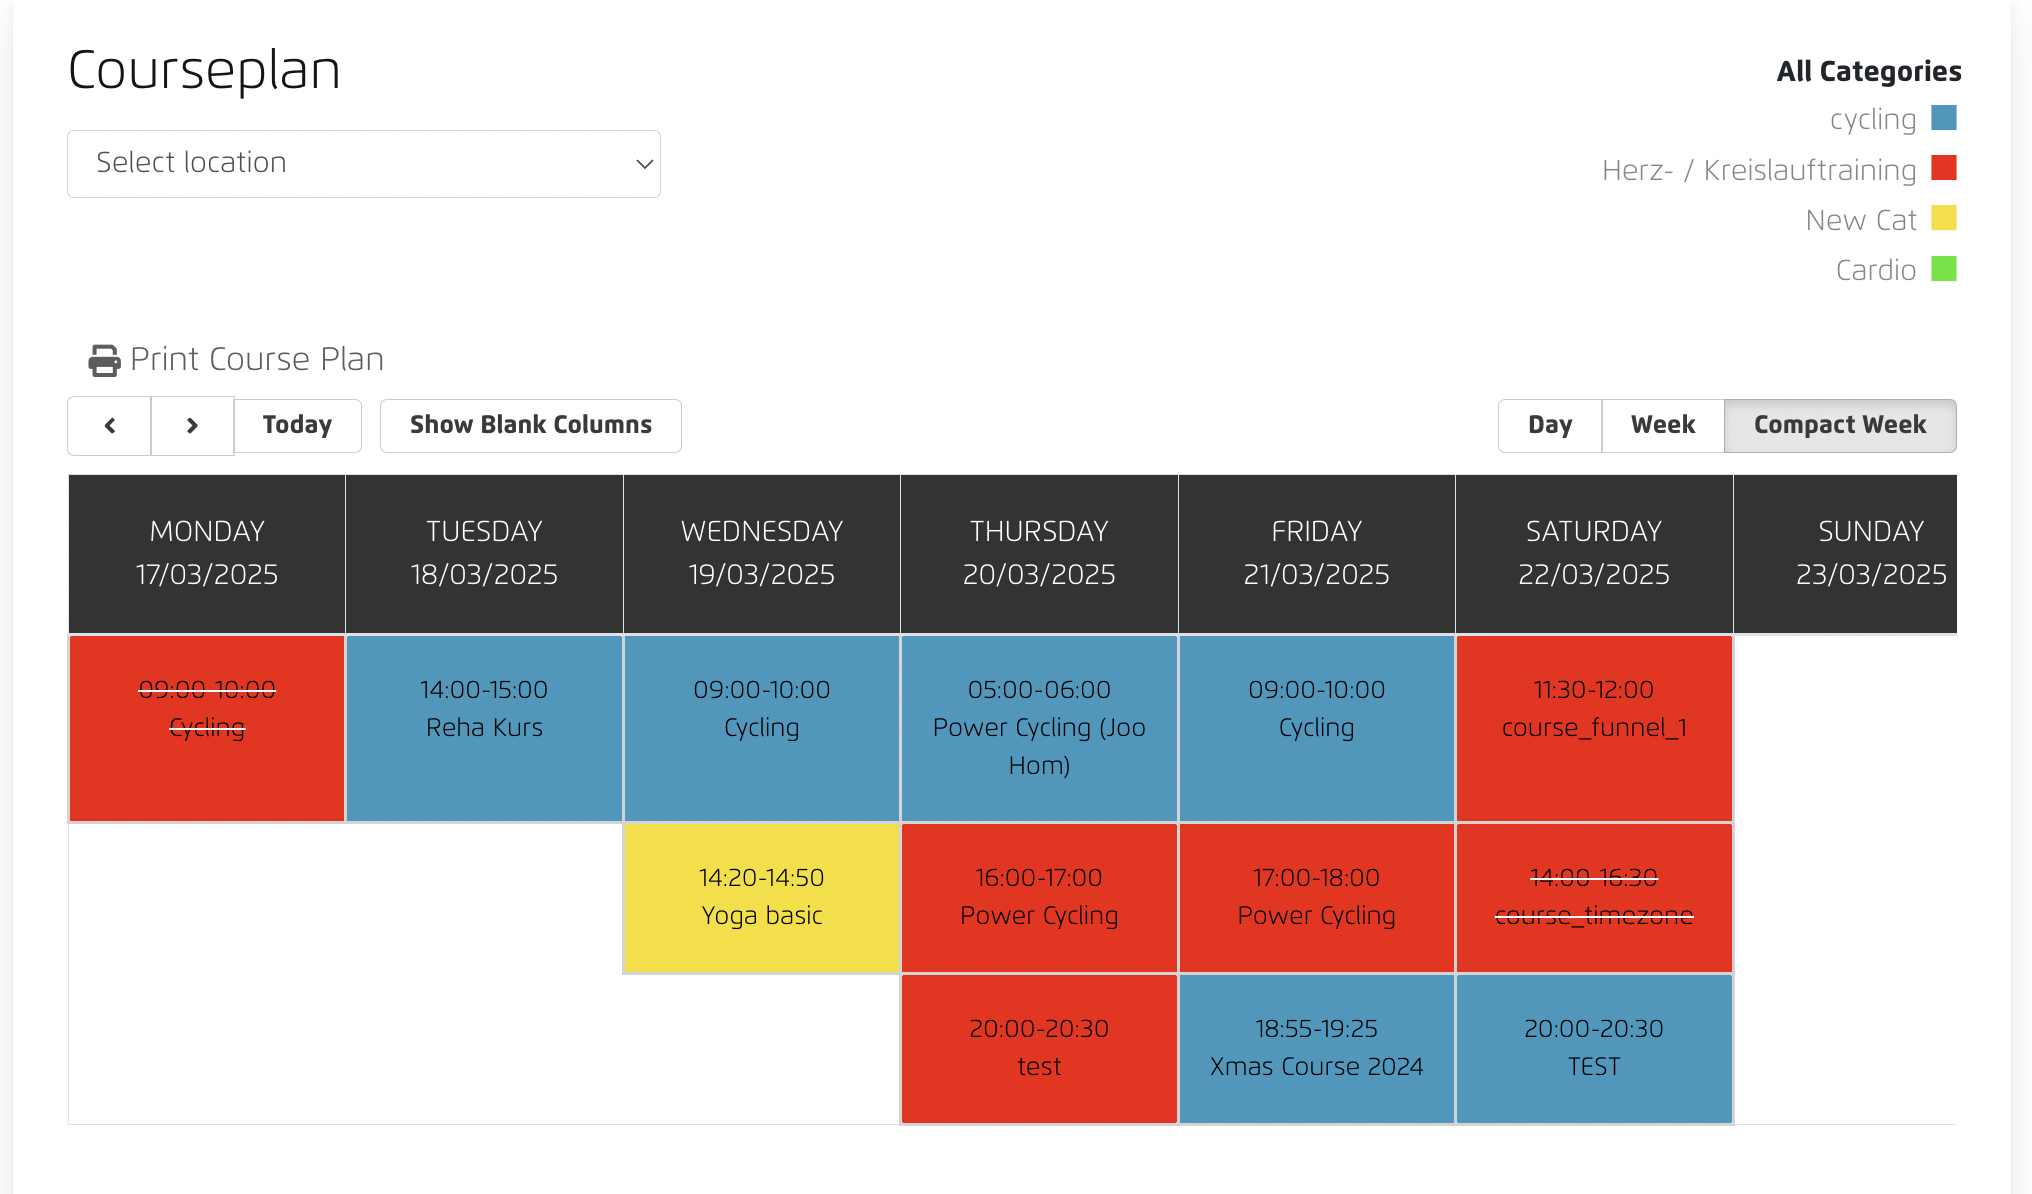
- Show blank columns for compact week : When this is unchecked, all blank column will be removed and the calendar will be displayed like below :
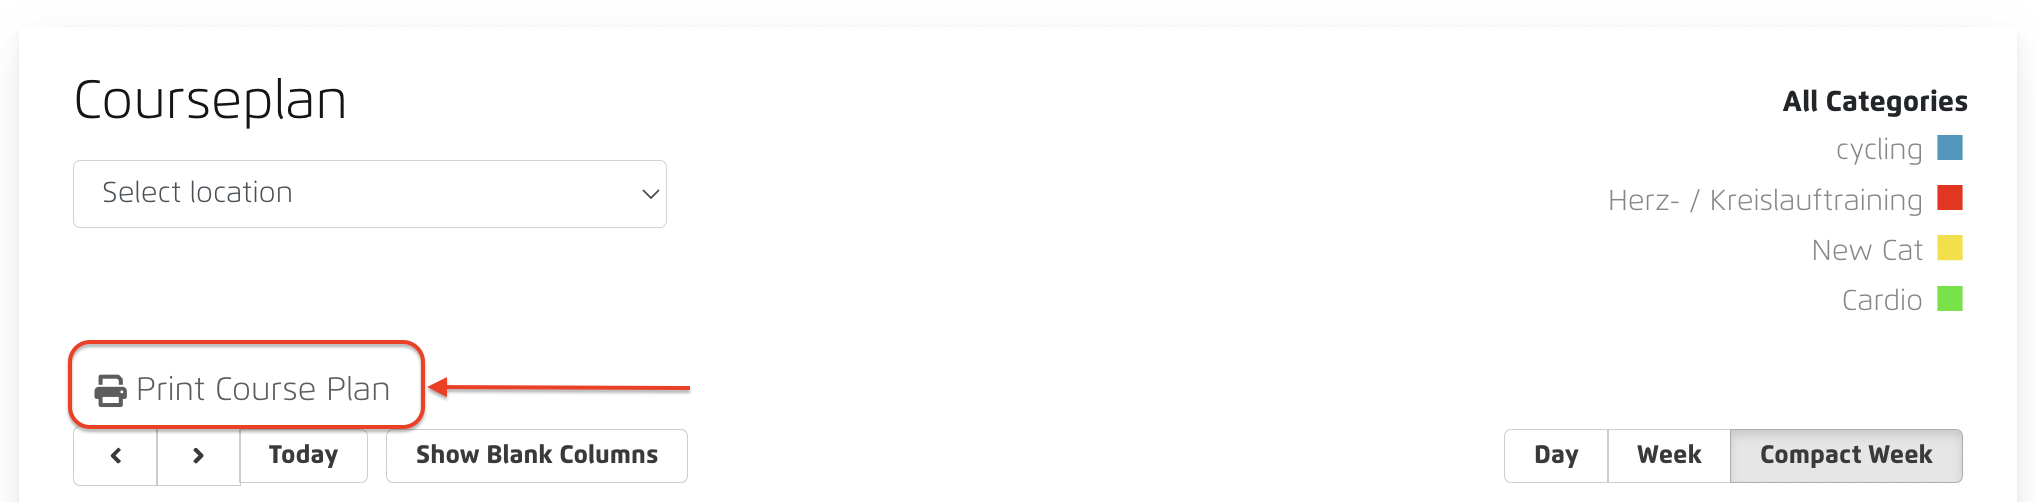
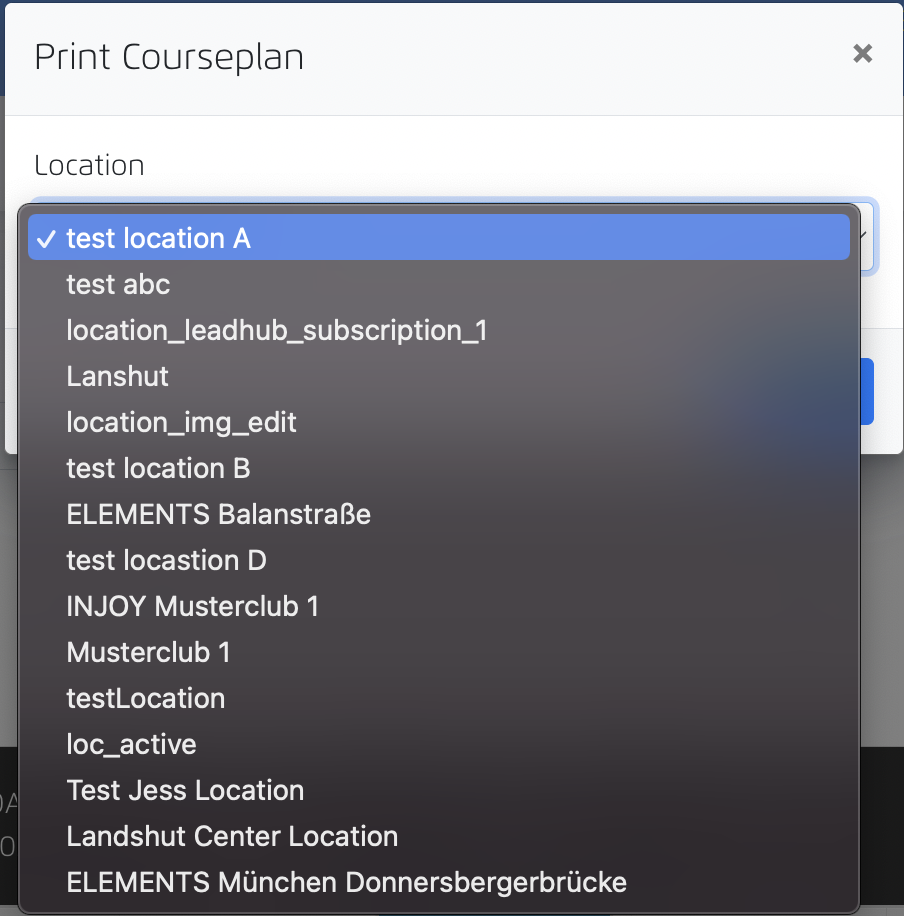
- Following modals pops-up when click on the button:
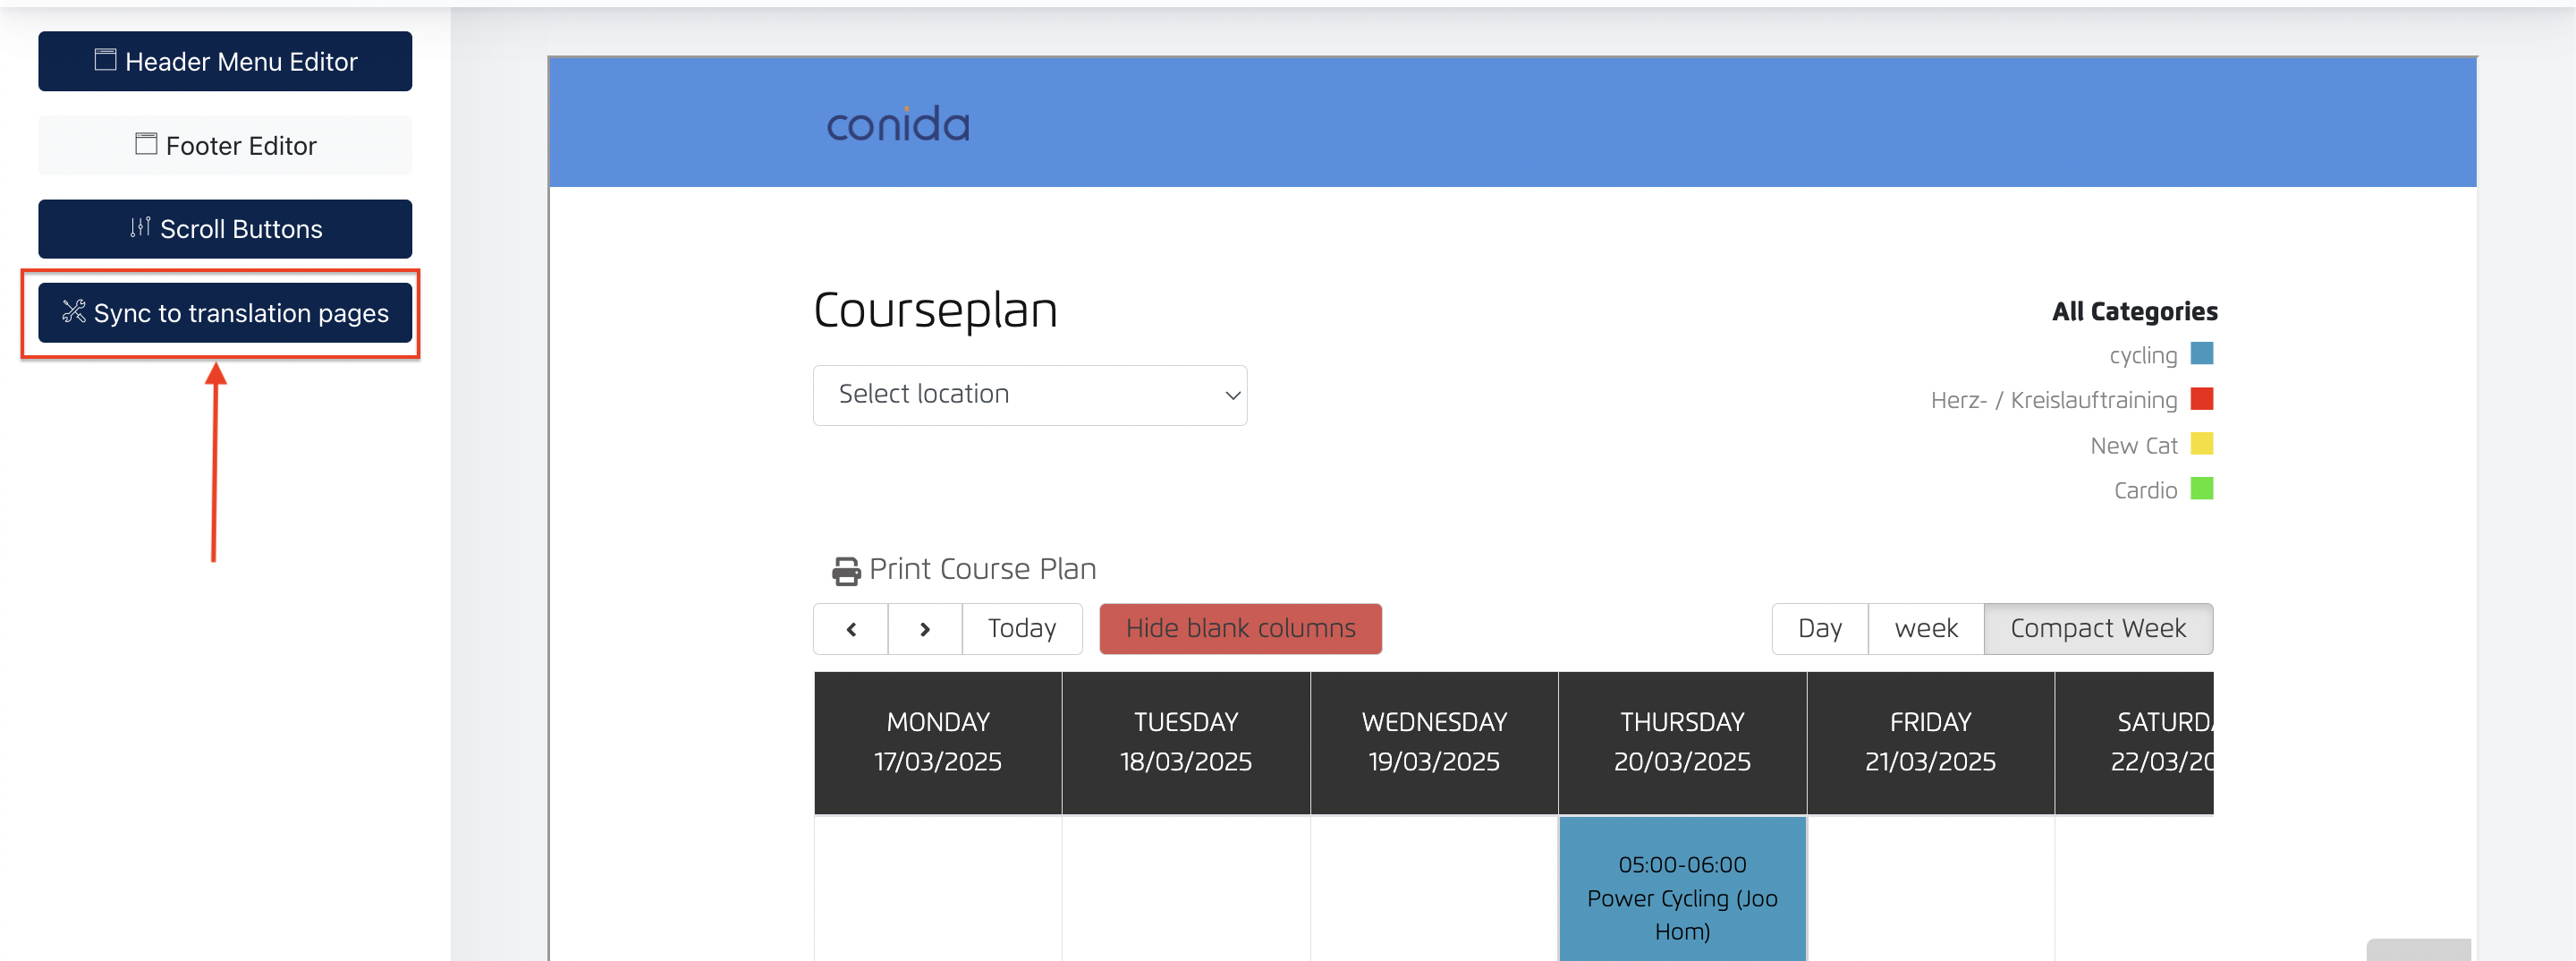
When above setting are all done, Admin may click " Sync to Translation Page" so the same setting applies to the rest of the languages pages.
5. Members
This page allow Center Admin to update members data. Members include members subscribe to Gym Membership, which include physical membership, and Online Membership.
5.1 Add a Member
Click "Create Member"

Fill in the member data accordingly :
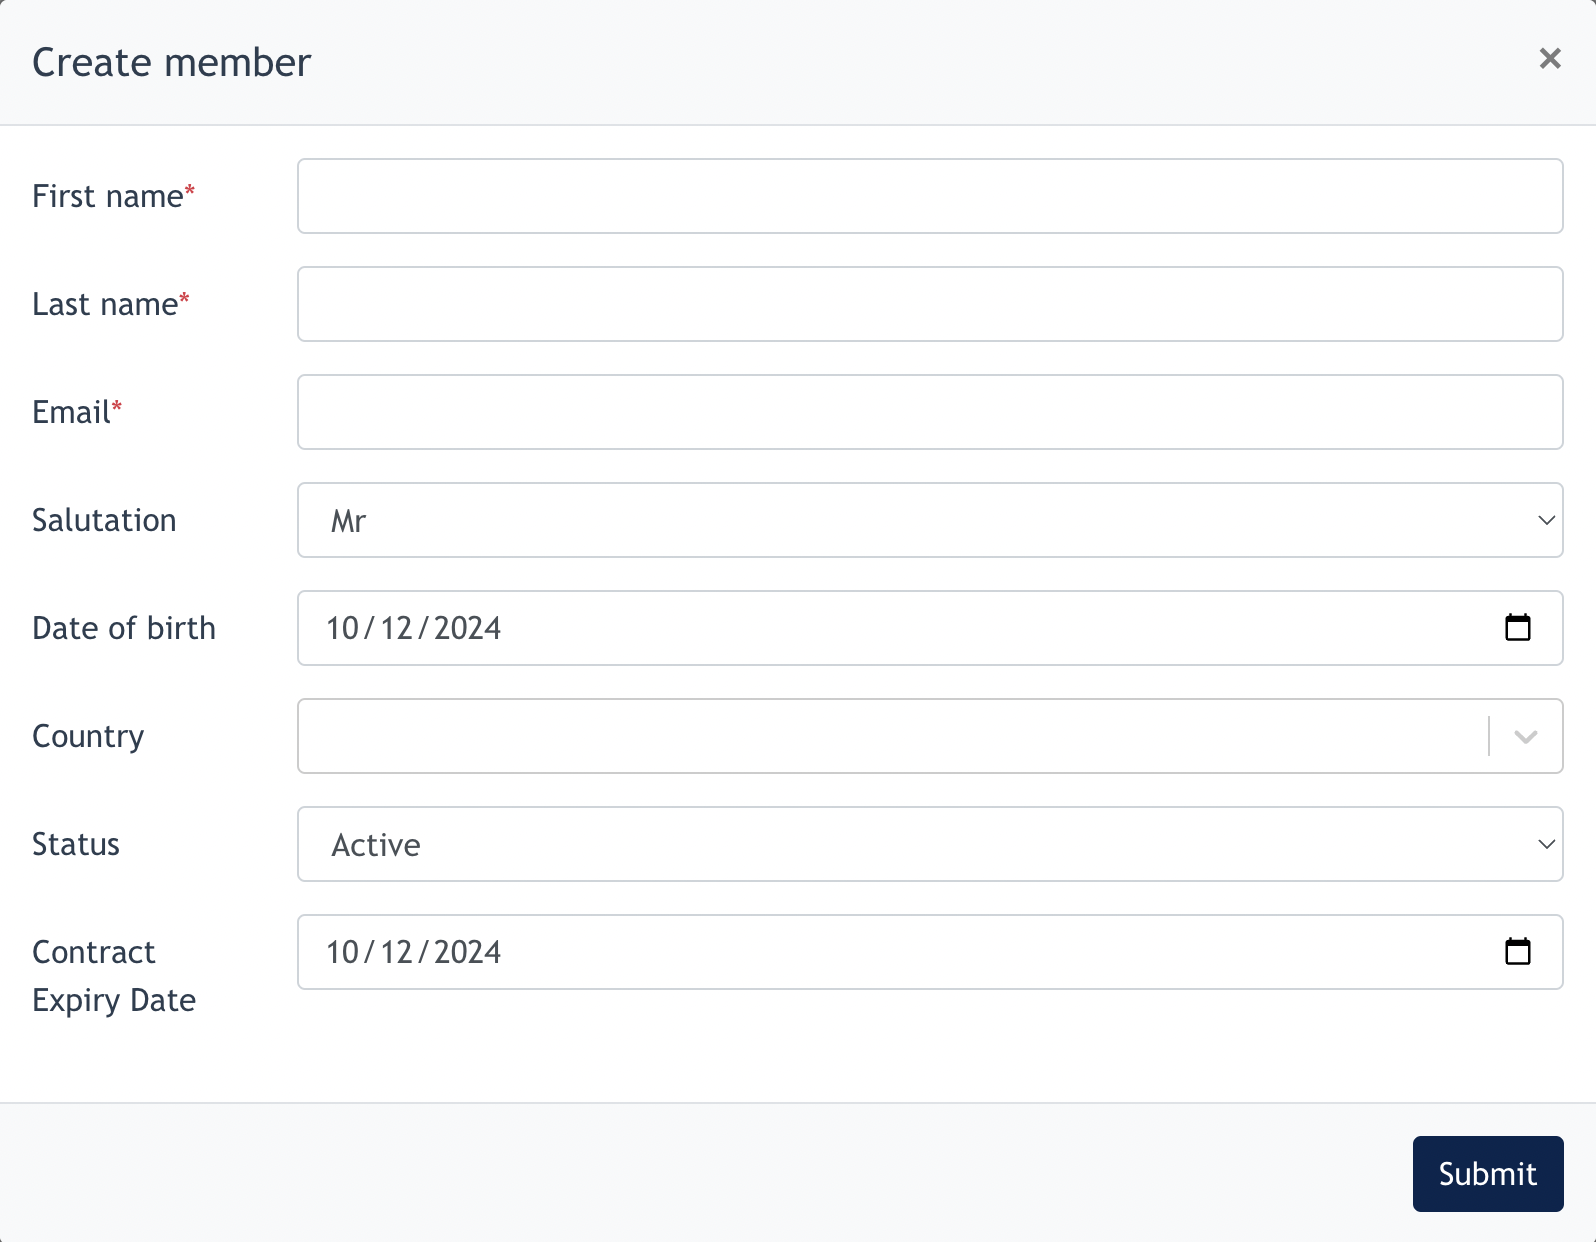
Remarks : Contract Expiry Date refers to the Membership End Date.
5.2 Bulk Uploads
Admin may choose to upload a listing of members in Excel File, by click on the [ Bulk Uploads ] button.

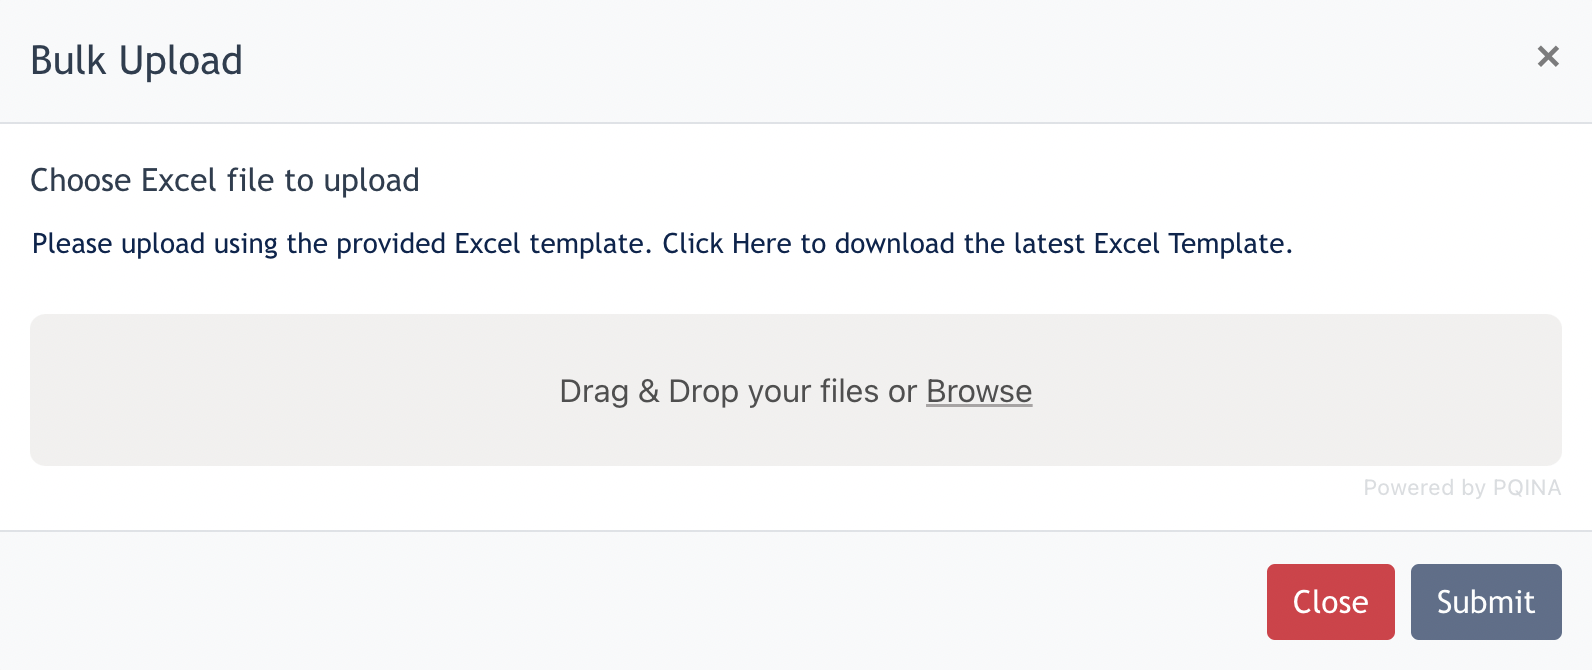
- Download a sample of Excel Template.
- Admin needs to create an Excel file and input members data into the same format/template given.
- Upload this Excel File
- Click Submit --> Members data successfully added
- the end -