
Admin Panel : Courseplan
Overview
CourseThe planCourseplan is onea mainpaid Ark module infor conidacreating websiteand system.managing Itcourse allowsschedules everyfor Centera fitness center.
Once activated, Admin createscan newset up courses and displaymanage themtheir onschedules through the Courseplan Calendar.
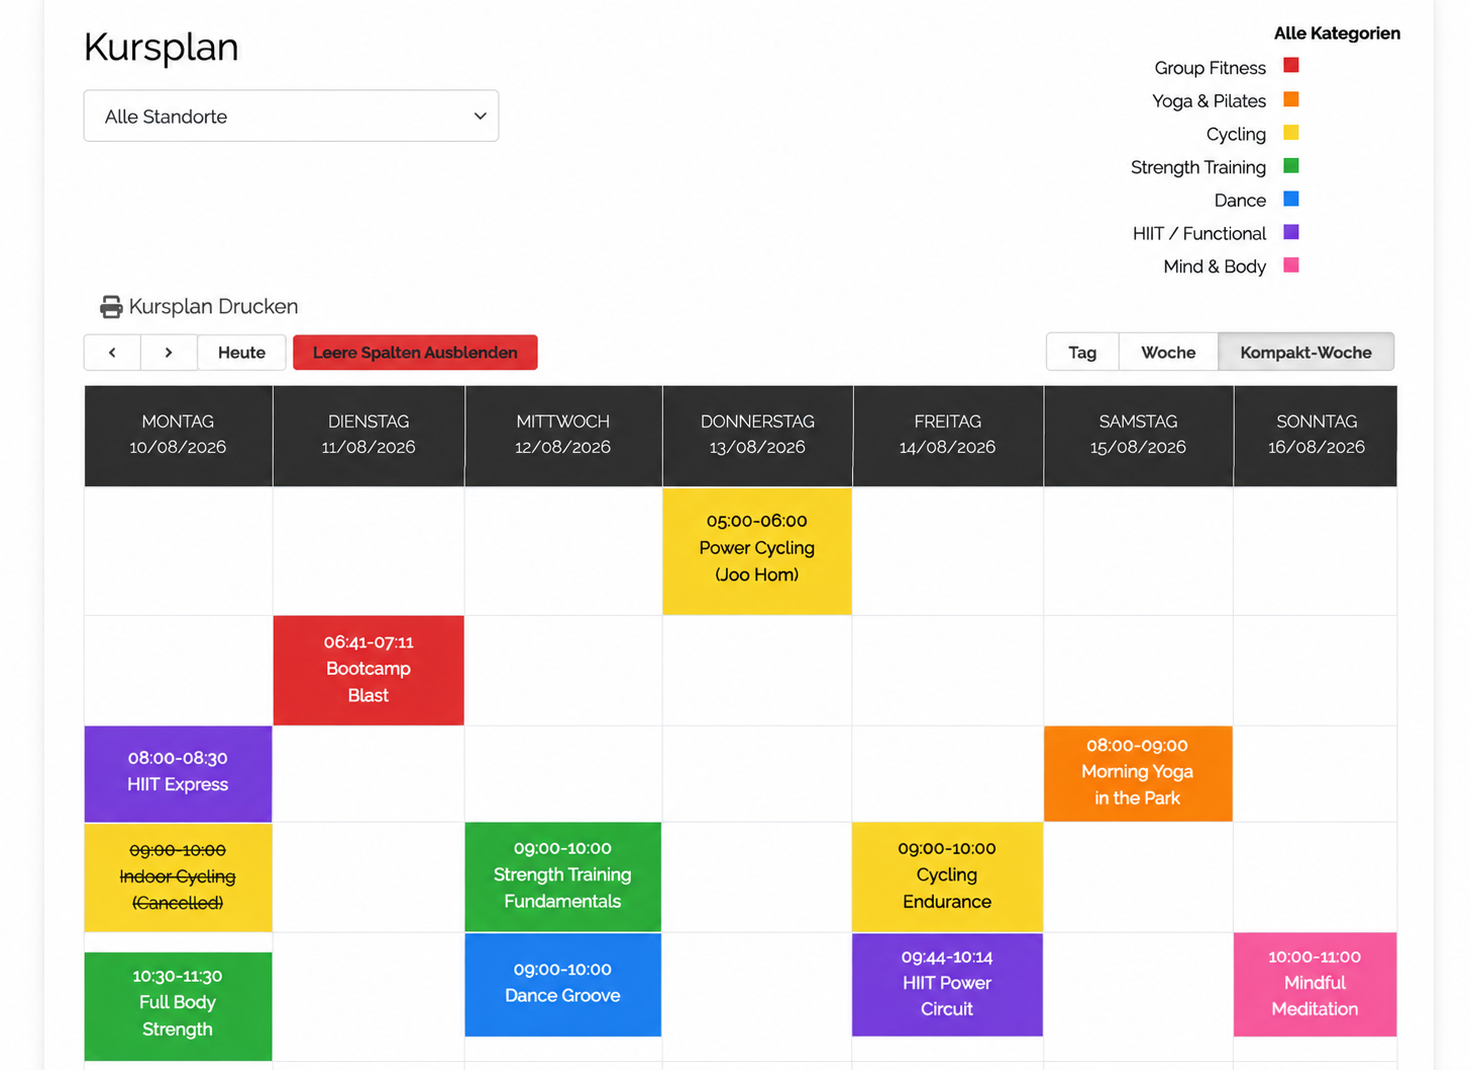
Live View of the Course Calendar
Rooms and Categories
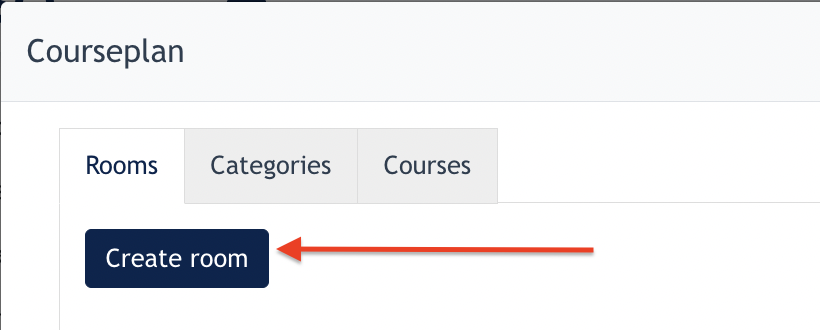
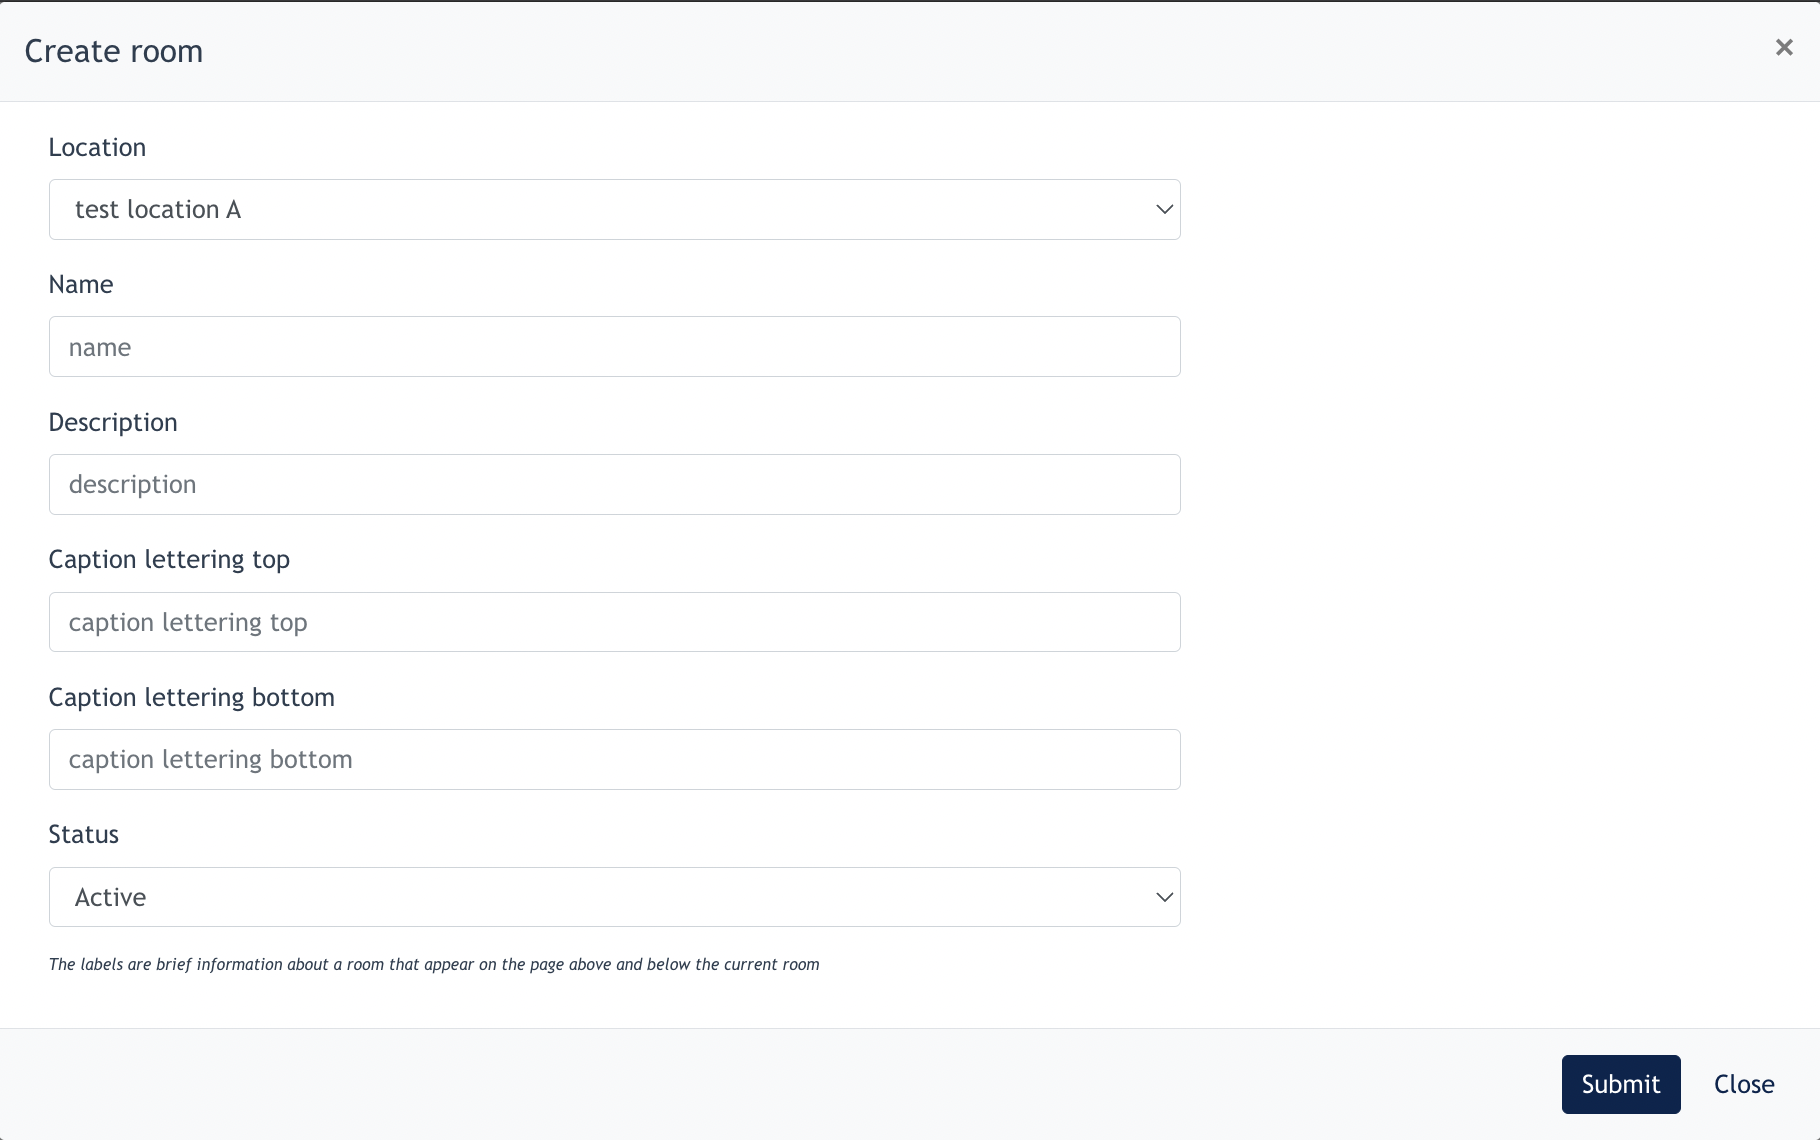
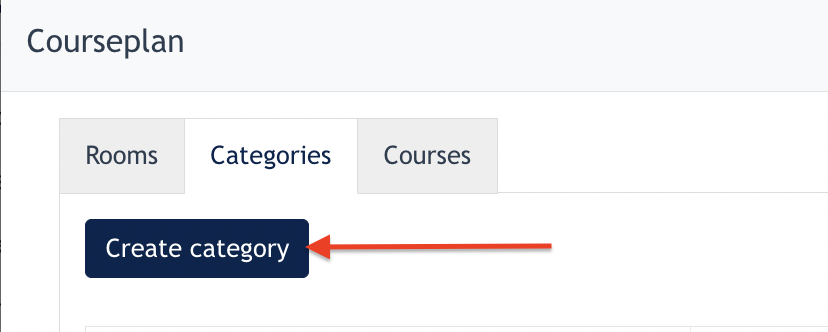
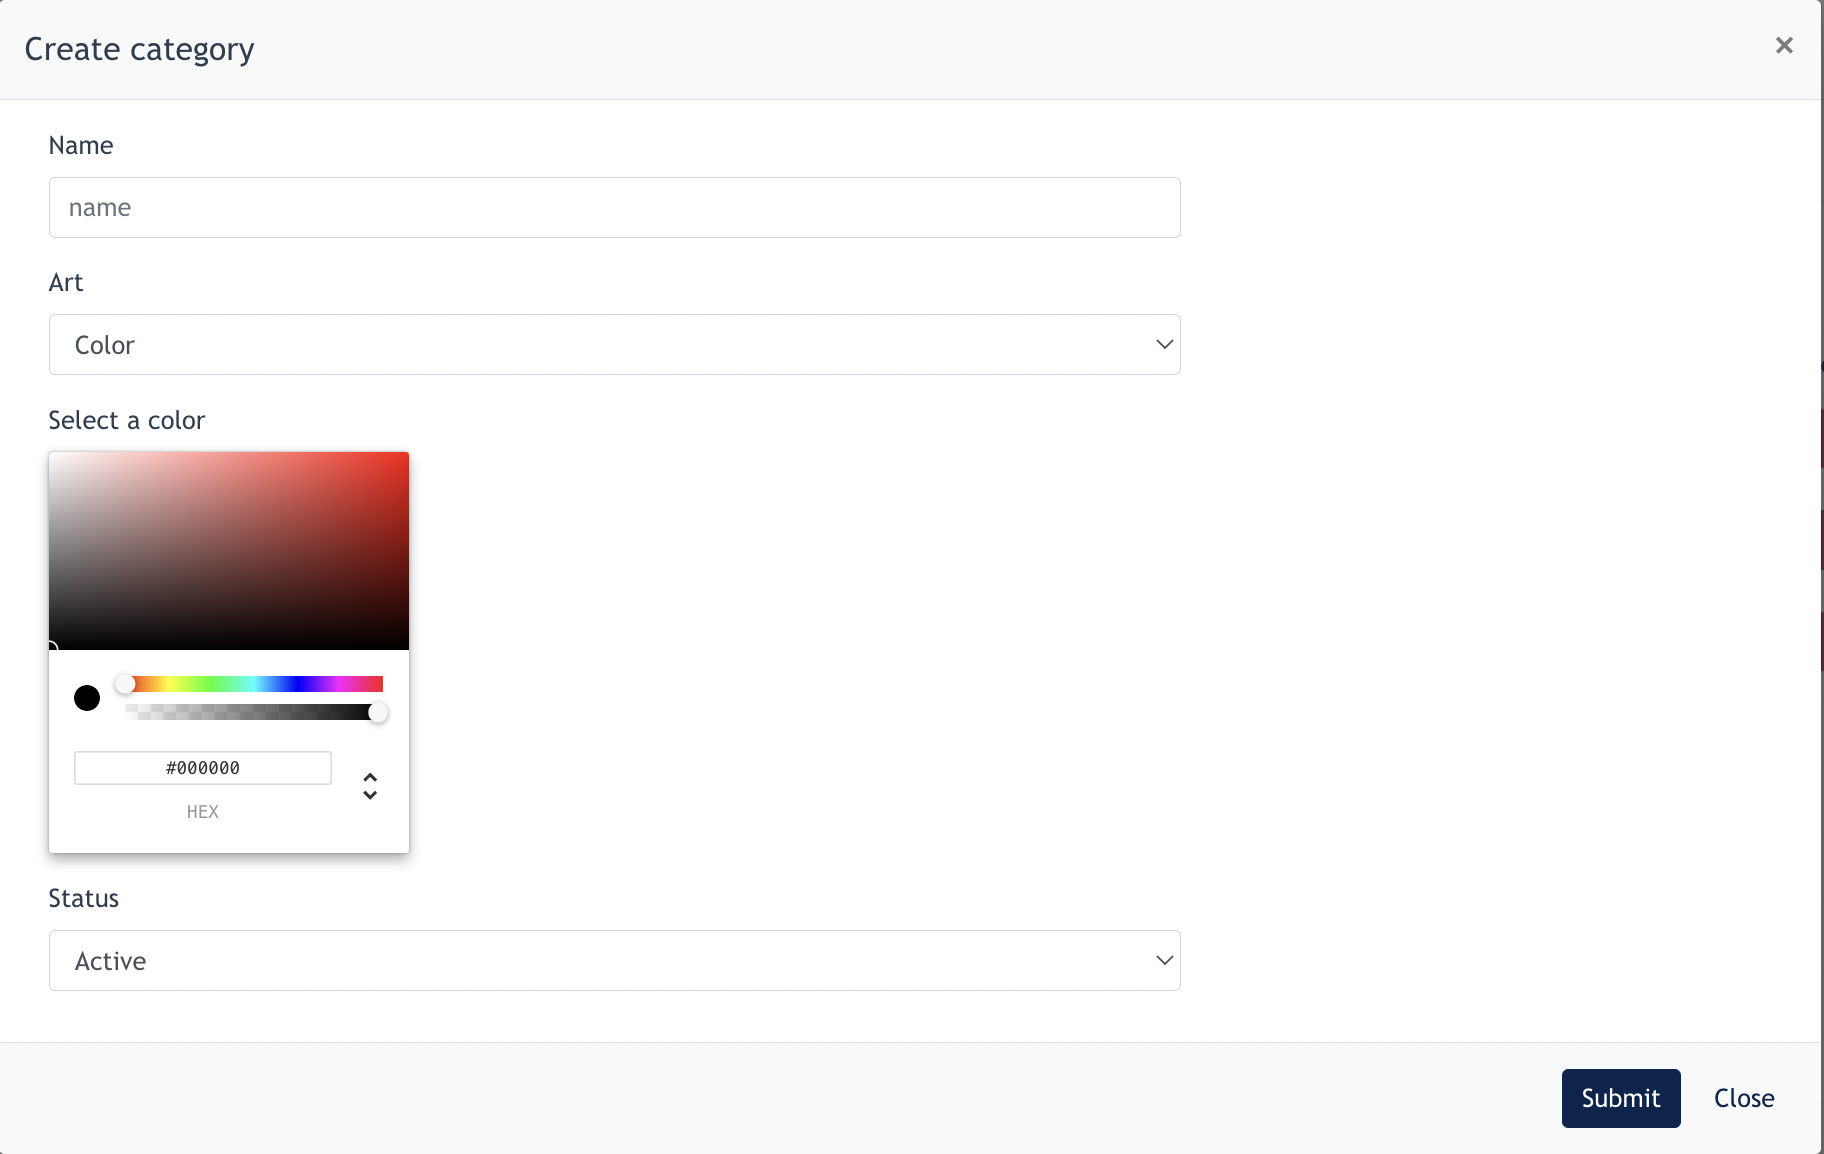
Before creating a course, set up the relevant Rooms and Categories under Setup Calendar.
| Setting | Description |
|---|---|
| Rooms | Defines the room within a fitness center where a course takes place. When creating a room, select the Location it belongs to and enter the room details. |
| Categories | Groups courses by type, such as Cycling, Yoga, or Functional Training. |
1. Creating a Course
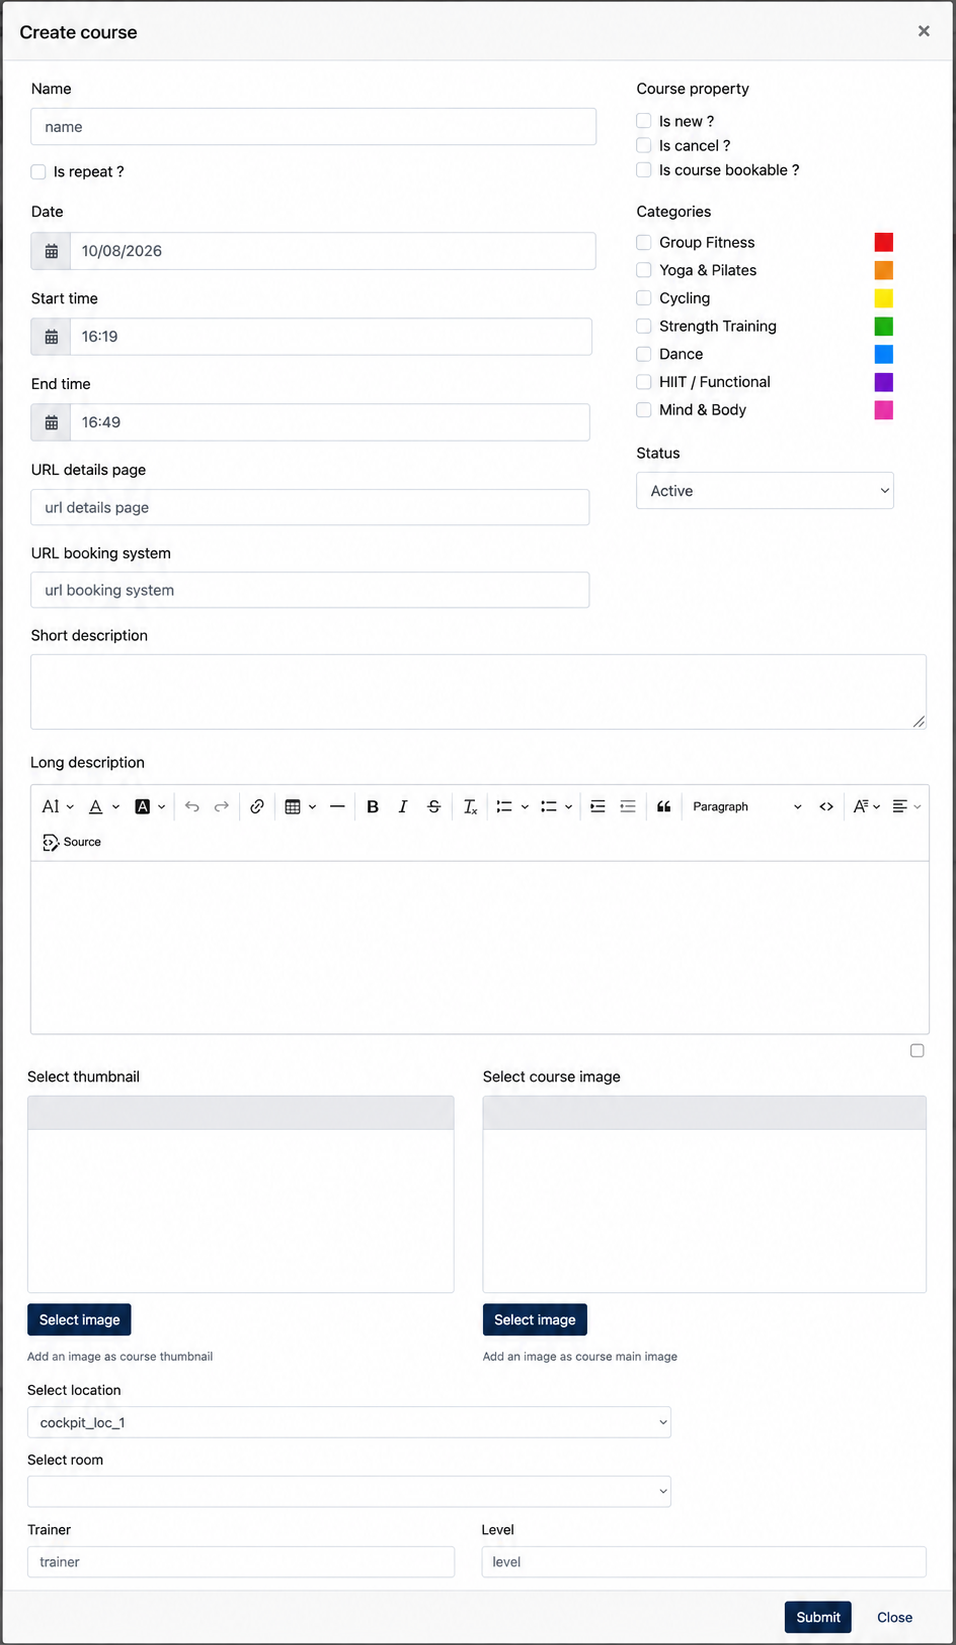
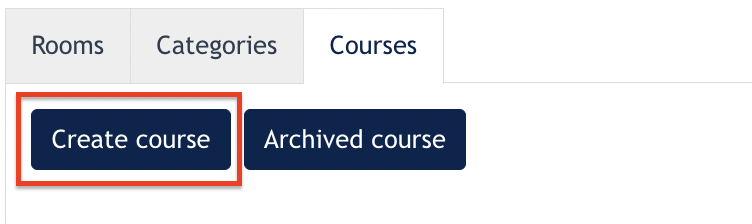
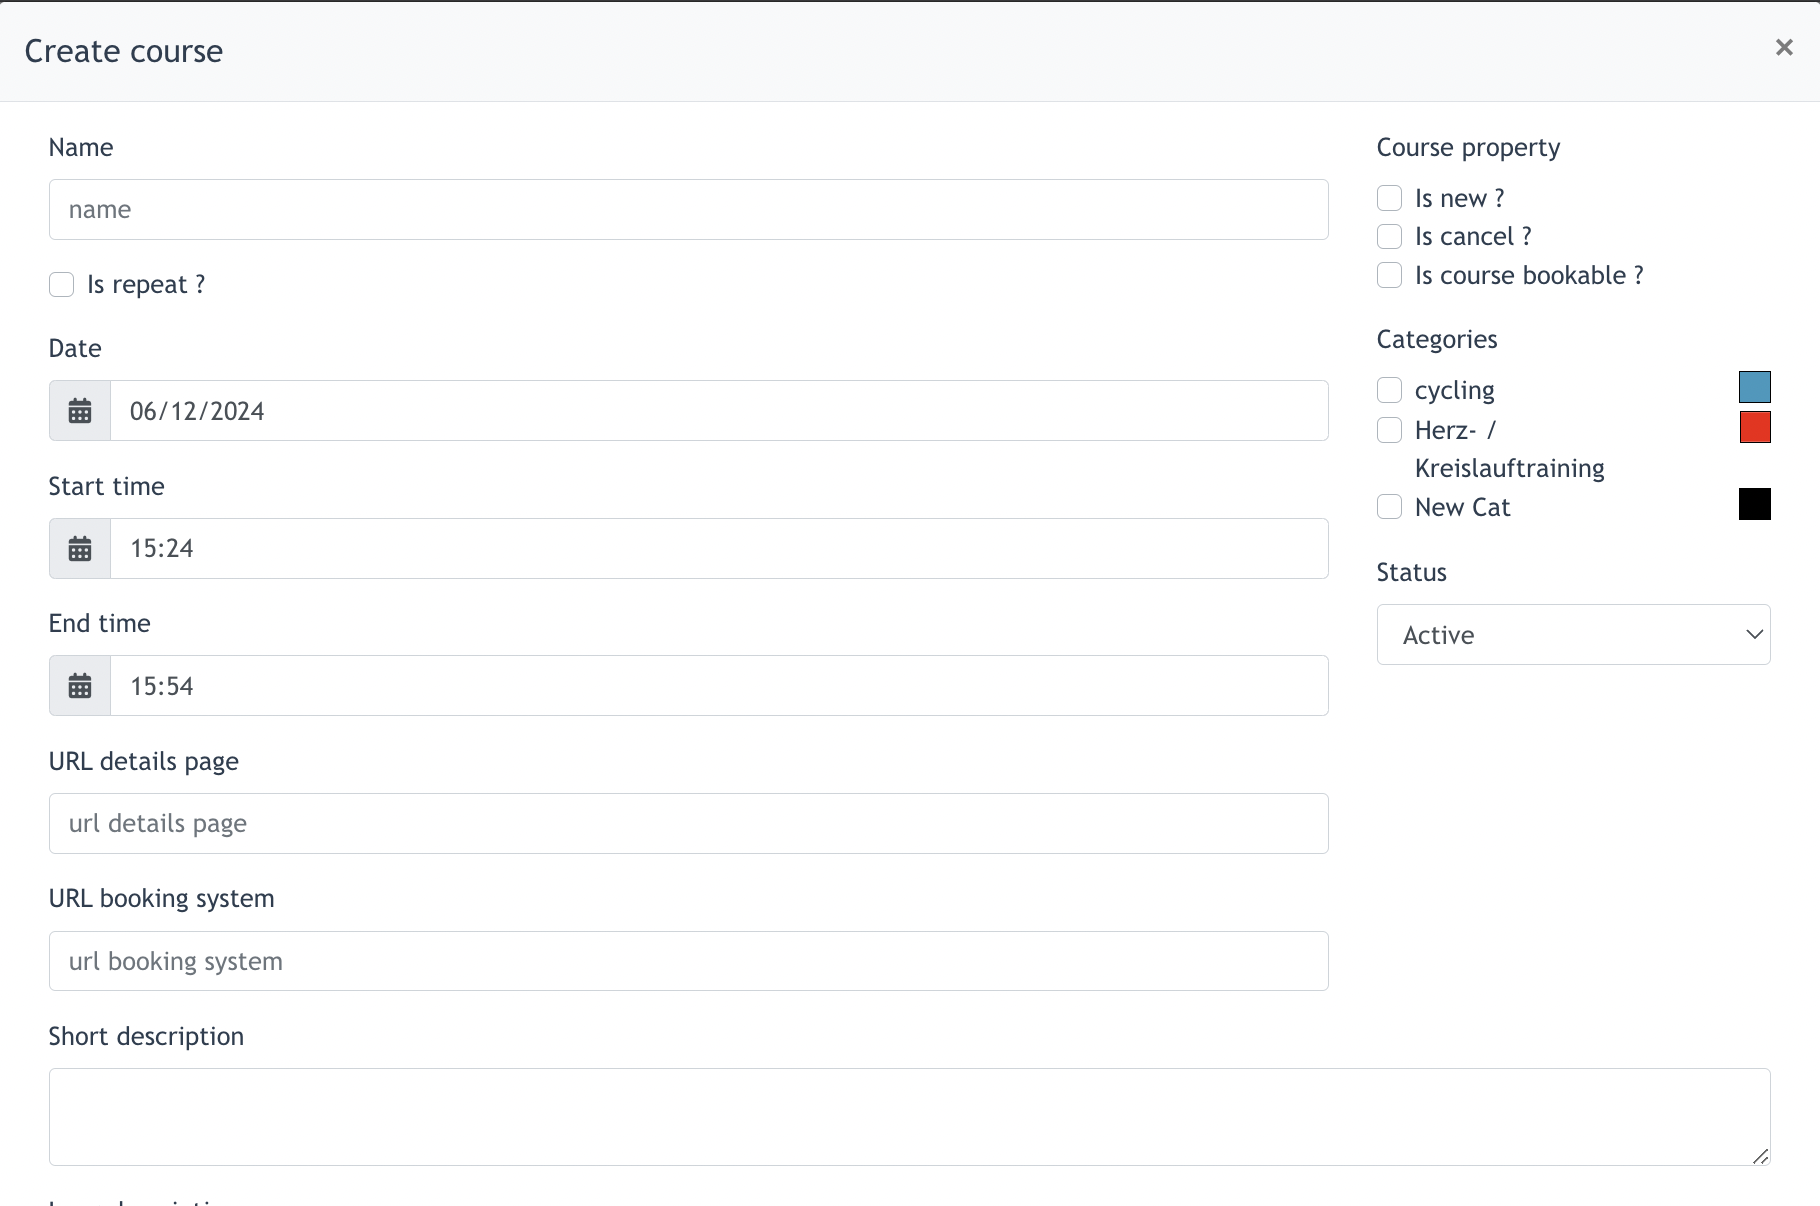
Go to Courseplan → Setup Calendar → Courses and click Create course.
Enter the course schedule,information and allowconfigure Centerits members / website visitor to book the courses online.
1. Courseplan Calendar
This is the place where Center Admin views existing schedule, create new course,schedule and viewproperties joinersas booking list.
Example of a courseplan admin panel page :required.
Clicks
| Field | Description |
|---|---|
| Name |
Enter the name of the |
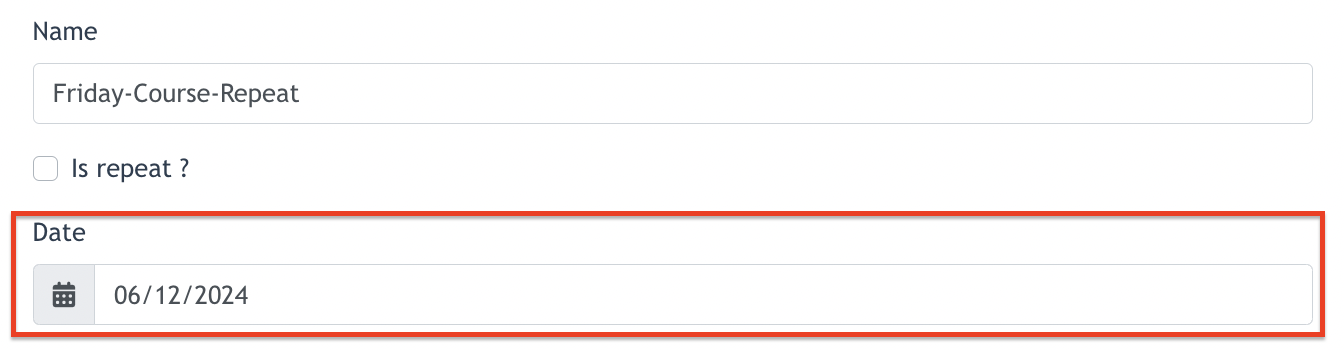
| Is repeat? |
Enable this |
| Date | Select the |
Start time 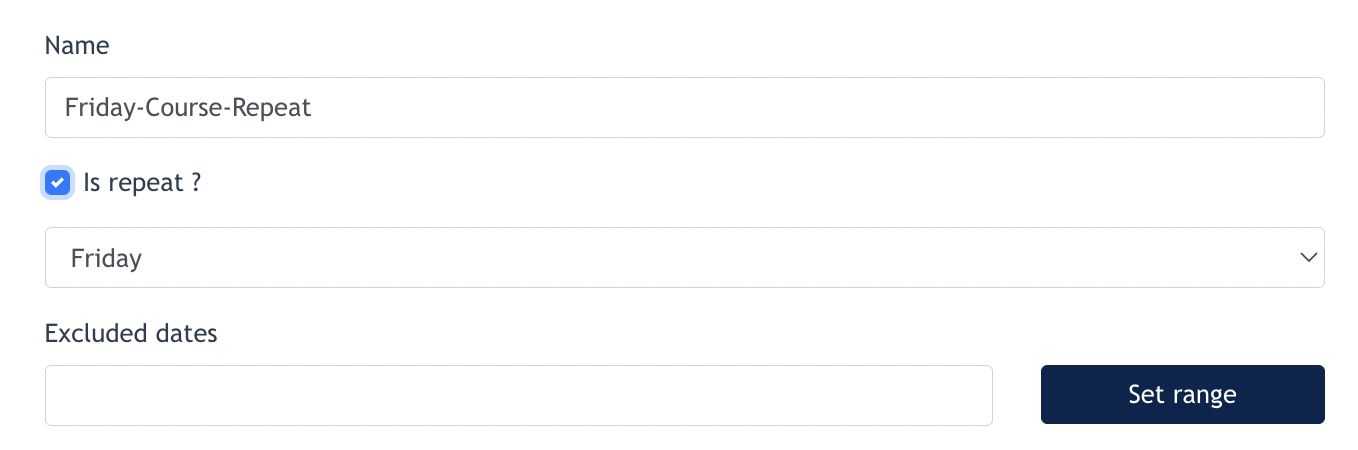
|
Define |
| URL details page |
Optional |
| URL booking system |
Optional URL to an external booking system |
| Short description |
Enter |
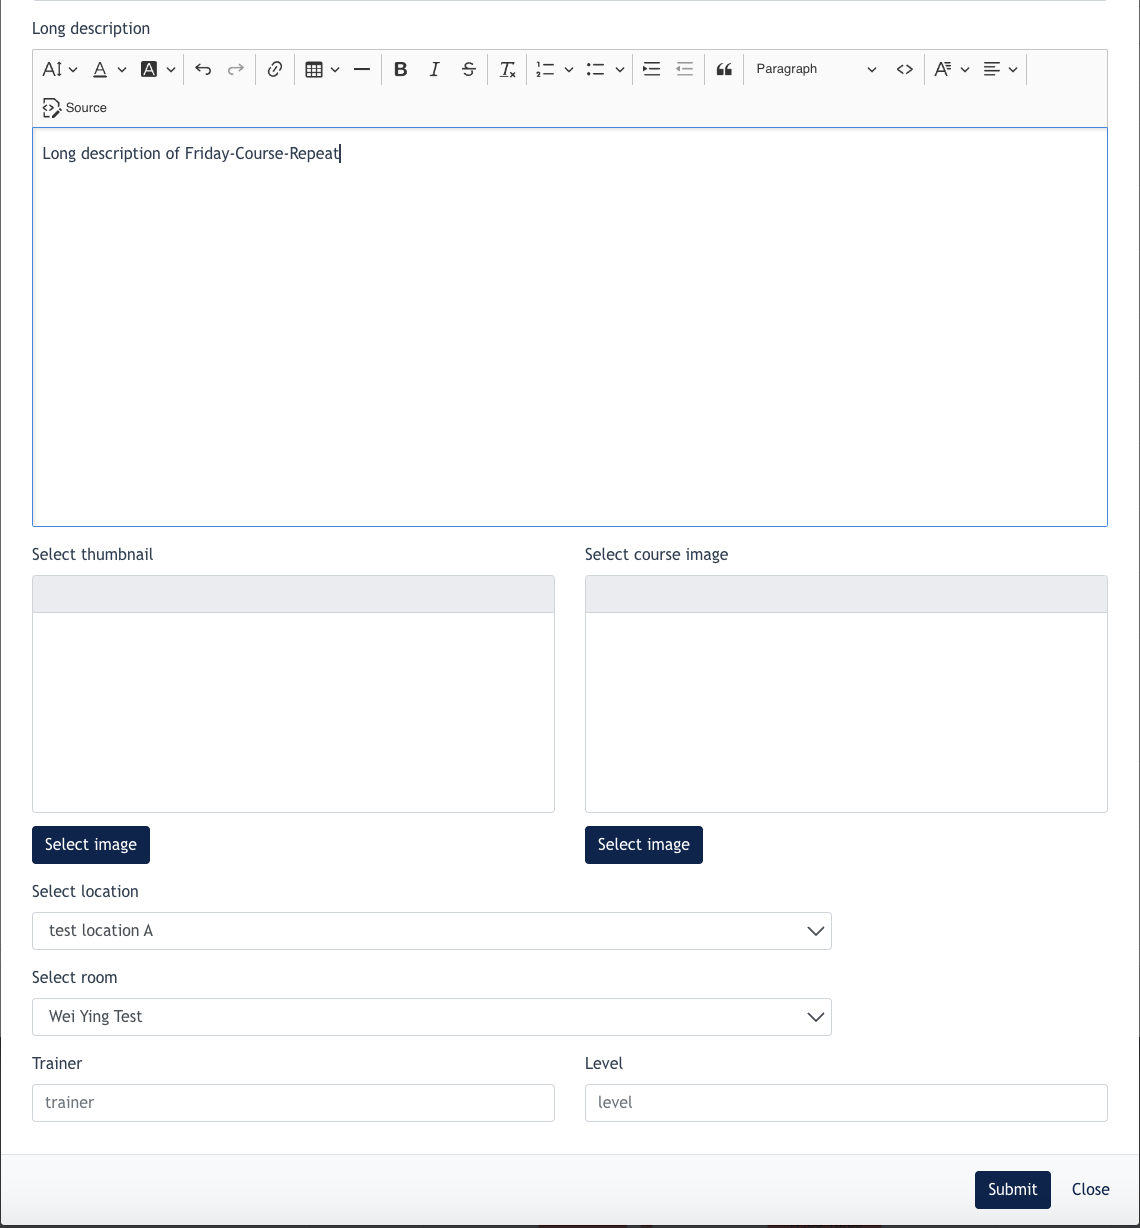
| Long description |
Enter a detailed description of the |
| Select Thumbnail | Add an image as course |
| Select |
Add |
| Course property | Select |
| Categories |
Assign |
| Status | Set whether the course |
Course level of this course
Properties
Before submitting the course detail, make sure theThe following areproperties alsocan configuredbe :applied where required:
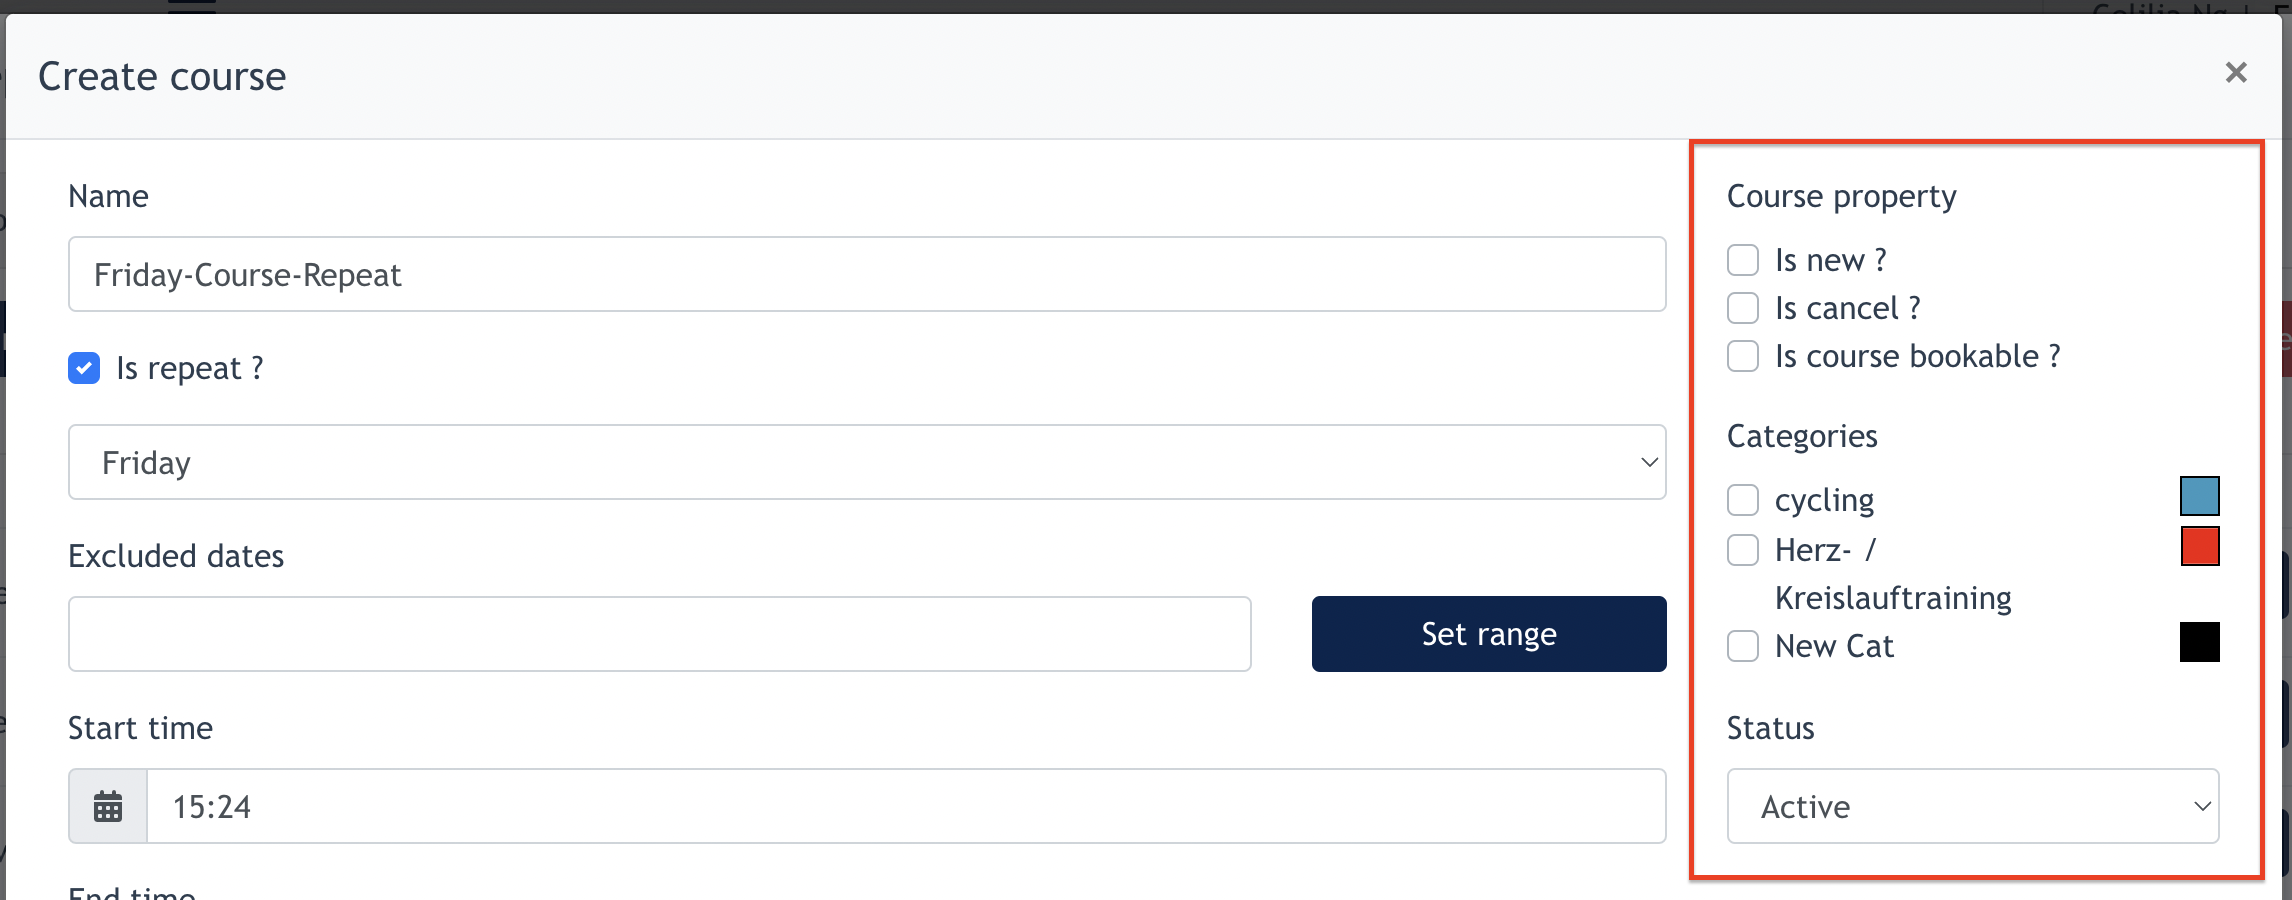
Course property:- Is
New:Check this if the Course is Newly created course Is Cancelnew?:–Check this if Admin wants to cancel this courseIs Bookable: Check thisMarks if the course isopen for bookingCapacity: Center Admin can set how many people are allowed to join this course.
- Is
CategoriesIs cancel?:Category–createdMarkswith status active will be displayed here. It's mandatory for everythe coursetoasbelong to at least 1 category.cancelled.ClickIsSubmitcoursetobookable?save– Indicates that booking is available for the course.
After completing the course information, save the course to add it to the Courseplan Calendar.
2. About Course Listing
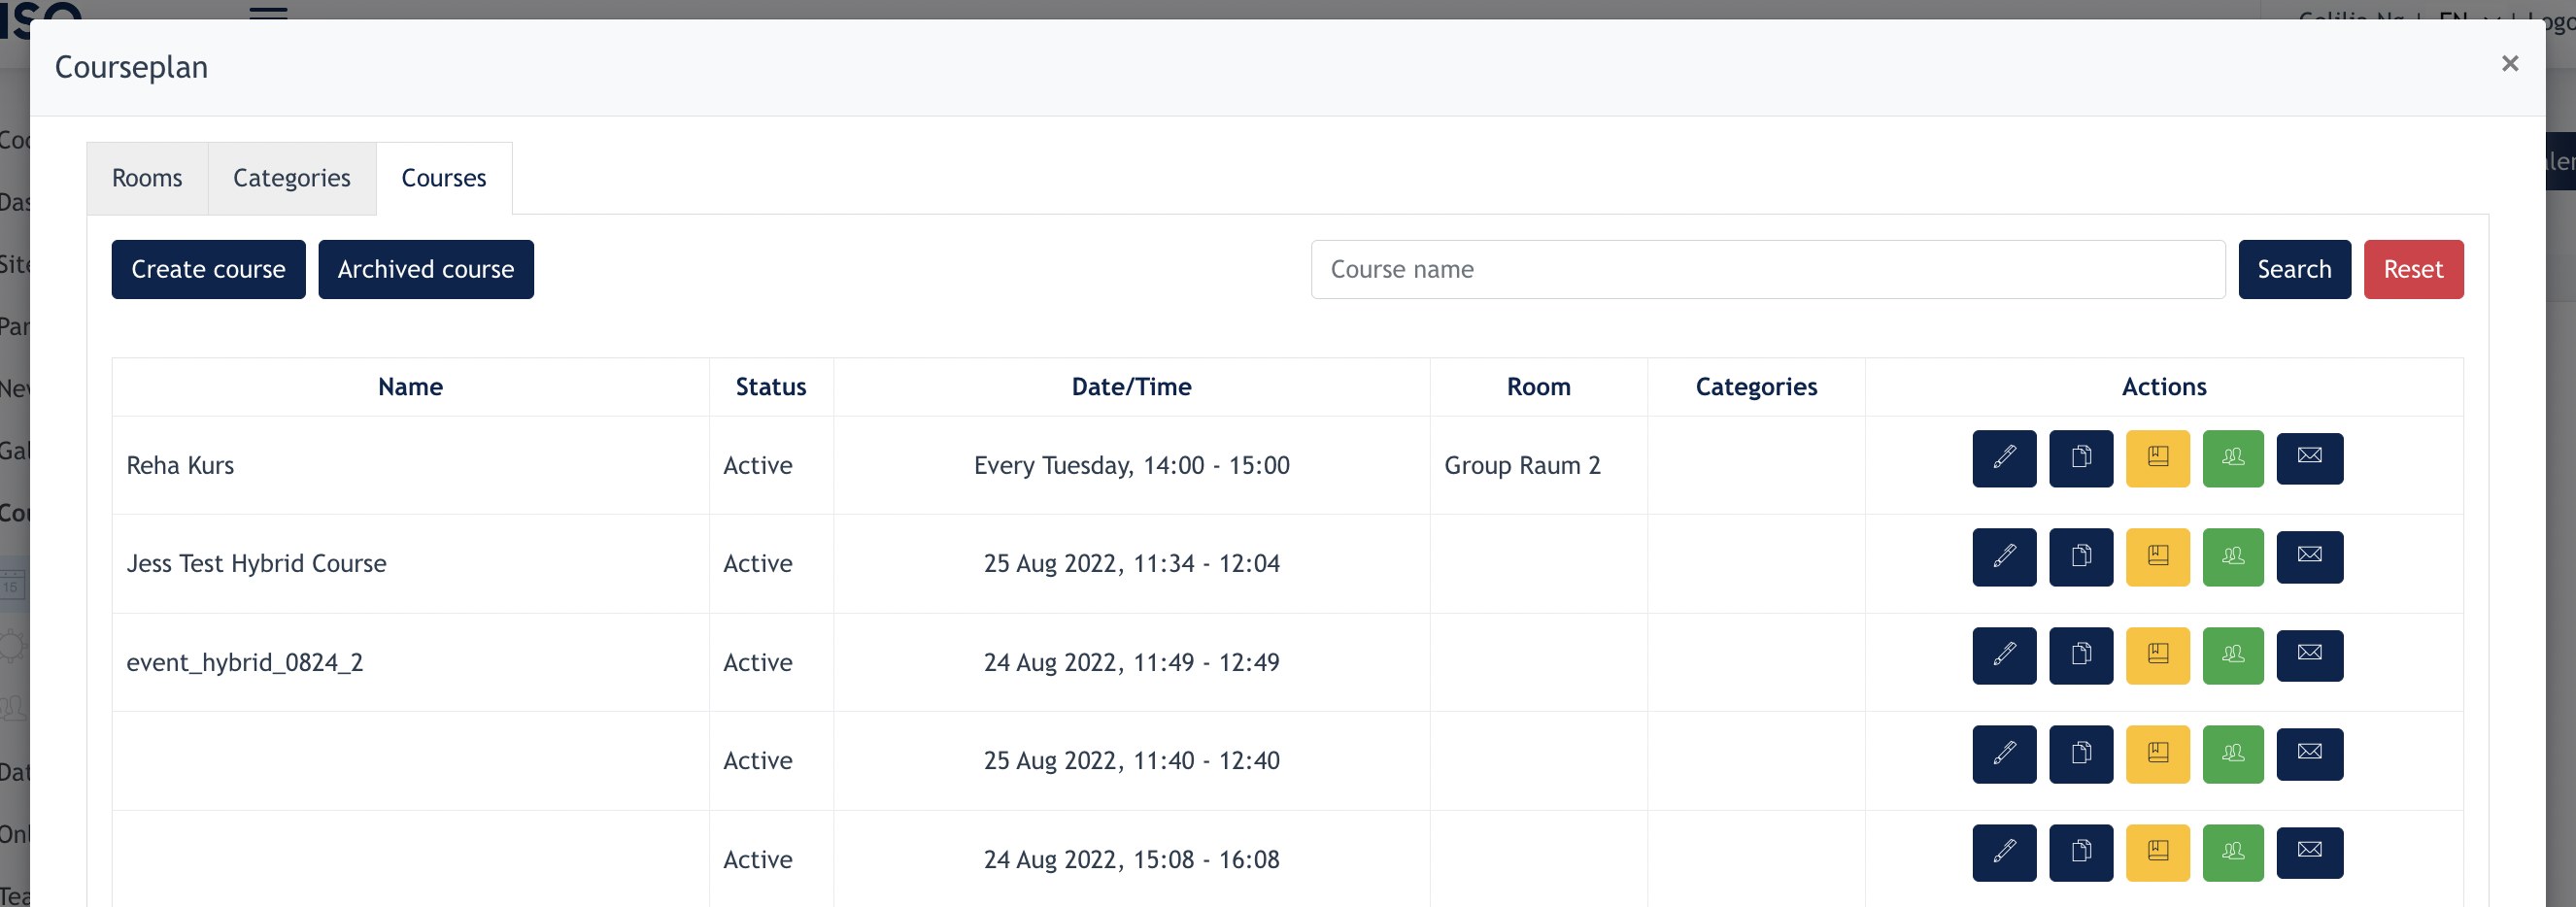
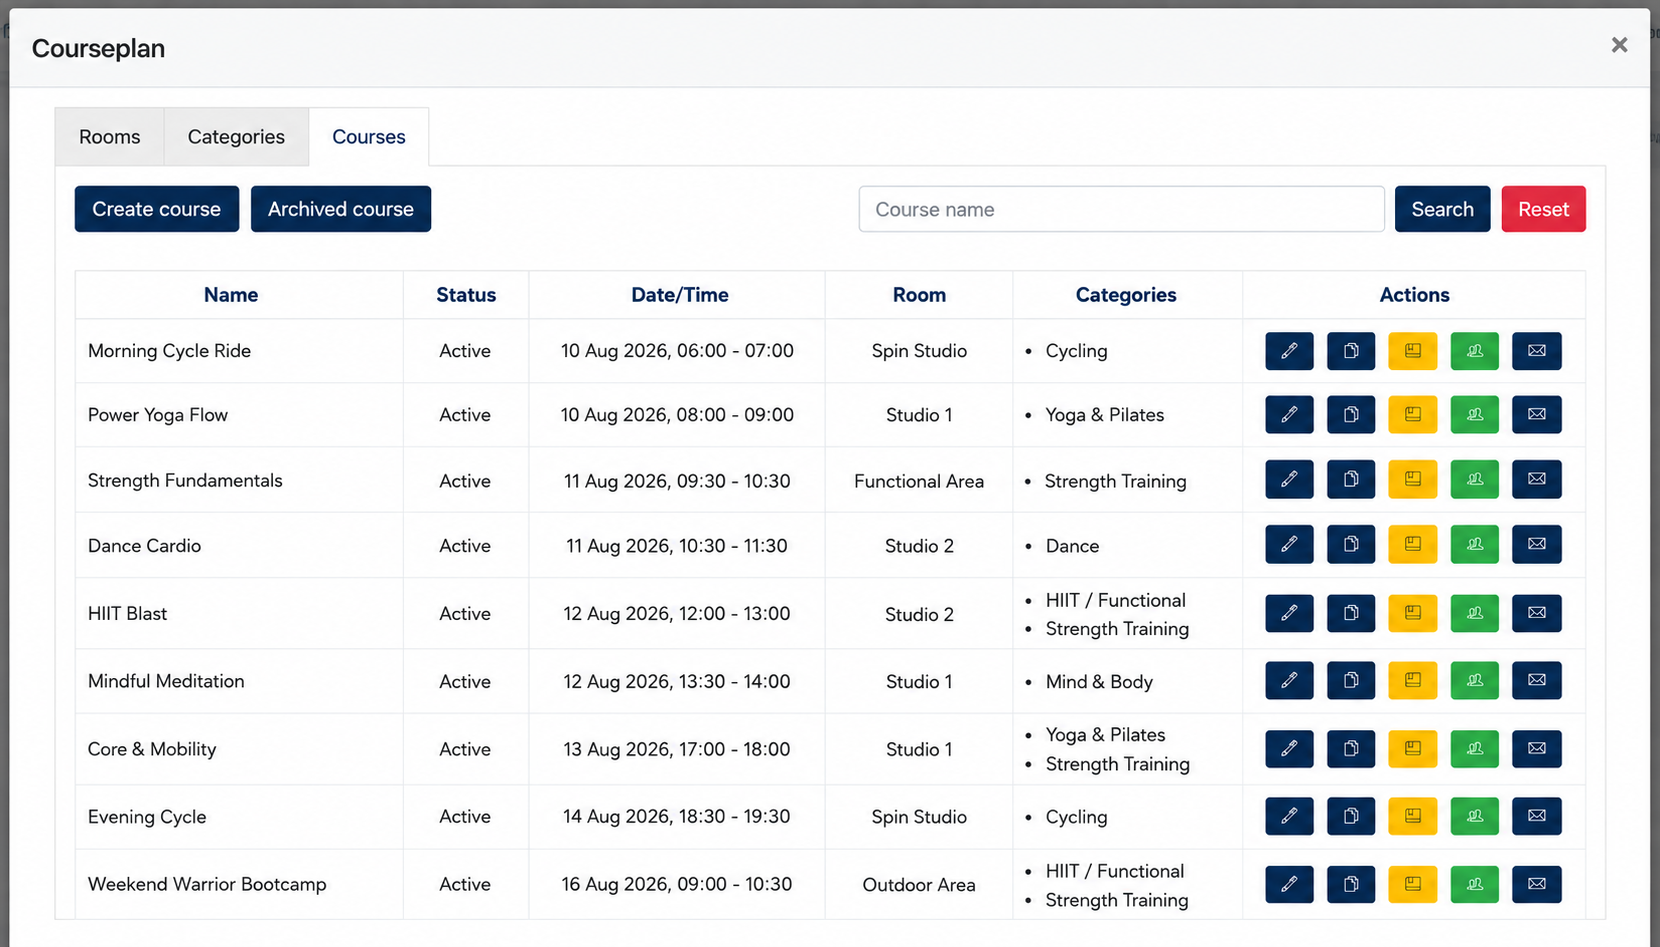
Under the [ Calendar Setup ], Admin can review and manage the created course via this lisitng.
Under [ Action Column ]
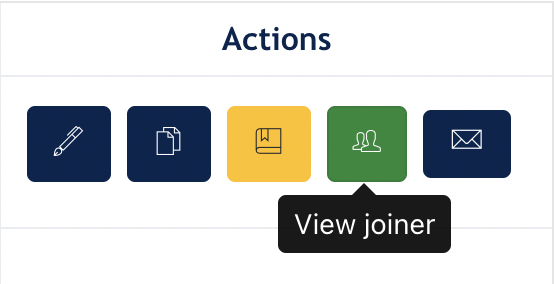
Edit- Center Admin may edit the course basic info, however, info such as Course date, and time are not allowed to change once there is joiner for the course.Duplicate- Center Admin may click this button to duplicate this courseArchive- Center Admin may archive the course if the course is expired, and not needed anymore.Joiners- Center Admin may check who has join the coursesEmail- Center Admin may send message to joiners by configuring the following modal. Click "Send push notification" and this content will be emailed to Joiner's email account.
2.1.
View
Joiners
Waiting List Logic
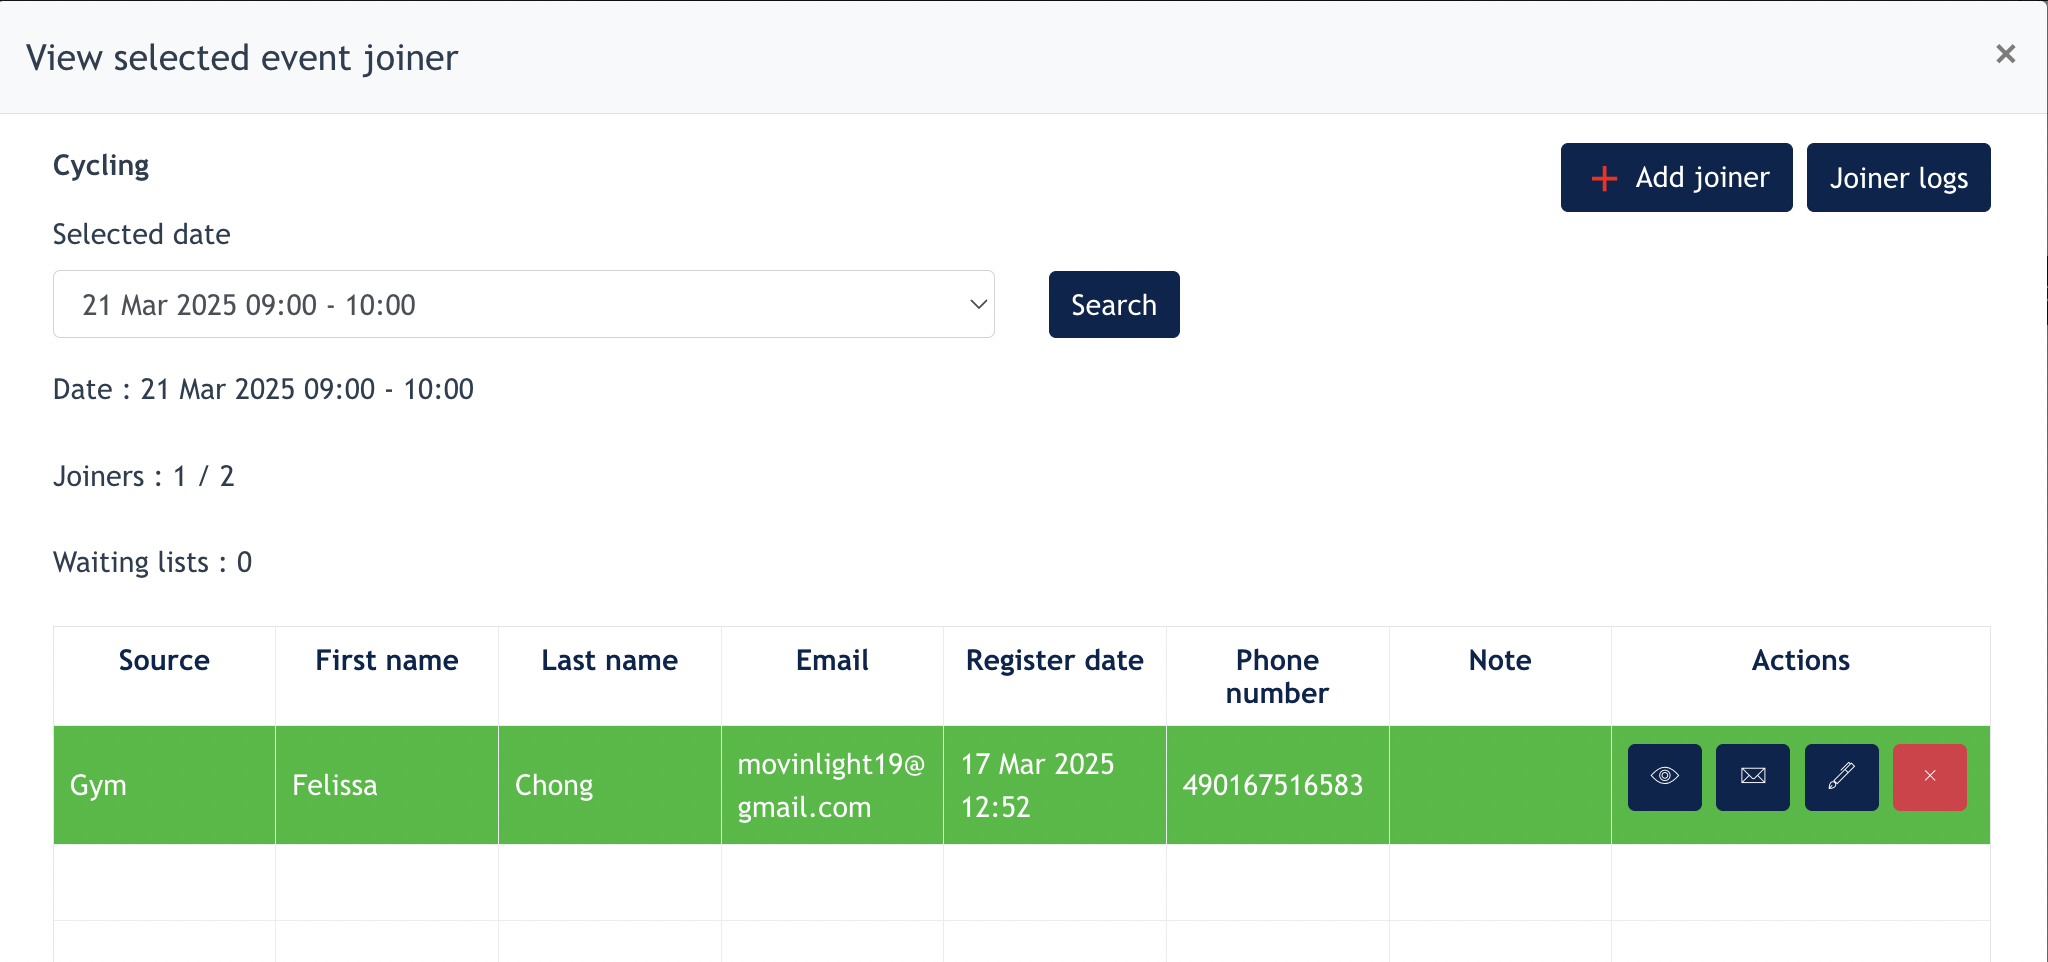
If you click on "View Joiners" under the Action column ( of a specific COURSE ), the following modal will be opened up:
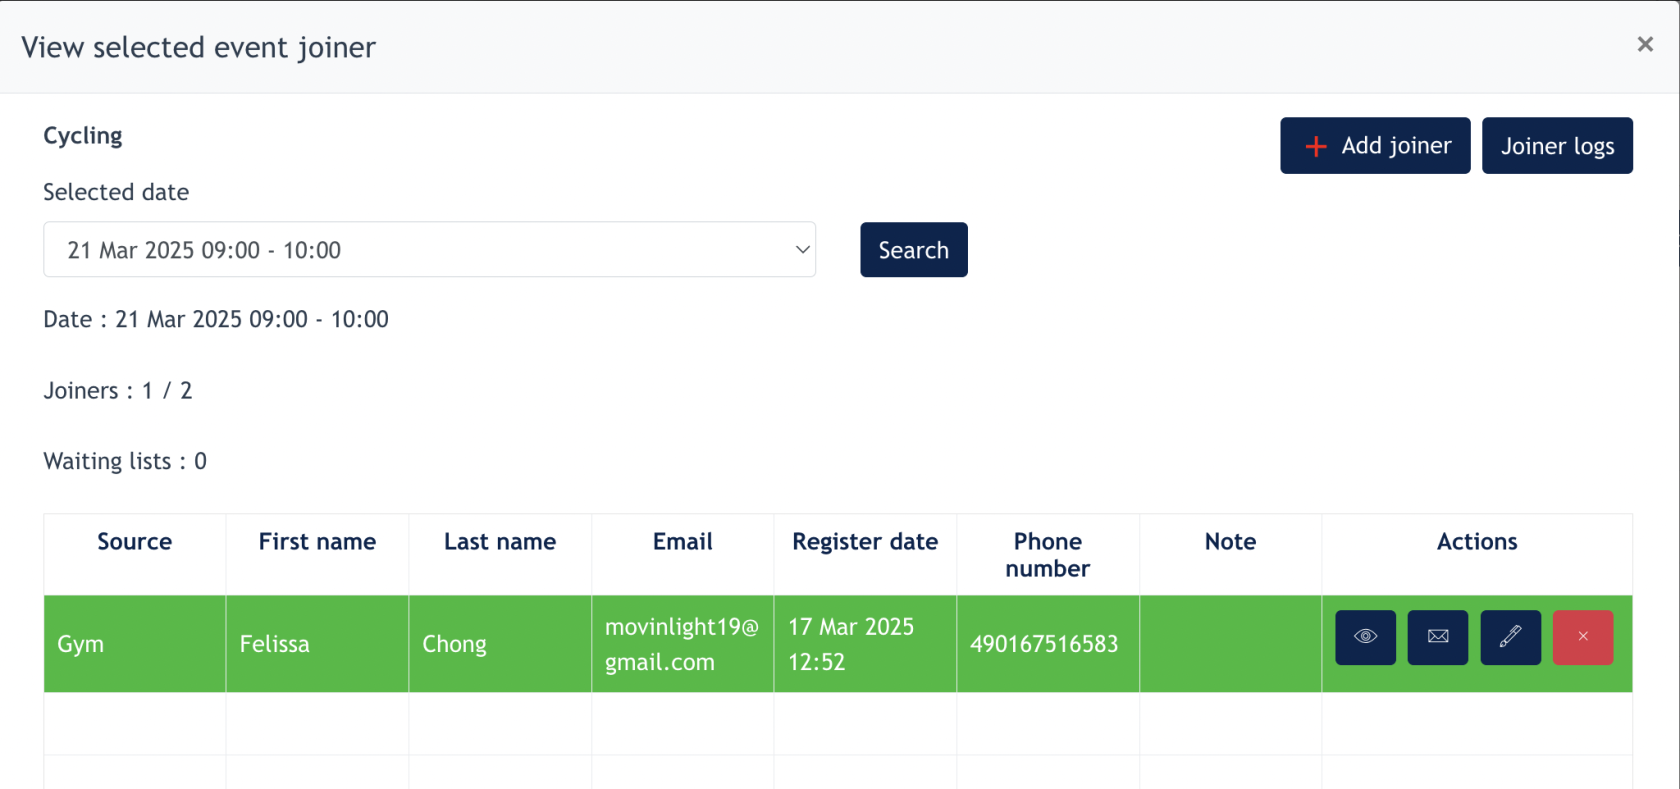
[ Selected date ] and [ Search ] : this is for Center Admin to pickWhen a course date,reaches clickits maximum capacity, any additional registrations will automatically be placed on Search to view the Joiners listing.
[ Joiners ] : x / y - Here it means x out of y is still available for the booking. From the above example, there are 1 seat available for booking.
- Waiting List.
:If Thisa showconfirmed howjoiner manycancels joinerstheir areregistration, underthe first person on the waiting list. list - will automatically take the available seat and become a confirmed joiner.
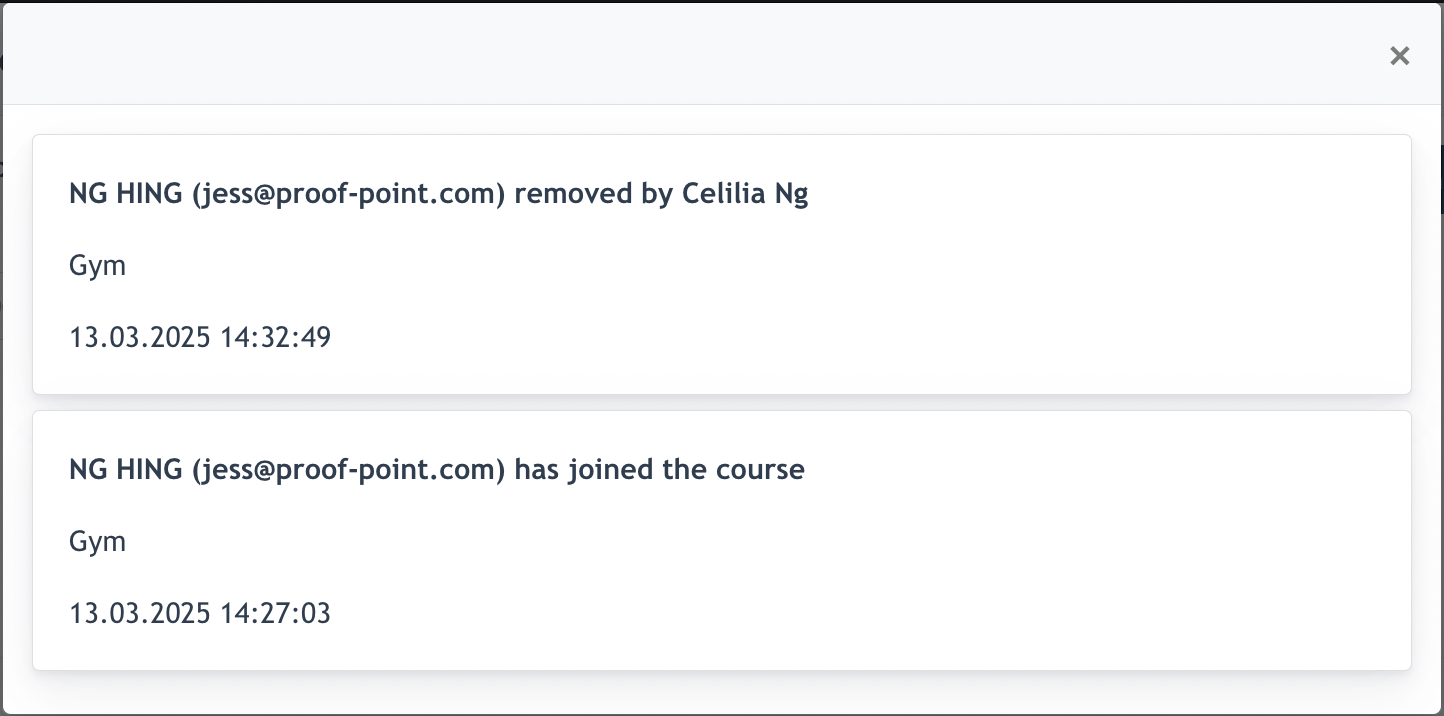
Joiners Log
The Joiners ListingLog :provides
a history Viewof :registration viewactivities joiner'sfor particulara EmailAdmin :can senduse emailthe log to thischeck joiner
Edit : Admin to change any details of the joiner, if required
Remove : Admin to remove this joiner manually, if required
[ Add Joiner ] button : Admin may addhow a joiner manuallywas via here.
[ Joiners Log ] button : Admin can view the logs of joiners being added/remove via Website, App, Admin Panel.
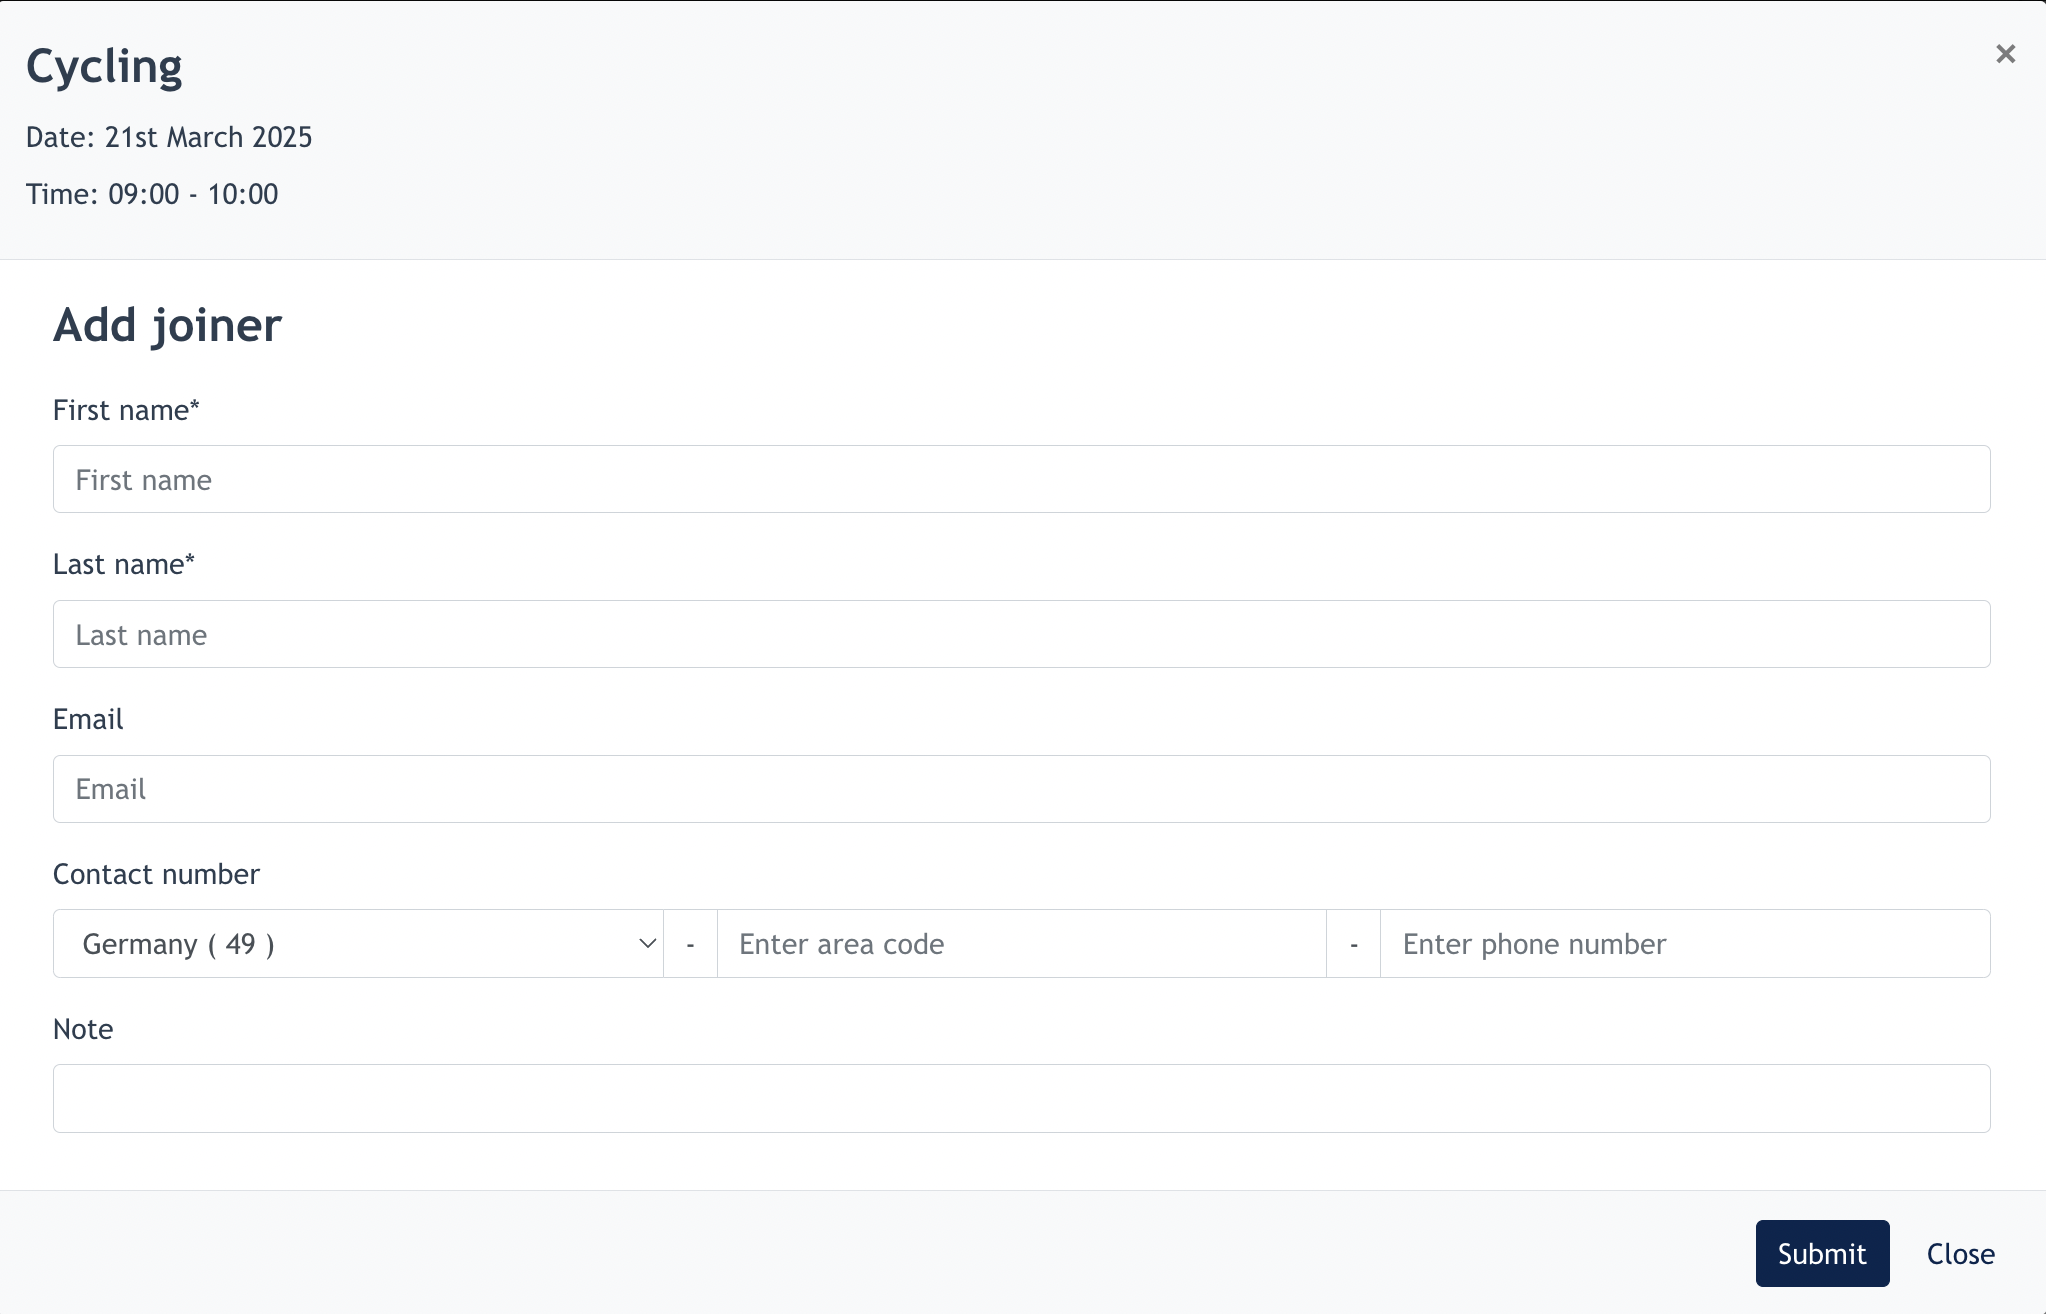
2.2 Add Joiners
Click on [ Add Joiners ] button :
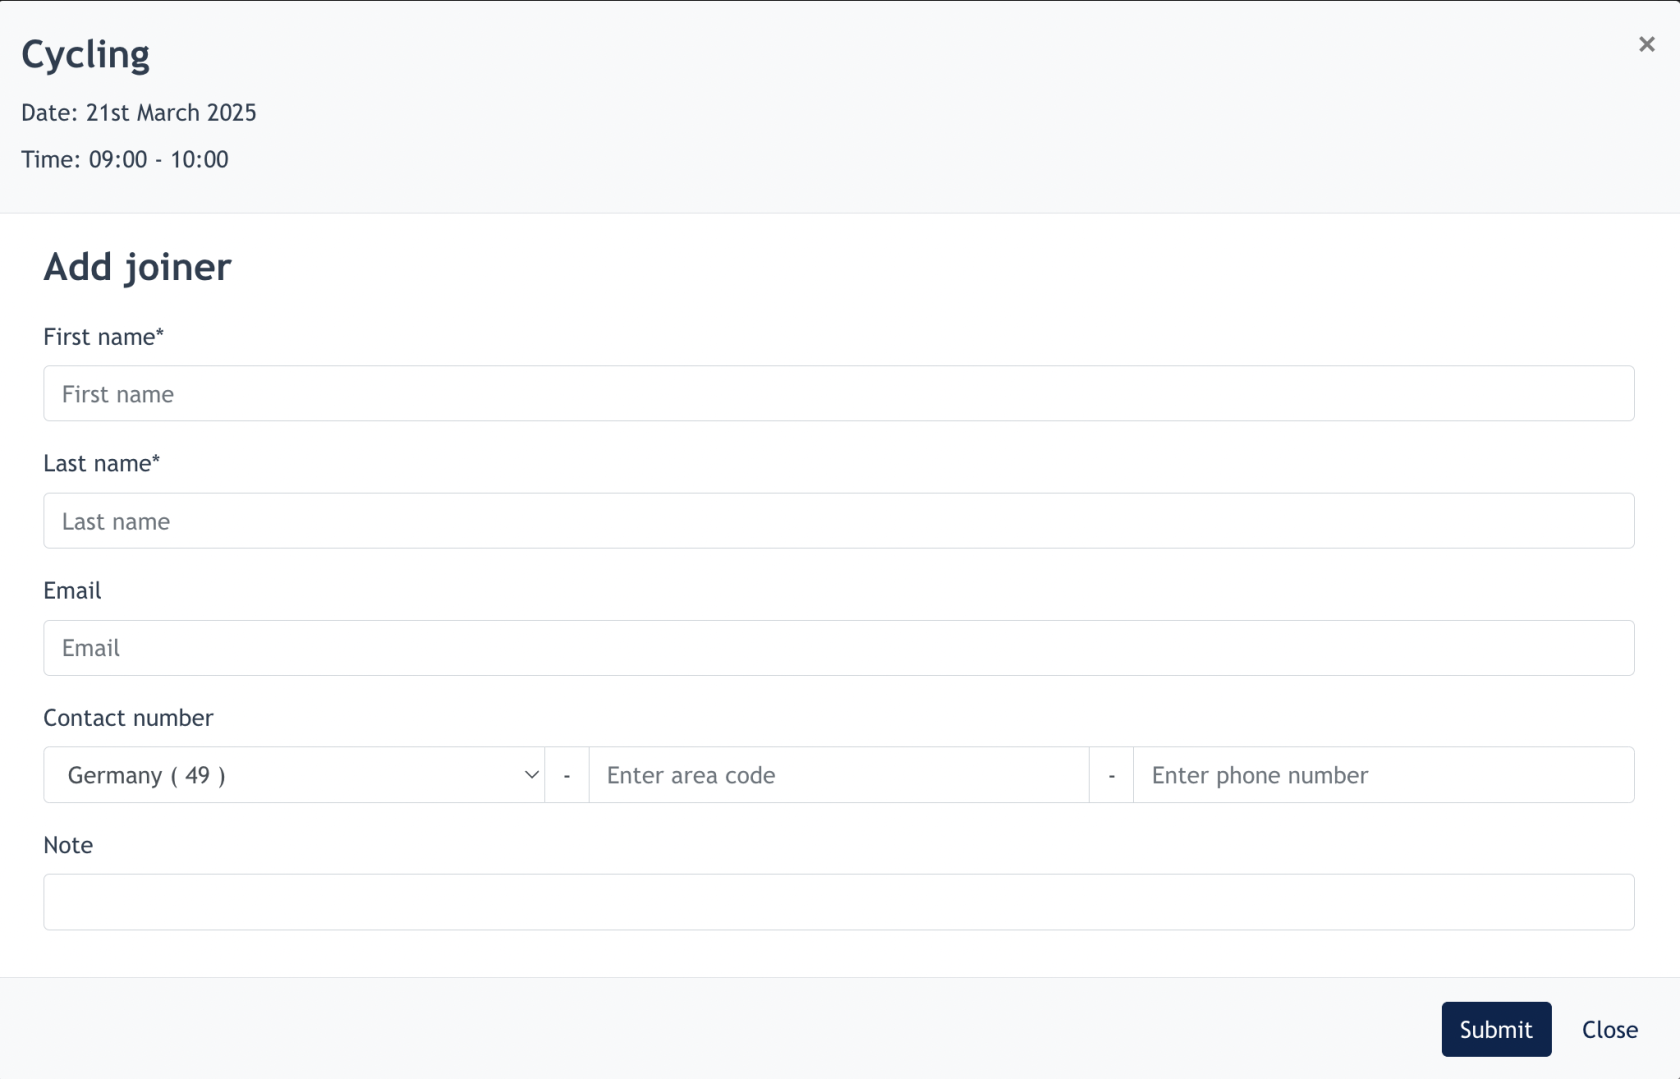
Admin to fill in all fields above, and this person will be added as Joiner of the course.
2.3 Waiting List Logic
In the courseplan registration, if the capacity is 10 pax. The 11th joiner will be put on waiting list (Mark in red color on the Joiner Listing). If an existing joiner decided to cancel their registration, then the 11th joiner will automatically fill in the seat. The color of this joiner will then change to green like the one below.

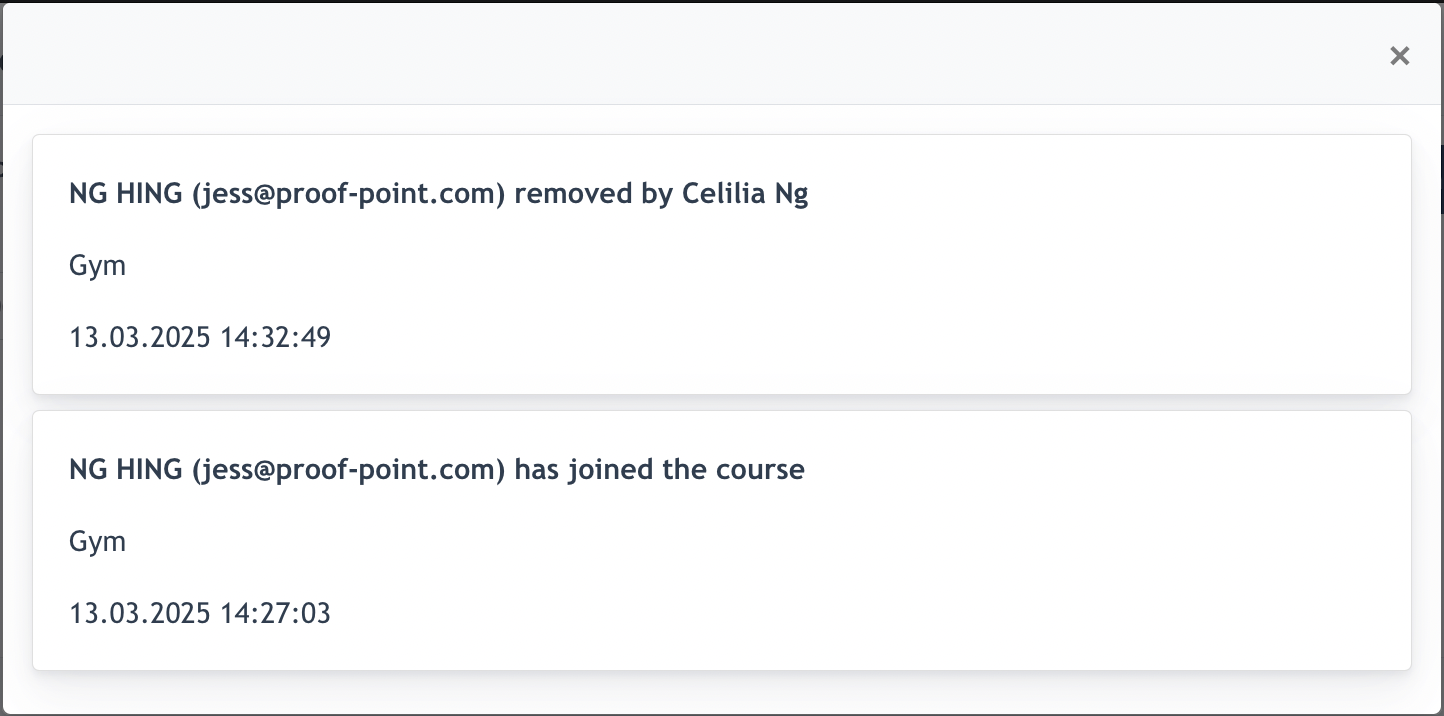
2.4 Joiners Log
Admin able to check if this joiners join the course via:
Website Registration
App Registration
Admin Panel Registration ( added manually by Center Admin)
Admin also able to check if this joineror removed from the course, viaincluding :registrations
or cancellations Deregistermade fromthrough the Emailwebsite, Unsubscribeapp, LinkDeregisterunsubscribe fromlink, or manually through the App
Deregister from Admin Panel ( removed manually by Center Admin)
Example screenshots of the Joiners Log : Panel.
3. Courseplan Setting
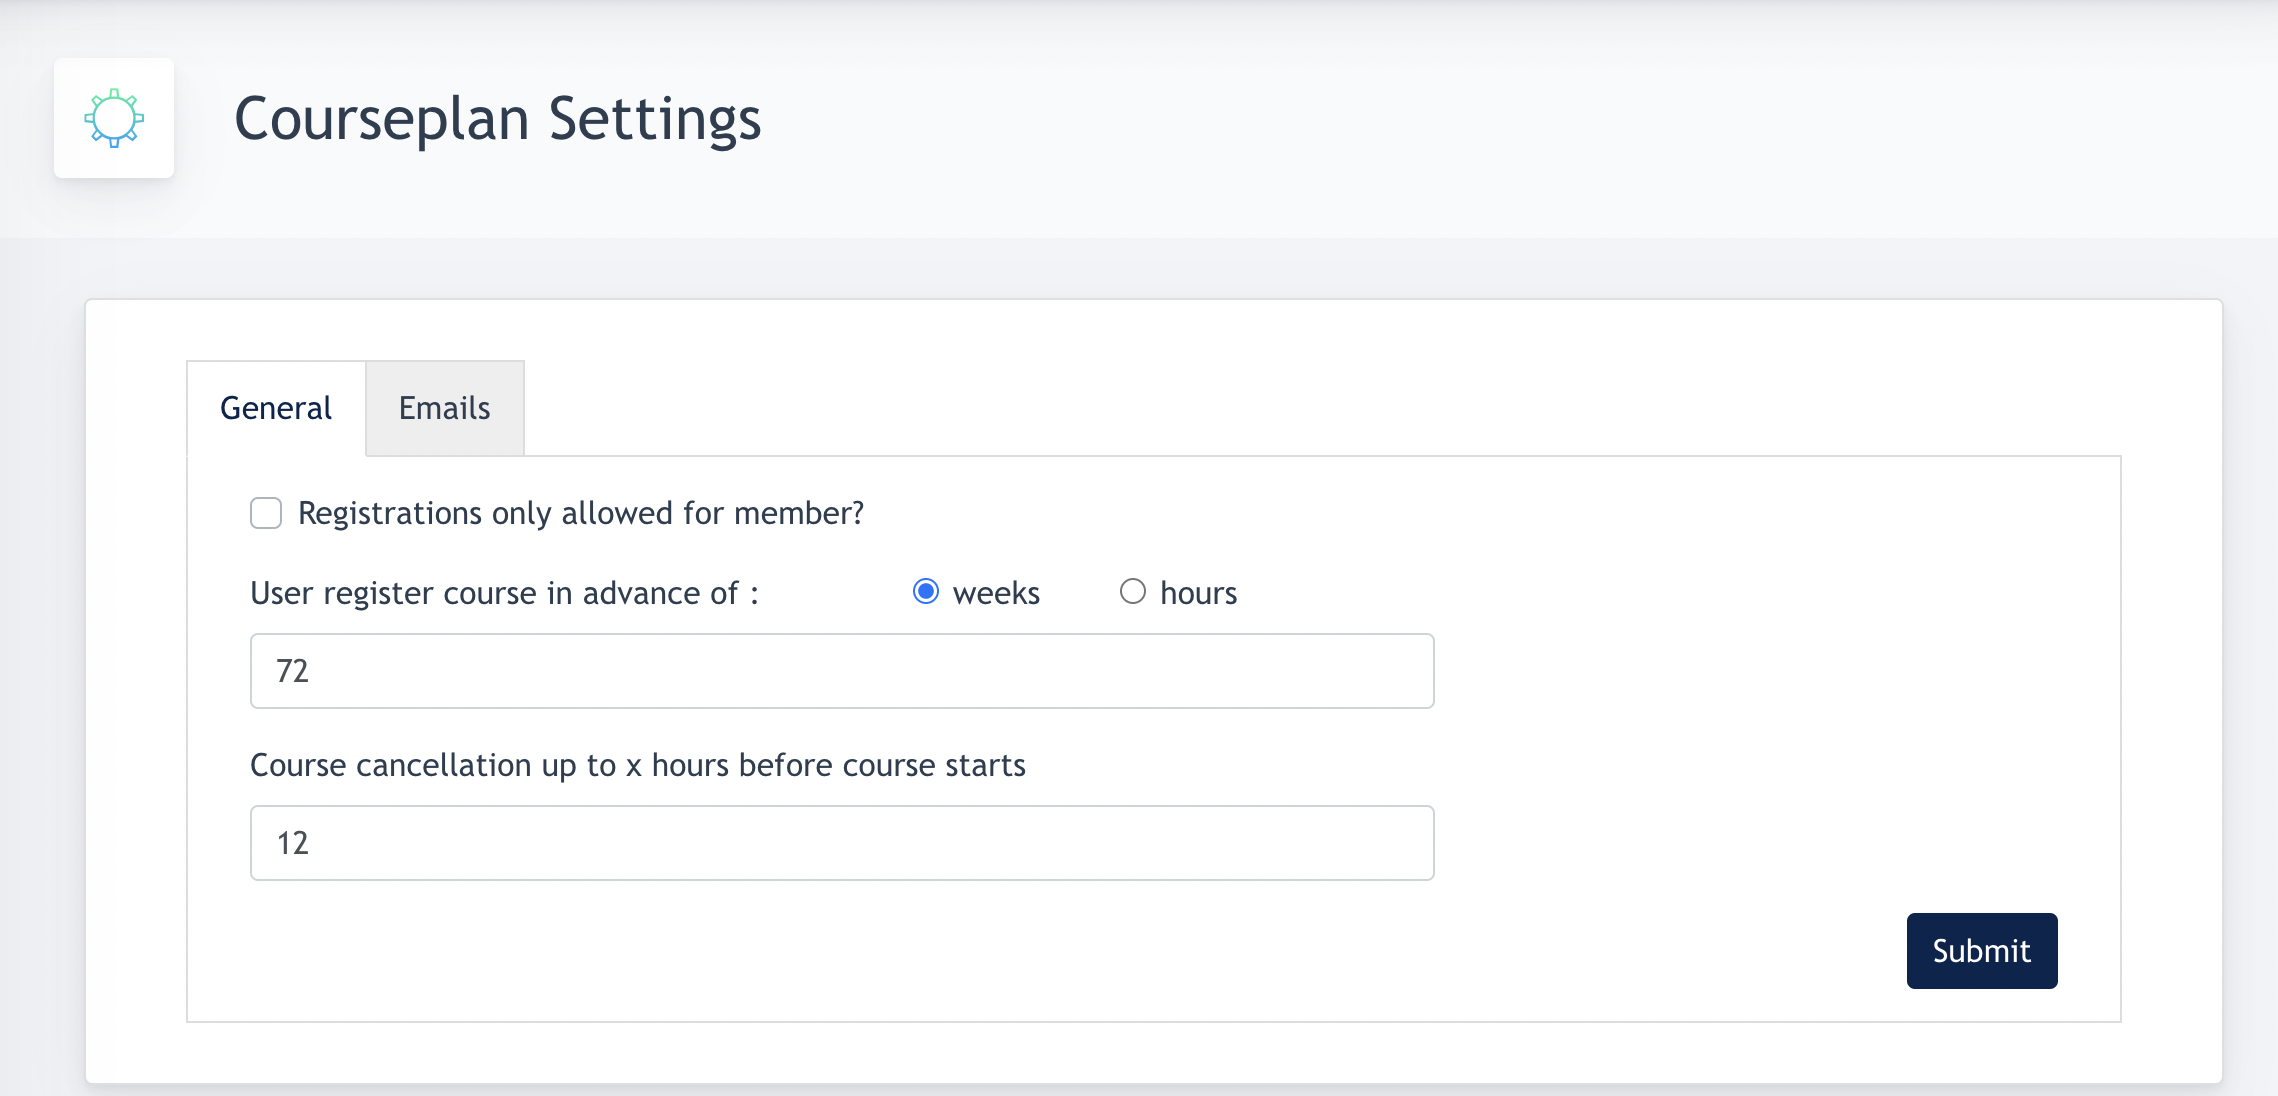
ThisThe isCourseplan theSettings placeallow forCenter Admin to configure somethe general settingregistration and cancellation rules for thiscourses, modulesas :well as email notifications for course registration activities.
The settings are divided into two tabs:
[3.1 General Tab ]
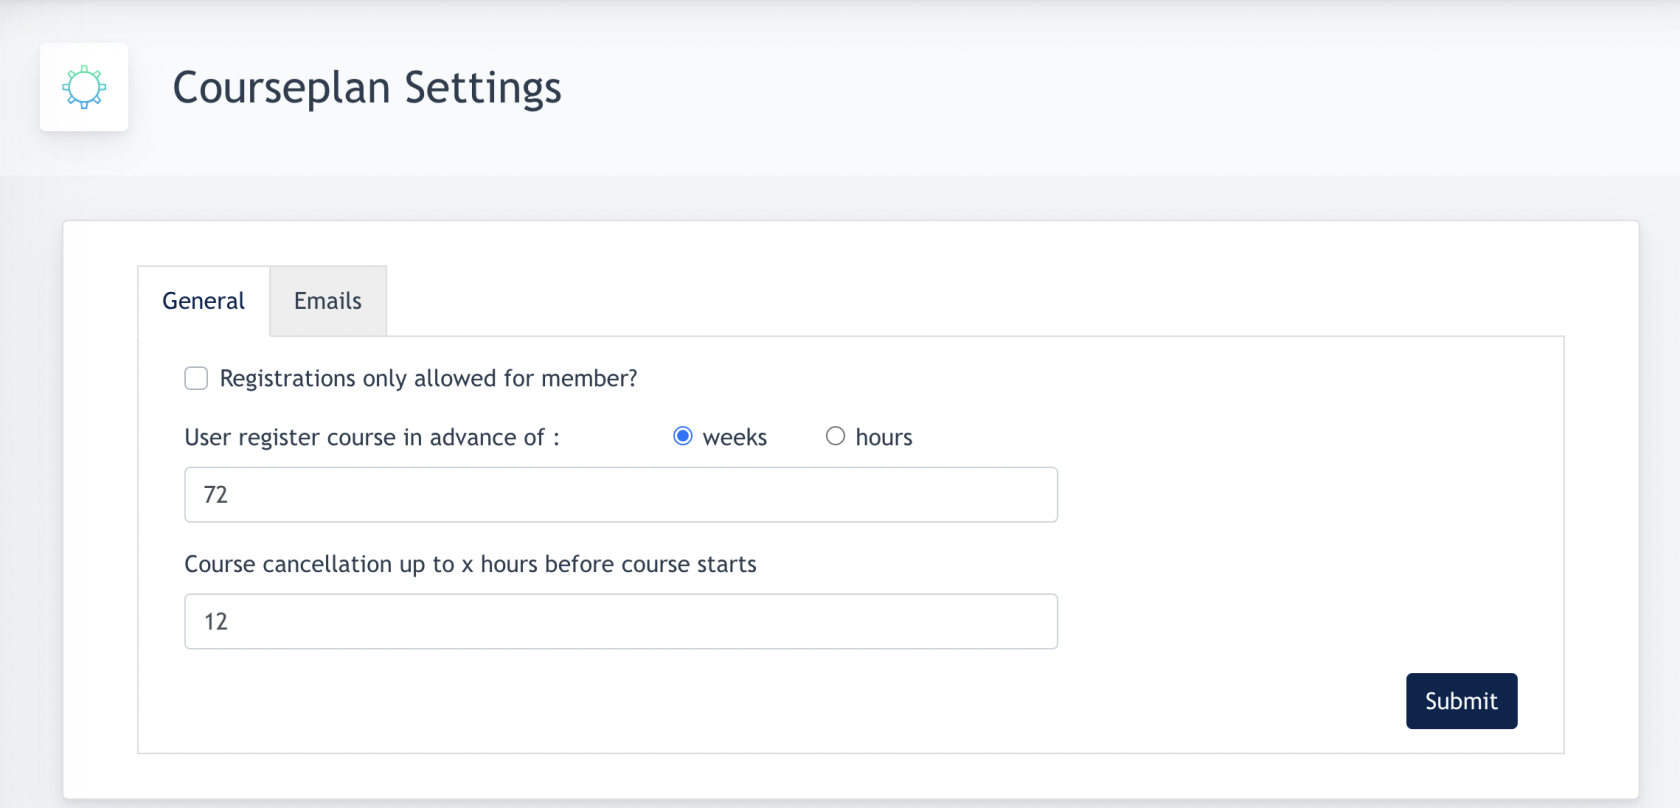
The InGeneral tab defines the formrules :that
apply when users register for or cancel a course.
-
Setting
Description
"RegistrationRegistrations only allowed for member"member?-When if this checkbox is ticked, the courseplan canenabled, only beregistered joined byclub members ofare theallowed Club.to - register for courses.
User register course in advance of
:Defines how far Weekin / Hour : Admin may configureadvance a periodcourse ofbecomes available for registration. IfEnter 72a weeksvalue areand set,select thenWeeks joineror mayHours registeras the coursetime 72unit.
weeks
before
the course date/time.
CouseCourse cancellation up to x hours before course startsDefines Adminthe maylatest configuretime a periodjoiner ofis timeallowed forto cancel their registration before the course starts.
Example: If the cancellation ofperiod theis course.set Ifto 12 hours are set, then, joiners may cancel thetheir courseregistration withinuntil 12 hours before the scheduled course starts.
start
time.
[3.2 EmailEmails Tab ]
Waiting List Logic
If you click on "View Joiners" under the Action column ( of a specific COURSE ), the following modal will be opened up:
[ Selected date ] and [ Search ]: this is for Center Admin to pickWhen a coursedate,reachesclickits maximum capacity, any additional registrations will automatically be placed onSearch to viewtheJoiners listing.[ Joiners ]: x / y - Here it means x out of y is still available for the booking. From the above example, there are 1 seat available for booking.- Waiting List.
list:IfThisashowconfirmedhowjoinermanycancelsjoinerstheirareregistration,underthe first person on the waitinglist.- will automatically take the available seat and become a confirmed joiner.
Joiners Log
The Joiners
aListingLog:provideshistory
- course.
Viewof:registrationviewactivitiesjoiner'sforparticulara:cansendusethischeckjoinerEdit: Admin to change any details of the joiner, if requiredRemove: Admin to remove this joiner manually, if required[ Add Joiner ]button : Admin may addhow a joinermanuallywasvia here.[ Joiners Log ]button : Admin can view the logs of joiners being added/remove via Website, App, Admin Panel.
2.2 Add Joiners
Click on[ Add Joiners ]button :
Admin to fill in all fields above, and this person will be added as Joiner of the course.
2.3 Waiting List Logic
In the courseplan registration, if the capacity is 10 pax. The 11th joiner will be put on waiting list (Mark in red color on the Joiner Listing). If an existing joiner decided to cancel their registration, then the 11th joiner will automatically fill in the seat. The color of this joiner will then change to green like the one below.
2.4 Joiners Log
Admin able to check if this joiners join the course via:
Website RegistrationApp RegistrationAdmin Panel Registration ( added manually by Center Admin)or
Admin also able to check if this joineror removed from the course,viaincluding:registrationscancellations
Deregistermadefromthrough theUnsubscribeapp,LinkDeregisterunsubscribefromlink, or manually through theAppDeregister fromAdminPanel ( removed manually by Center Admin)
Example screenshots of the Joiners Log :Panel.

| Setting | Description |
|---|---|
| When |
|
| User register course in advance of | Defines how
|
| Defines |
Example: If the cancellation ofperiod theis course.set Ifto 12 hours are set, then, joiners may cancel thetheir courseregistration withinuntil 12 hours before the scheduled course starts.
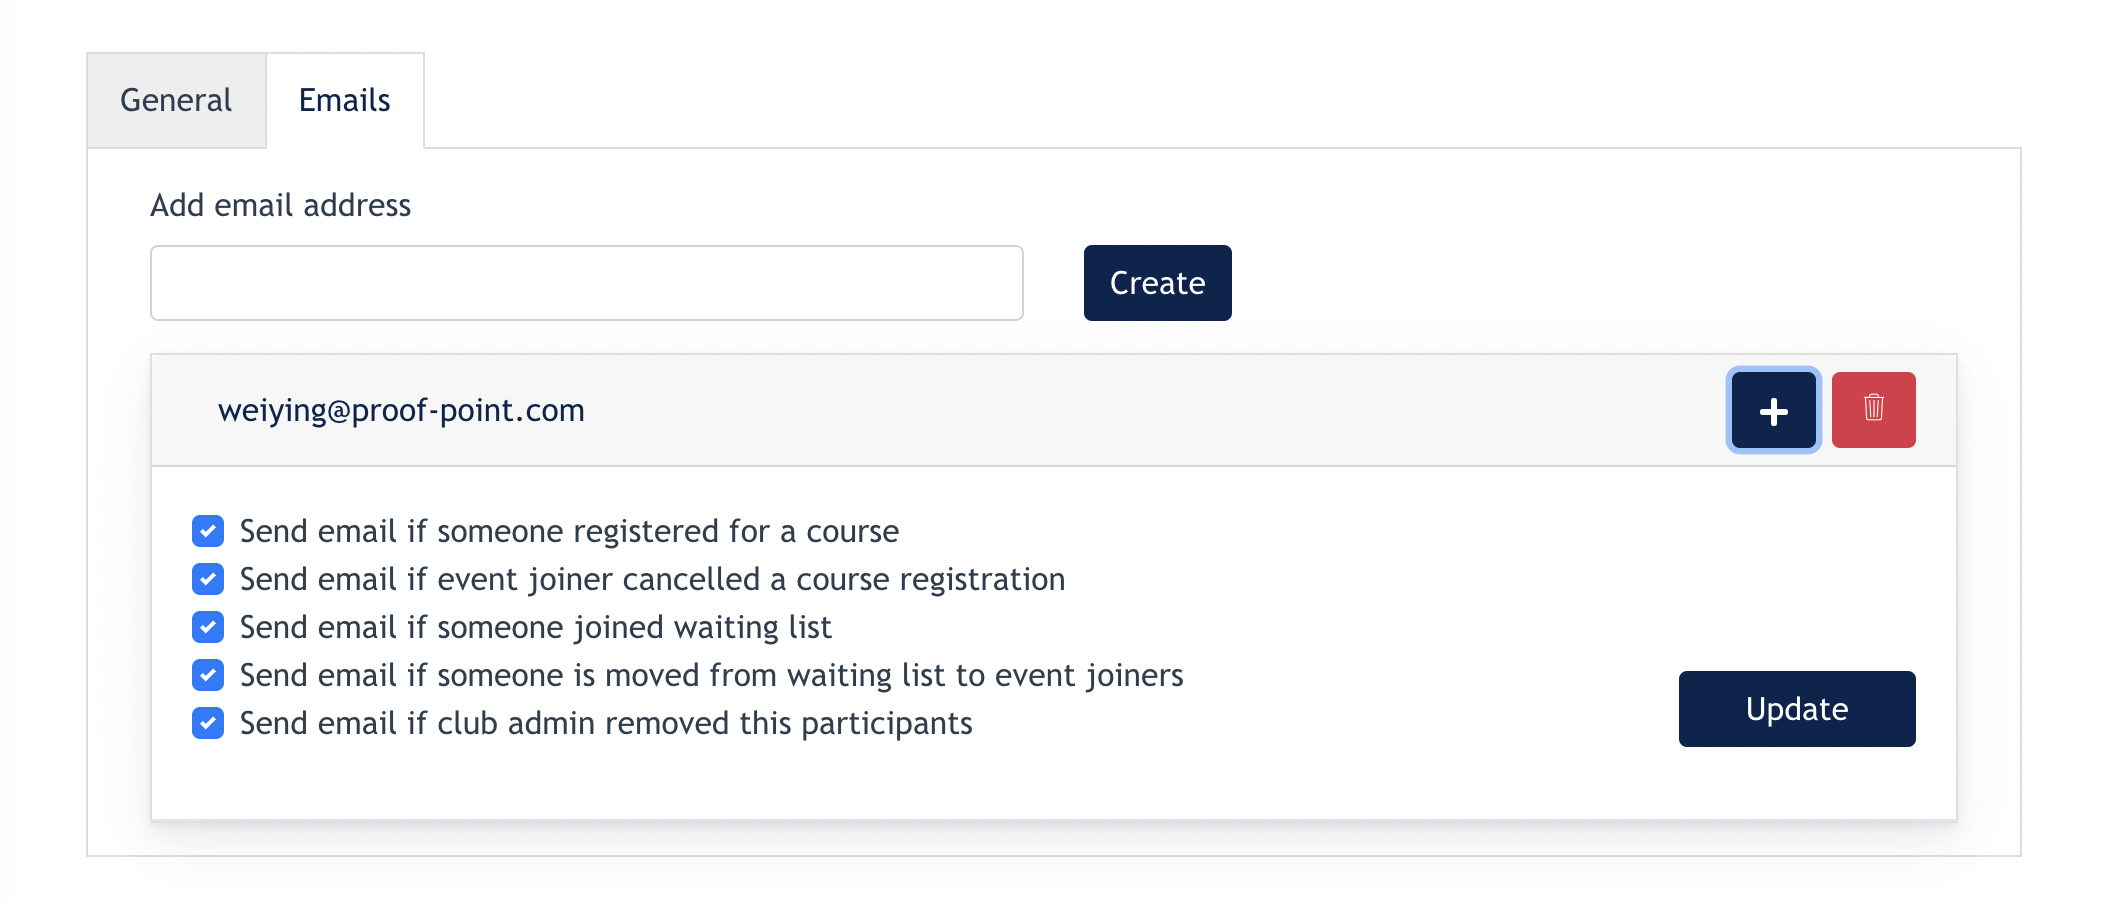
The Emails tab allows Center Admin mayto setconfigure internal email notifications for course registration activities.
Admin can add one or more email addresses and select which employee's emailactivities should receivetrigger ana emailnotification iffor anyeach ofrecipient, such as when:
- someone registers for a course;
- a joiner cancels a course registration;
- someone joins the
abovewaitingscenarioslist; - someone
met.is moved from the waiting list to the confirmed joiner list; or - a participant is manually removed by a Club Admin.
This allows different employees to receive notifications based on the course activities relevant to them.
4. Configuration of Courseplan View
There are 4 types of views Center Admin can choose to display kursplan on their website (Desktop/Mobile) :
- Day View
- Week View
- Compact Day
- Compact Week
Center Admin goes to : Site Pages > System page > Kursplan
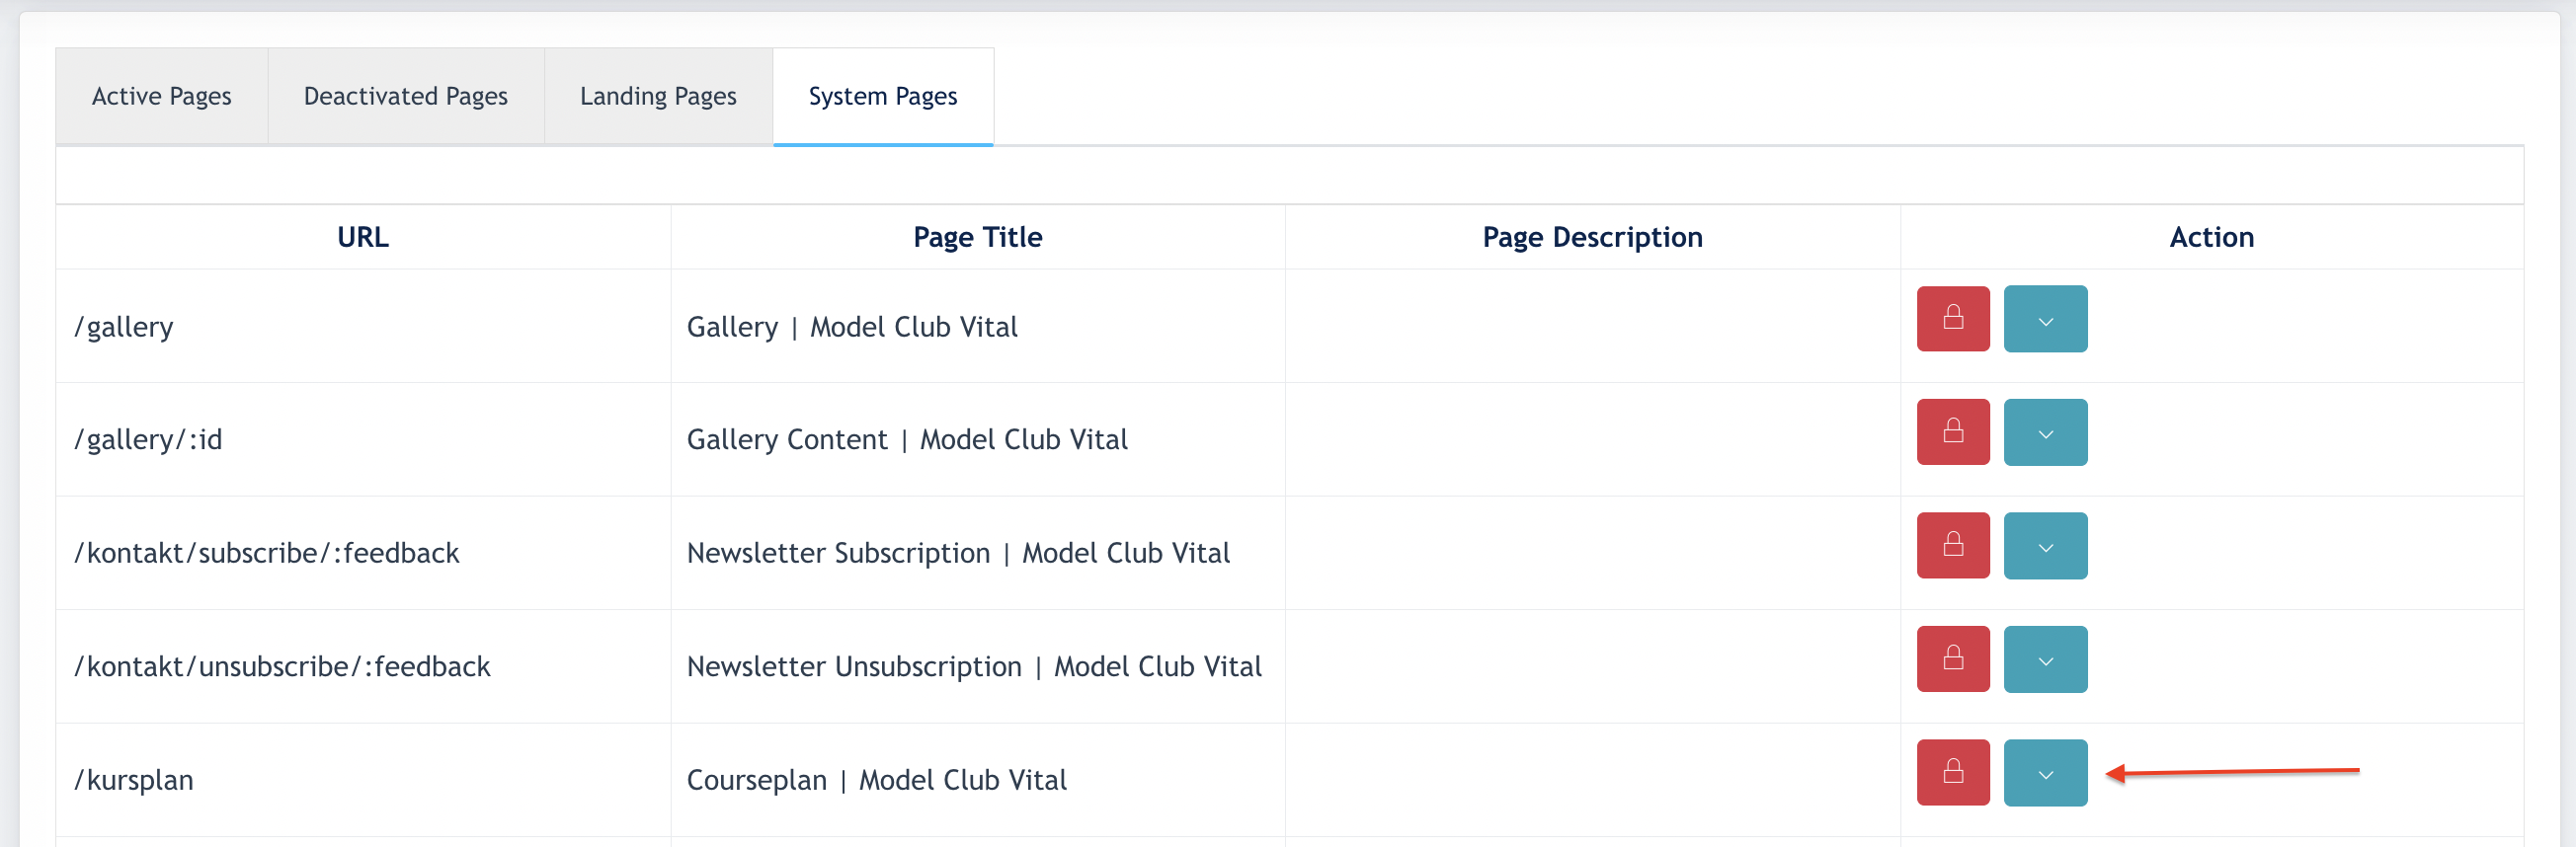
Click [ Edit ] on any language page :

Enter the Editor View of Courseplan > Click on [ Edit ]
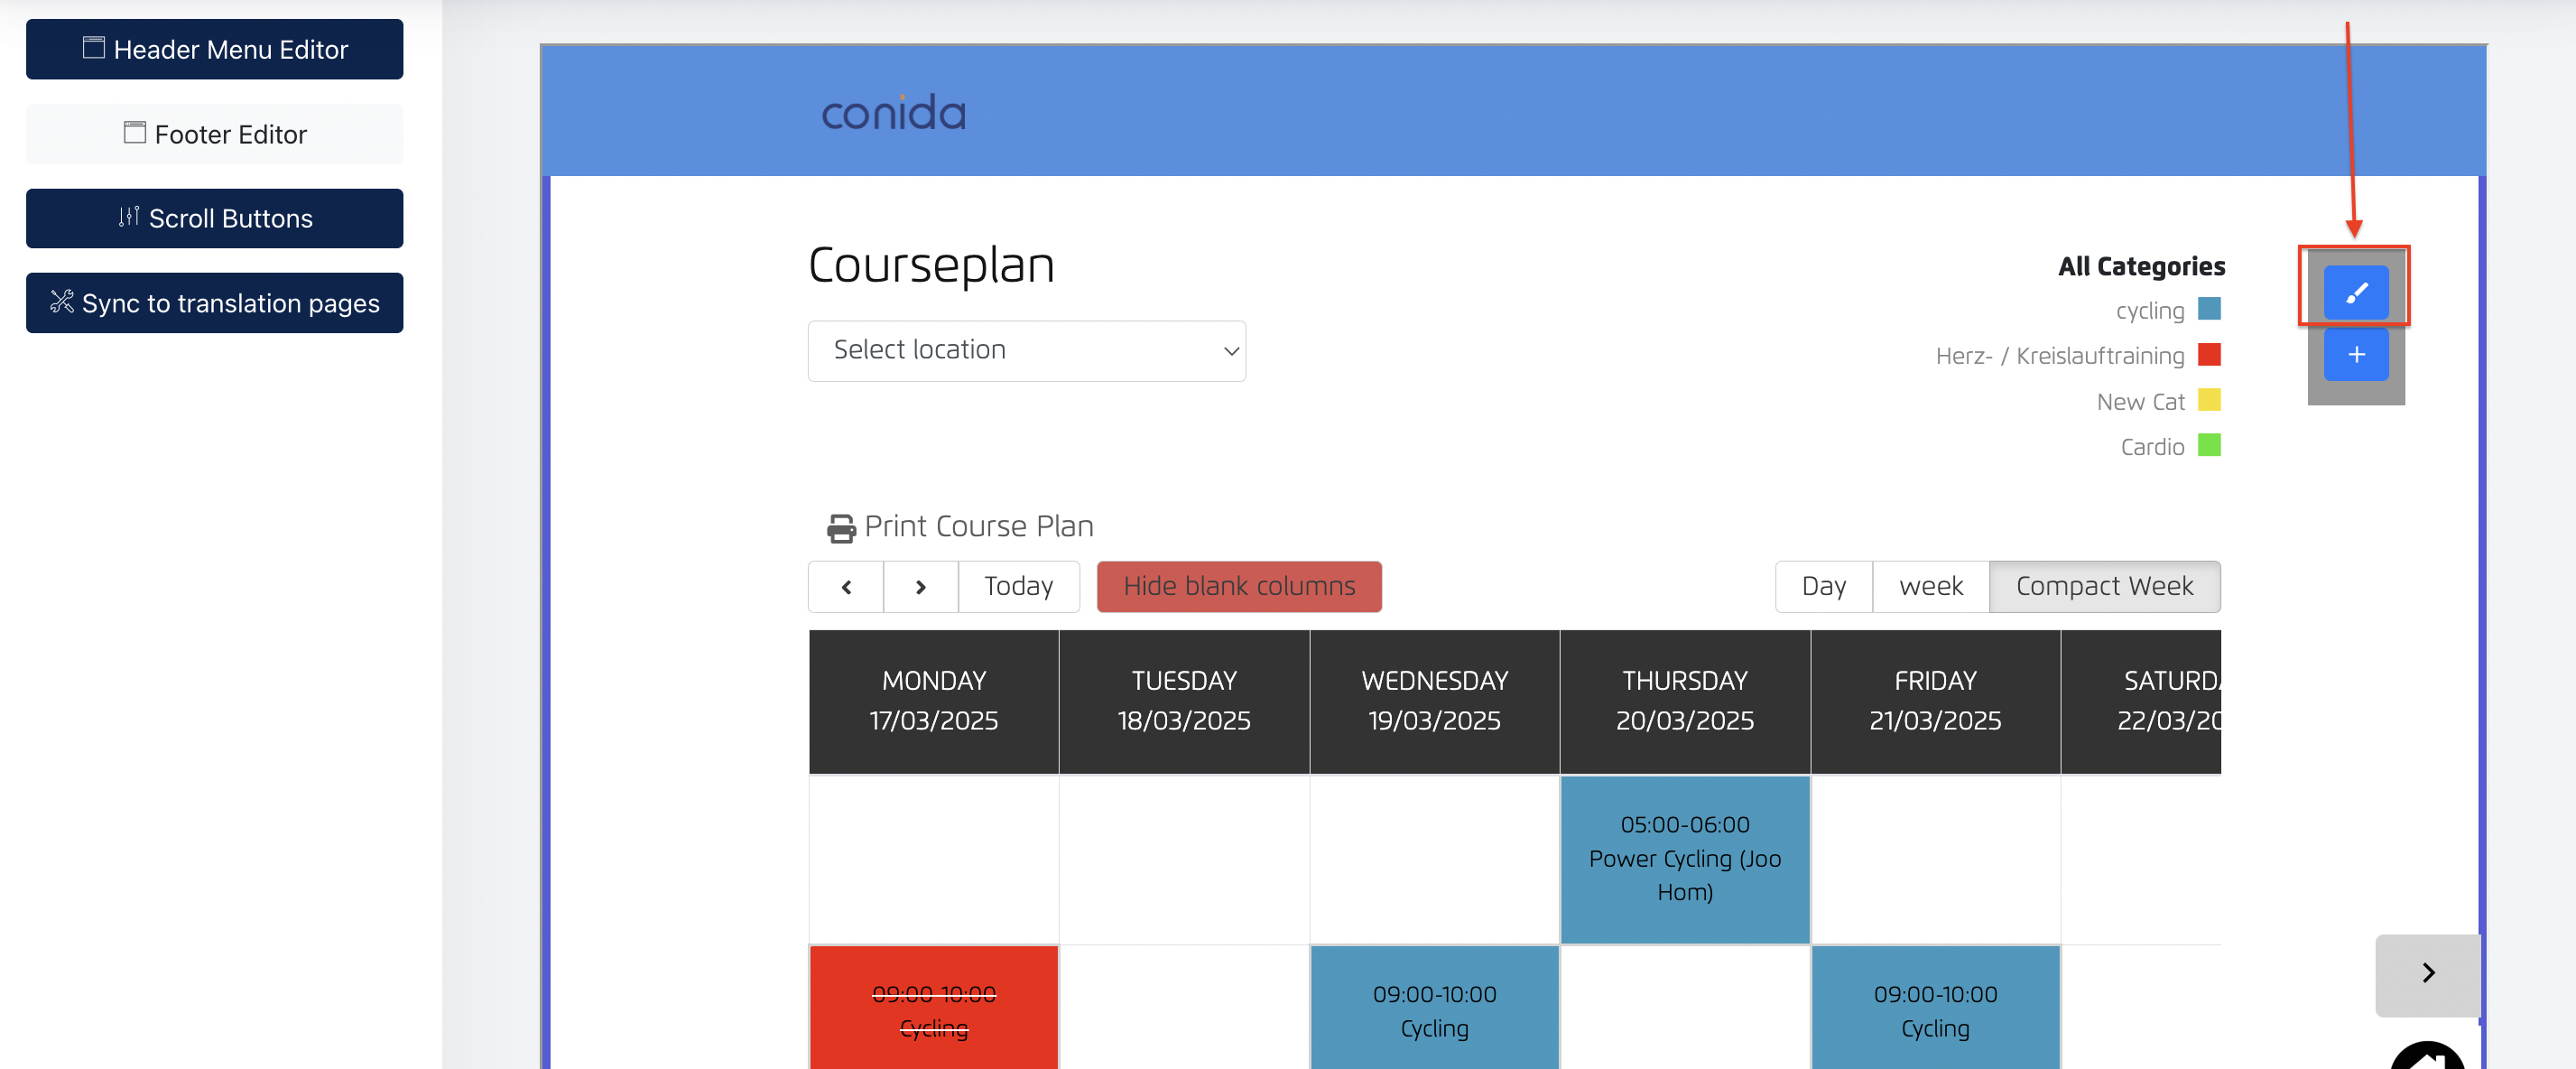
From this modal, Admin can configure Kursplan view on Website/Mobile.
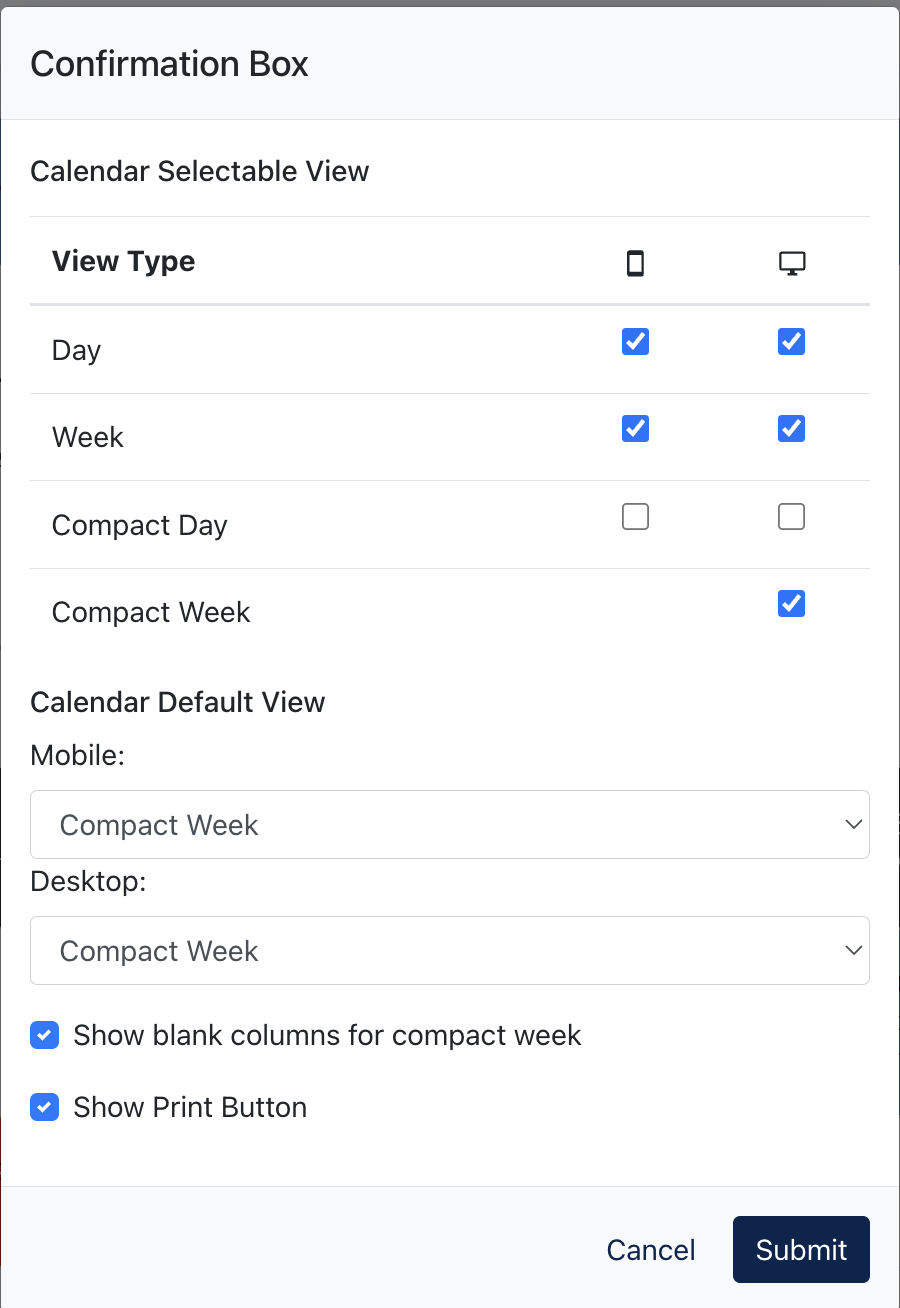
- View Type : Admin may configure different view types which is available on the Website :/kursplan
- Based on the above configuration, Desktop will display [ Day ], [ Week ] and [ Compact Week ]
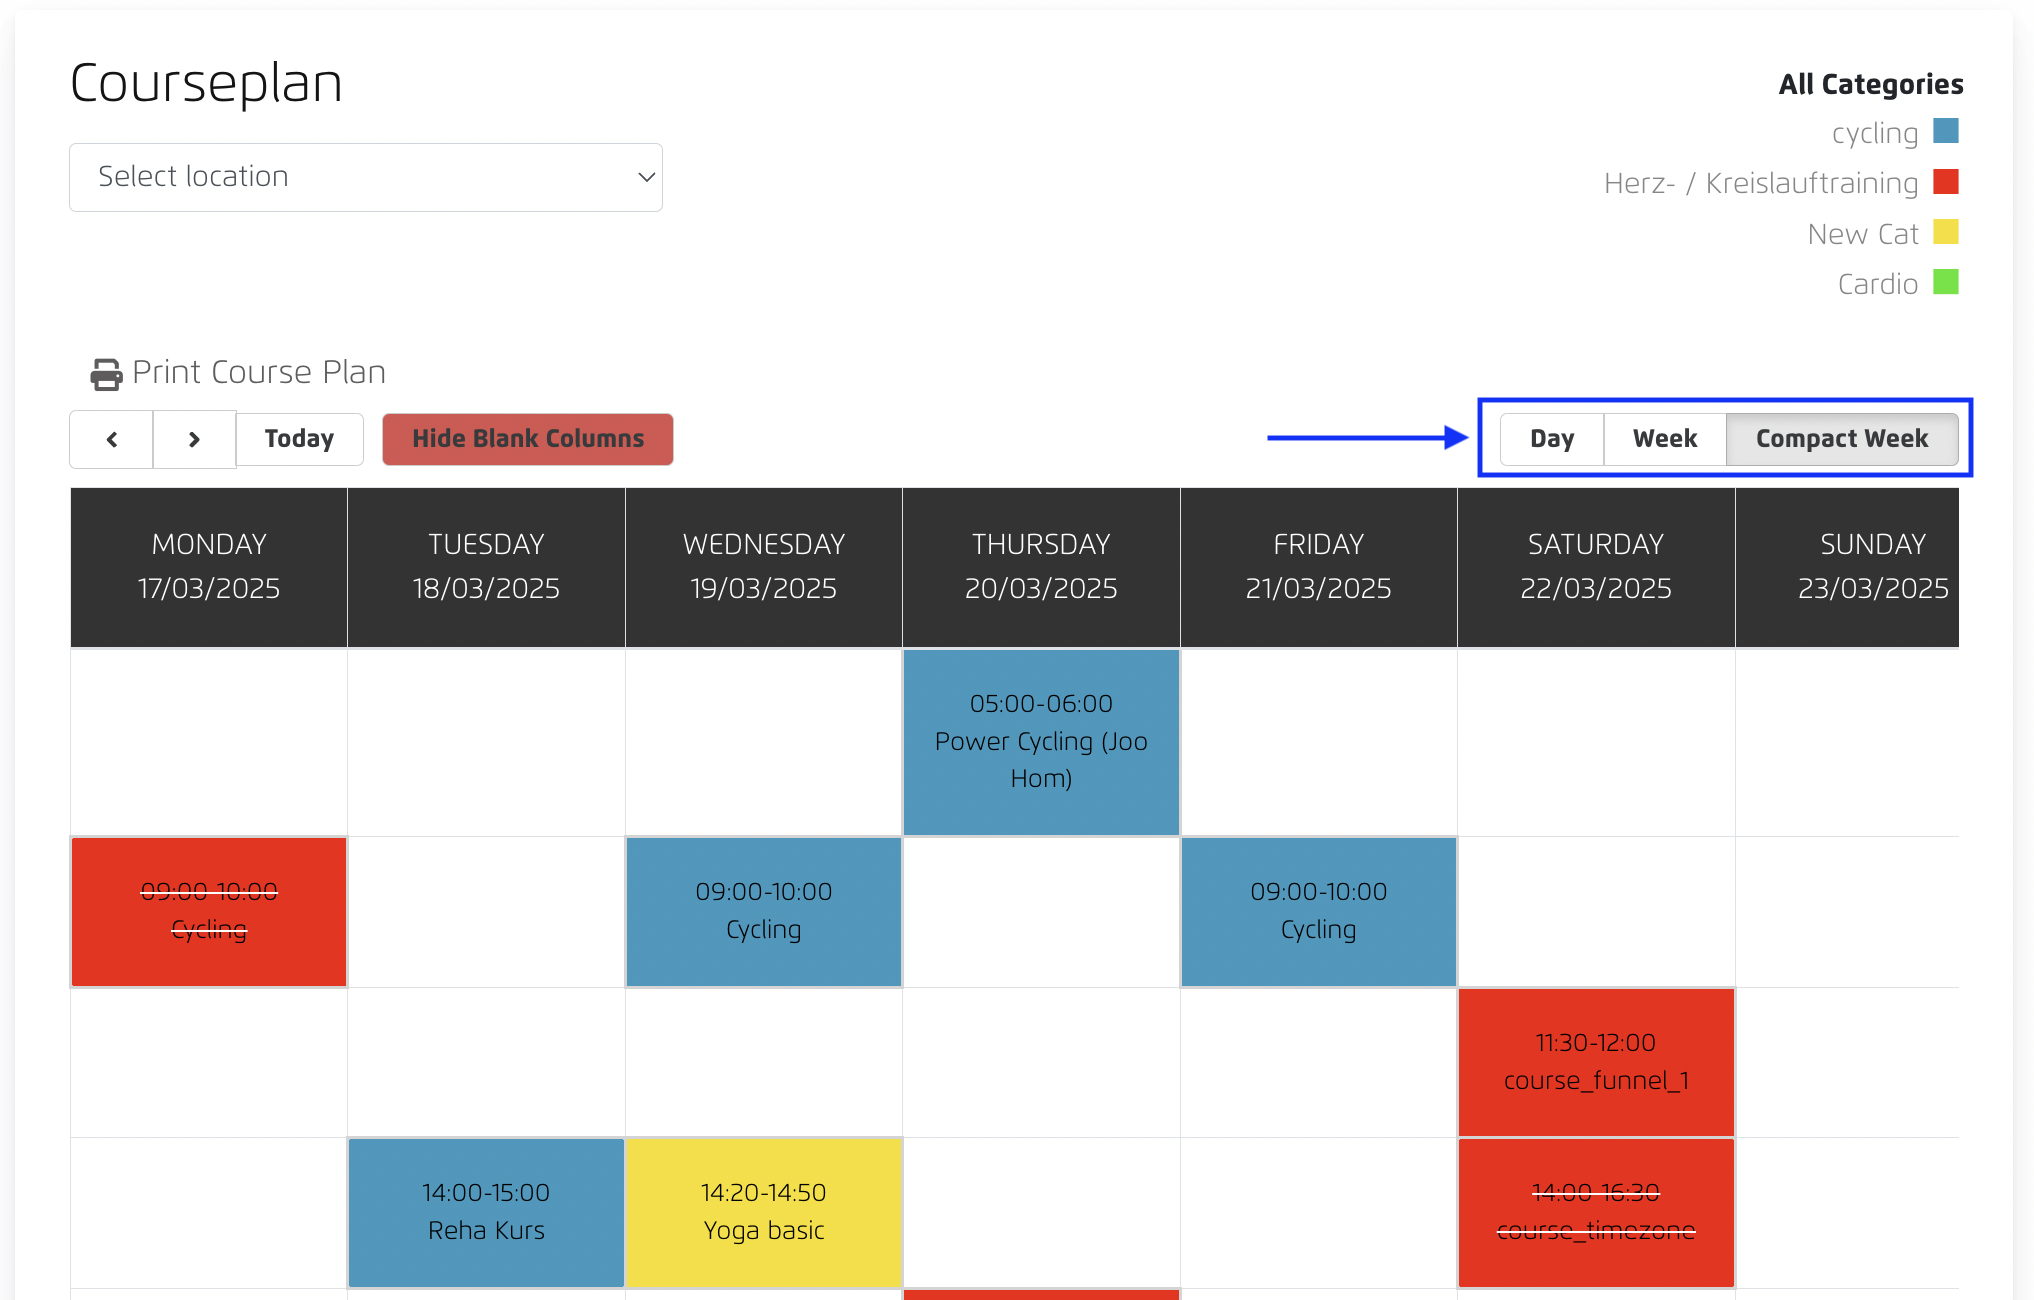
- Calendar Default View : Admin can configure the default view of the calendar when a visitor first logon to this page.
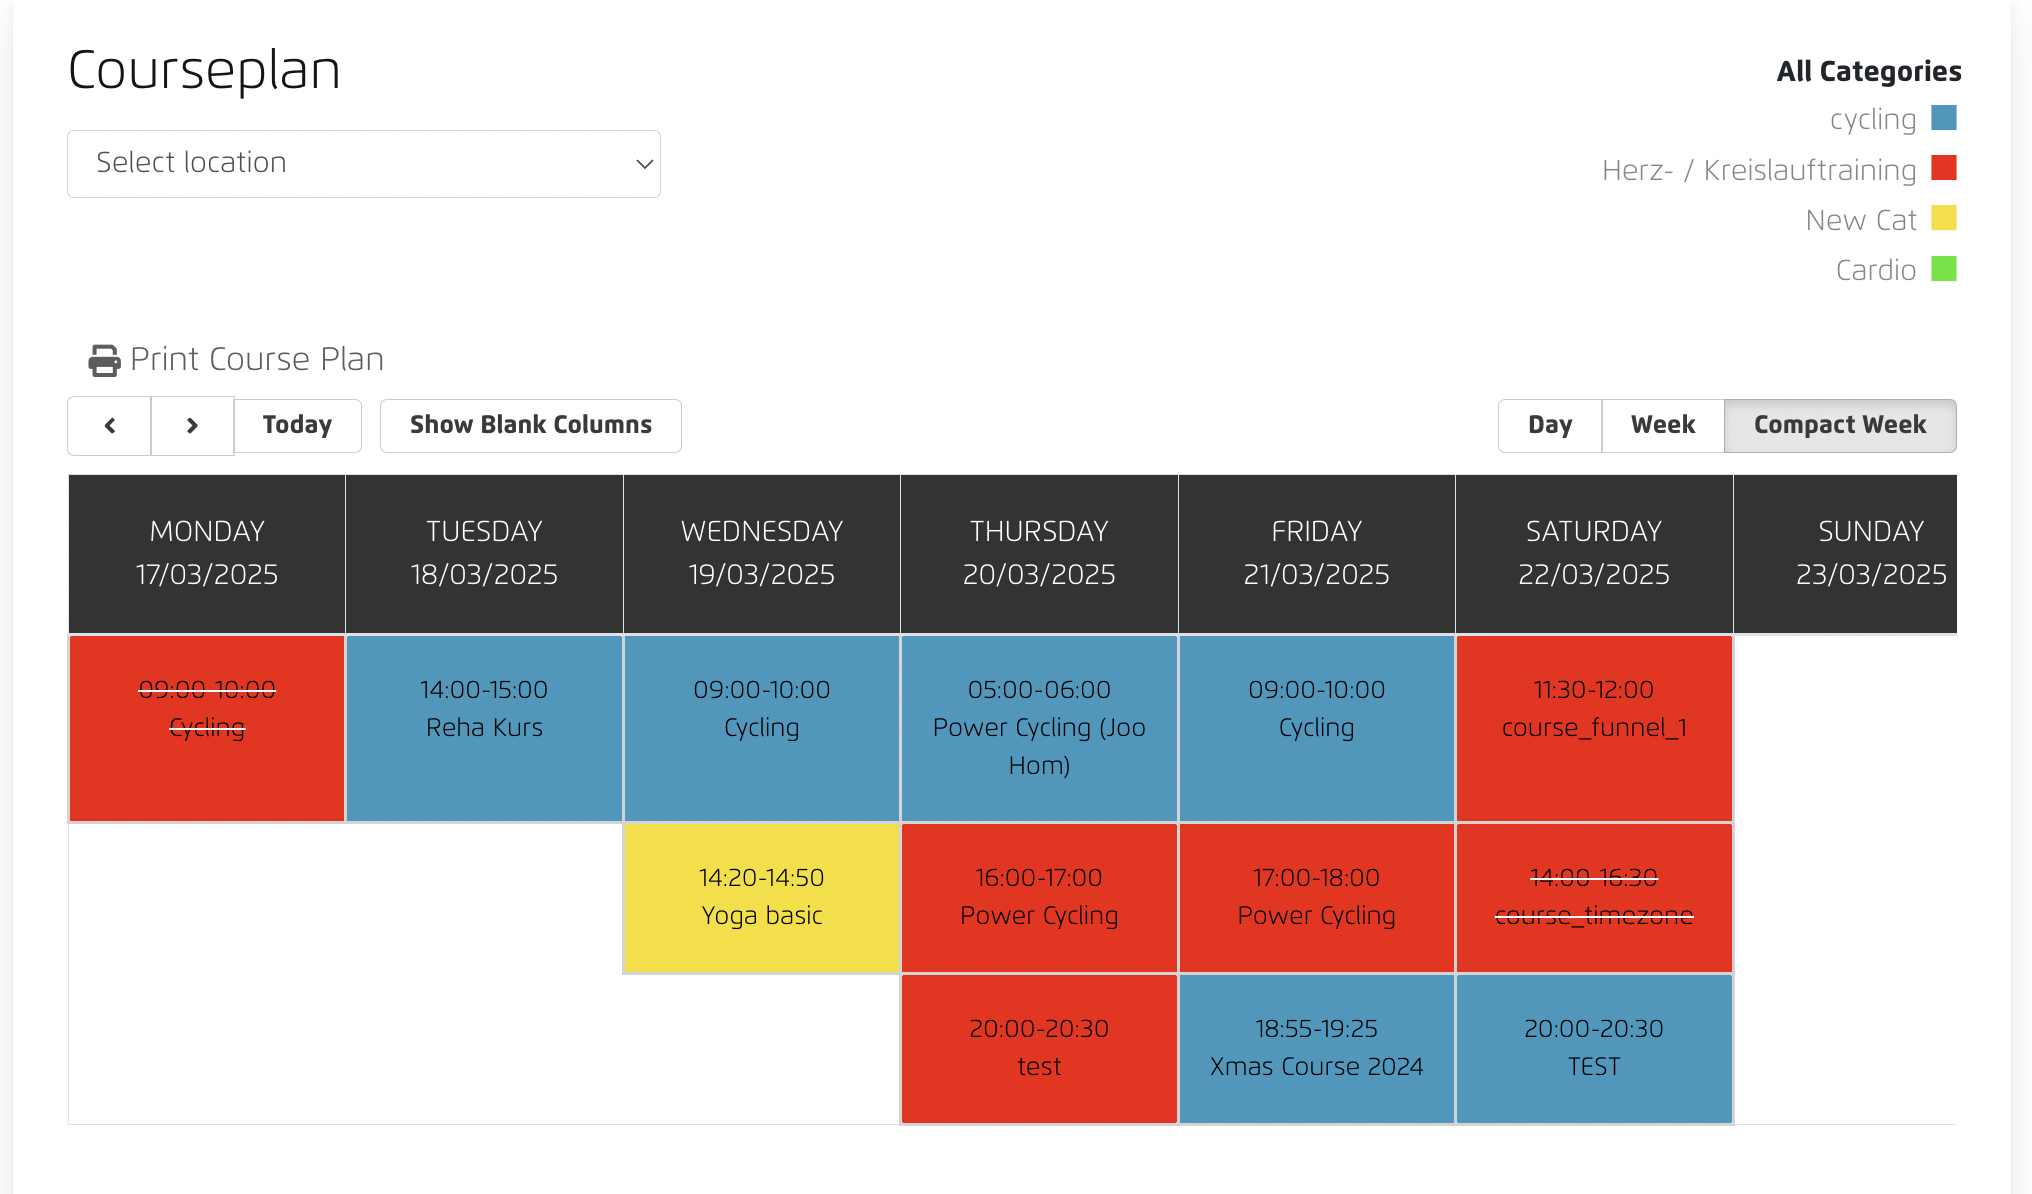
- Show blank columns for compact week : When this is unchecked, all blank column will be removed and the calendar will be displayed like below :
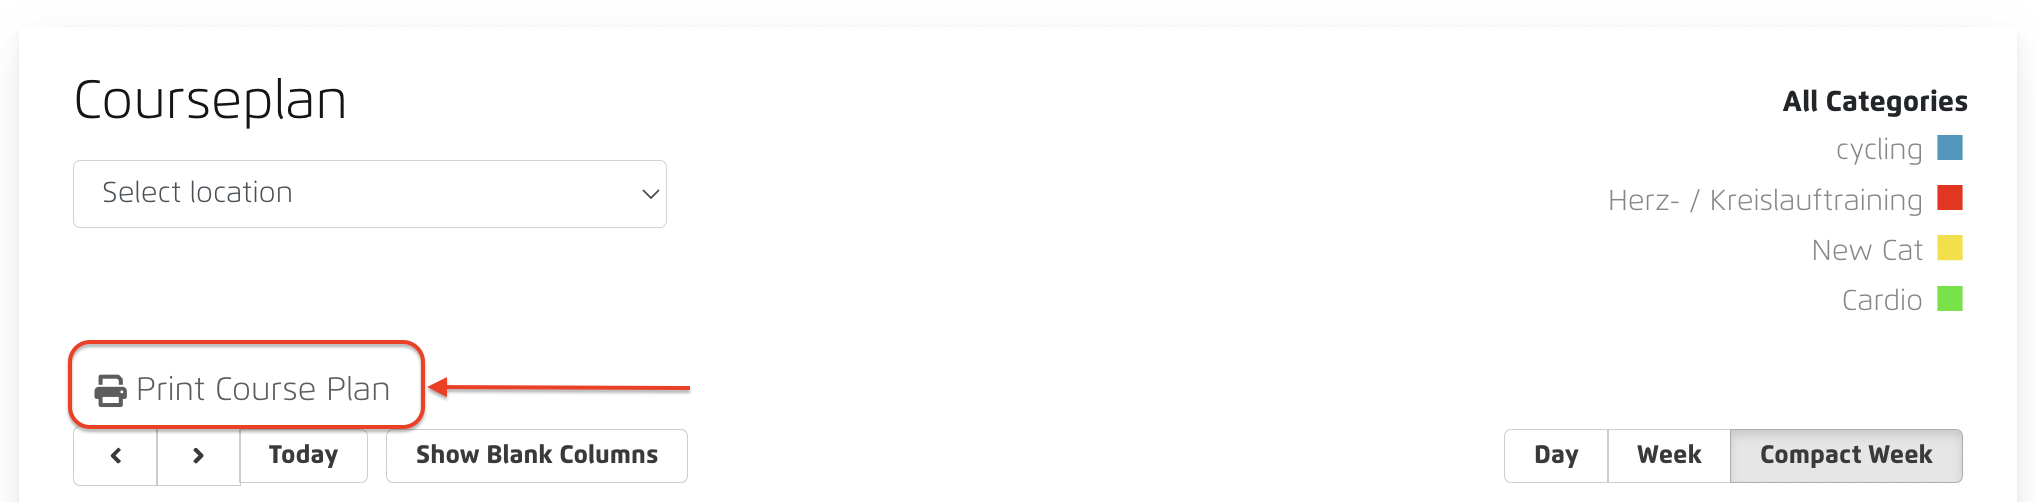
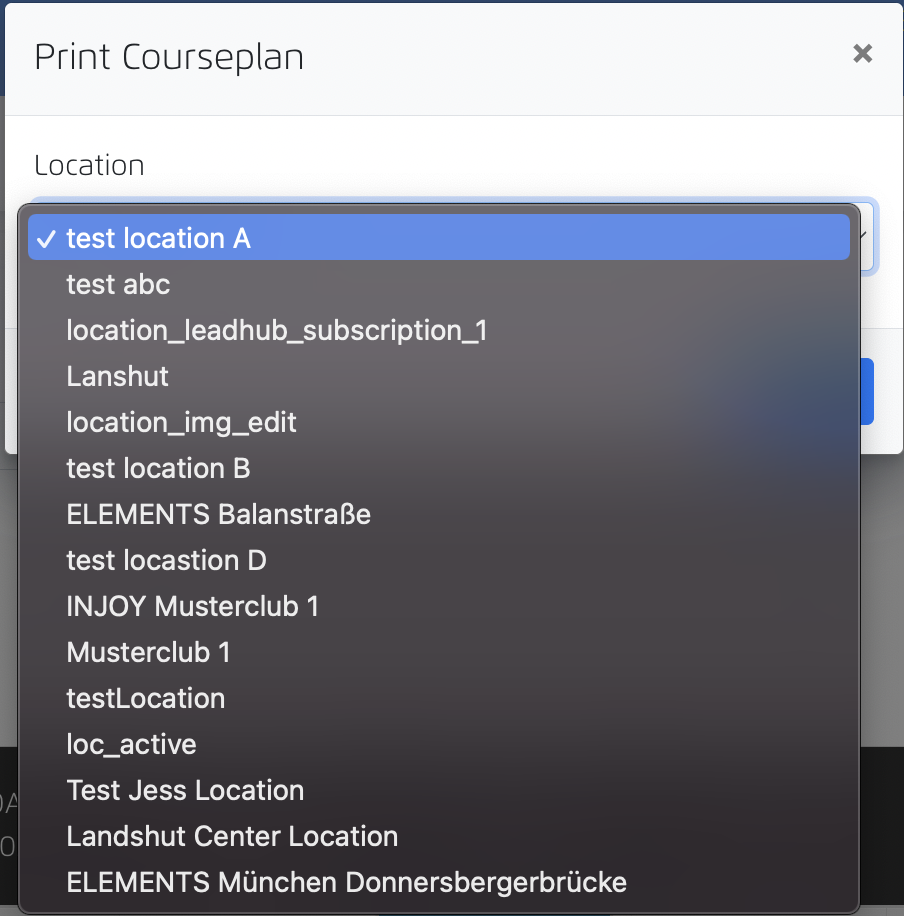
- Following modals pops-up when click on the button:
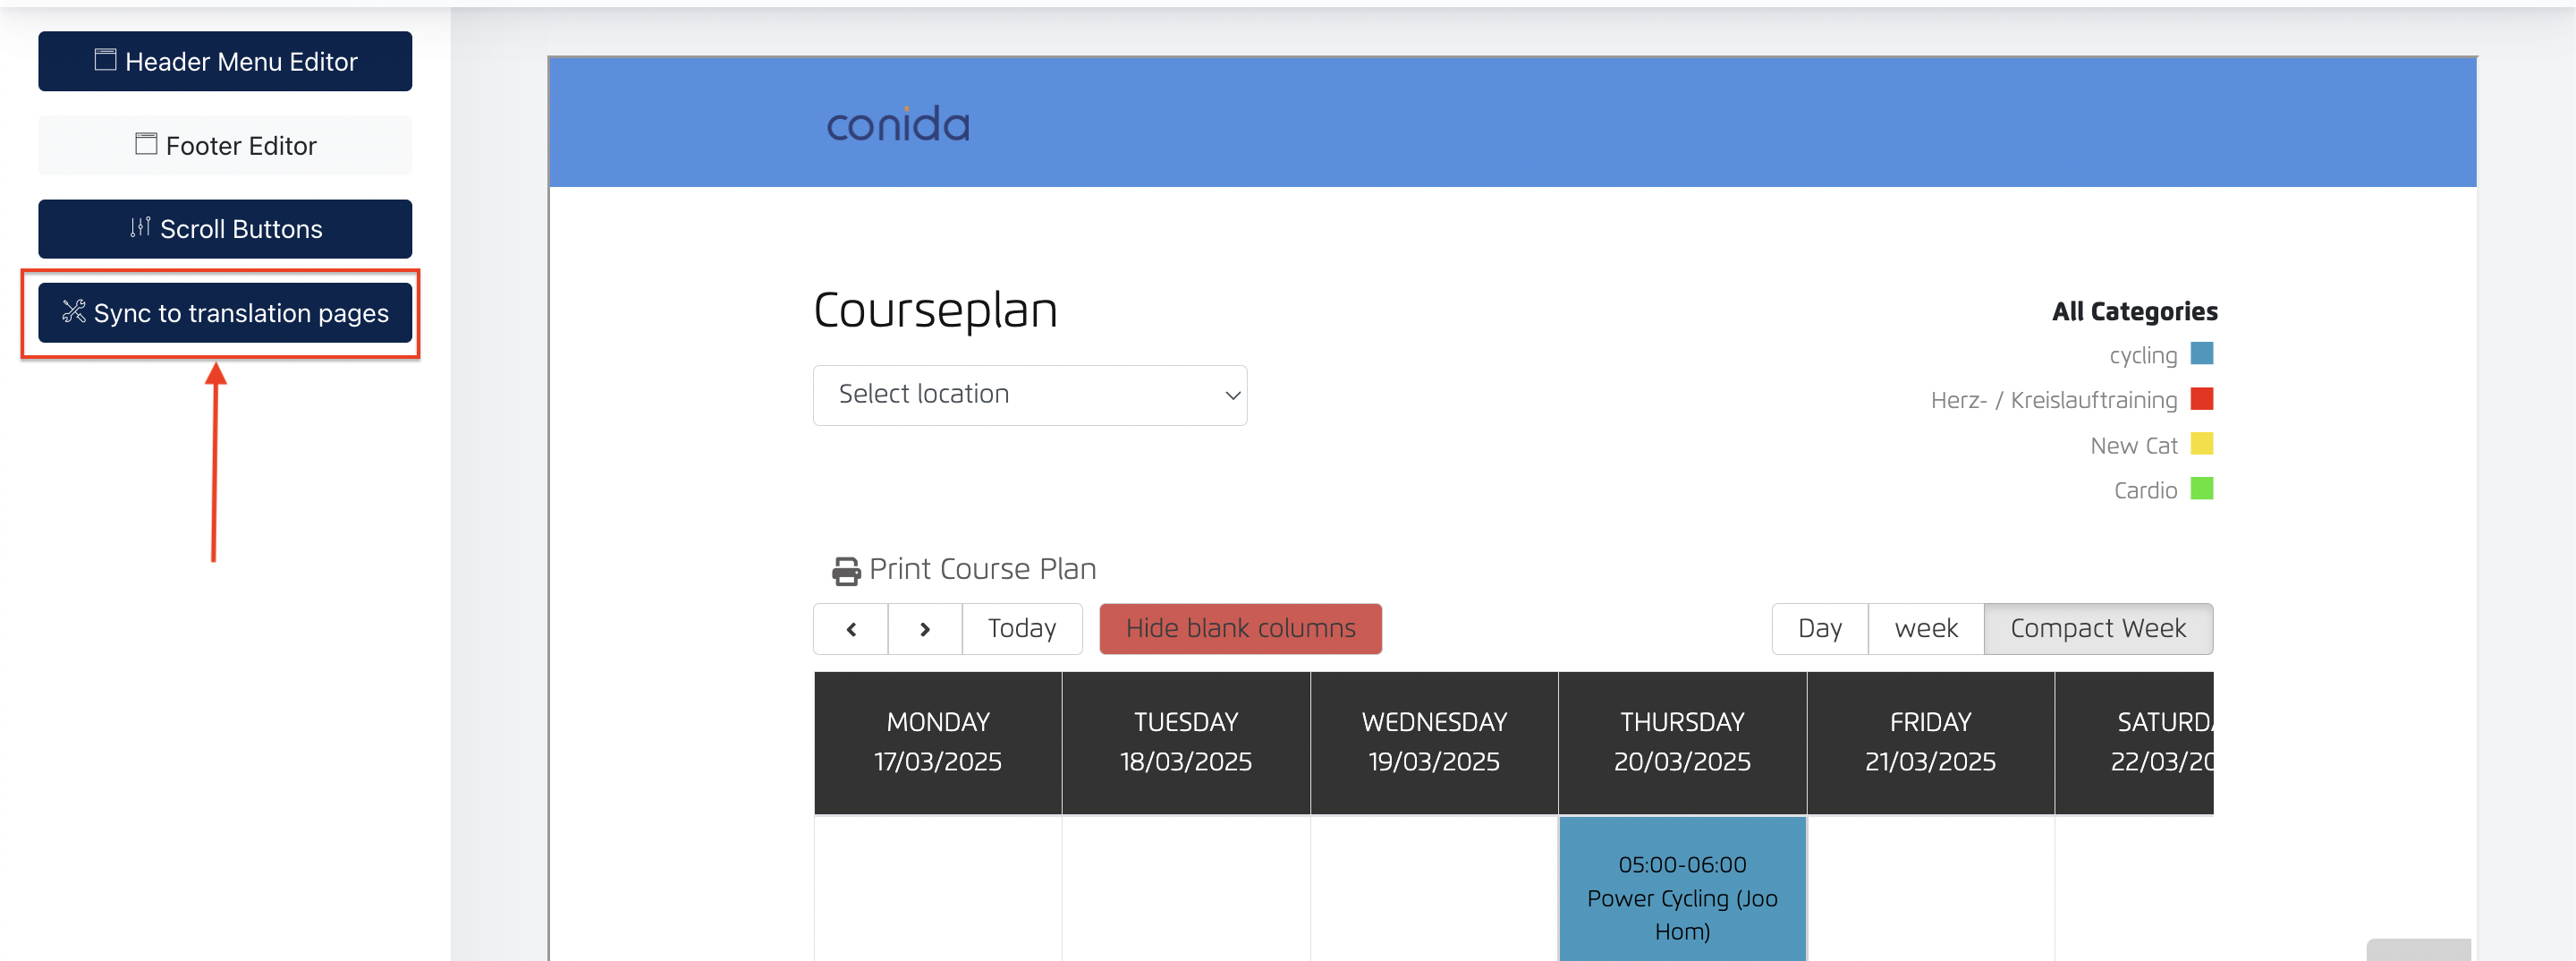
When above setting are all done, Admin may click " Sync to Translation Page" so the same setting applies to the rest of the languages pages.
5. Members
This page allow Center Admin to update members data. Members include members subscribe to Gym Membership, which include physical membership, and Online Membership.
5.1 Add a Member
Click "Create Member"

Fill in the member data accordingly :
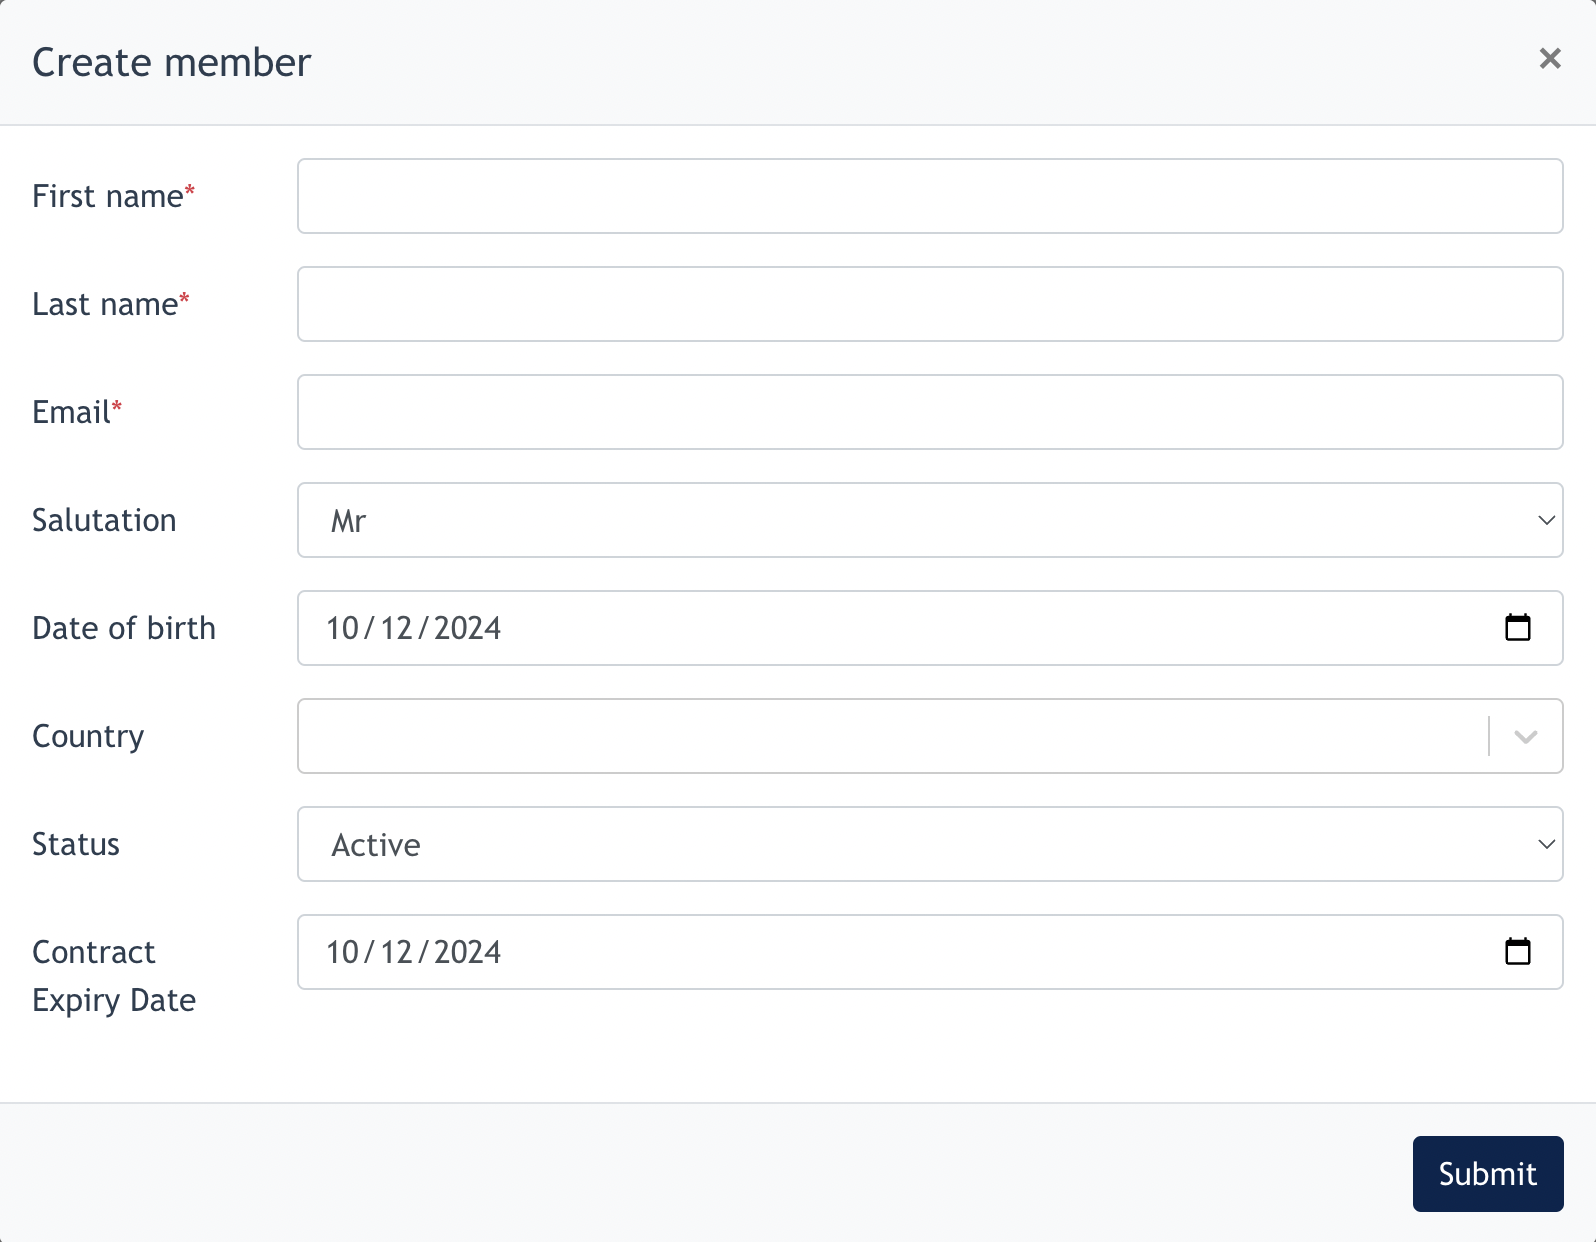
Remarks : Contract Expiry Date refers to the Membership End Date.
5.2 Bulk Uploads
Admin may choose to upload a listing of members in Excel File, by click on the [ Bulk Uploads ] button.

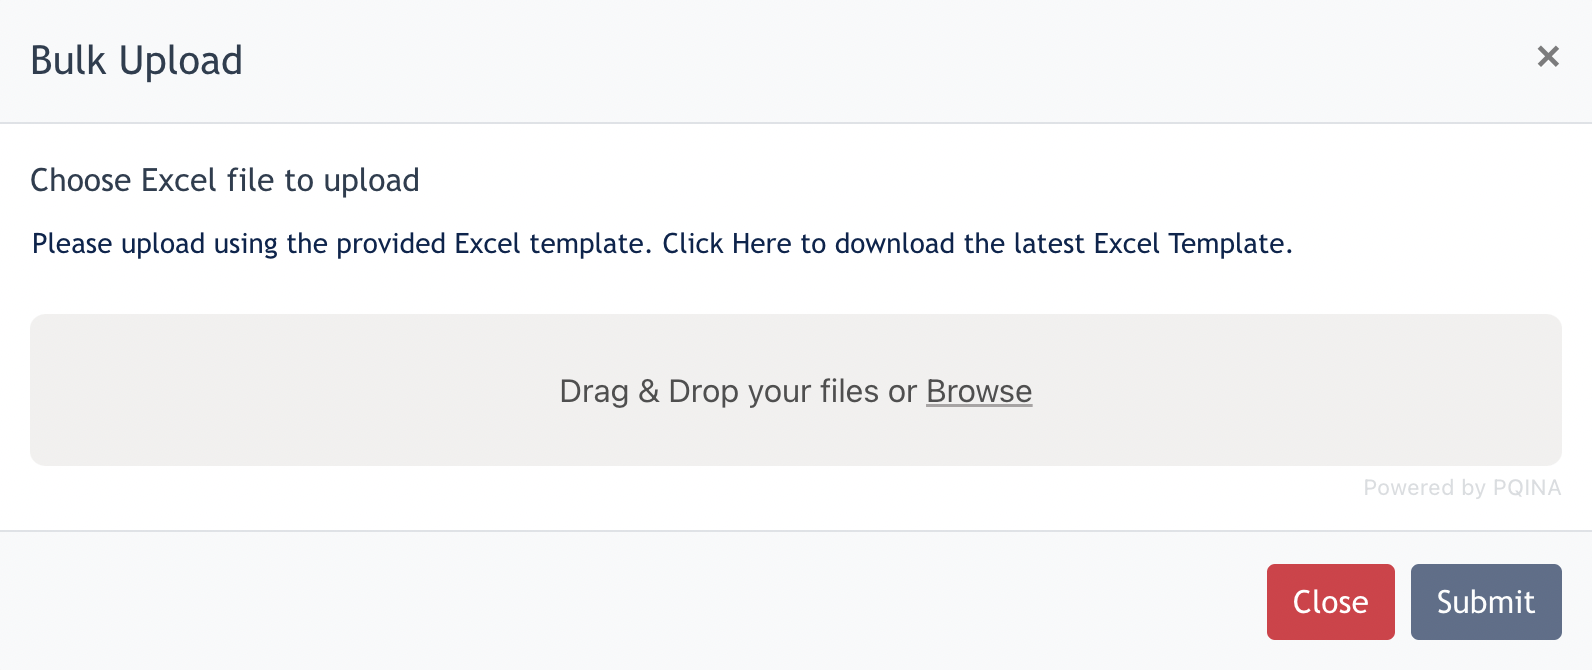
- Download a sample of Excel Template.
- Admin needs to create an Excel file and input members data into the same format/template given.
- Upload this Excel File
- Click Submit --> Members data successfully added
- the end -