
Location Finder Module
Overview
The Location Finder is a module designed for centers with multiple locations. It allows Admin to maintain and add their gym locations to the Location Listing, while providing a search function on the frontend for website visitors to find suitable gym locations.
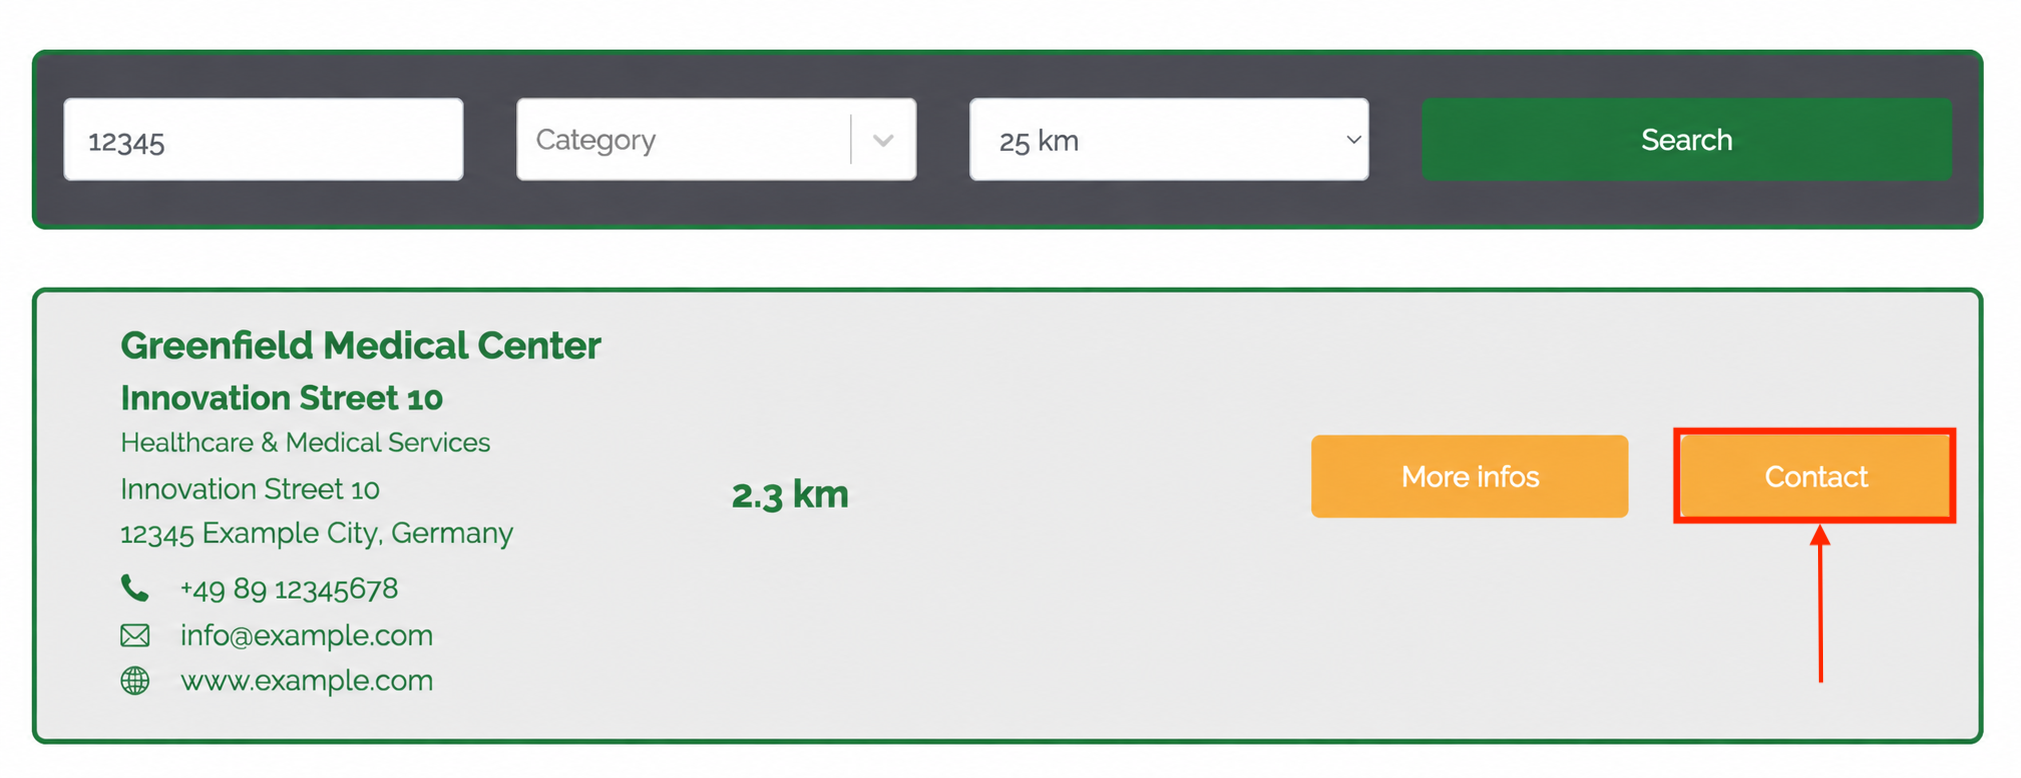
On the Live Site, visitors can search for nearby locations by entering a postcode and specifying a search radius in kilometres (km). Locations that match the search criteria are displayed together with their basic information and distance from the searched postcode.
From the search results, visitors can view further information about a location on its dedicated Location Page or contact the location through a form.
1. Setting up Locations
Before the Location Finder can be used on Ark Site, Admin must first set up the locations that should be available in the system. Each location created will be stored in the Location Listing, where Admin can manage the location information and settings.
To create location, go to Location finder > Locations > Create
1.1 Create a Location
Click Create to open the Create Location form. Enter the relevant location details and click Submit to save the location. Once created, the location will appear in the Location Listing.
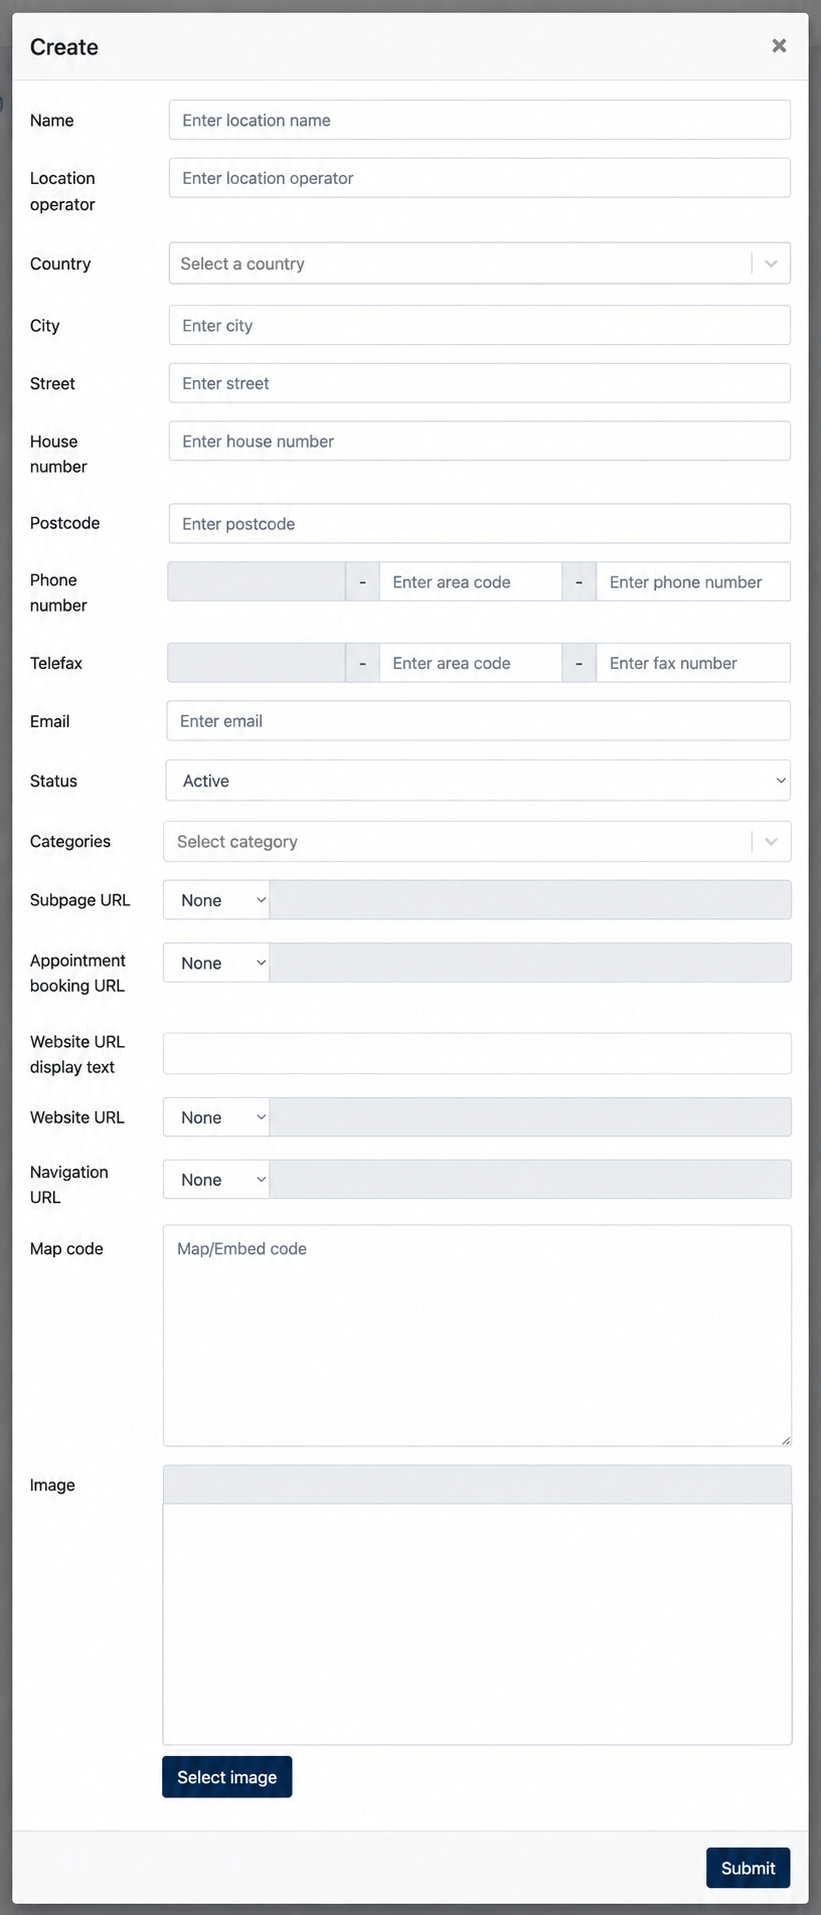
Most fields in the form are self-explanatory. The following fields require additional explanation.
| Field | Description |
|---|---|
| Categories | Assign one or more categories to the location finder. |
| Subpage URL | Defines the page URL that users can access to view further information about the location. |
| Appointment Booking URL | (Optional) An appointment booking button will appear on the location content if this is filled |
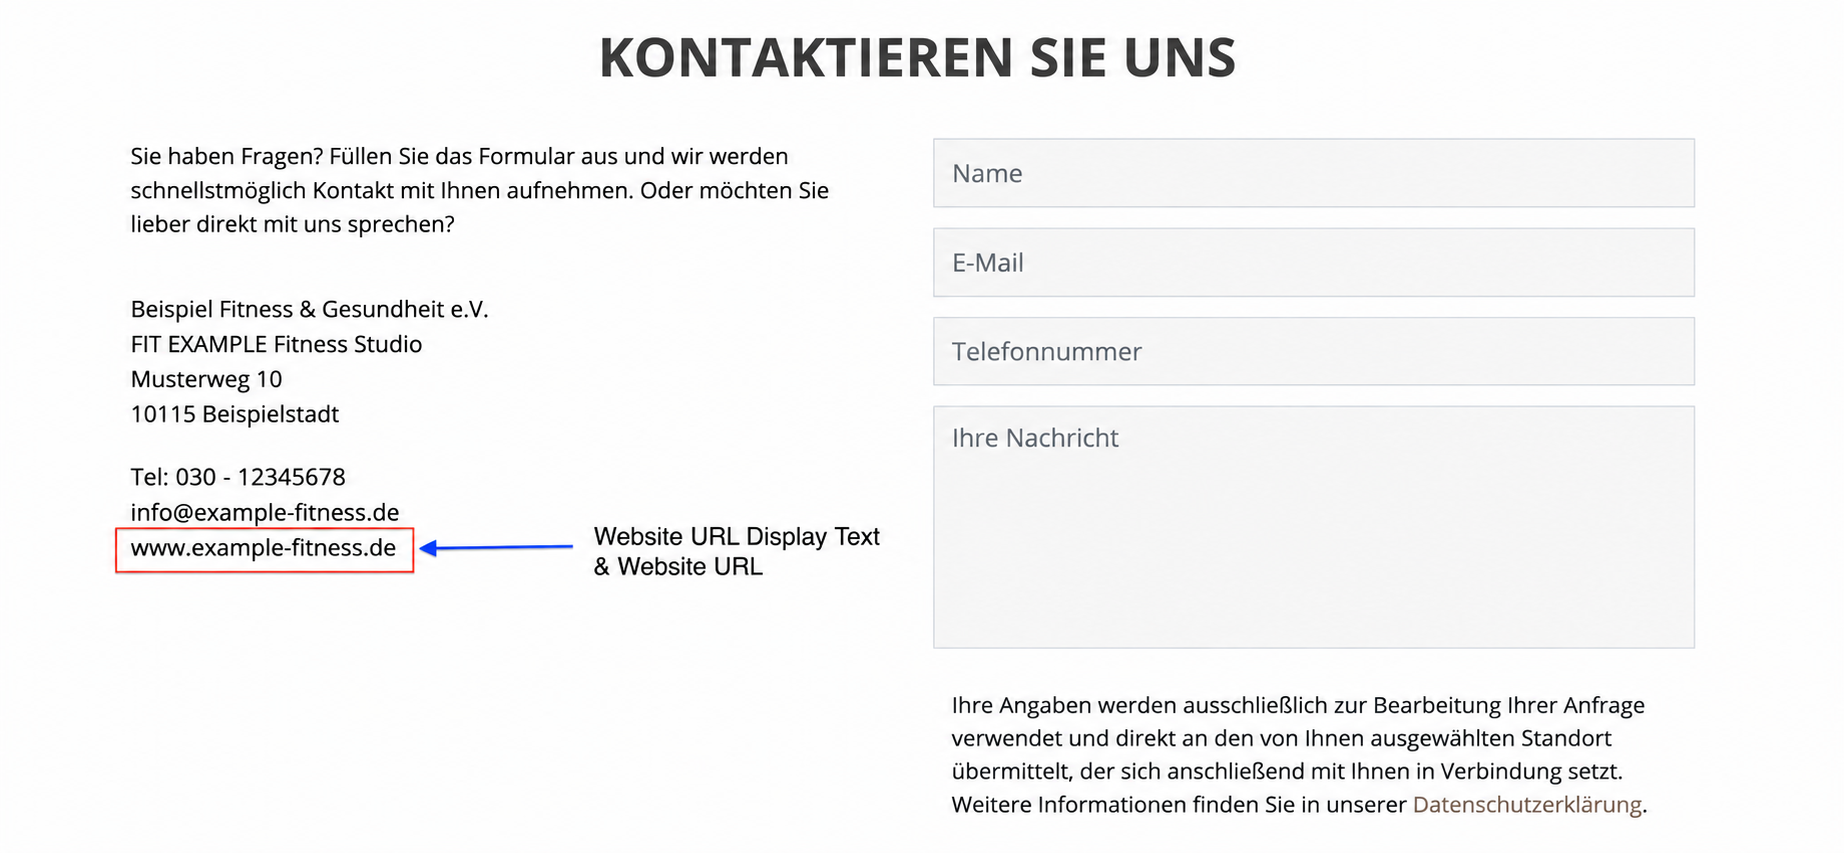
| Website URL Display Text | Defines the clickable text displayed for the Website URL on the Location Subpage. |
| Website URL | Defines the website URL that visitors are directed to when clicking the display text. |
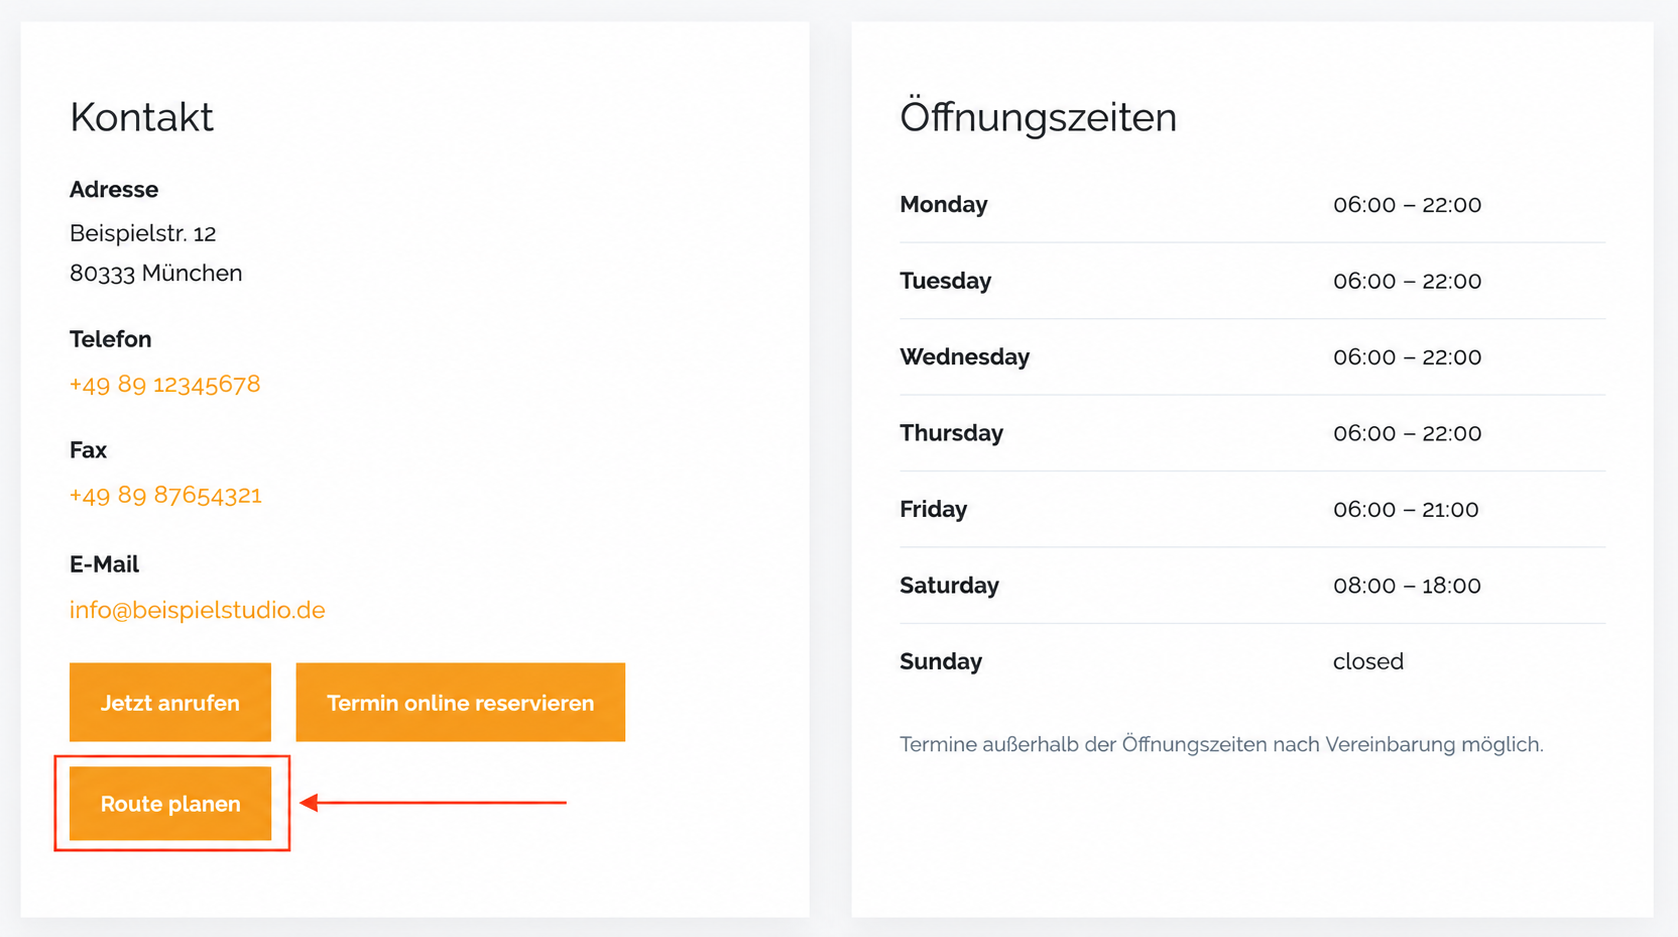
| Navigation URL | A "Get Direction" button will appear if this field is filled. |
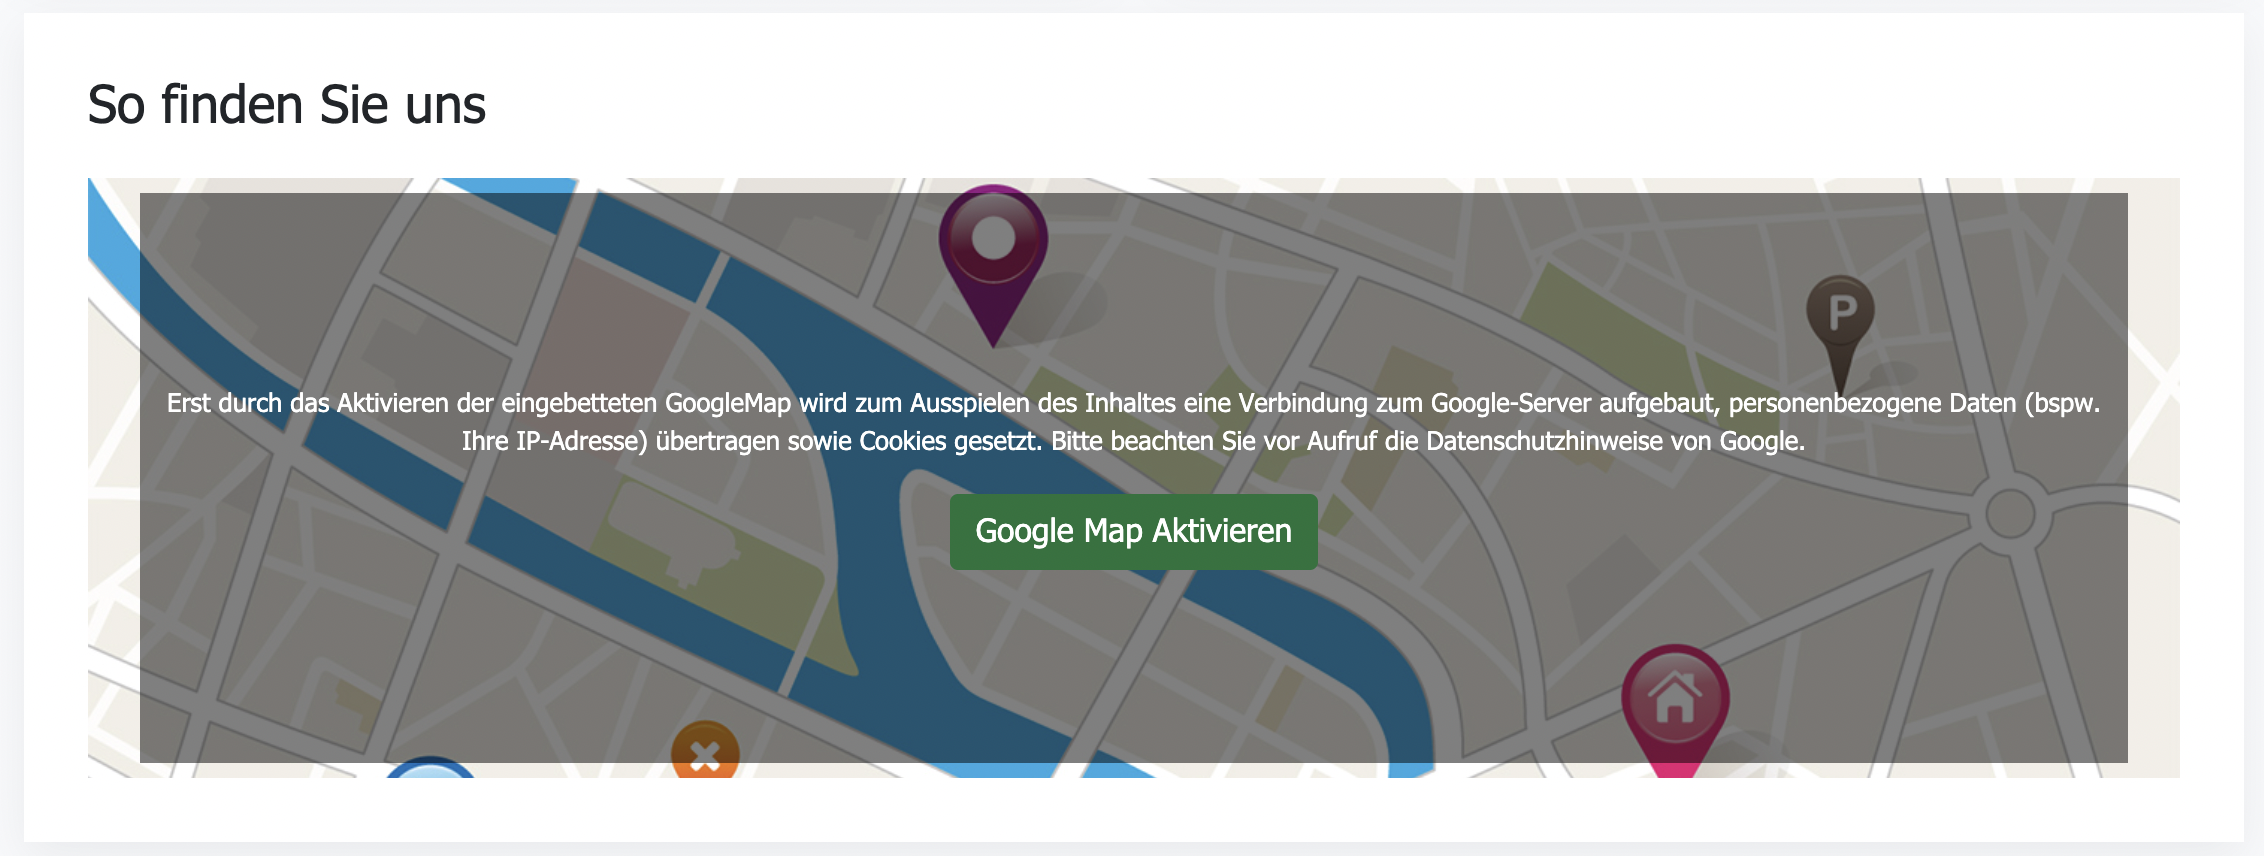
| Map Code | Add the map/embed code used to display the location on a map. |
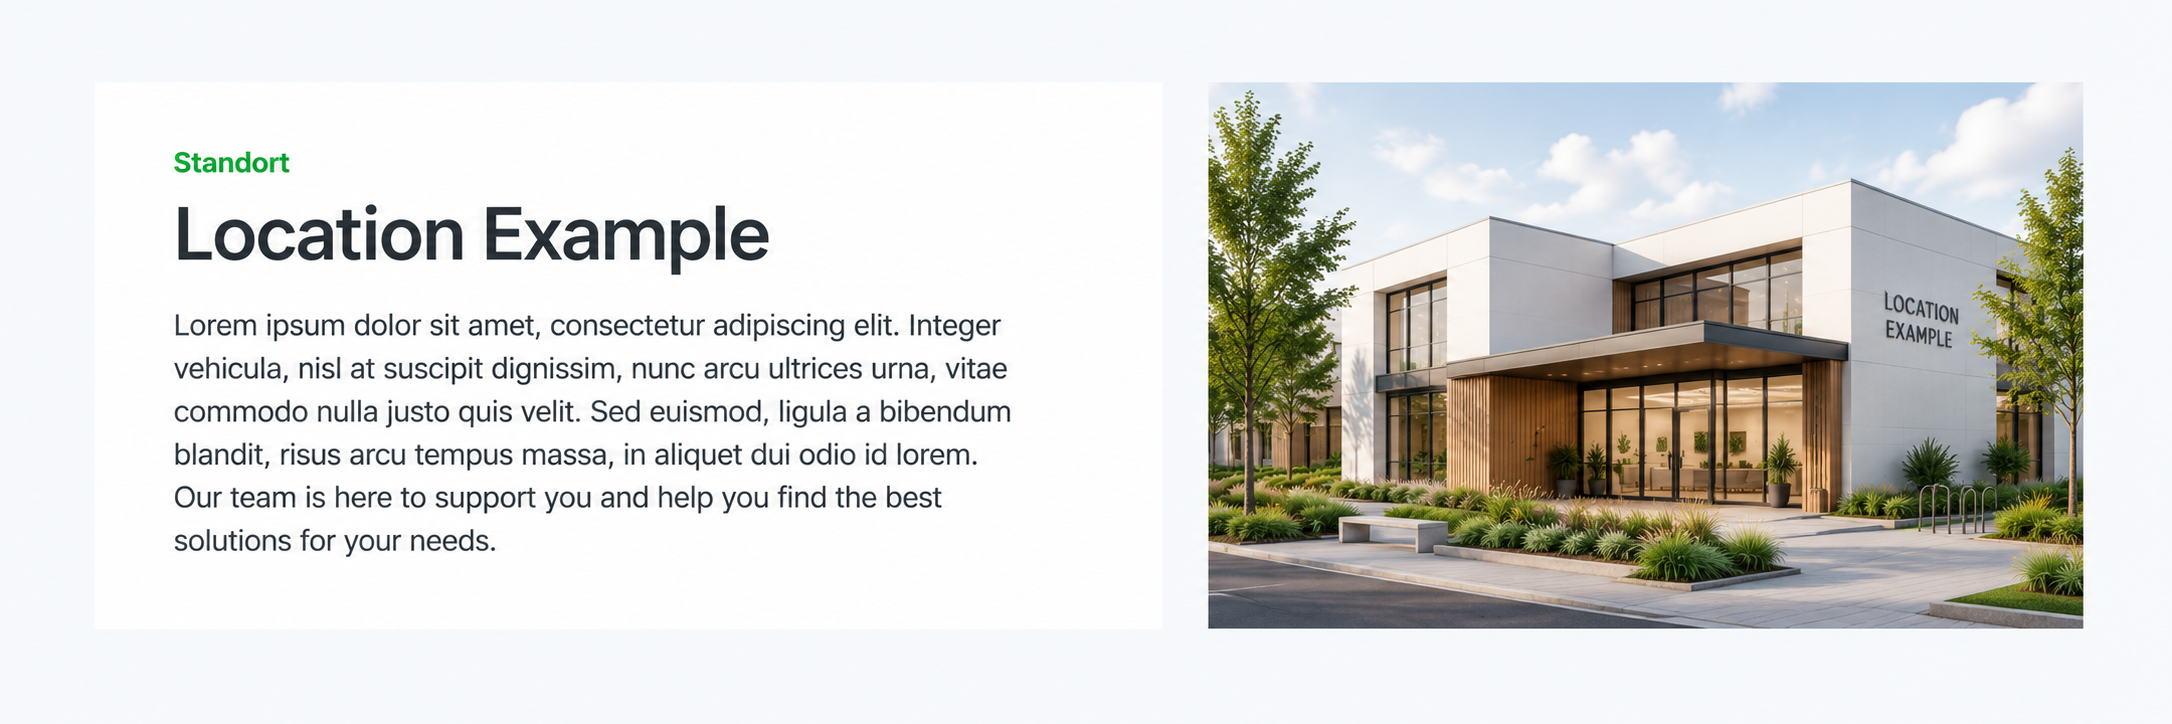
| Image | Upload an image representing the location. |
i) Categories
Here, Admin can assign one or more categories to the location.
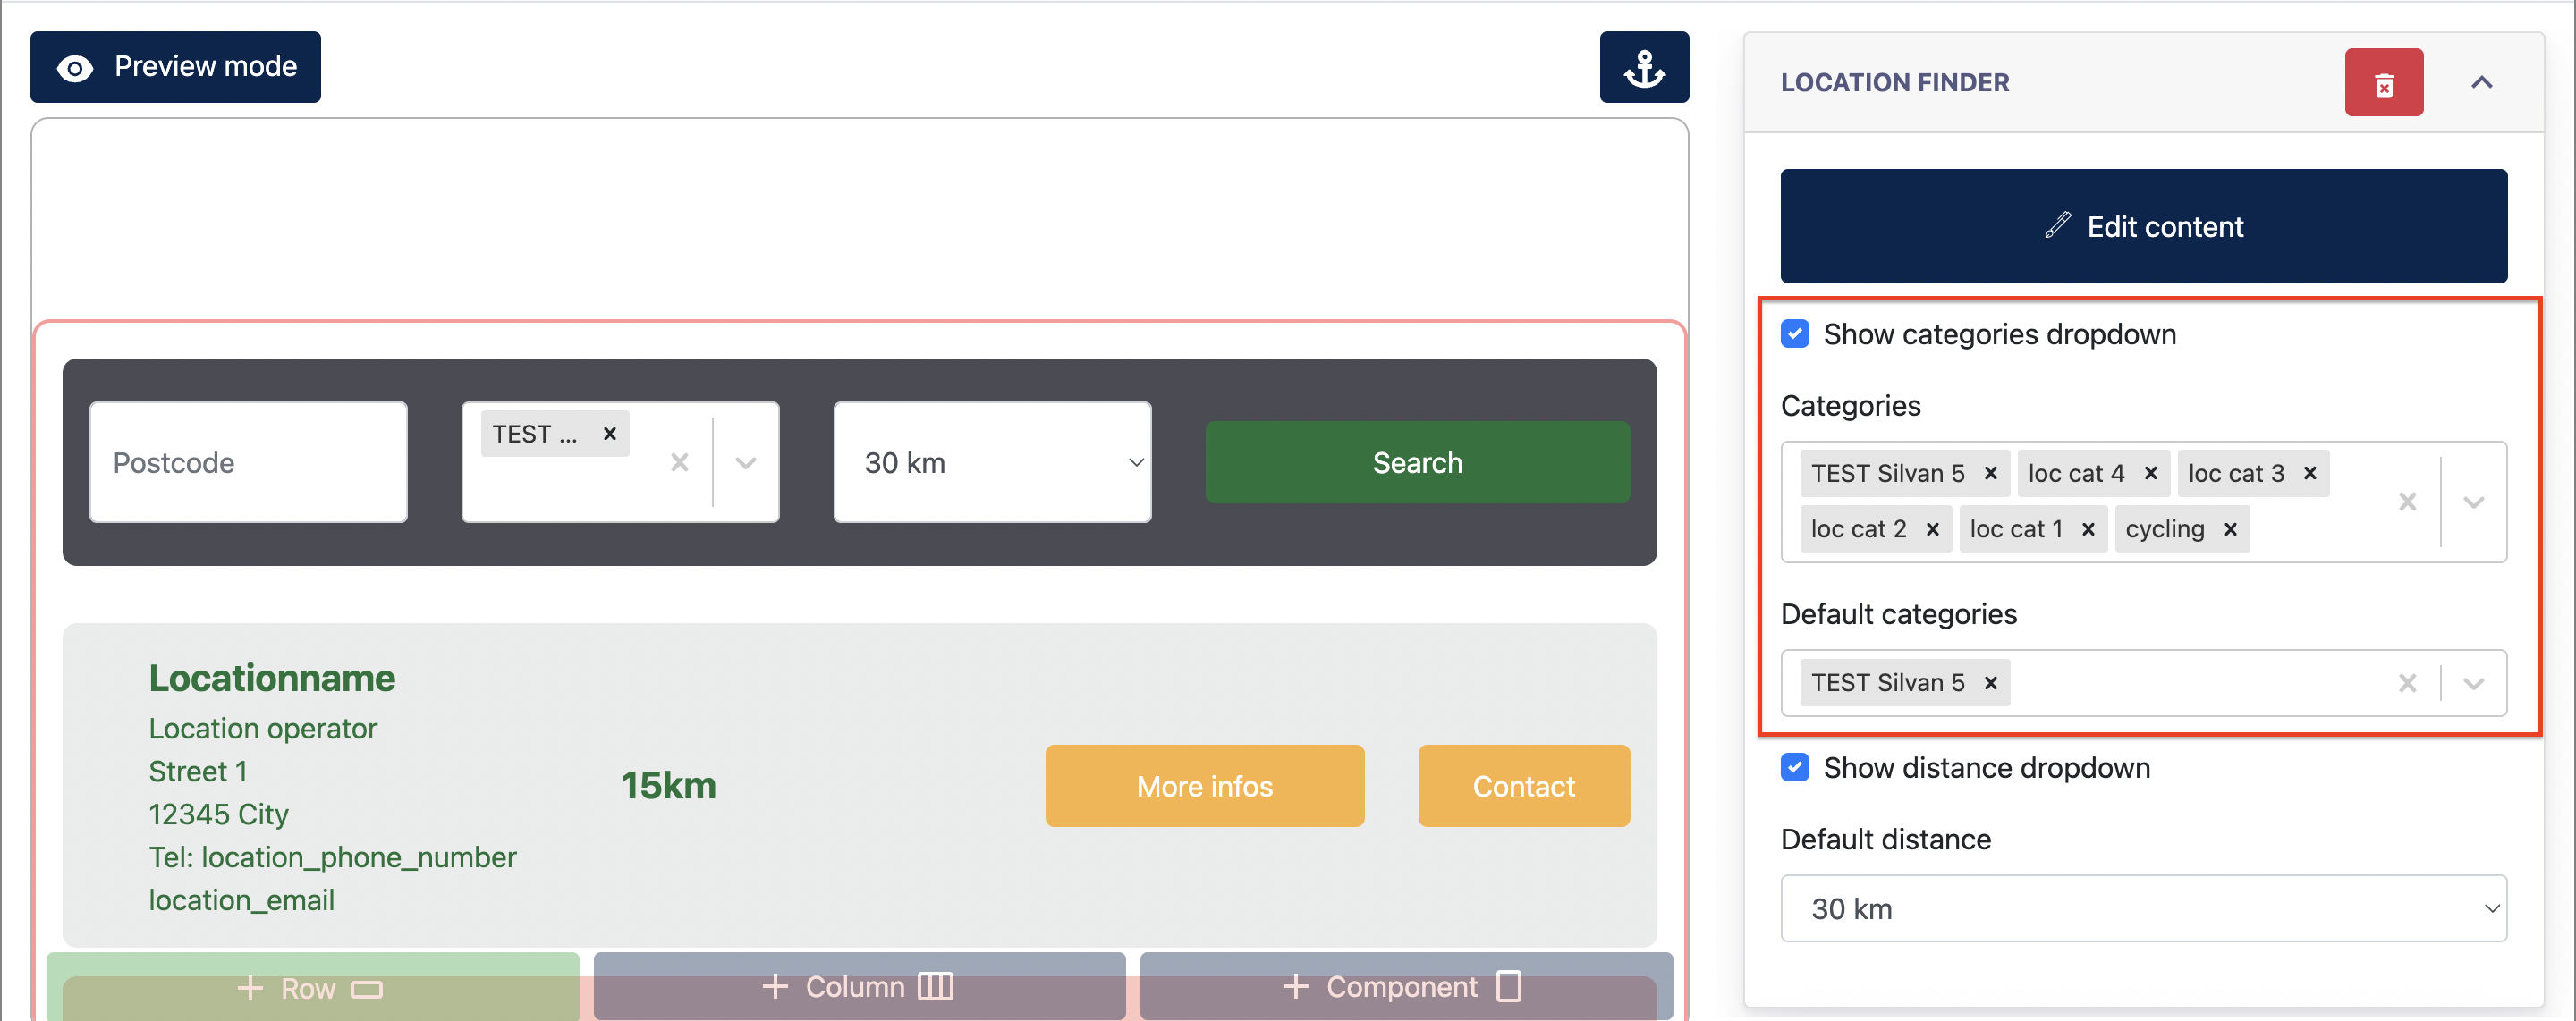
These categories can be used as a search filter in the Location Finder when Categories Search is enabled. The Categories Search function is optional.

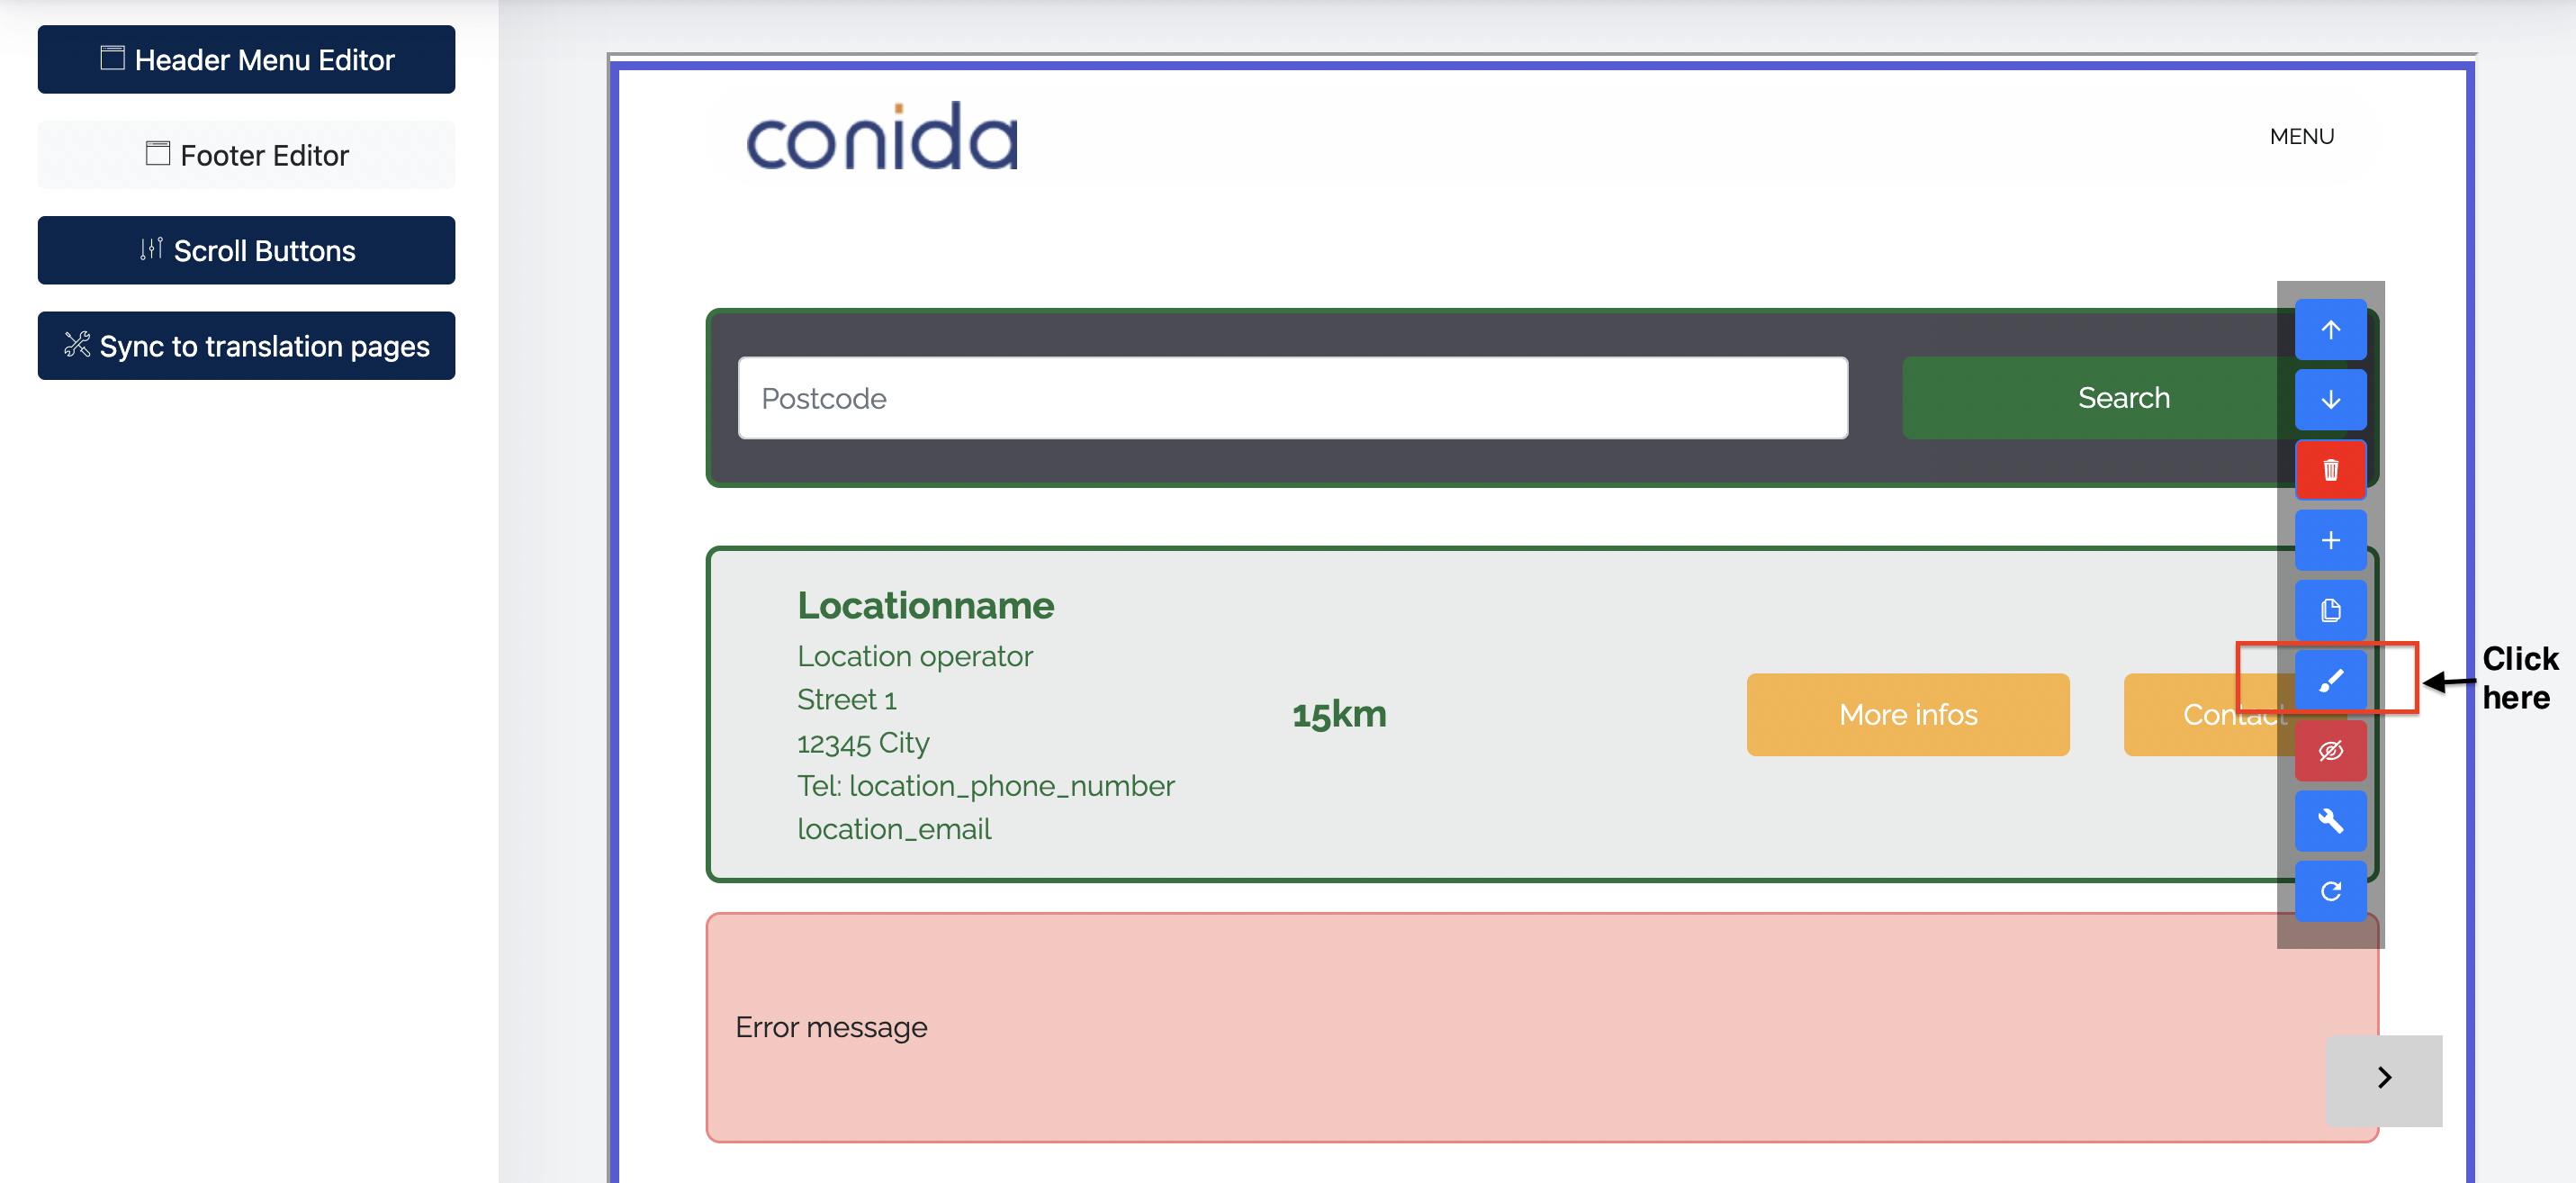
How to enable Categories Search to a Location Finder
- Go to the page where the Location Finder is added.
- Click Edit to enter the Section Editor.
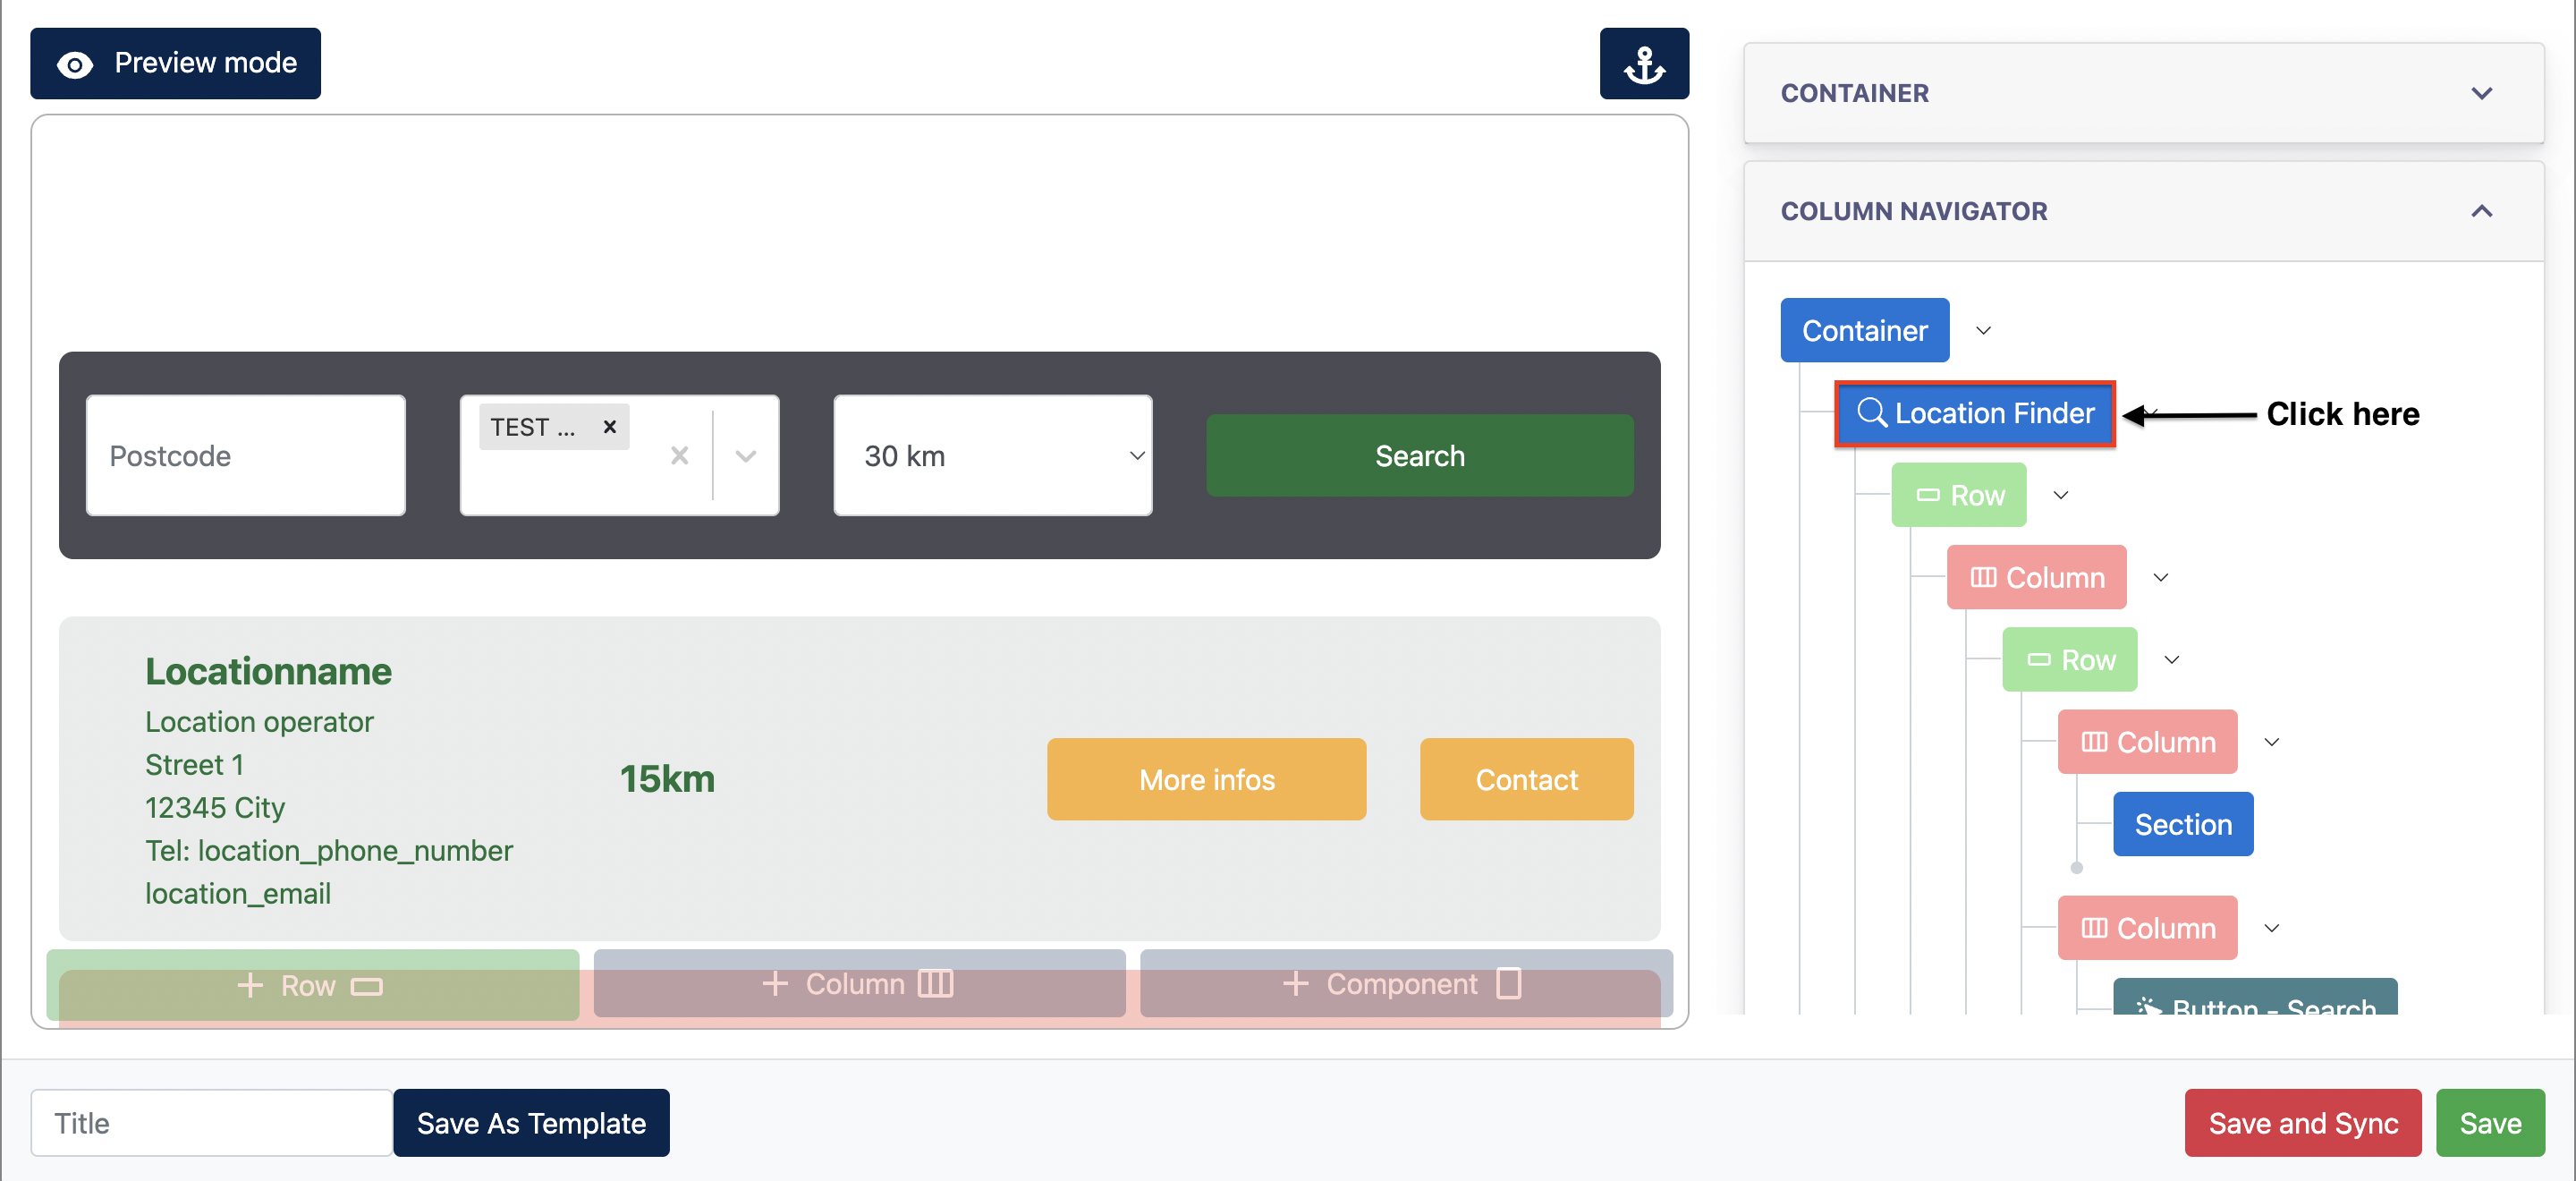
- Under Column Navigator, click the Location Finder component.
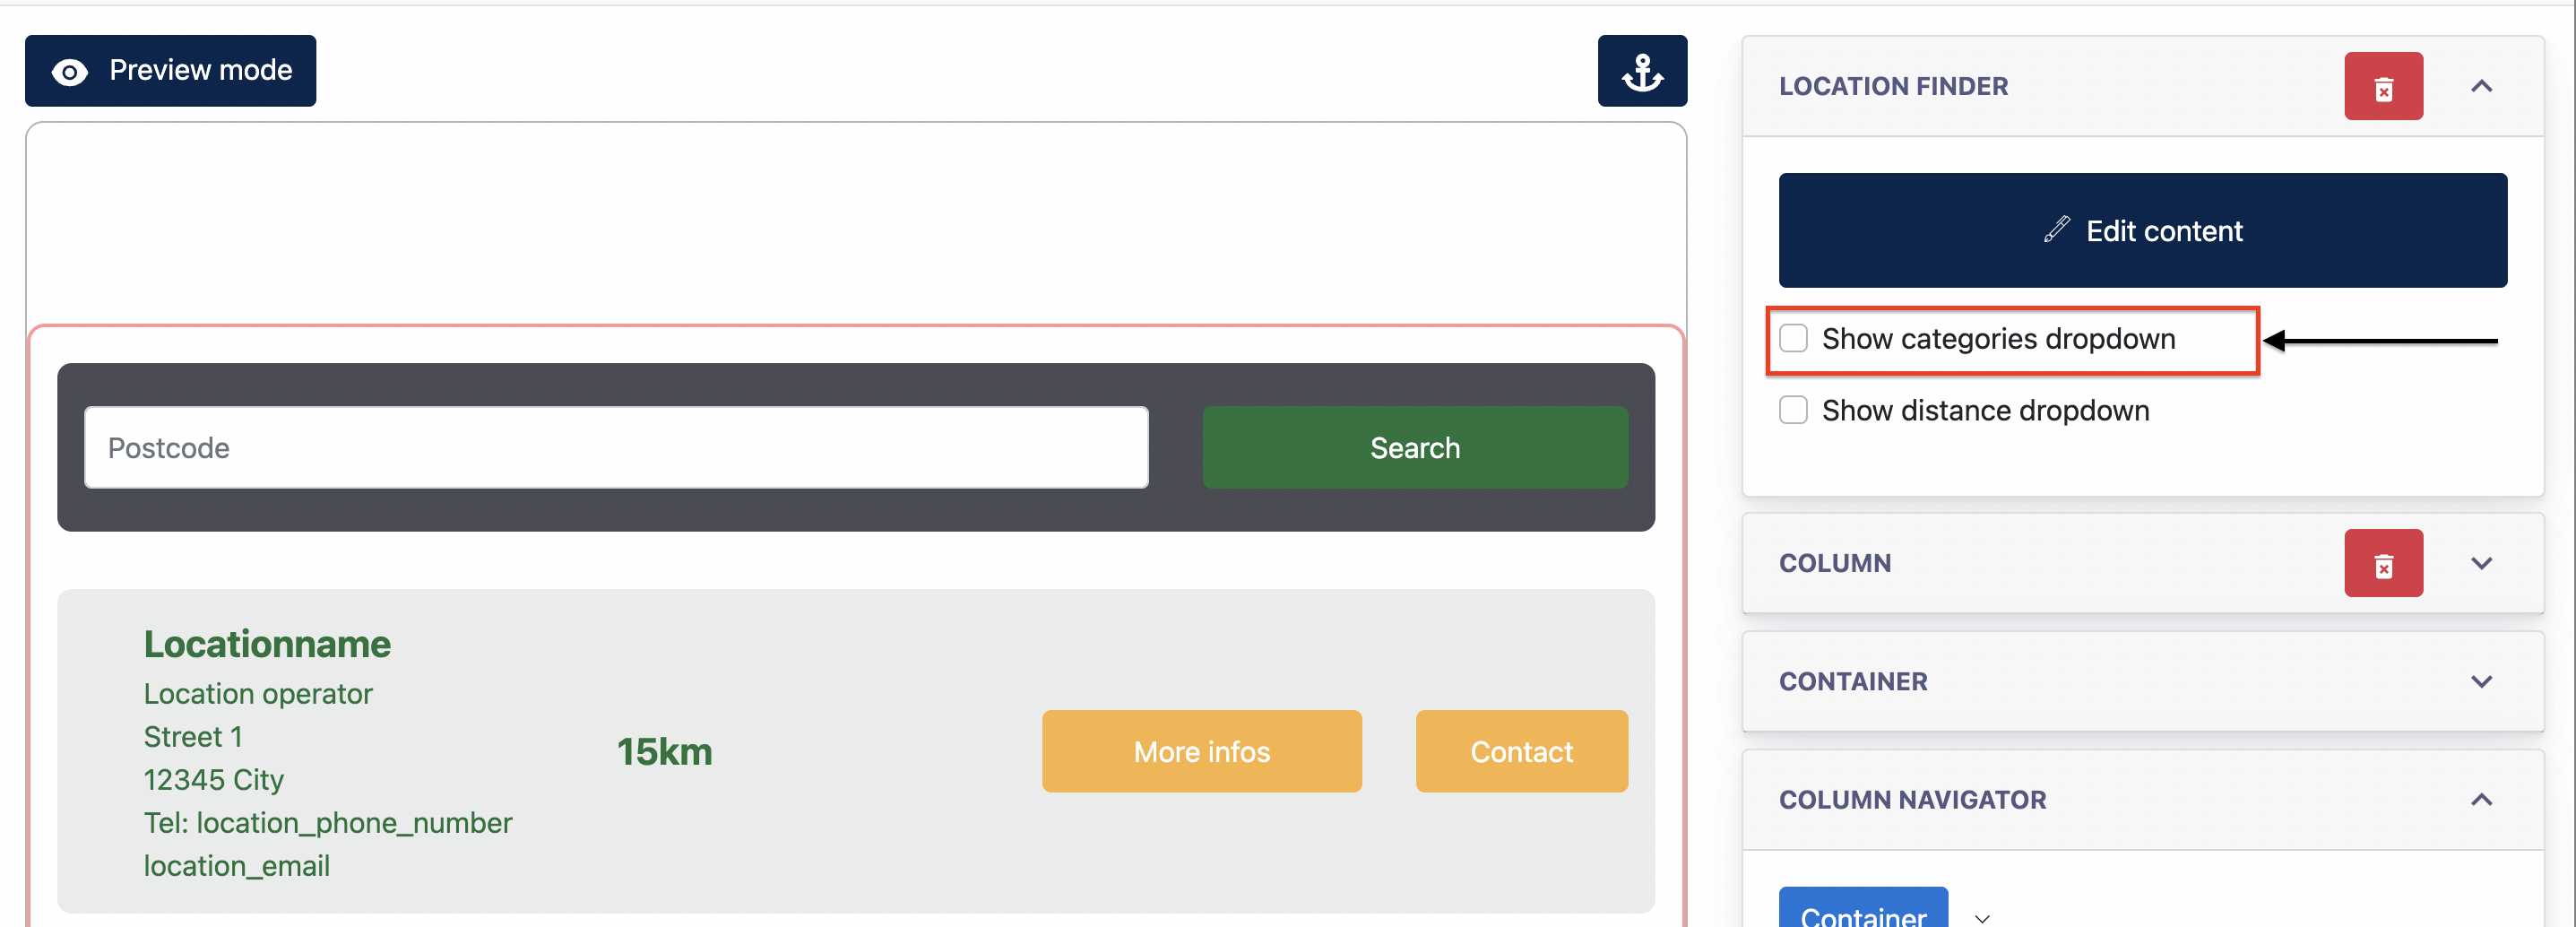
- In the Location Finder configuration, tick the Categories checkbox to enable Categories Search.
- Configure the available categories and, if required, select a Default Category.
Step 1 & 2:
Step 3 :
Step 4 :
Step 5 :
ii) Subpage URL
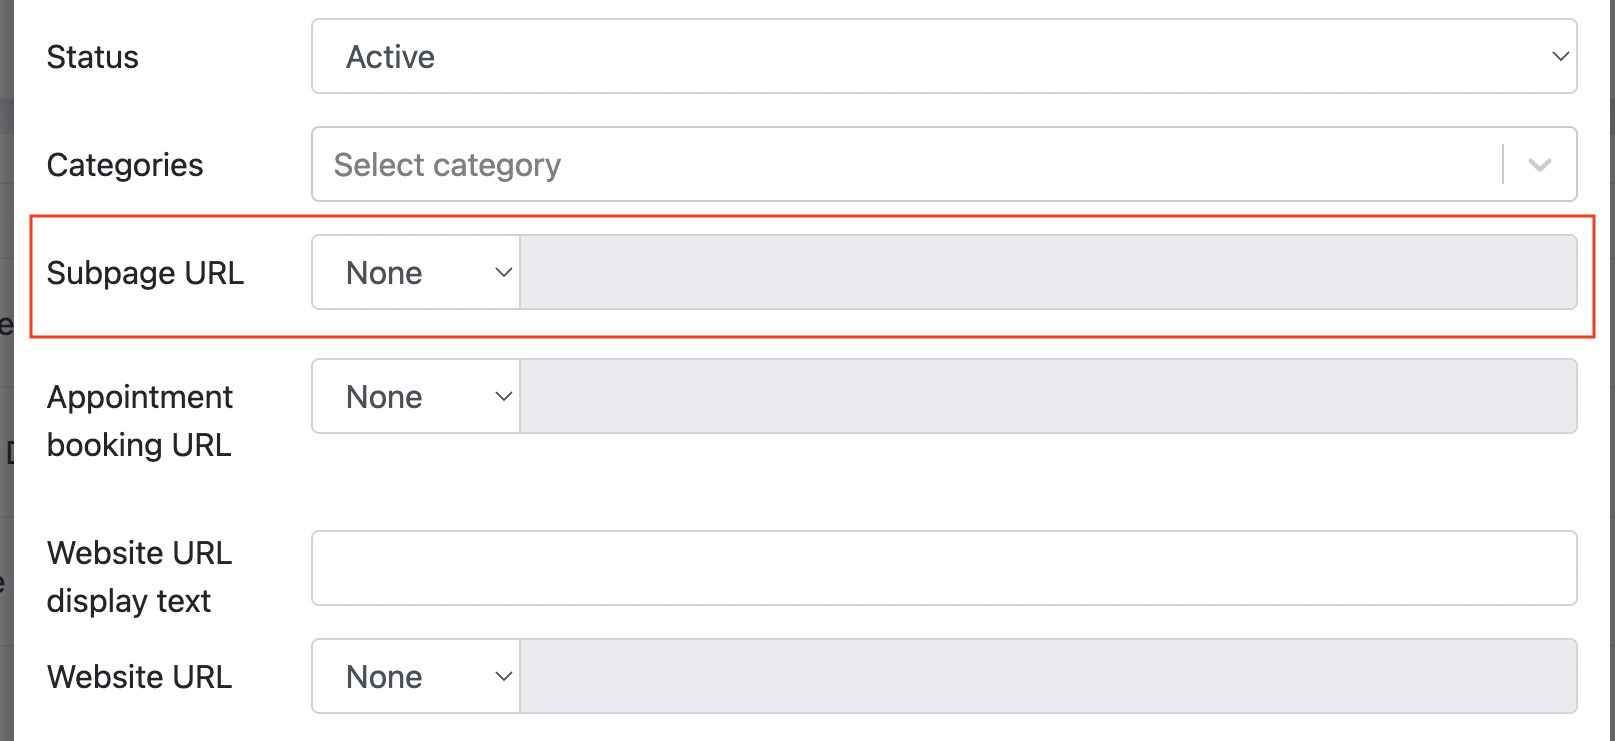
For the Location Finder, Admin can create a dedicated Subpage for each location to provide more detailed location information.
The Subpage is created under Site Pages and its URL is assigned to the corresponding location via the Subpage URL field. Once assigned, visitors can click More Info from the Location Finder search results to access the location's Subpage.
Step 1 : Create a site page via Site Content > Site pages
Step 2: Go to Location Finder, click Edit for the respective location, and select the Site Page created in Step 1 under Subpage URL.
iii) Appointment Booking URL
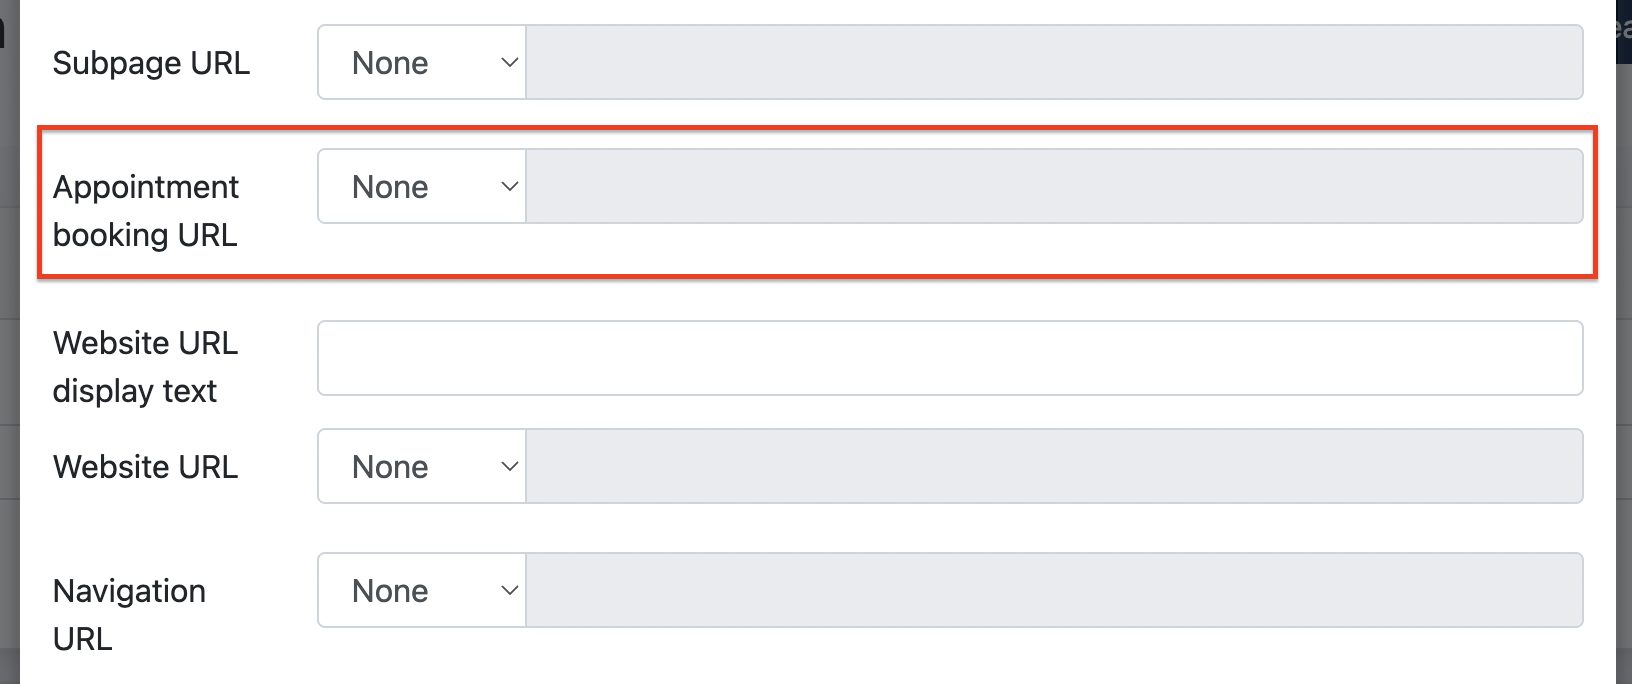
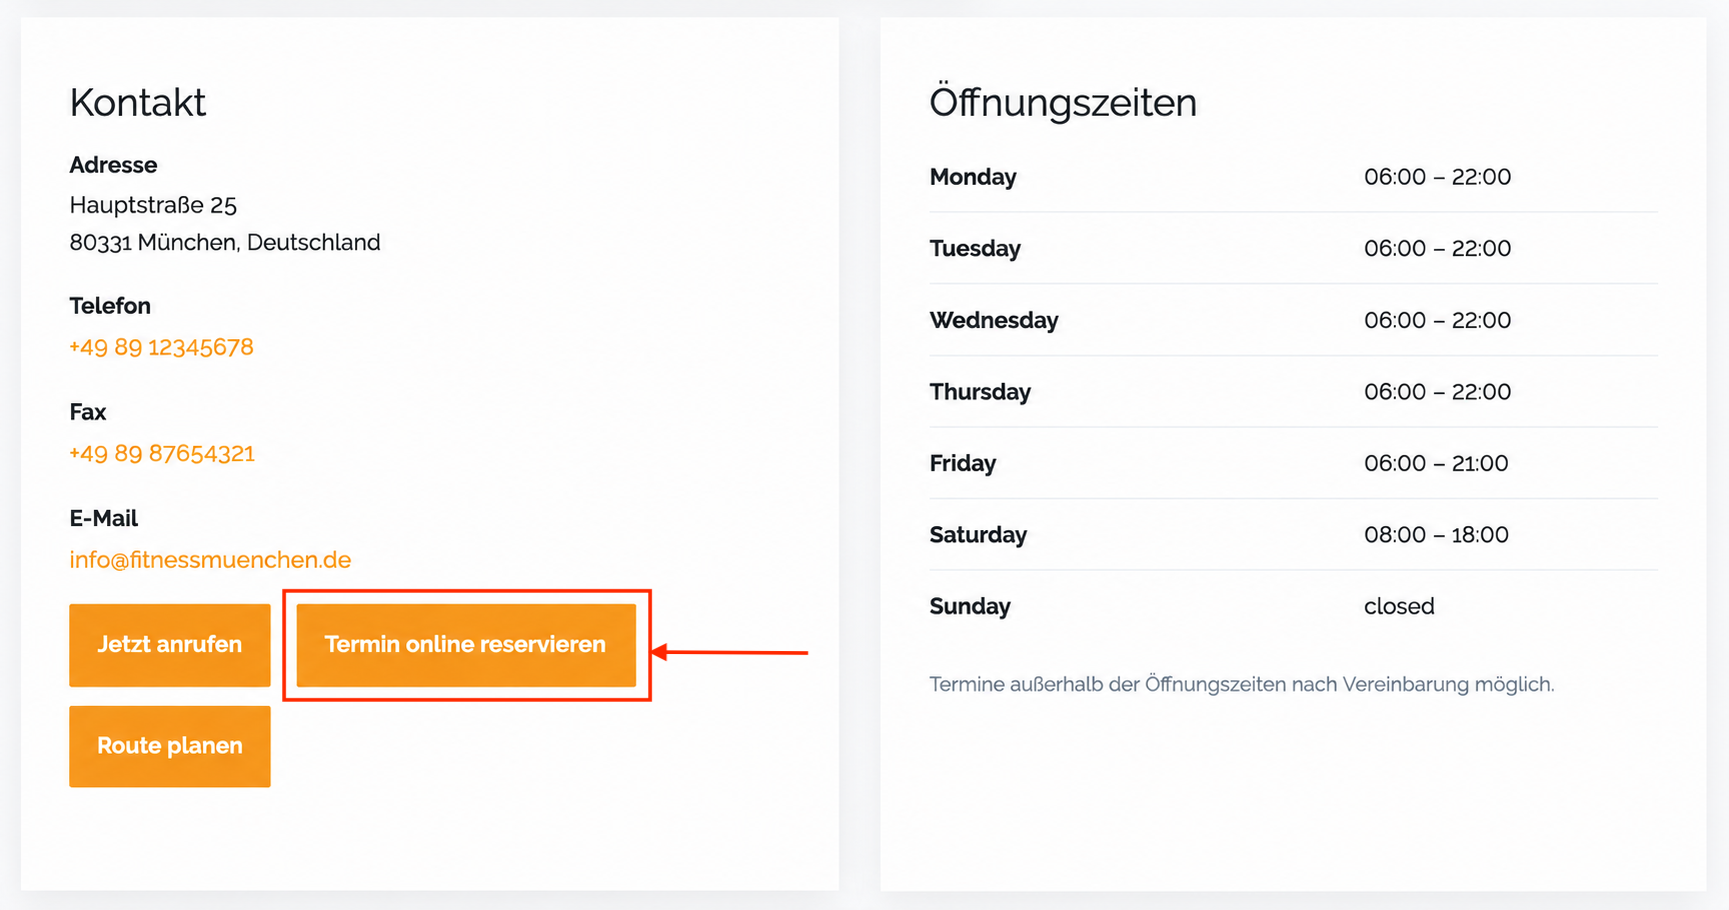
The Appointment Booking URL is applicable to locations with a Subpage URL configured. It allows Admin to add a third-party booking link for the location.
When configured, an appointment booking button is displayed on the location Subpage. Clicking the button directs visitors to the specified booking URL.
Adding a subpage URL to a location :
iv) Website URL Display Text and Website URL
These fields are available only for Rehavital as part of their customized Location Content.
They allow Admin to add a website link to the Location Subpage, with the Website URL Display Text defining the clickable text and the Website URL defining the destination link.
v) Navigation URL
vi) Map Code
The Map Code allows Admin to display the location directly on a map within the Location Content subpage. Admin can obtain the embed code from a map service, such as Google Maps, and paste the generated code into this field. Once configured, the embedded map will be displayed on the location page, helping visitors easily identify where the location is situated.
vii) Image
The Image field allows Admin to upload an image that represents the location. The uploaded image will be displayed on the Location Content Page, providing visitors with a visual representation of the location.
Summary :
After creating all required locations, Admin can go to the Location Listing and click Edit to configure the relevant fields for each location. These settings determine the information displayed on the respective Location Content Page, allowing each location to have its own individual content and details.
2. Location Finder Contact Form
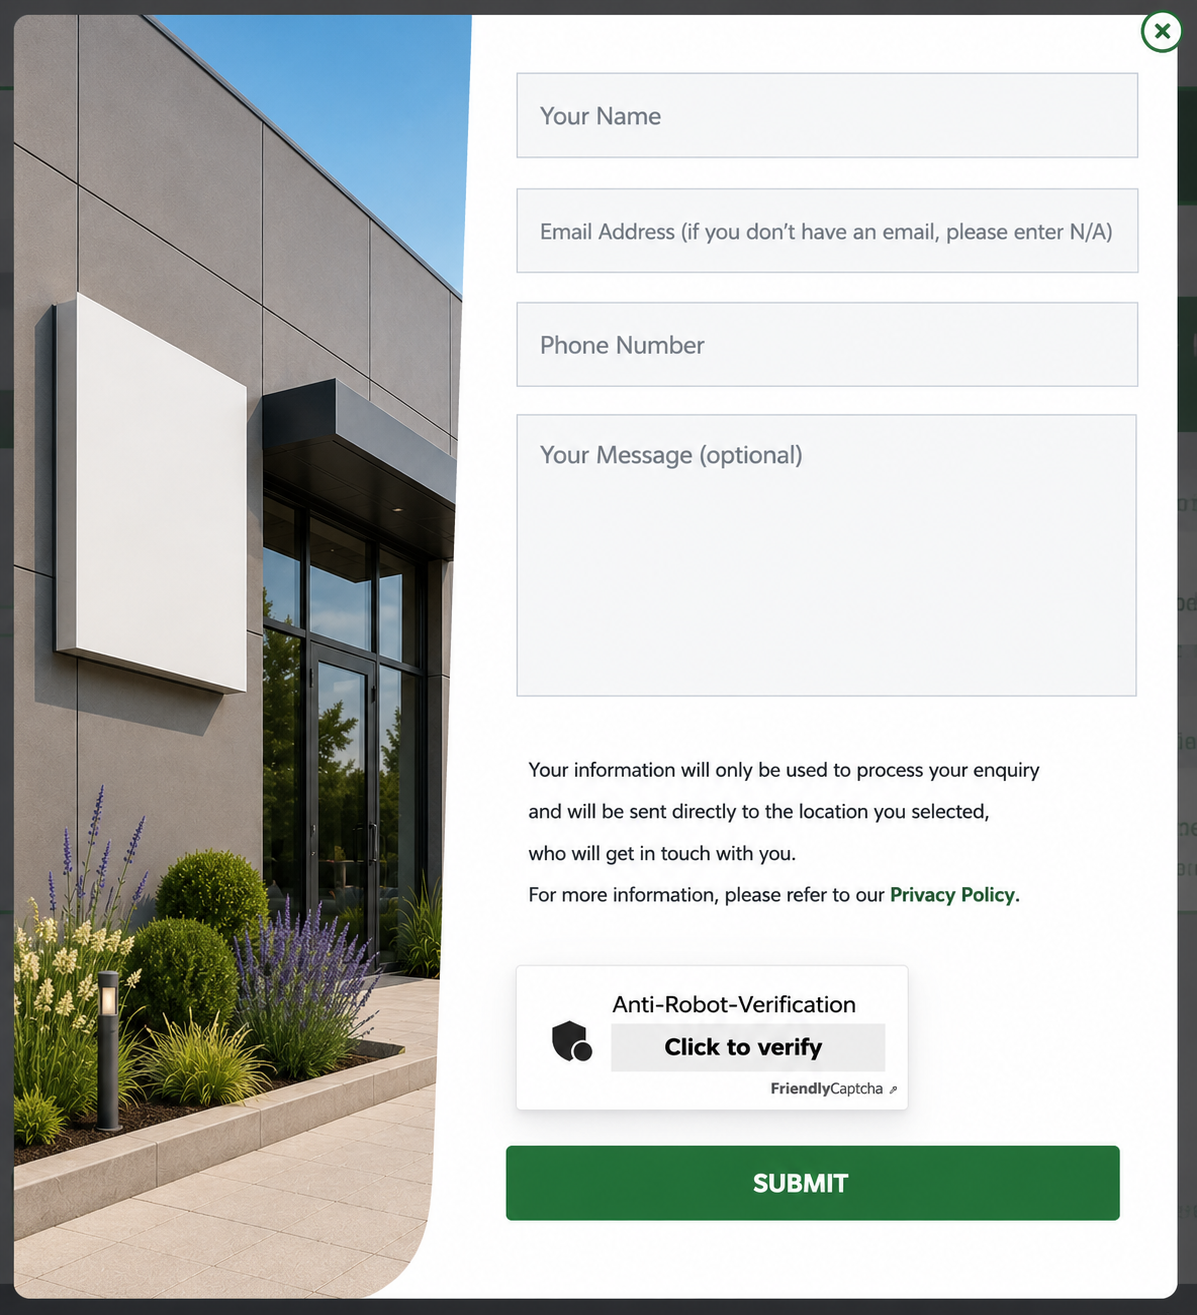
When a location is displayed in the search results, users can click the Contact button to open a contact form. After the user fills in and submits the form, the enquiry will be sent to the Location Email configured for the respective location.
Live View of Search Result:
Live View after clicking "Contact" Button
2.1 Configuration of the general Contact Form