How to Create an Order
Creating Order Workflow
To create an order, there is a business workflow to follow. In order for the client orders to be created successfully.
1. Creating client
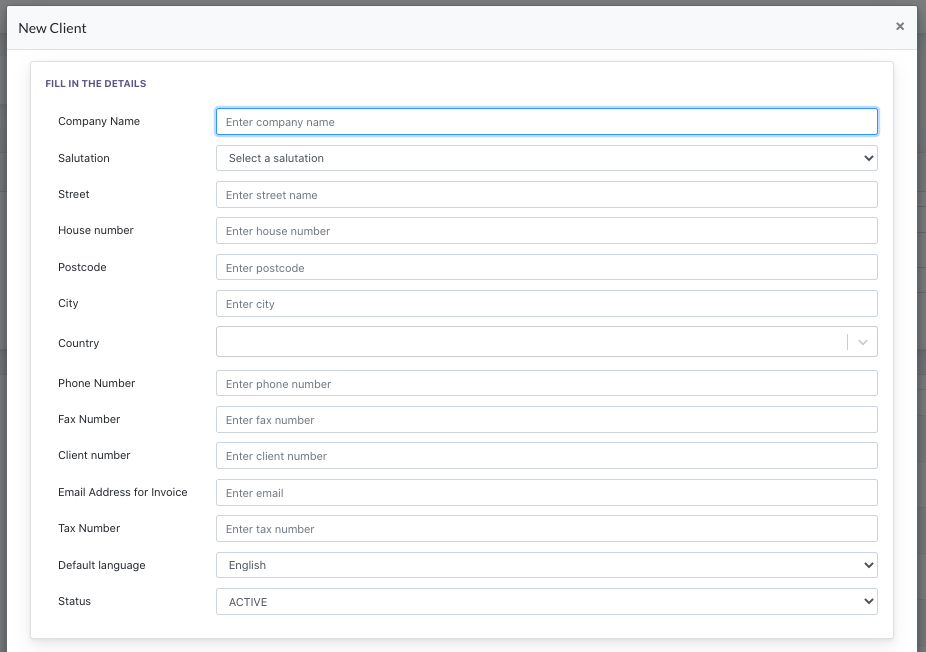
Fill in the information for the client.
Select default language → this is the default platform’s language when client logins to the platform.
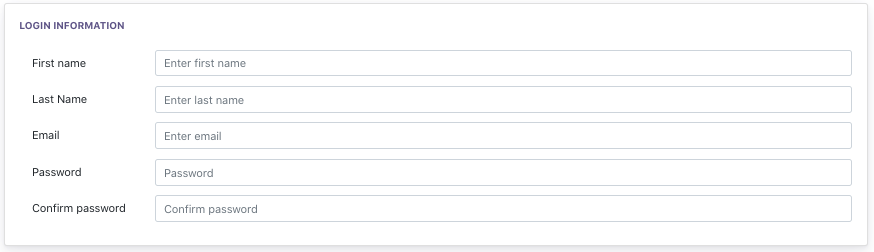
Creating the login credential of this client. This info is sync with the AM > User Management listing.
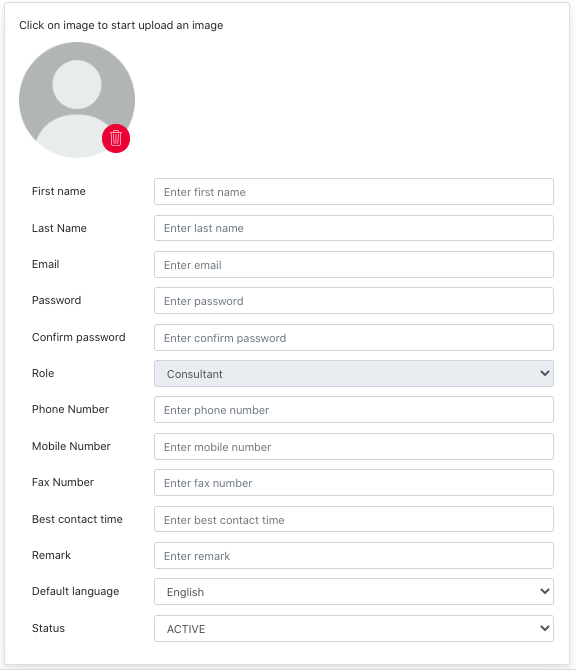
2. Creating Consultants
A pool of consultants can oversee clients assigned to them.
Every Center is mandatory to assign to one consultant during center creation, and every consultant can have multiple centers assigned to them.
3. Creating Center Group
Center group is used to group the centers under different marketing purposes. This is a listing of center groups.
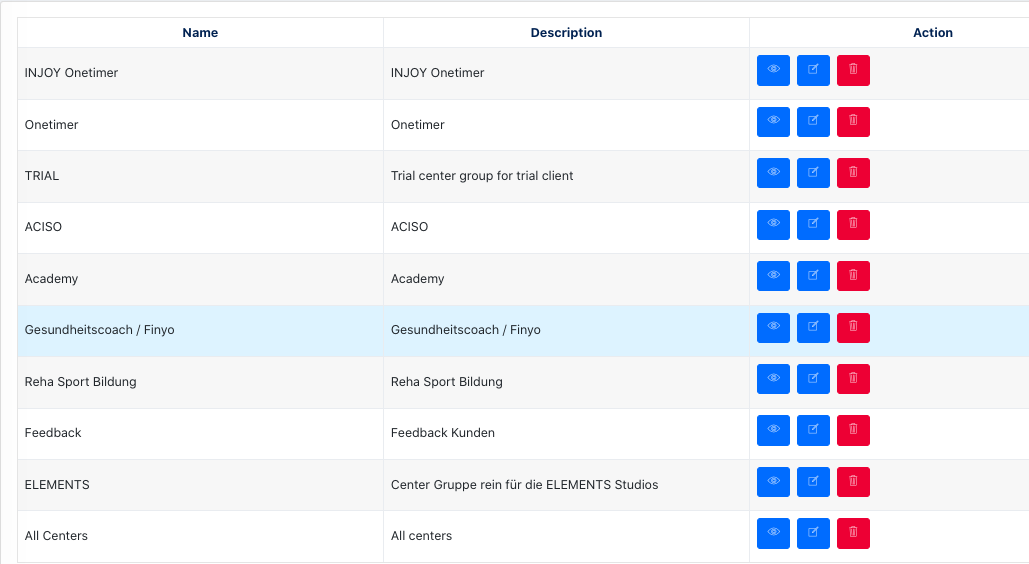
To understand this better, we need to know how a Center group applied to the business logic.
When we want to create a [content], [newsletter template], [digital order form] & etc…. we can decide to show this to different groups of centres for different marketing purposes. This is when Center Group comes into application.
4. Creating Centers
[ Client ] refers to the owner of the centre, one client can have multiple centers.
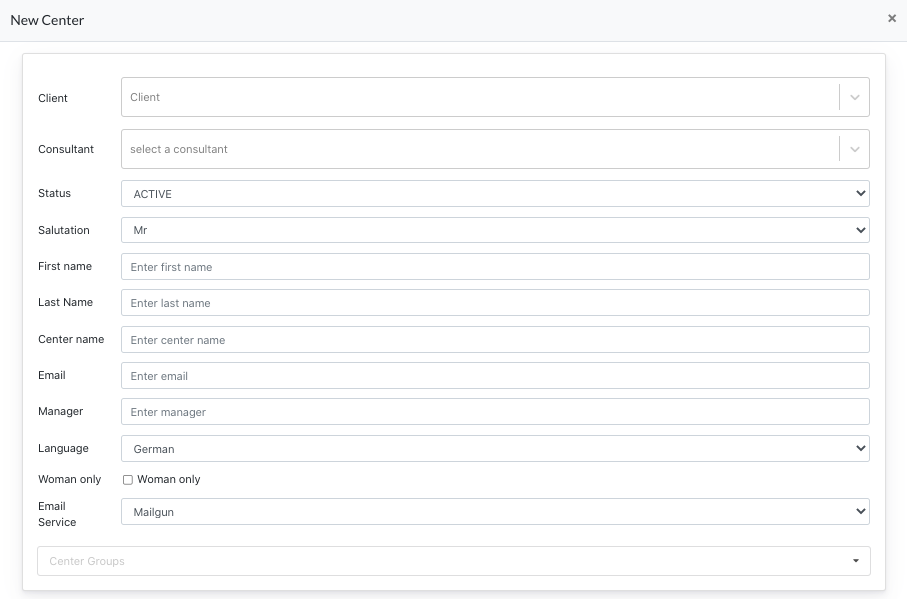
It’s mandatory, when creating a center, to assign a {Client} & {Consultant} for this center. And setup other necessary details for the center, eg: {Center Group} .
If no center group is selected, system will automatically assign this center to { All Center} which is the default center group for all centers.
5. Creating Orders
Once the user has completed setting up item 1 - 4, then he can start creating orders for the center.
Notification:
Every center can only have one order, any new modules ordered will need to be added via the [ edit ] button.
> Click [ New Order ] 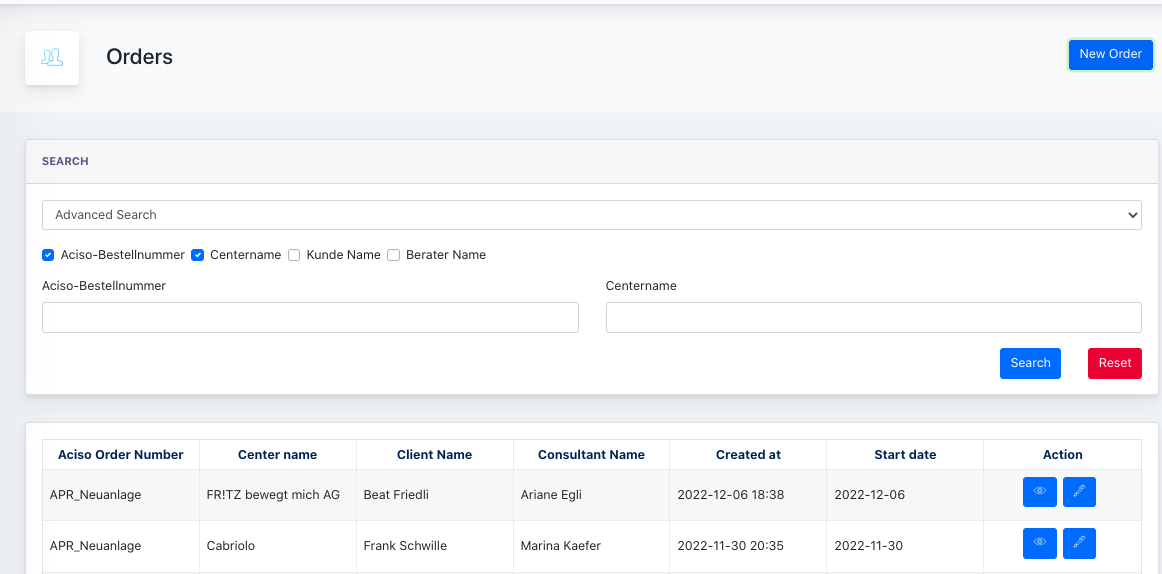
Under the new order modal, you’ll see :

In the form:
- Center : center belonging to this order for
- Order Number: Manually fill in the order number
- Start date: by default is today’s date
- Remarks: You can leave a remark for the order process here
- Assigned Package : A package configured under AM > Package ( a bundle of different modules together as one package to ease the ordering process)
- Assigned Modules : Individual module for selection
- Ordered modules: All assigned modules/packages will be displayed here once selected.
Remarks :
There are individual modules which can function for a center without ark site.
- Funnel marketing
- OLS
- Digital Order form
Logic for Modules for Centers without ark site.
- These centers logon to Cockpit to access the module.
- They can login via Center Admin / Client login
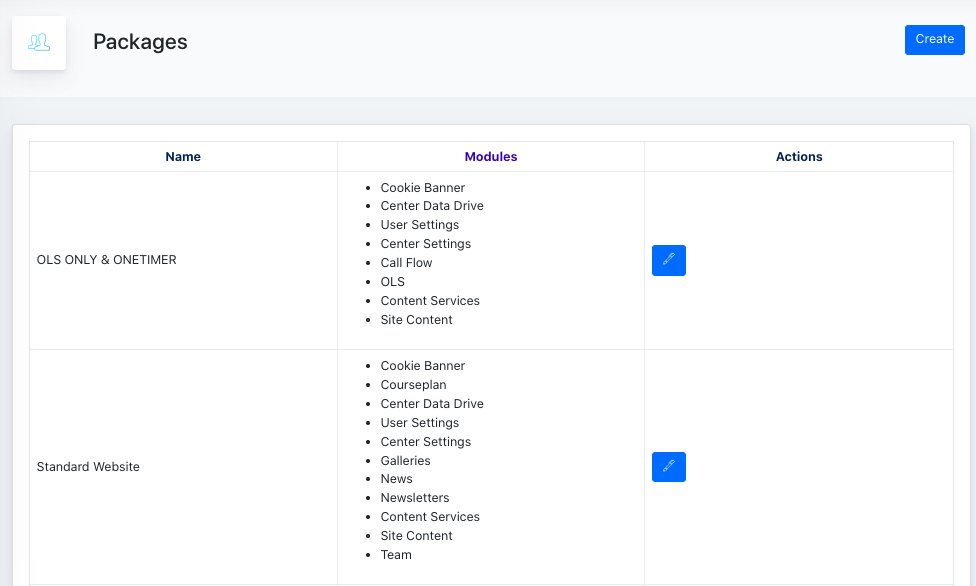
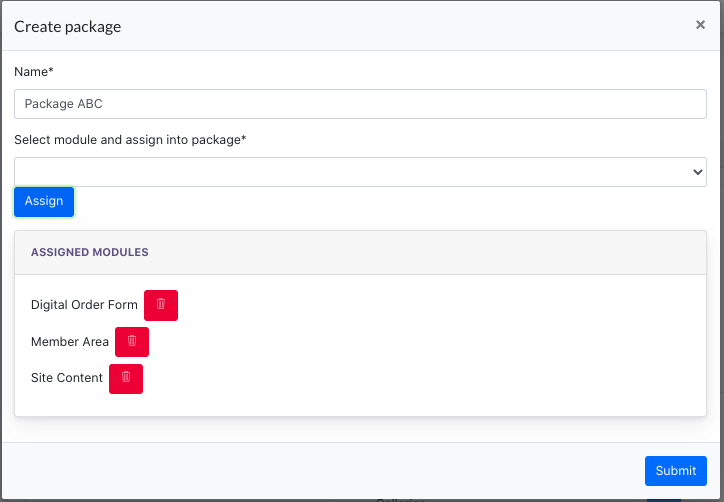
5.1 Configuration of package
On the Packages page, you may configure a package that comes with fixed modules within it. If an order is created, and a package is assigned. All modules within the package are assigned to this center.
Screenshot of packages listing
To create package, click [ Create ]
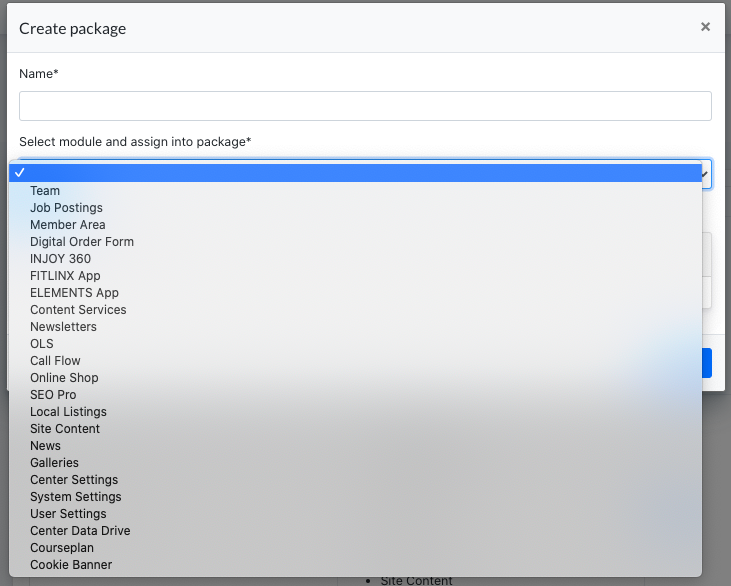
Add a name for this package, and assigned modules under this package.
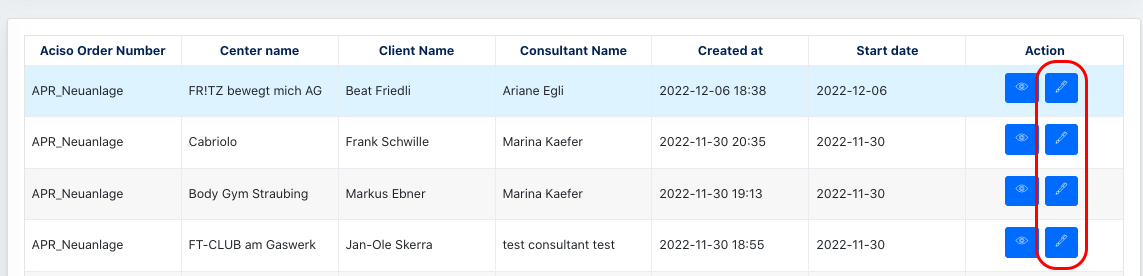
6. Updating Orders
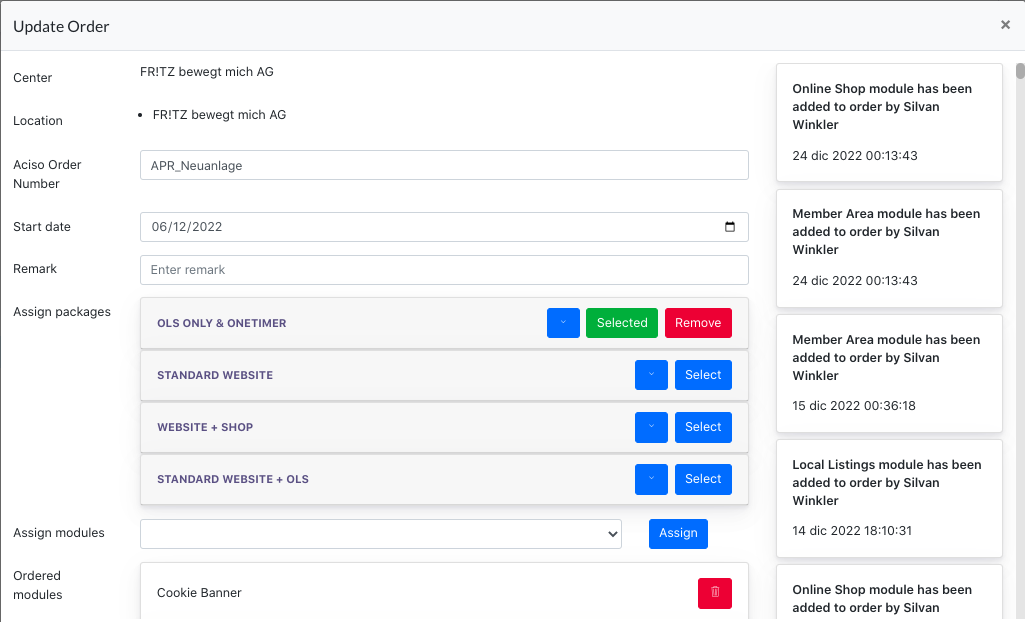
Users can always update/add/remove modules from existing orders, by clicking on the [ edit ] button on the Order Listing page.
Updating log will be displayed on the right side of the Order modal.
- the end -