Setting up Jobs Posting
Job Posting Module
This module allows Center Admin to create company job offers on the website. This is a smart section.
An example screenshot of the Job posting on website.
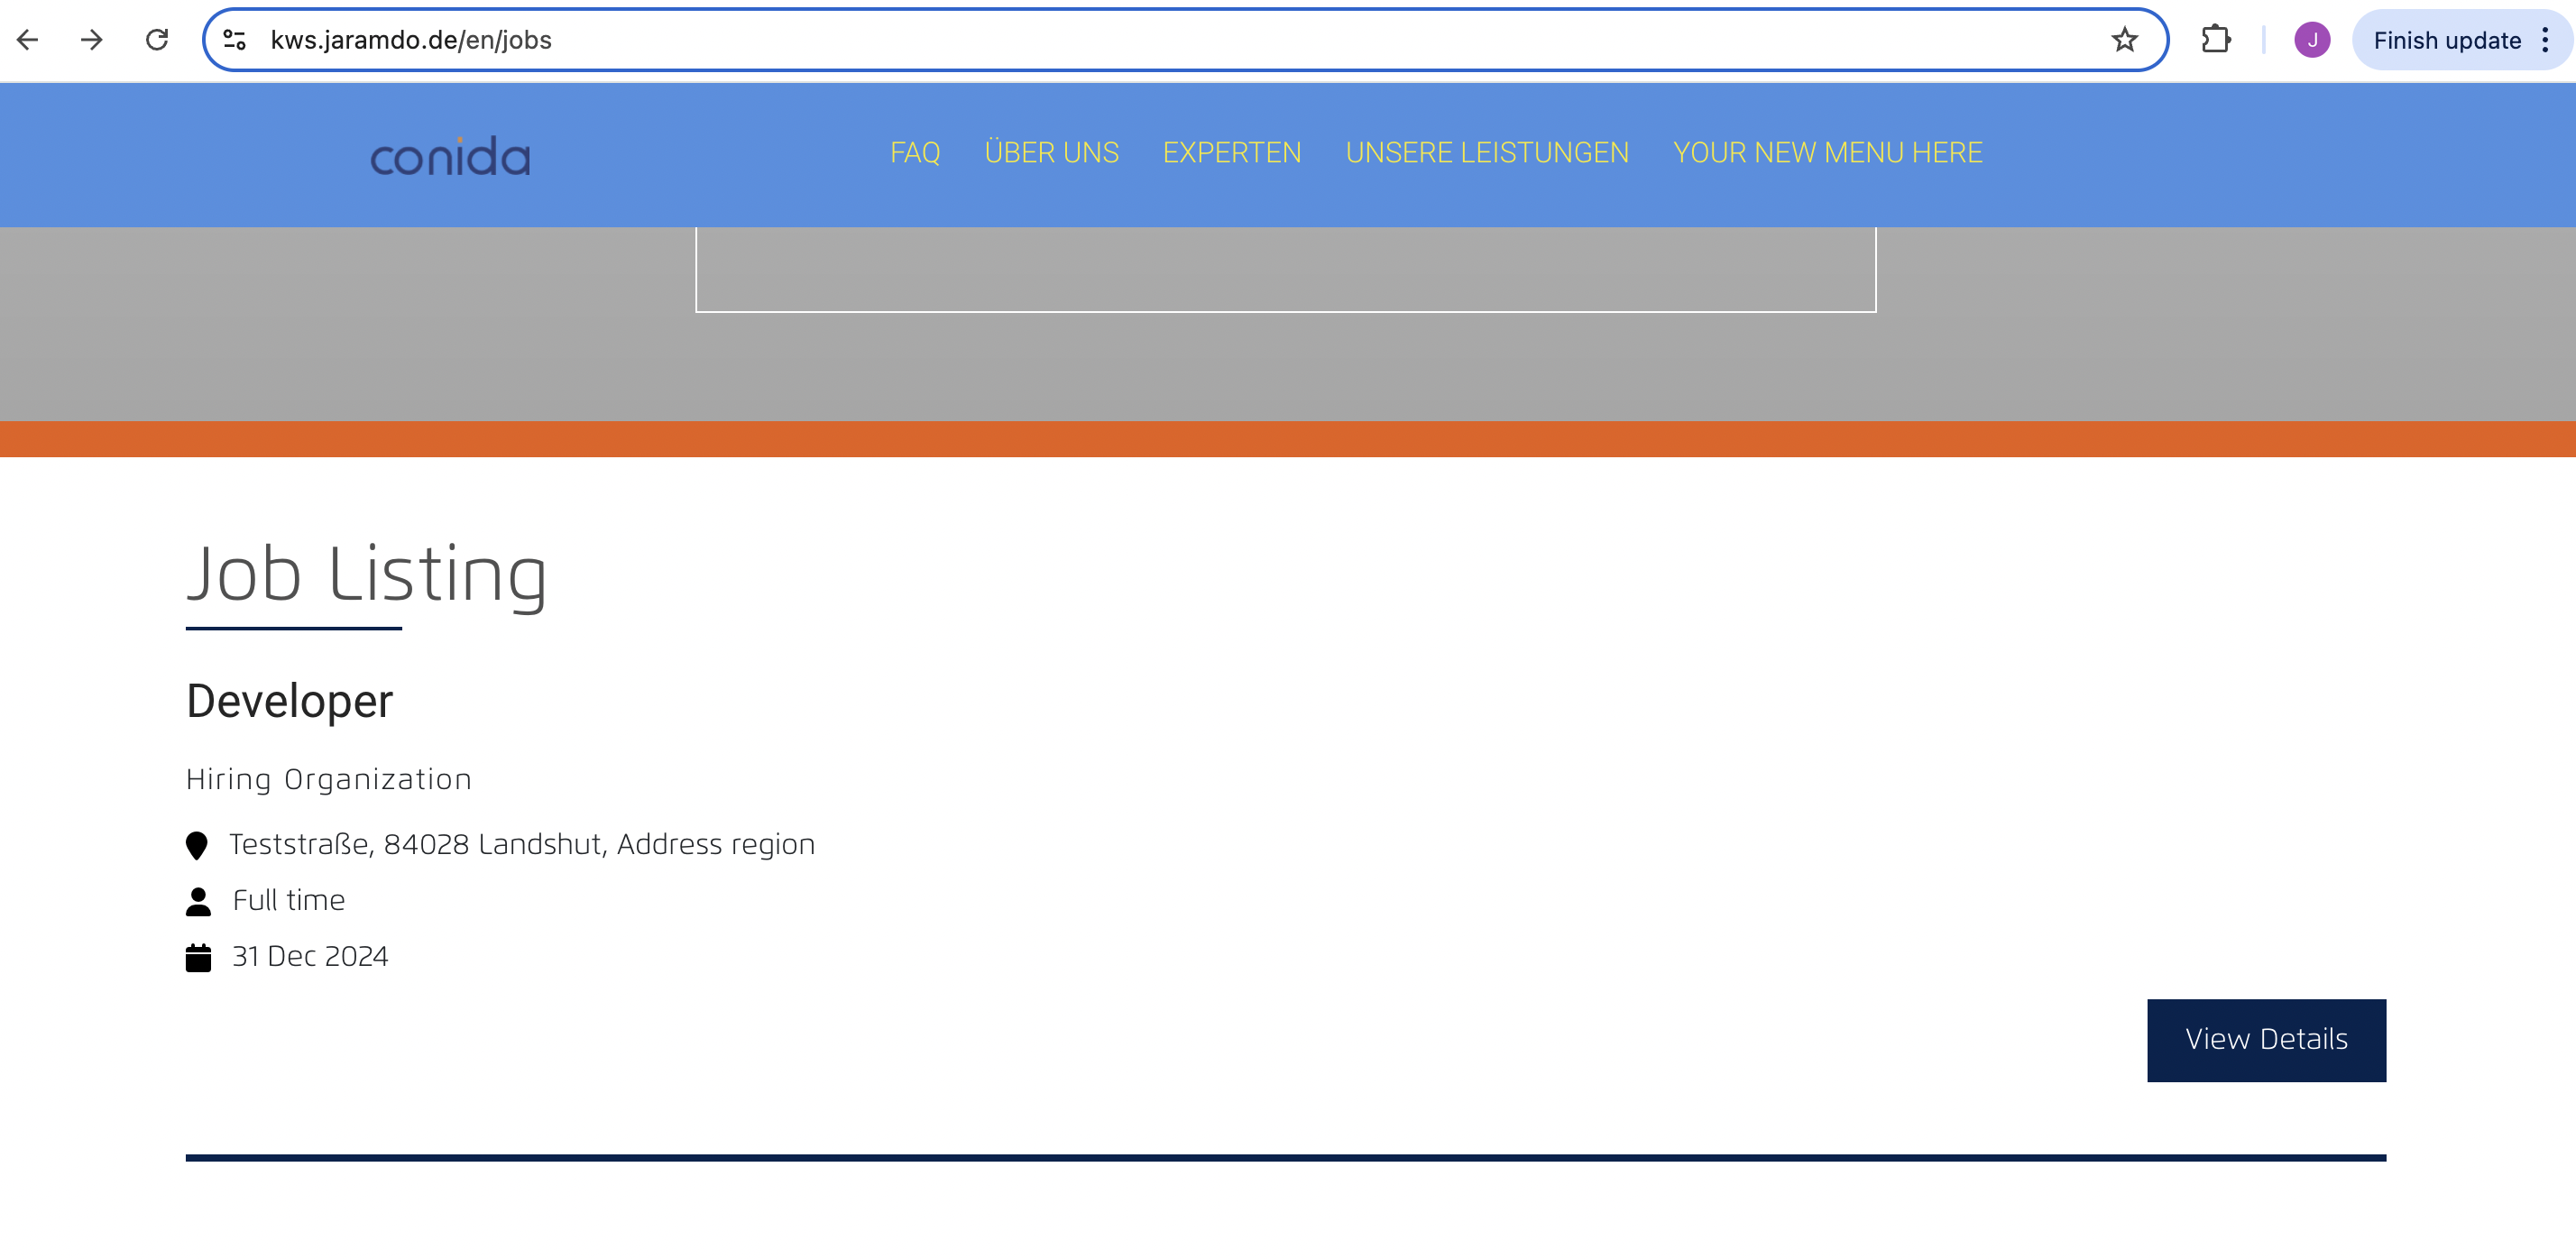
Interested Candidate may click on the [ View Details ] button to check further info of the position. And from here, candidate submit their details for the Center.

1. Setting up Job Posting
Go to Job Posting page. Clicks on [ Create ] button :

The following modal will appear :
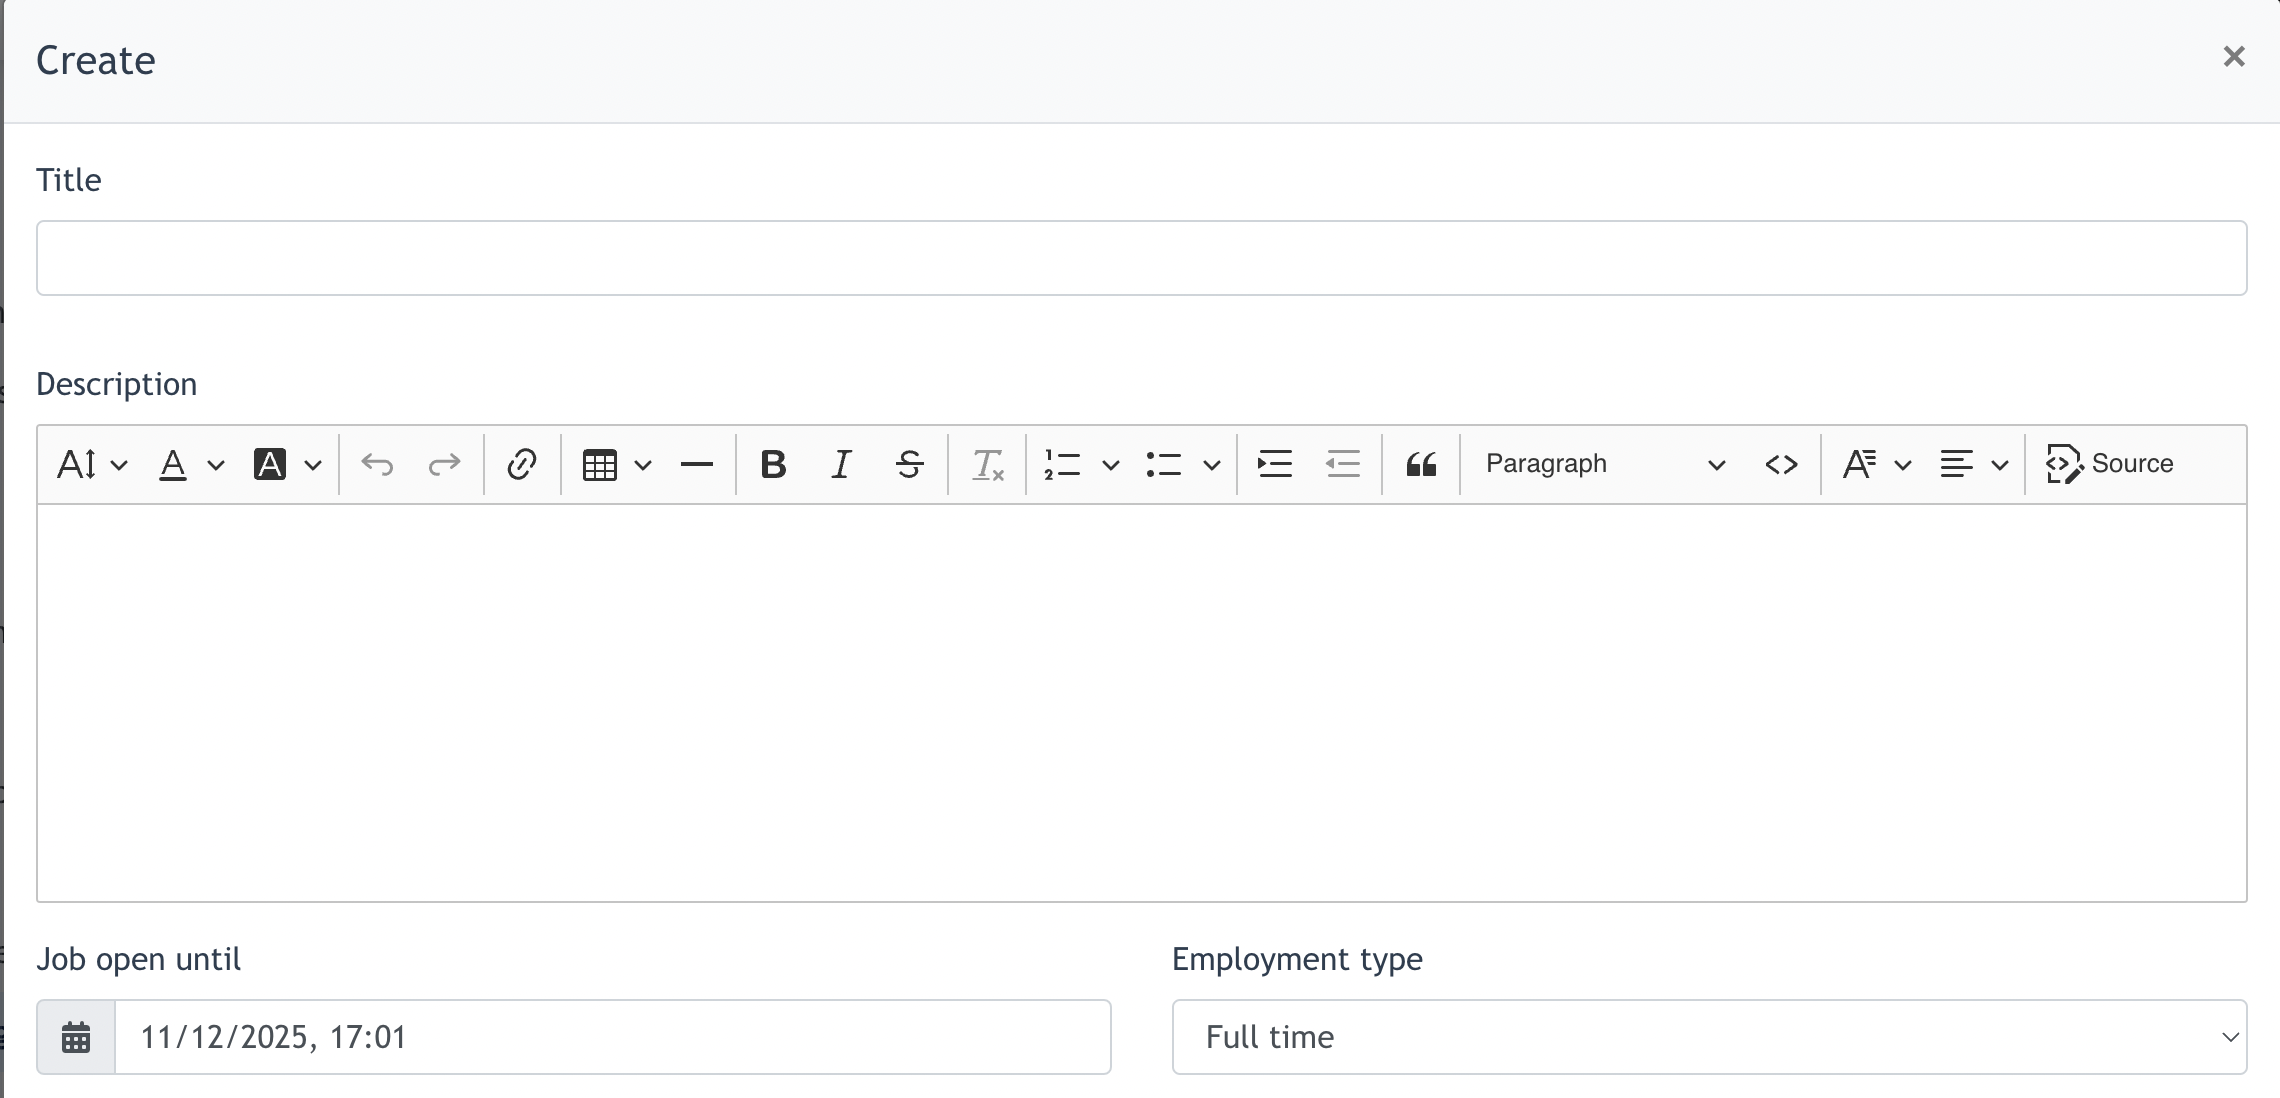
In the form :
- Title : Job Title
- Description : Fill in the job description
- Job open until : End date of vacancy
- Employment Type : Select between full / part-time
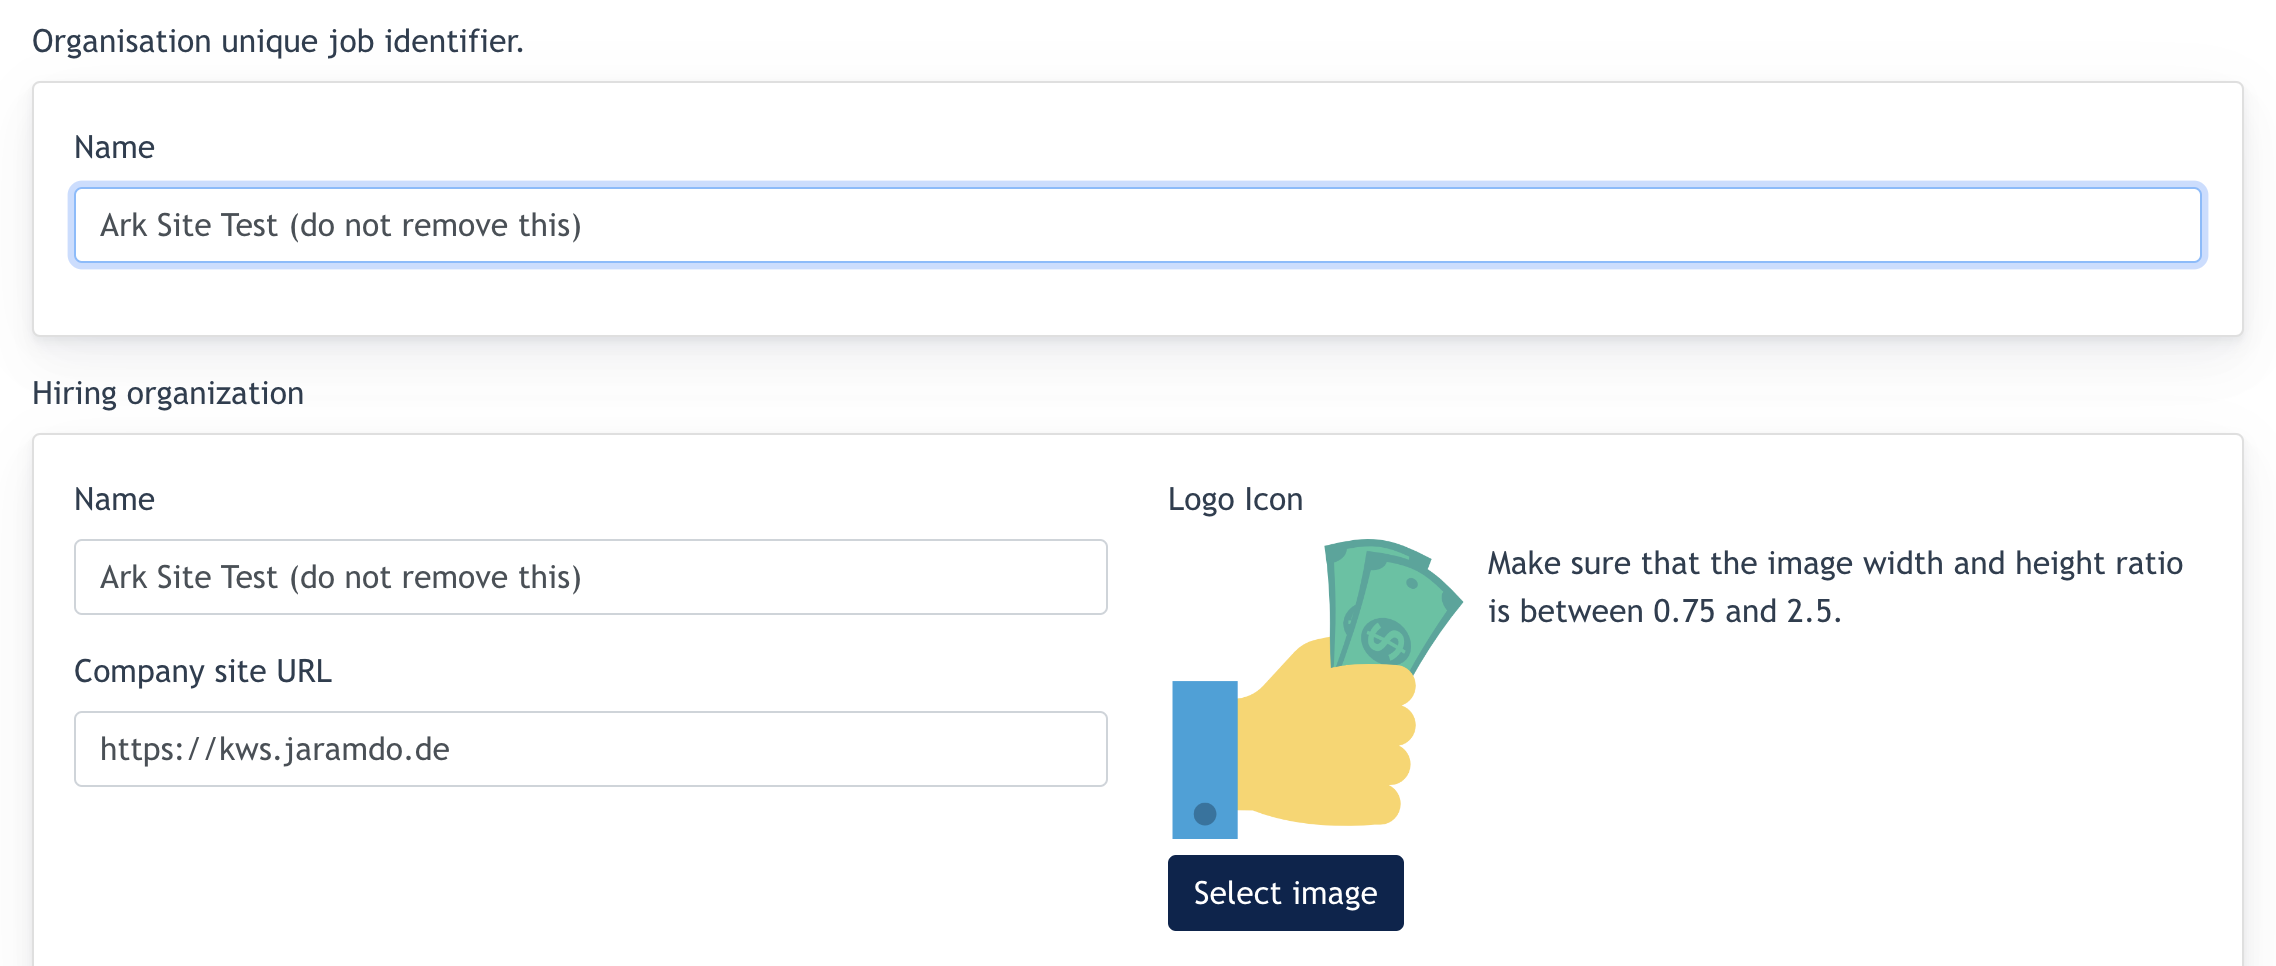
- Organisation unique job identifier :
- Name of the hiring organisation : name of the company
- Company Website URL : fill in website url here
- Logo Icon : Upload company logo
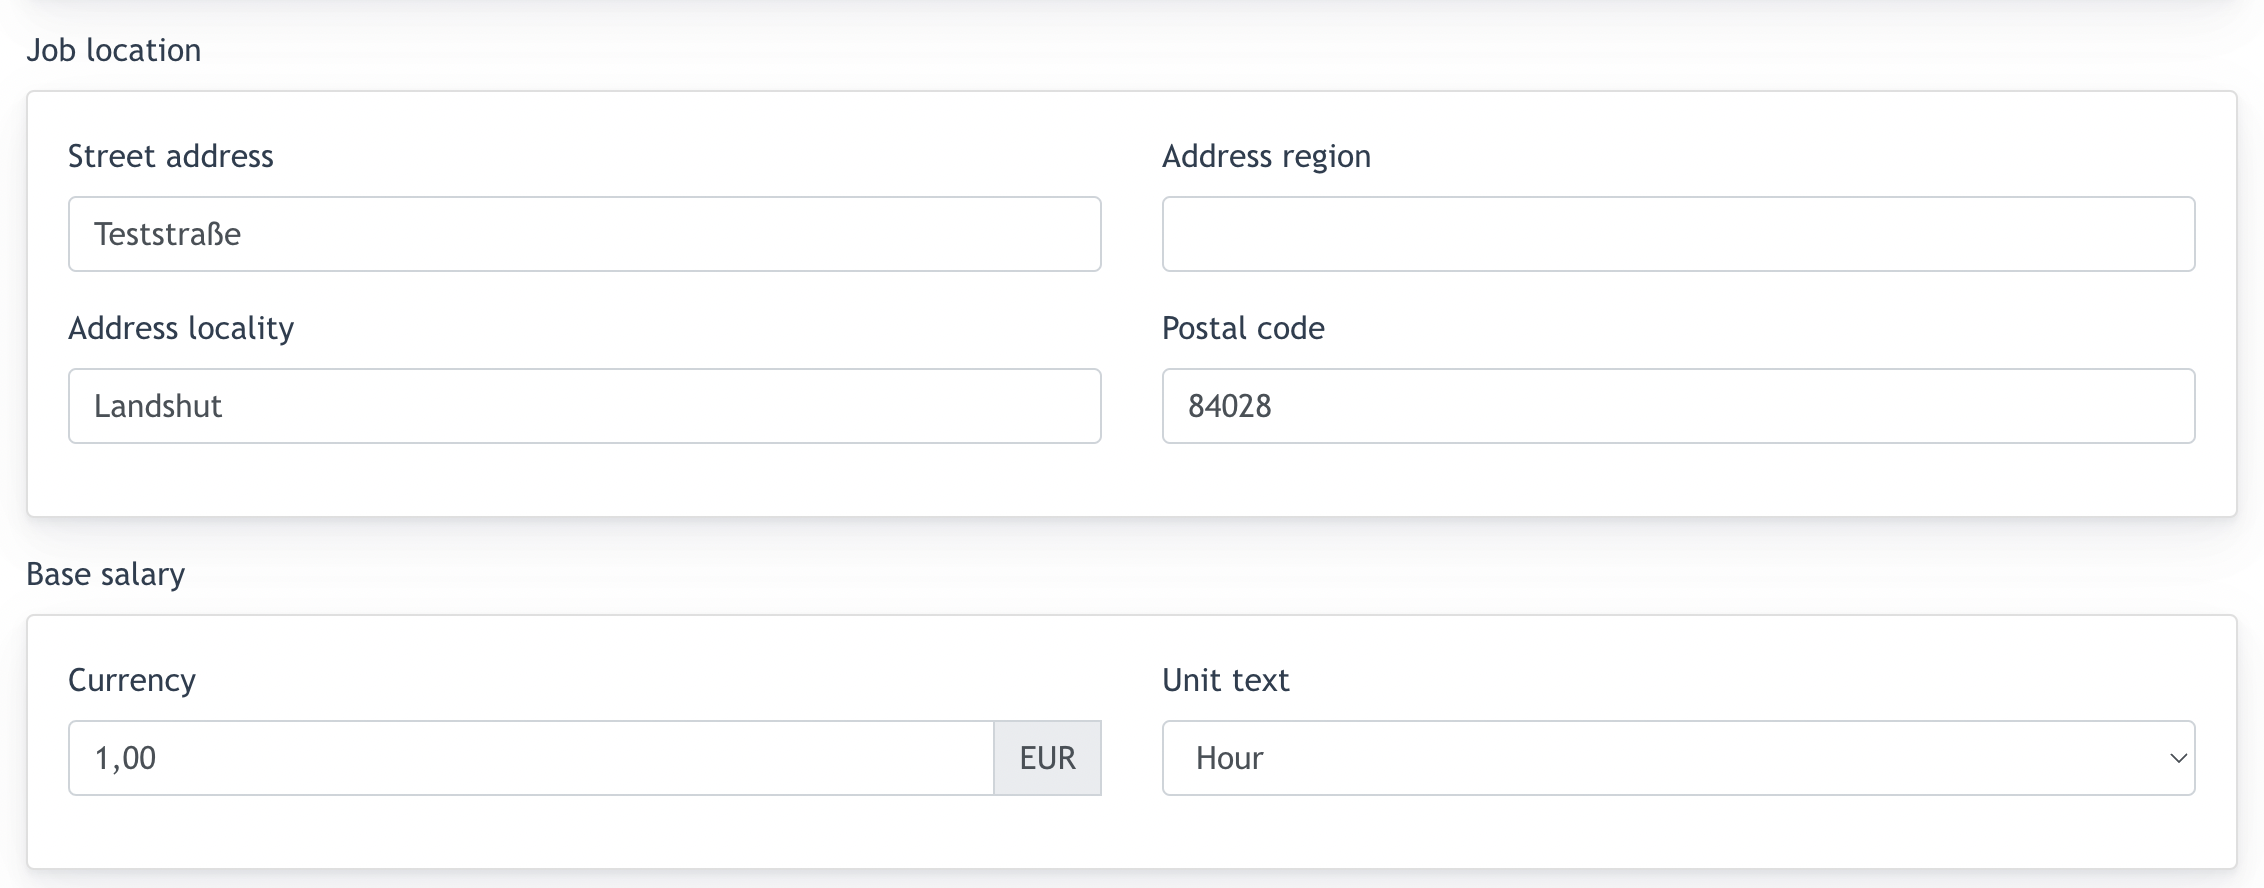
- Job Location : Fill in company address fields accordingly
- Base Salary : Fill in the base salary
- Click on the button [ Submit ] and this job will be created.
Fill out the job details form.
Title: Job titleDescription: Job descriptionJob open until: The last day of the vacancyEmployment Type: Full-time or part-time
Name of the hiring Organisation: Name of the hiring companyCompany website URL: The company's websiteLogo-Symbol: Upload the logo image of the companyAddress: The address of the hiring companyAdress Region:The region of the hiring companyaddress space:The location of the hiring companyPostal code: The zip code of the hiring companyCurrency:salary of the positionSalary Type/Unit: The salary based on hour, day, week or month- Job Listing
AfterAllyou have clicked on "Send", the newlyjobs createdpositionwill be displayedin the listing andon thevacancy/joblisting.page.Admin may still edit any data if required.
2.

2.3. Website:Showcasing Job posting form
On Admin just need to create jobs via the module, and the jobs will be display on Center Admin can use the This form is displayedJobs on theWebsite
jobdetailsconida pagewebsite system, there are 2 default pages for this module when the visitorsite clicksis Viewgenerated Details: 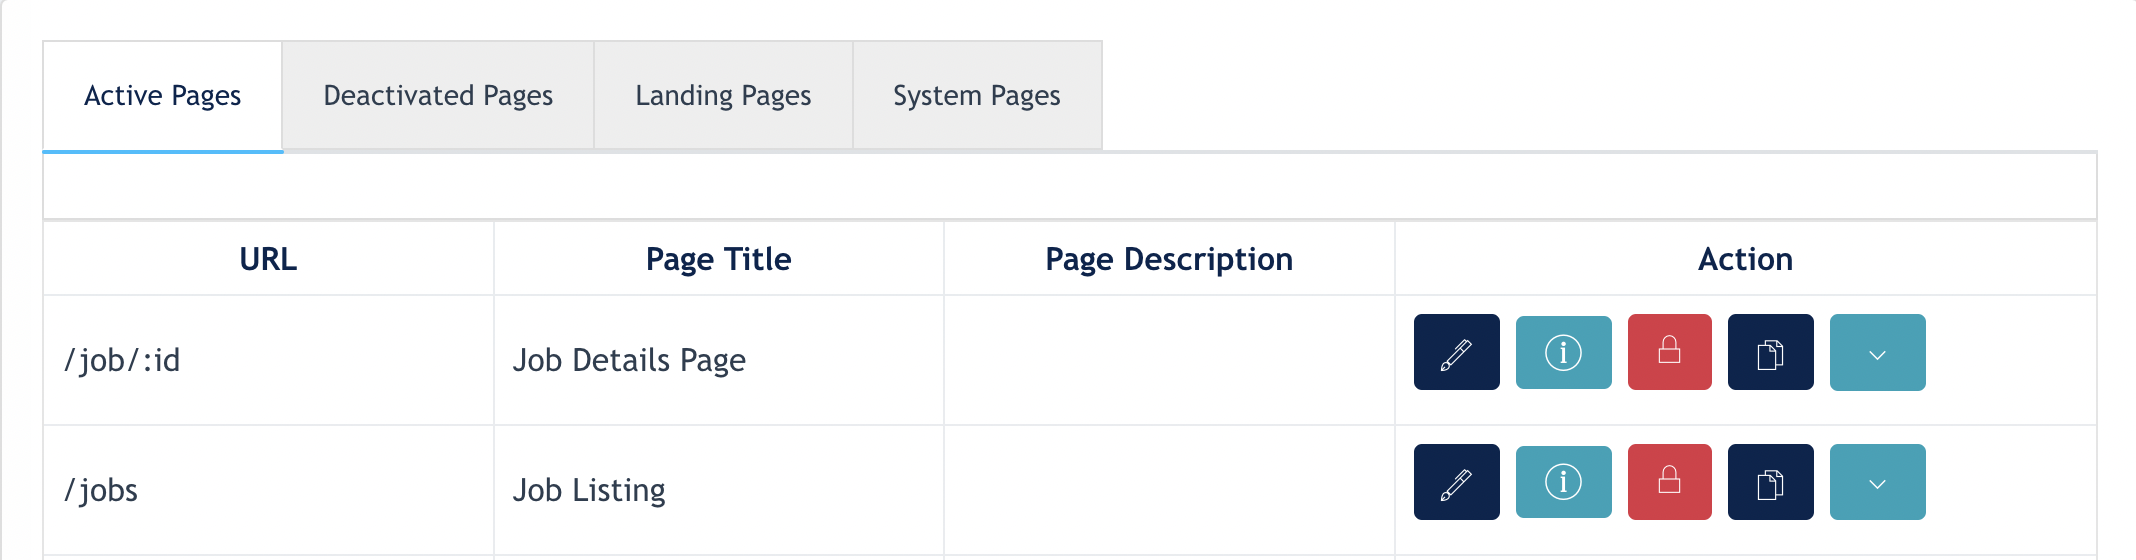
the: job/jobs posting.page Hereads4. Create Job Posting Form
jobWeb detailsForm and fills out the form, if he likes to apply for the job

Screenshot 1: Job postings page
Screenshot 1: Job Details page.

2.1 HowFeature to create a job posting form
This form is the same as the web form and contact form. They are created under Forms.
Sign up at atSite > Content > FormsClick on "Create new form"

Fill in the tab"General" the forms details. You can customize the “button” via the editor.


Create a form by adding an item or column.

Note: There is a list of items thatwhich can be addedused to the form (see below).

Customize each element individually, let's take "Text Box" for example:


Under the Settings tab:
Width: The width of the element in the formPadding: The element's distance from the edgeLabel: The name of the fieldMandatory field: Makes the selection required for the customerError message: This message appears when the visitor missed filling in the fieldHide in the language: Hide this field when the user selects the specific languageIs an email text field: Check this box if this is an email field and you want to send a copy of the submission to the submitter.Show tooltip: Check this box if you want to add a description of what is required for this field.preview text: This text is displayed when "Show Quick Info" is activated. The user sees this message when they mouse over the "Info" icon in the form.
Field values tab:

Feldname: This label will be displayed in the email and the submitted data to help the user to understand the data
Click "Save" when done.

2.2 Form Email Settings
Go toSite > Site Content > FormEdit the form and click the Email tab.


Email recipient- Configure who receives an email when a user submits a formBCC-E-Mail-Address- Configure which email address BCC is sent to when a user submits a formEmail subject- Subject of the emailemail content- Content for website form creatorEmail content for form sender- Content for the submitter of the formcheck box from[Note: Any user who provides their email address will receive a copy of their submission.]– This is checked automatically when a form consists of an email field.

Remarks : The Marketing Funnel tab is explained in the Marketing Funnel module documentation.
2.3 How to configure a job posting form foron the Job Details page.
-
GoExampletoSiteof>JobContentdetail>pagePages( /job/:id ) 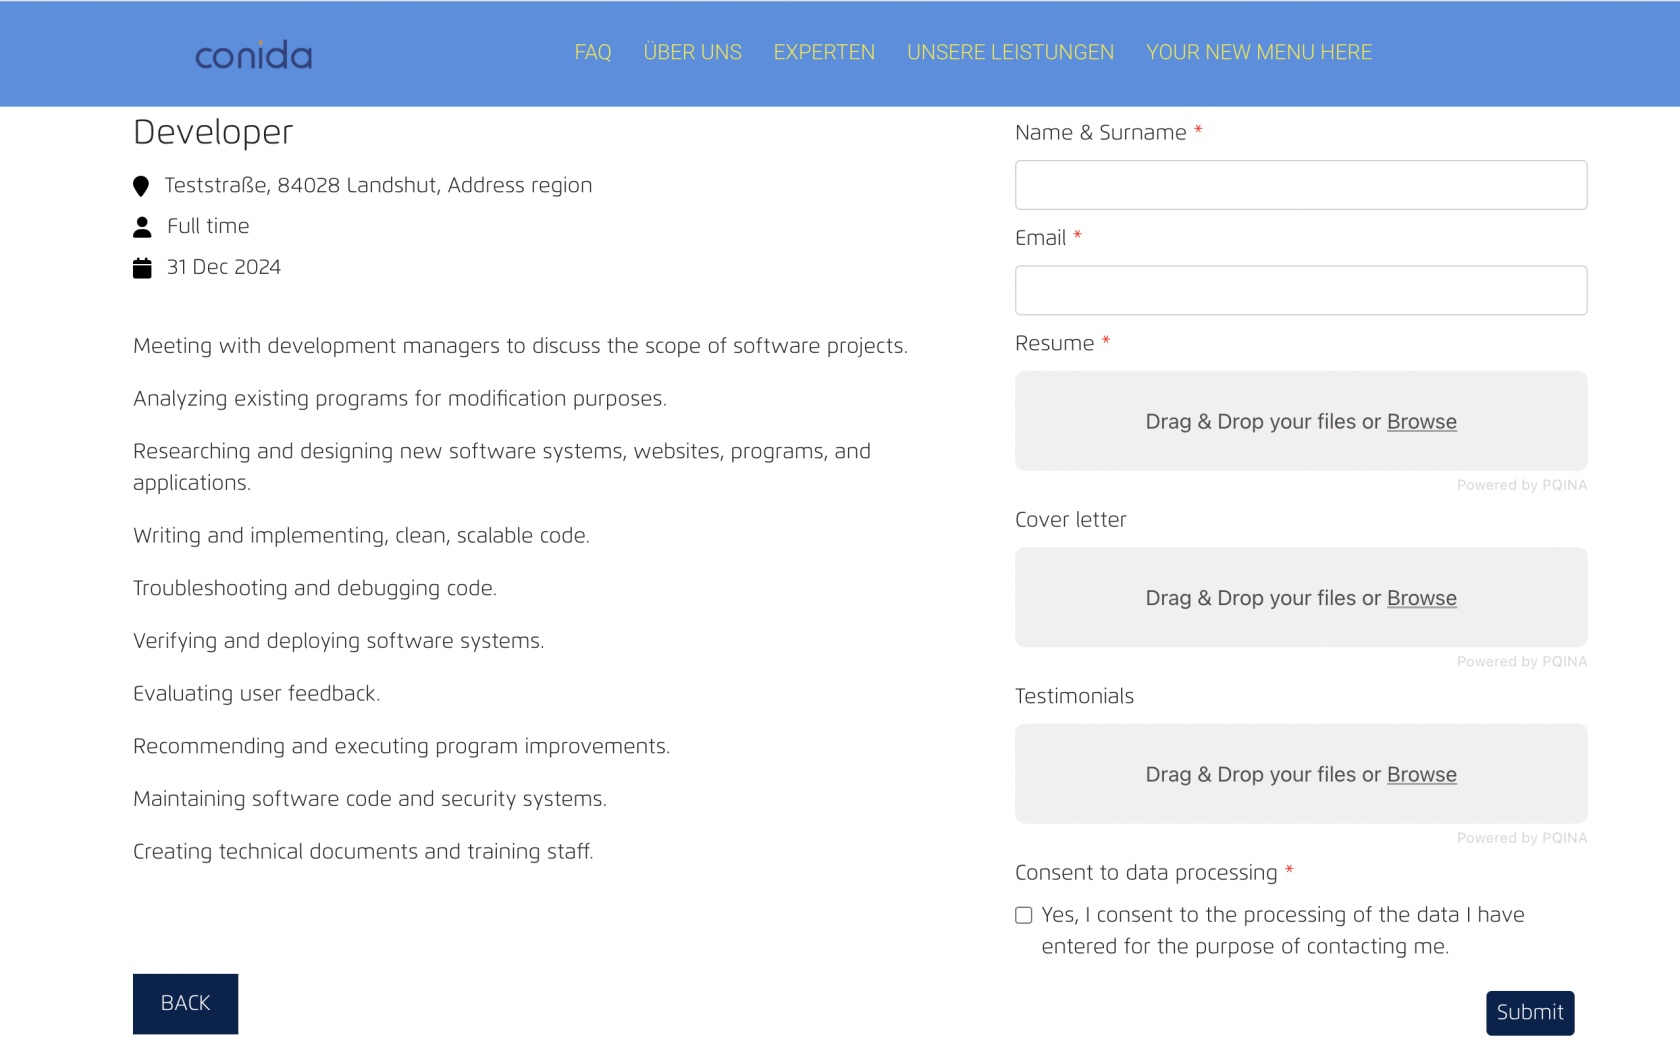
LocateCenter Admin may create a new Job form, and edit it. After the form is finalized, Admin may add it under the Job Details
pagepage,and edit the page

Click anywhere on the page to add a section.Look for the "Job Details" section. Thiswhich isavailable/jobs/idunder all templates

Click the Choose button to add the section to the pageEdit the sectionSelect the form you created earlier from the list
:

Save the section and close the editor. The form is now displayed on the live page.
3. Live Page: Job posting
Here the visitors can view and apply for available positions.
3.1 How to view and apply for a job
Go to the
/jobsfollowing page and click [ Edit ]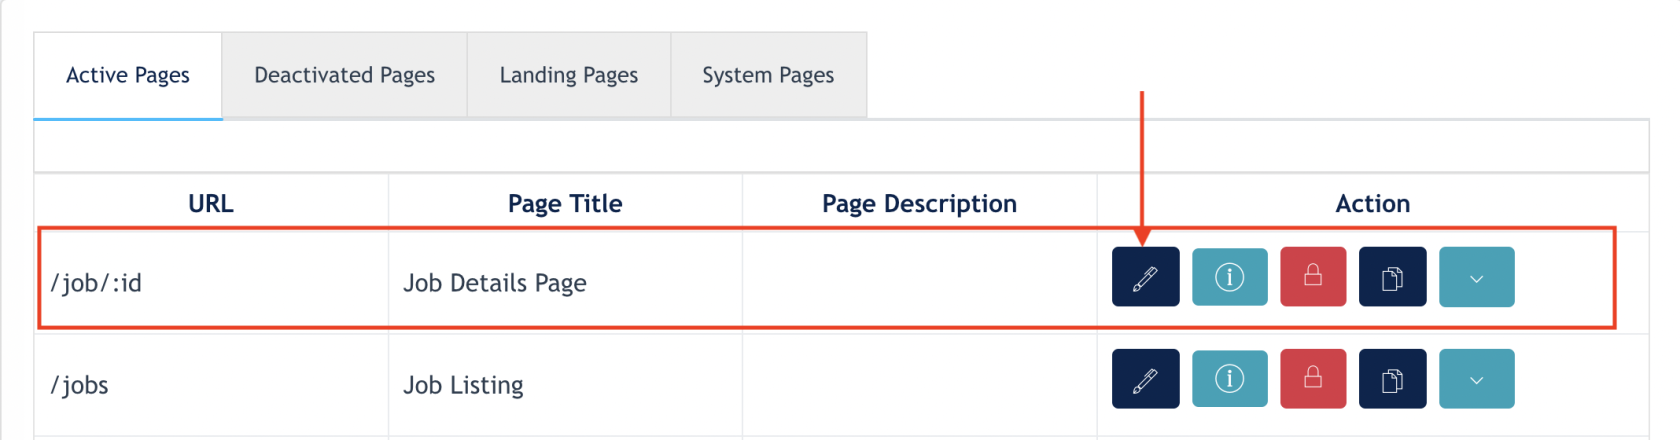
ForSelect thejobJob Details section, and click [ Edit ]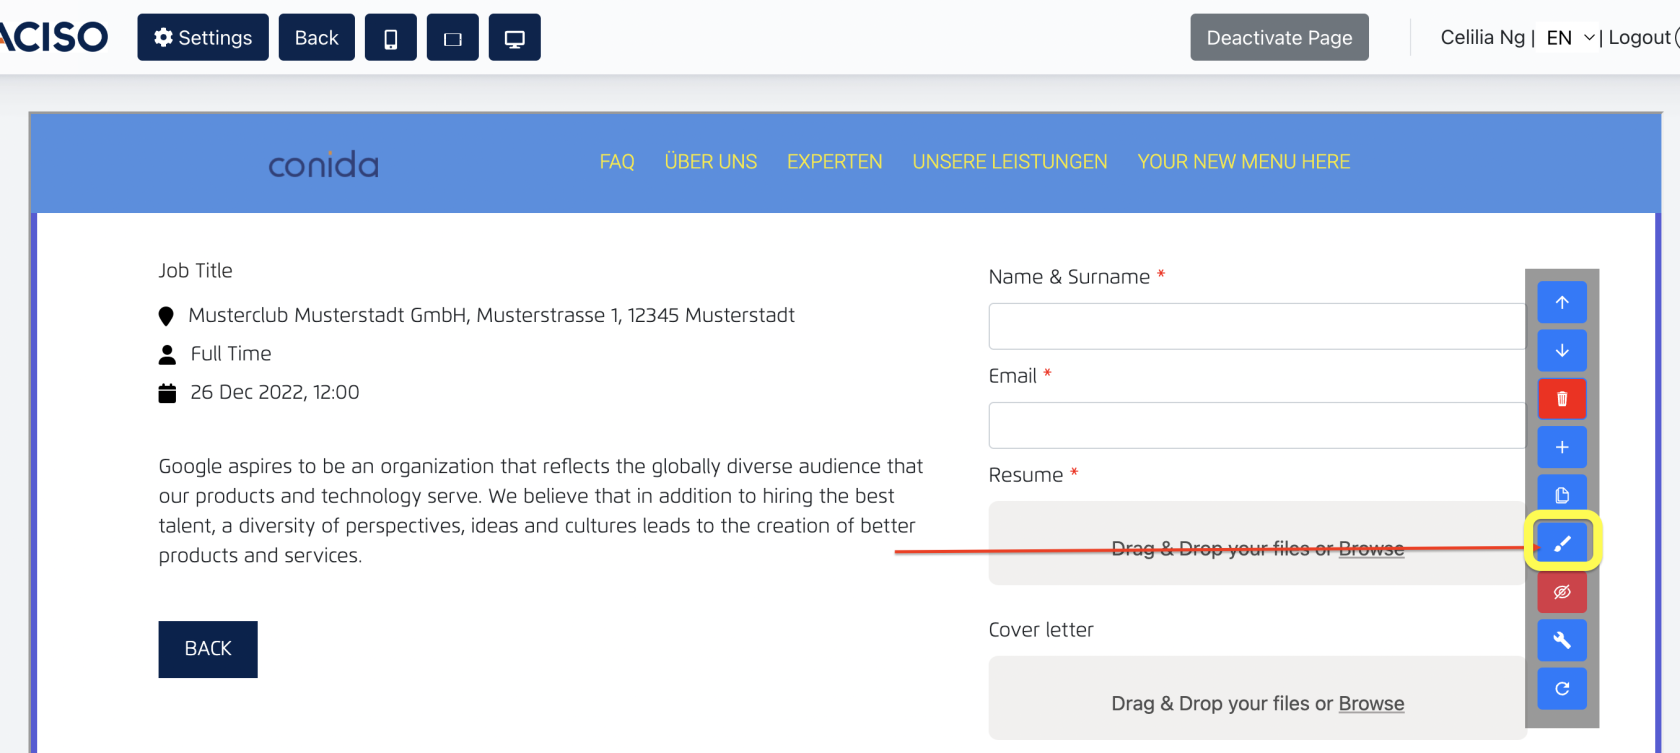
Then you
aremayinterestedselectin,form via the Select Form dropdown, and click to save this changes.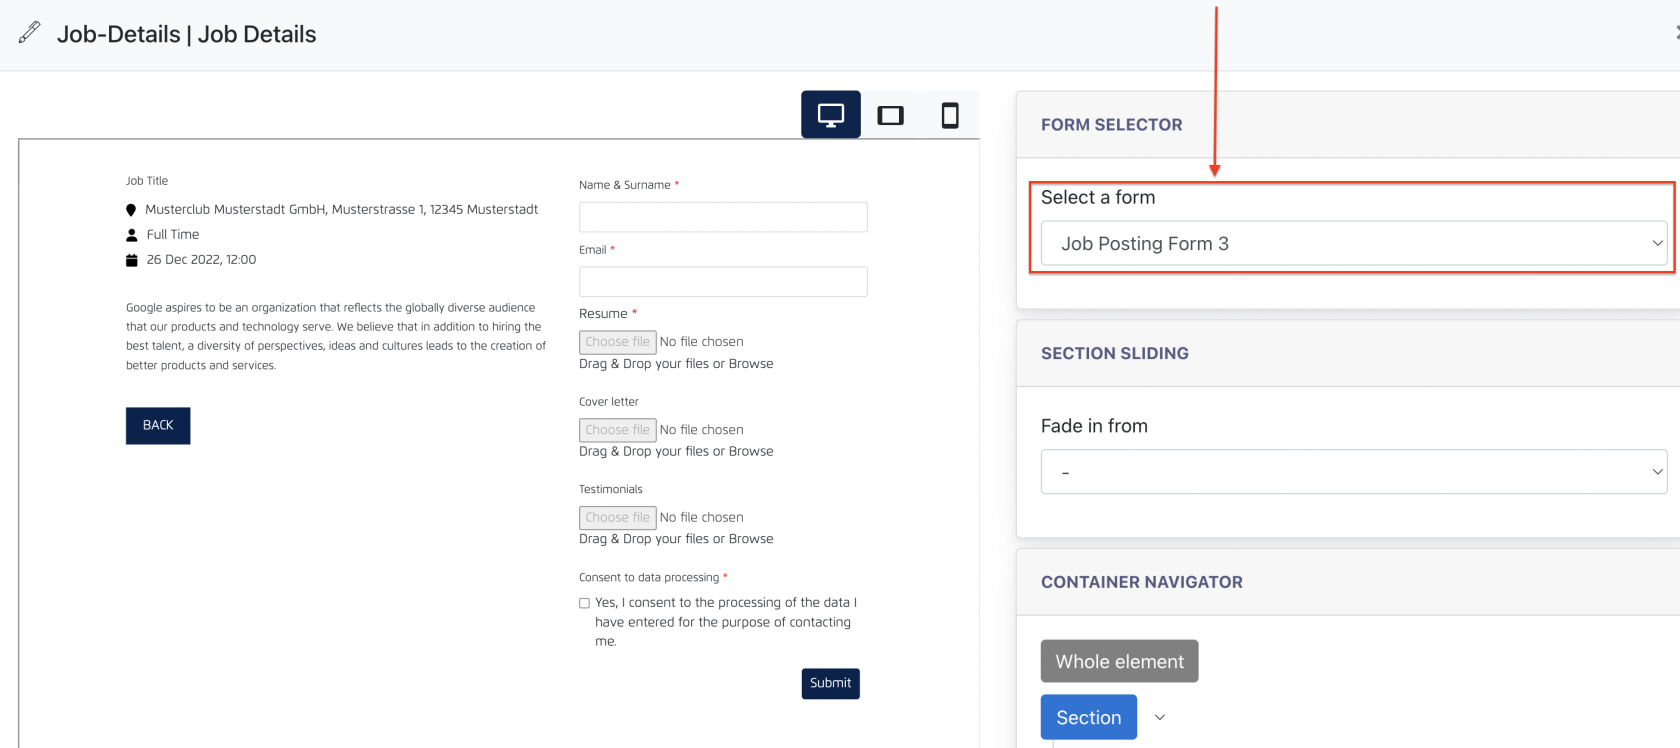
5. View
More.Job


Go

Readto thejobSitedetailsFormandpage,fillsearchout the form
Once the applicant has submitted the form, he/she will receive an email confirming his/her submission.

onThe customer andfor the formrecipientcreatedalsoforreceiveJobs,aandnotificationclickemail:

4. Website: Application Data
This is the place where users can view applicants' submissions.
Sign inSite > Site Contend > FormsanFind the appropriate form
DataClick[ View SubmittedData.
]

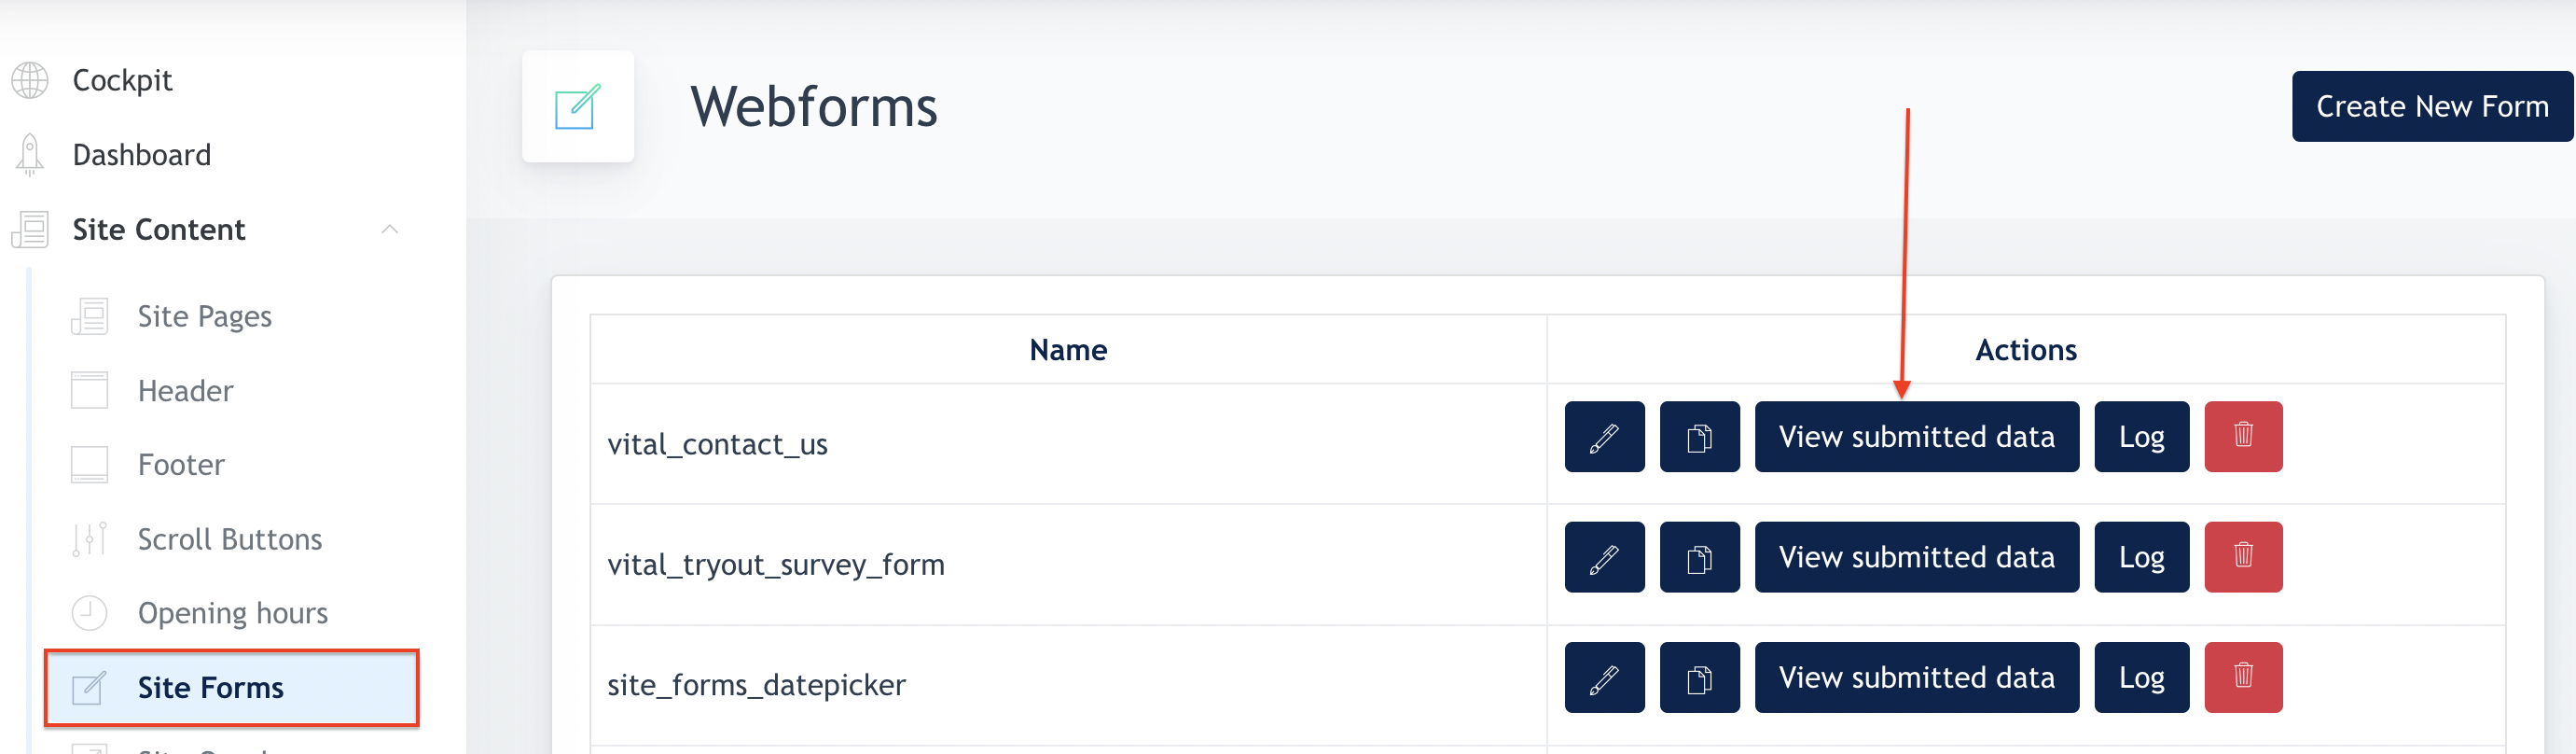
You can view all submissions here
5.
Notes from Developer
The schema for job that we are using is valid according to https://search.google.com/test/rich-results.


if job posting for a few days and the job cantcan't be searched. May try to claim the site on Google Search Console: https://search.google.com/search-console?utm_source=about-page&resource_id=https://www.injoy-ratingen.de/job/bereichsleiter-in-empfang-service--m-w-d-/ via html tag method
domain verification id can be assigned here by the user themselves
Example : https://www.injoy-soest.de/admin/center-settings/website-settings

After claiming, user can
-
see if their job page is indexed or
-
inspect job page url or
-
submit site map url
to ask Google to recrawl their sites
Google jobs structured data shouldn't be on listing page, it should be on selected job page, else it will hurt the SEO. This is mentioned in google documentation ( https://developers.google.com/search/docs/appearance/structured-data/job-posting )

Thus the indexing should be checked using slug page instead of job listing page ( https://search.google.com/test/rich-results/result?id=trMbGgneWToIjwkP4vLTTA )
