Cockpit : Dialogue System
Client/Center Admin can configure settings of the Dialogue System via Cockpit.
Customer Support will join/manage every dialogues with customers via Dialogue Listing & Live Dialogue page.
Remarks : Customer Support is a new roles introduced under this modules. Every center can creates more than 1 customer support.
1. Dialogue Listing
This is where all incoming and on-going dialogues will be displayed. Customer Support may click on the "join" button to join a conversation.
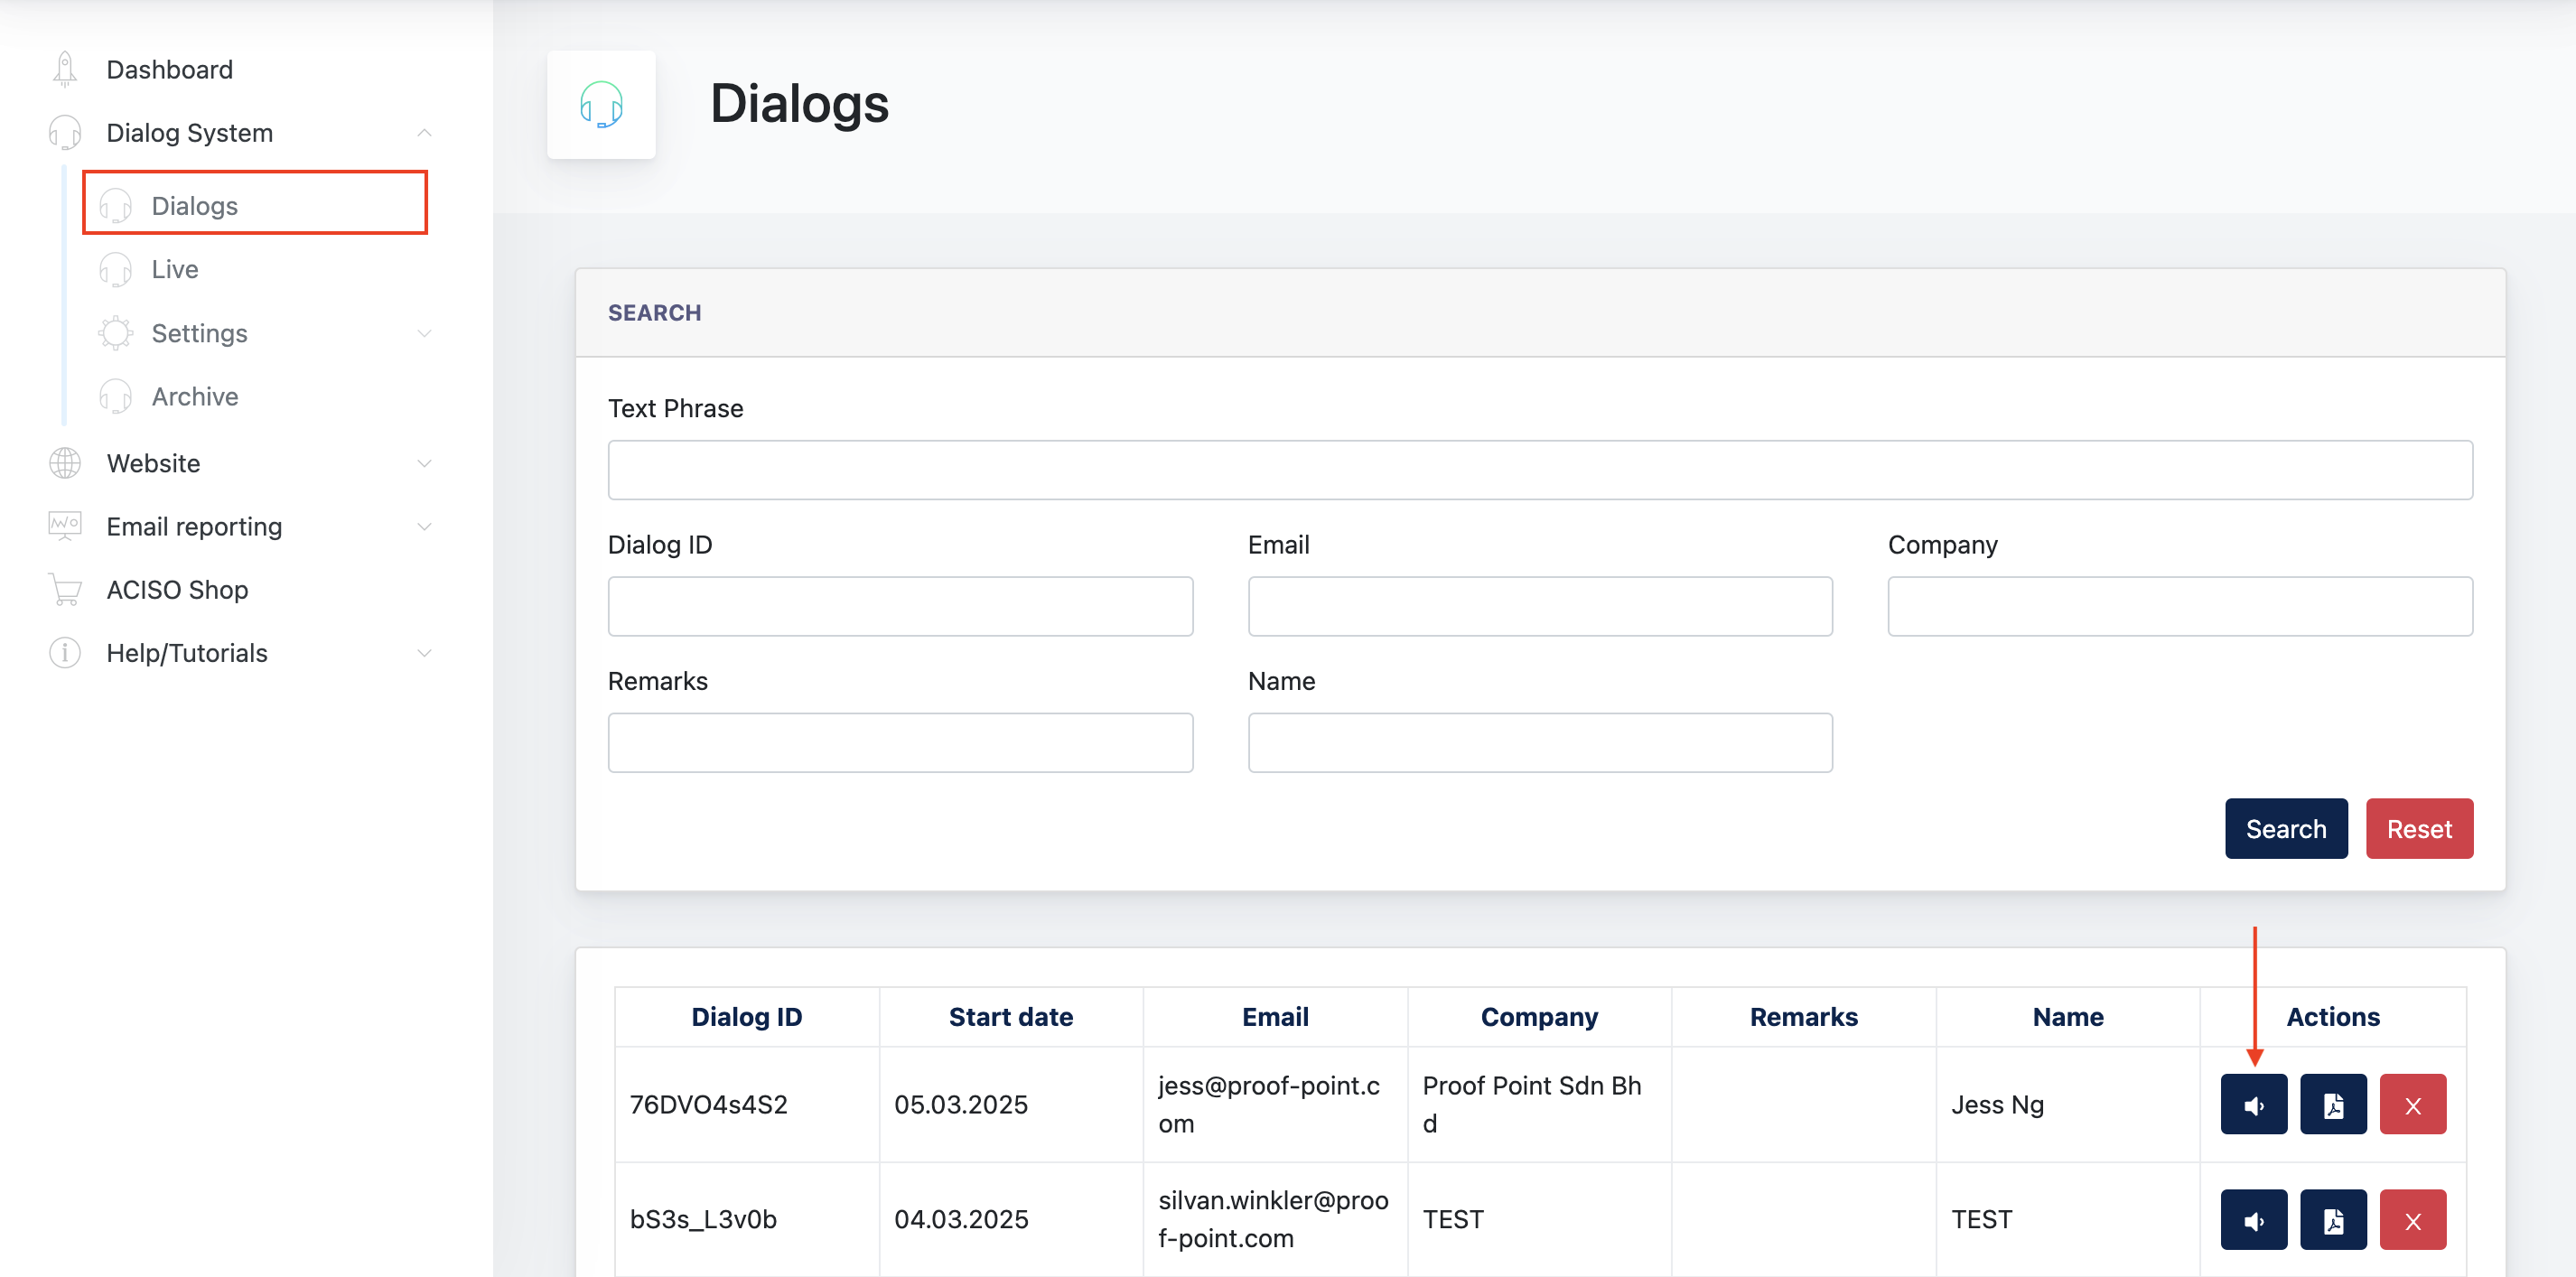
Alternatively, he/she may also clicks on the PDF button to download the dialogue in PDF.
When a conversation is complete, Customer Support may click on the red "x" button to end dialogues.
Remarks: only customer support can ends a conversation.
On the Dialogue Listing, you will see different columns in between "Dialogue ID" and "Actions" column. These are set up by Admin via the Settings page. (Explained later in the same chapter)
2. Live Page
This page will take over when Customer Support clicks on the "Join" button on the listing.
This is the chat window where Customer Support manages different dialogues he/she has joined.
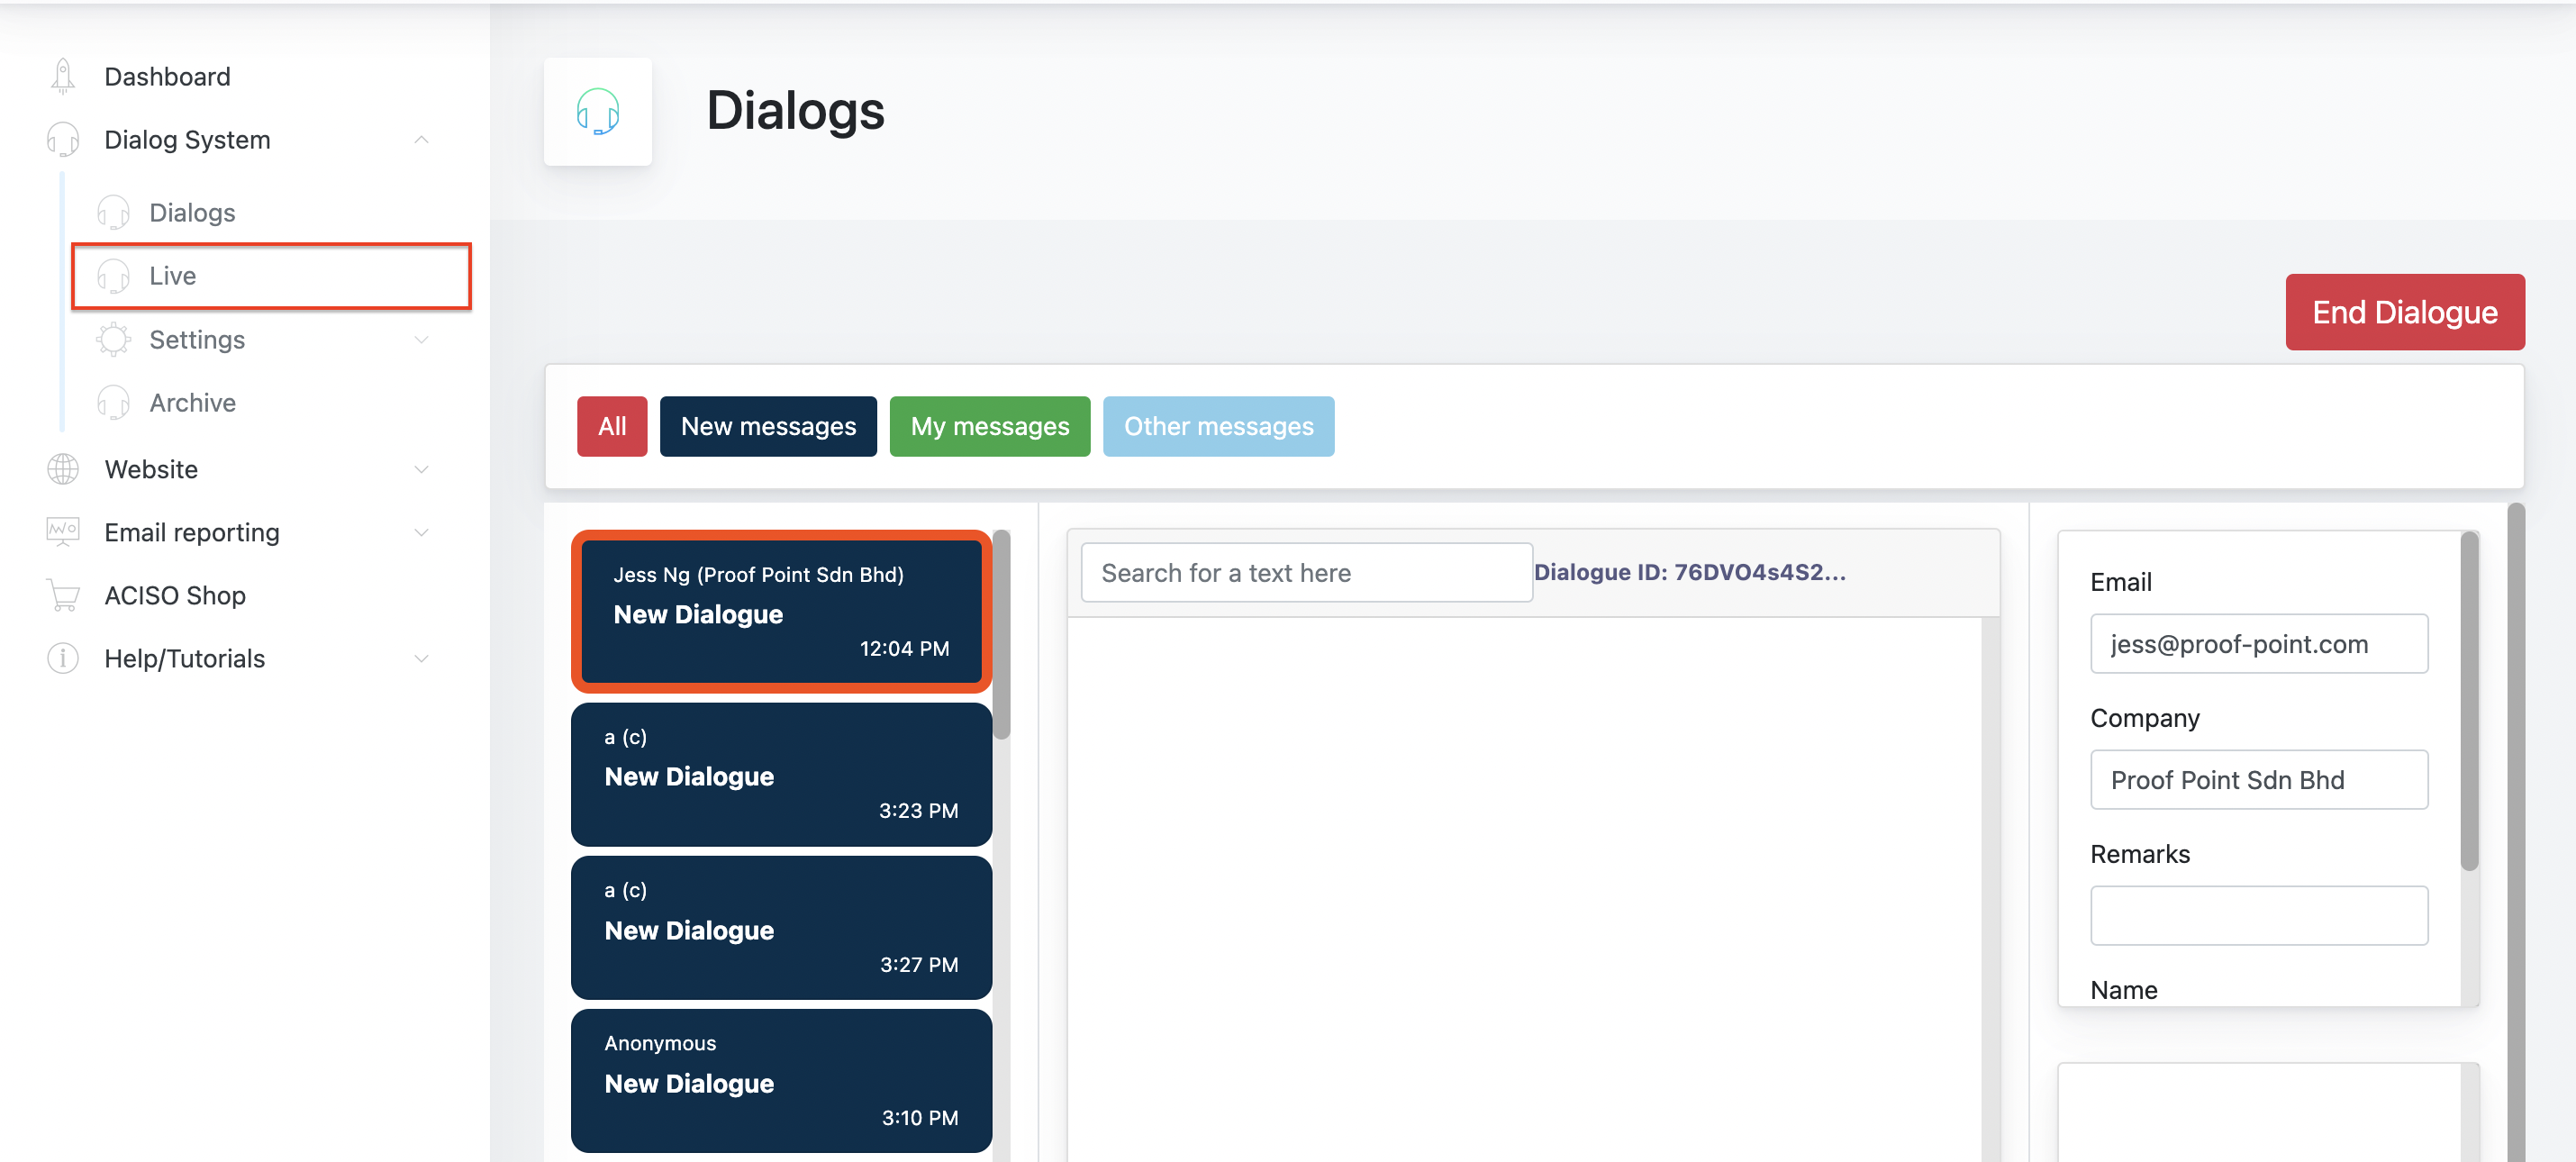
2.1 Messages Category
On the Live Dialogue page, there are few types of messages :
- New Messages - Incoming dialogues that haven't joined by any Customer Support, represented by dark blue color.
- My Messages - On-going dialogues that joined by logged in Customer Support, represented by green color.
- Other Messages - On-going dialogues that joined by other Customer Support, represented by light blue color.
When Customer Support joins "Live Page", he/she will see all messages under the ALL tab. He may also manoeuvre between tabs to manage different types of messages.
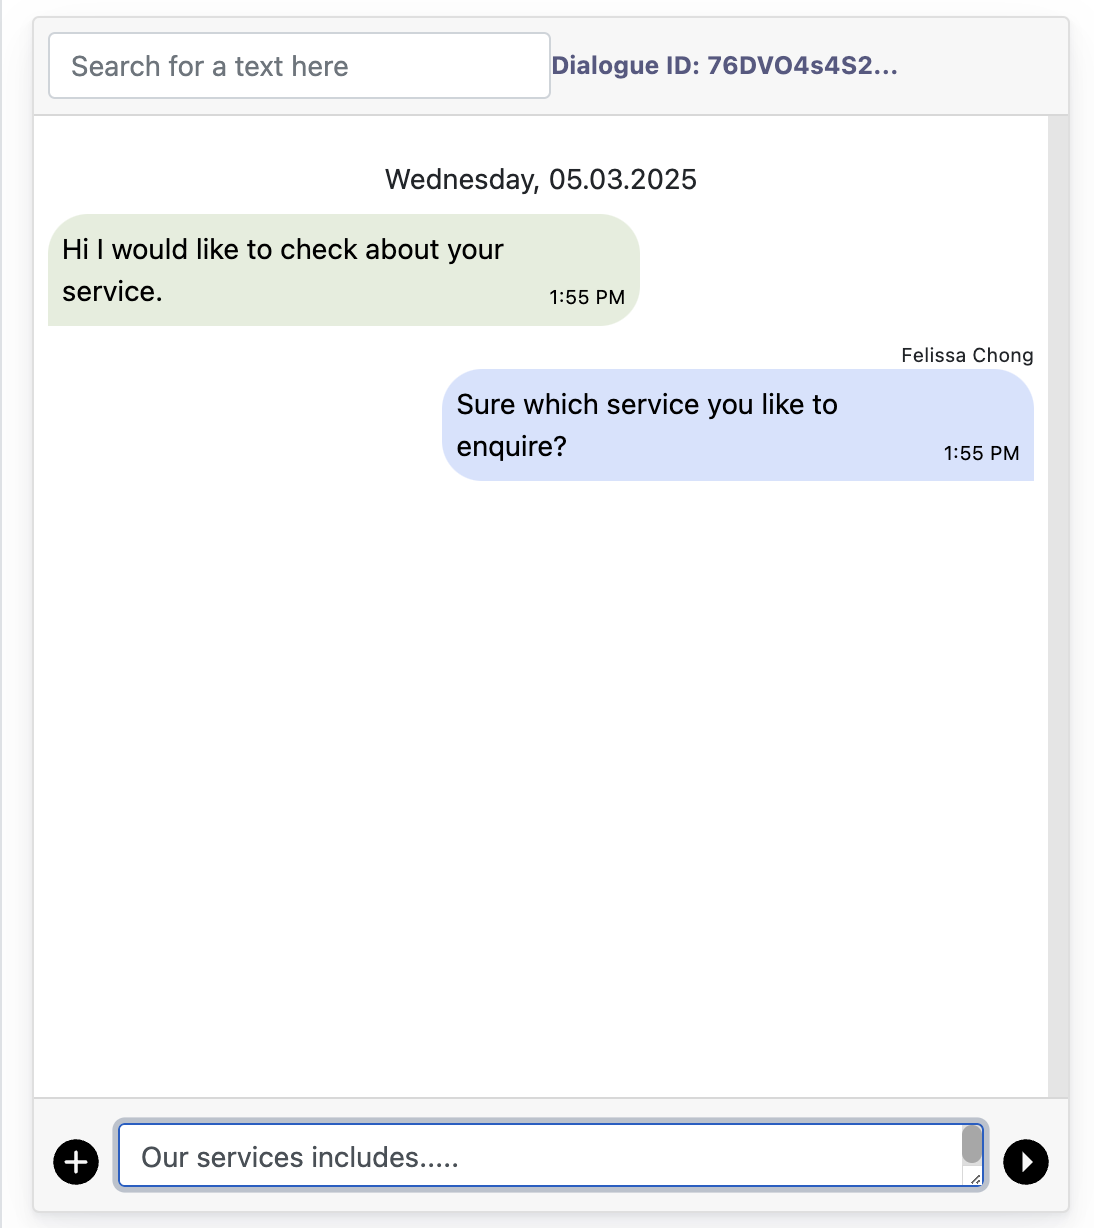
2.2 Live Chat window
The middle column is where the conversation is going on. Customer Support can perform a search by typing text phrase into the Search field, or add files/images using the "+" icon, positioned right beside the text field.
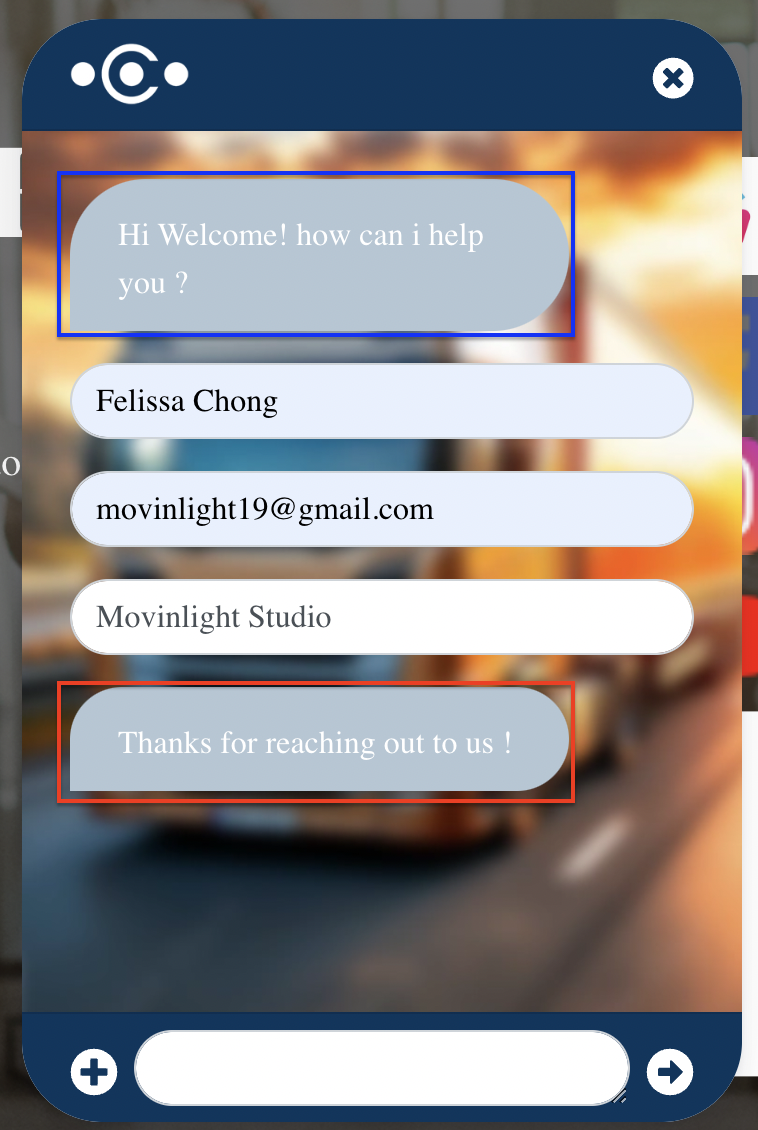
2.3 Welcome Fields
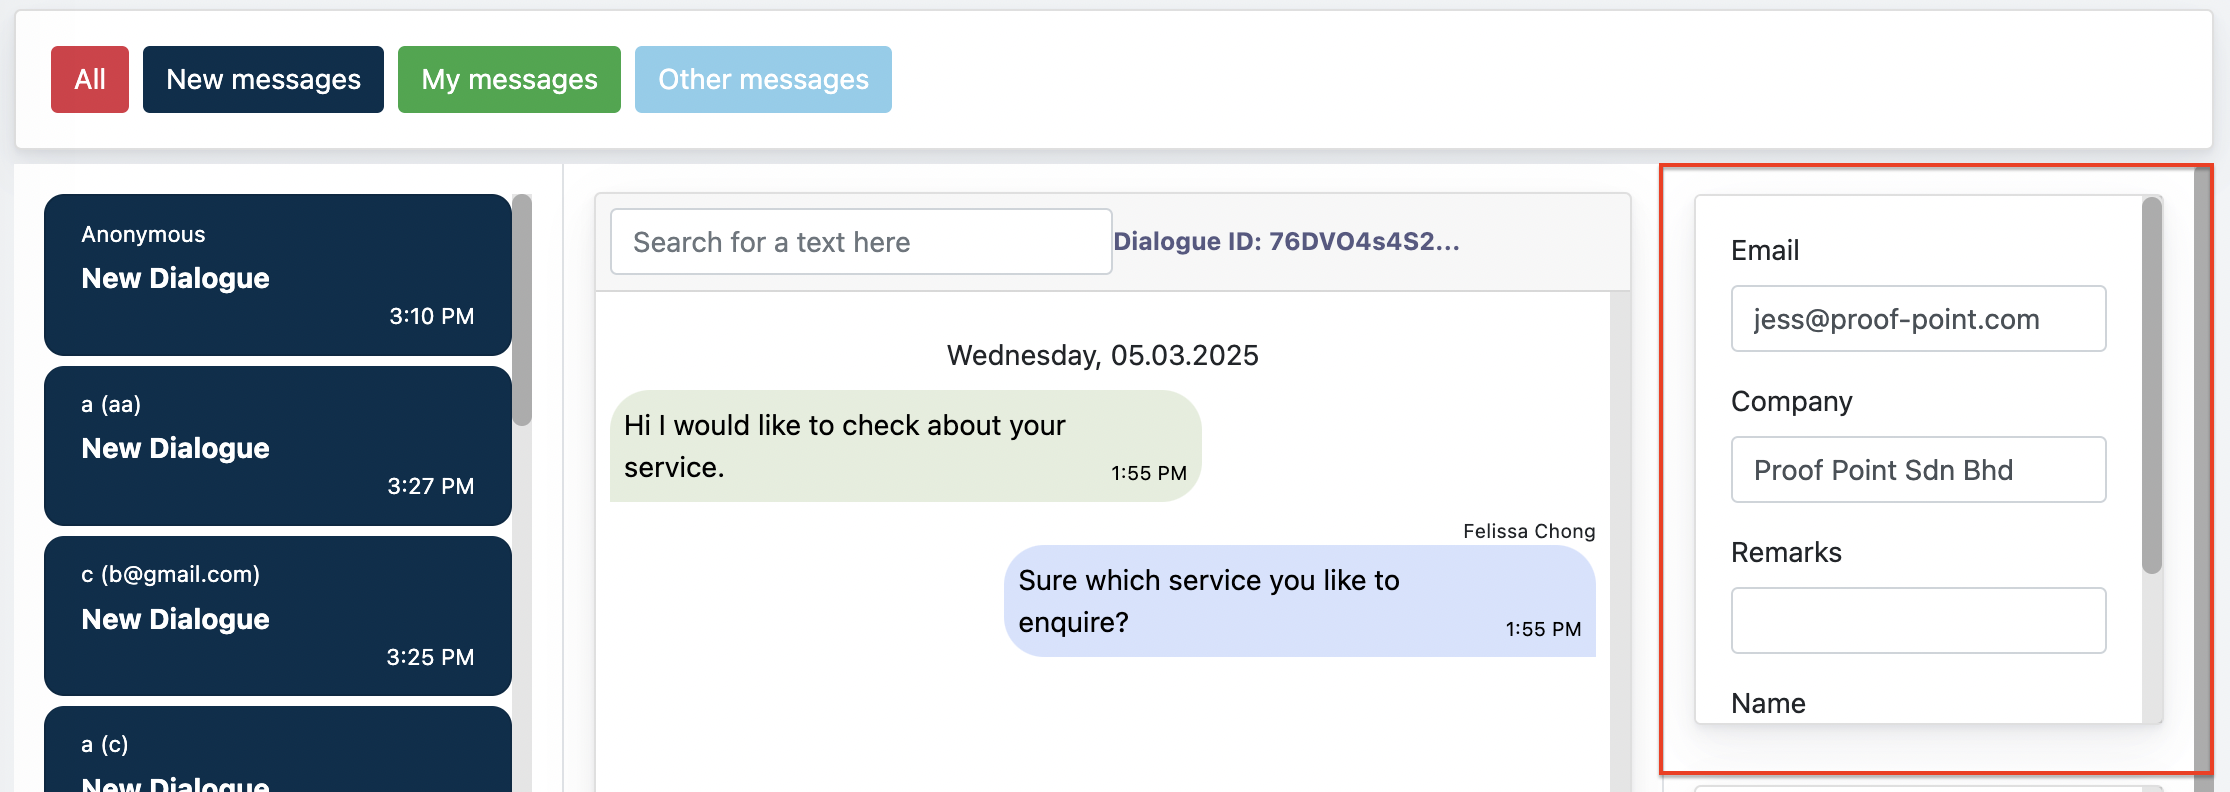
The fields on the right column are fields display on Customer Dialogue Windows on Ark Site. Below is an example :
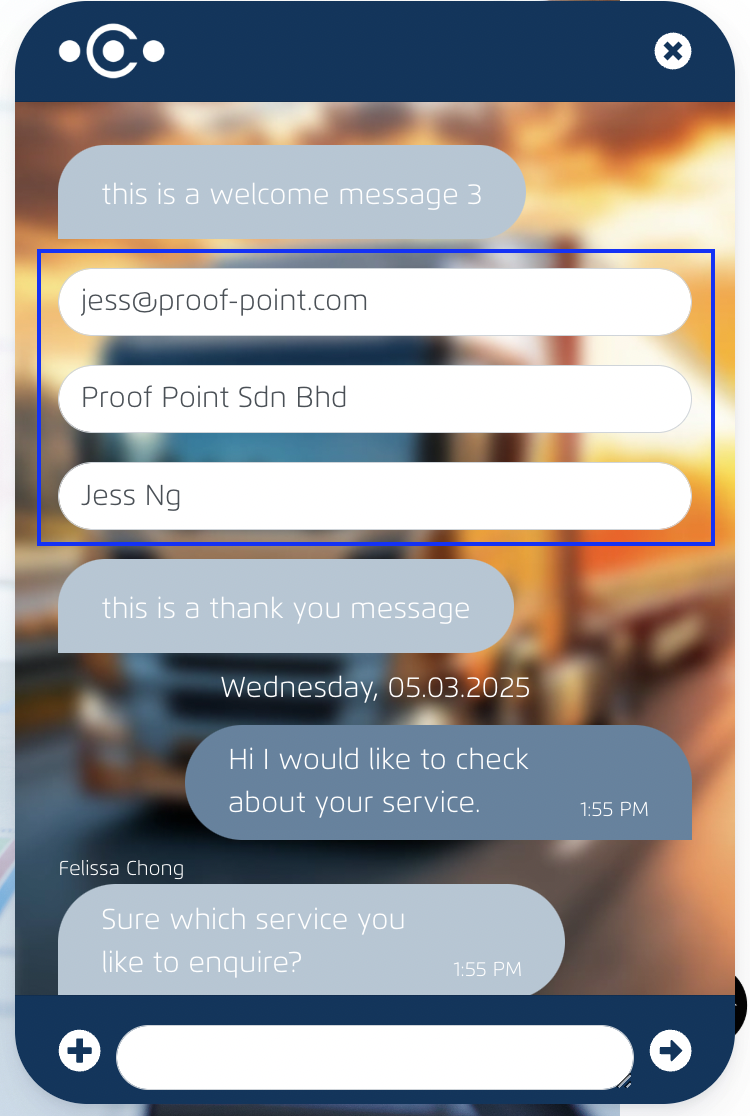
These fields are synced data in between the Ark Site and Cockpit. If customer update any fields on Ark Site, it will be saved and reflected on Cockpit, and vice versa.
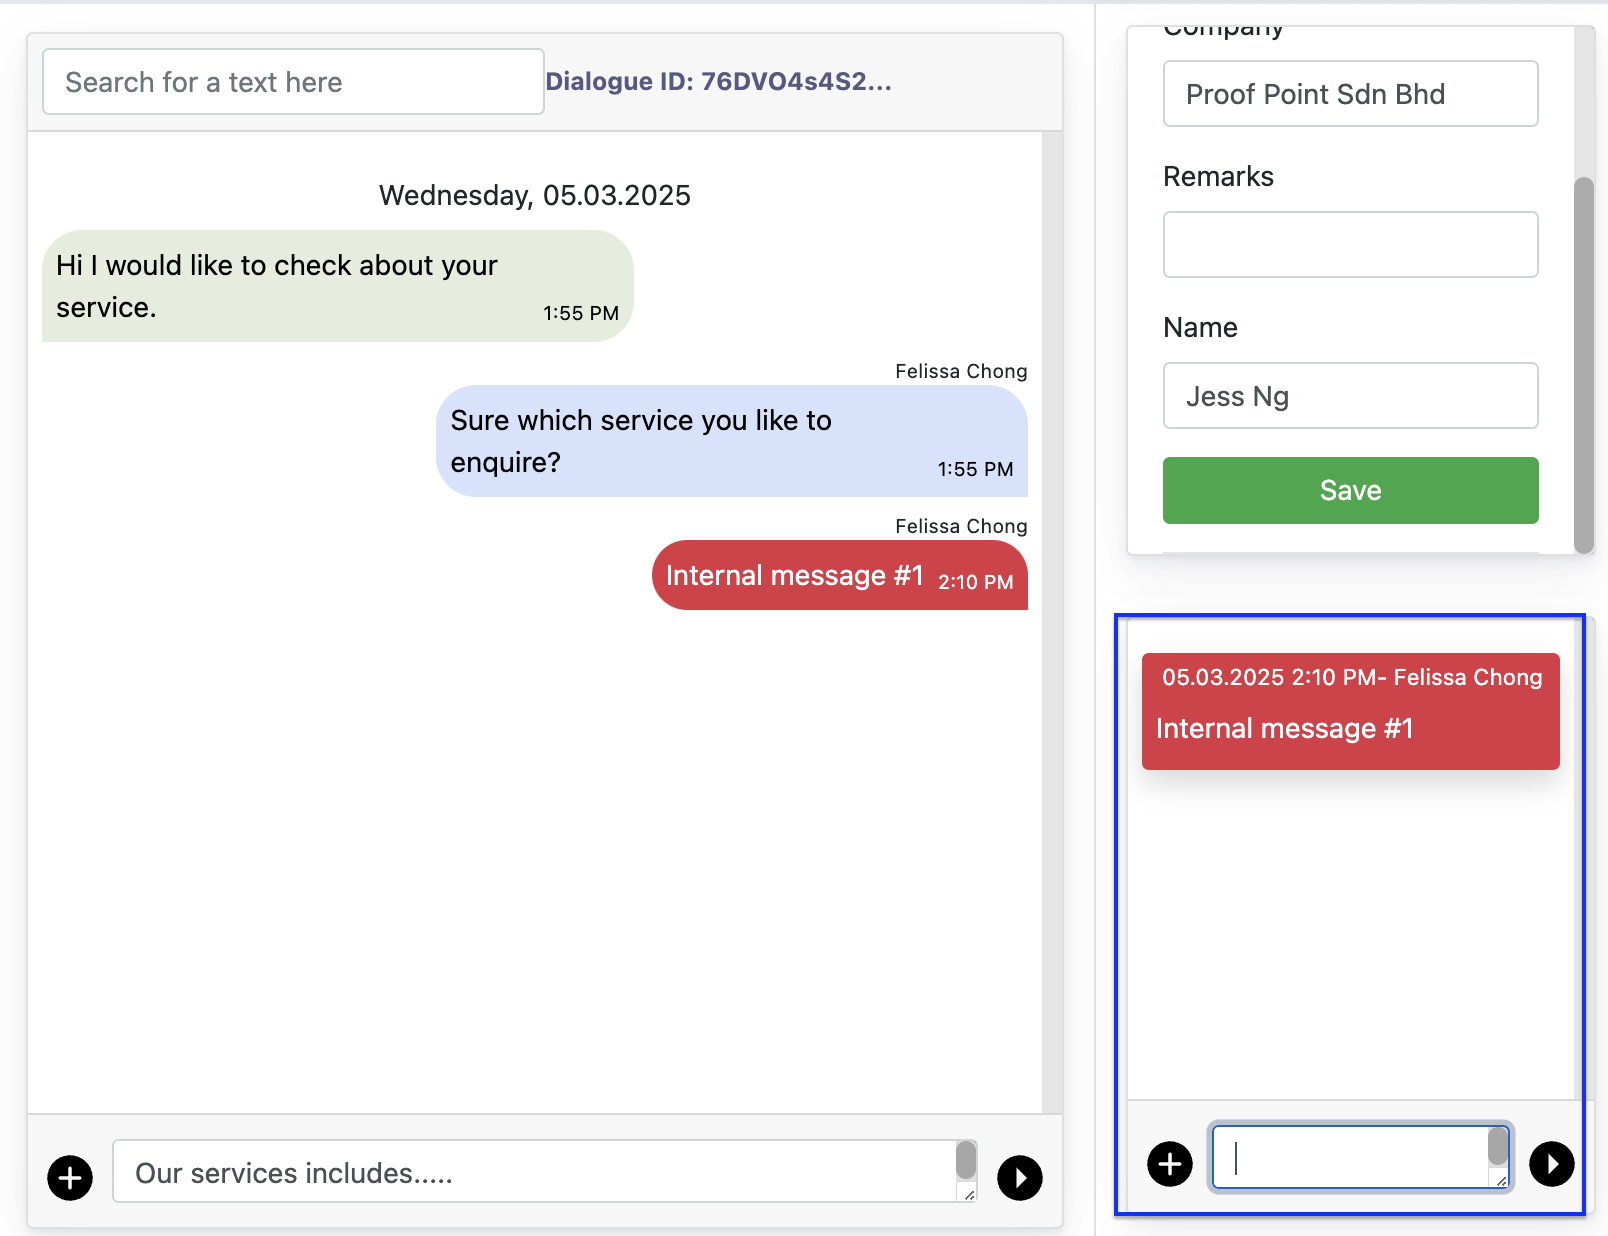
2.4 Internal Message
Customer support can send message which only visible to other customer supports. These messages are highlighted in red.
2.5 End Dialogue
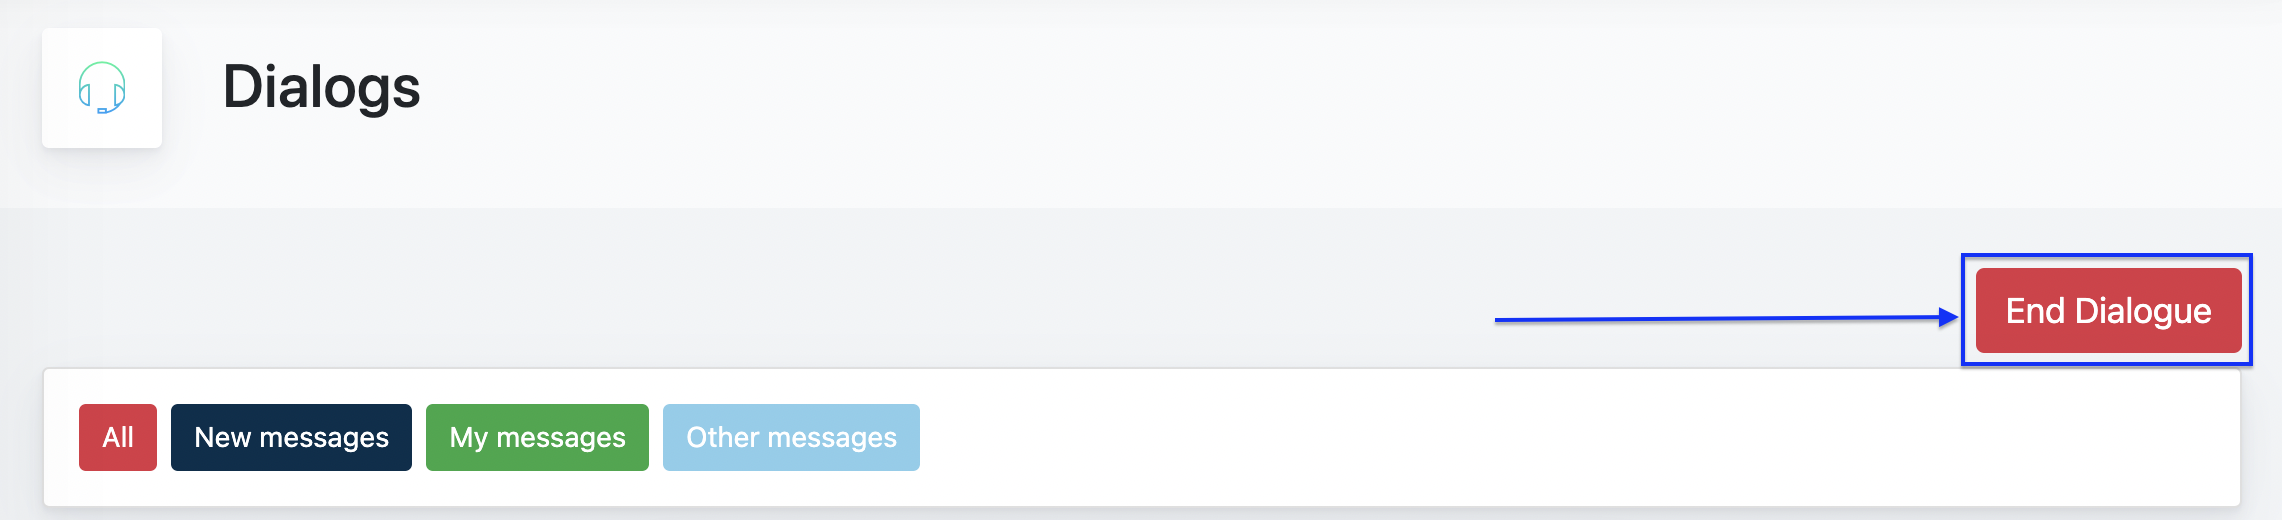
Customer Support can choose to end a dialogue by clicking the "End Dialogue" button.
When a dialogue is ended, it will be moved and saved on the Archived Listing.
3. Settings
This is mandatory for Customer Dialogue module to function properly on the ark site.
3.1 General
Under the General Settings page, user can configure a few important things of the module.
A. Opening Hour Setting
Admin may set opening hour for different language of the website. Customer Support will only be available during the set opening hour for a particular language site.
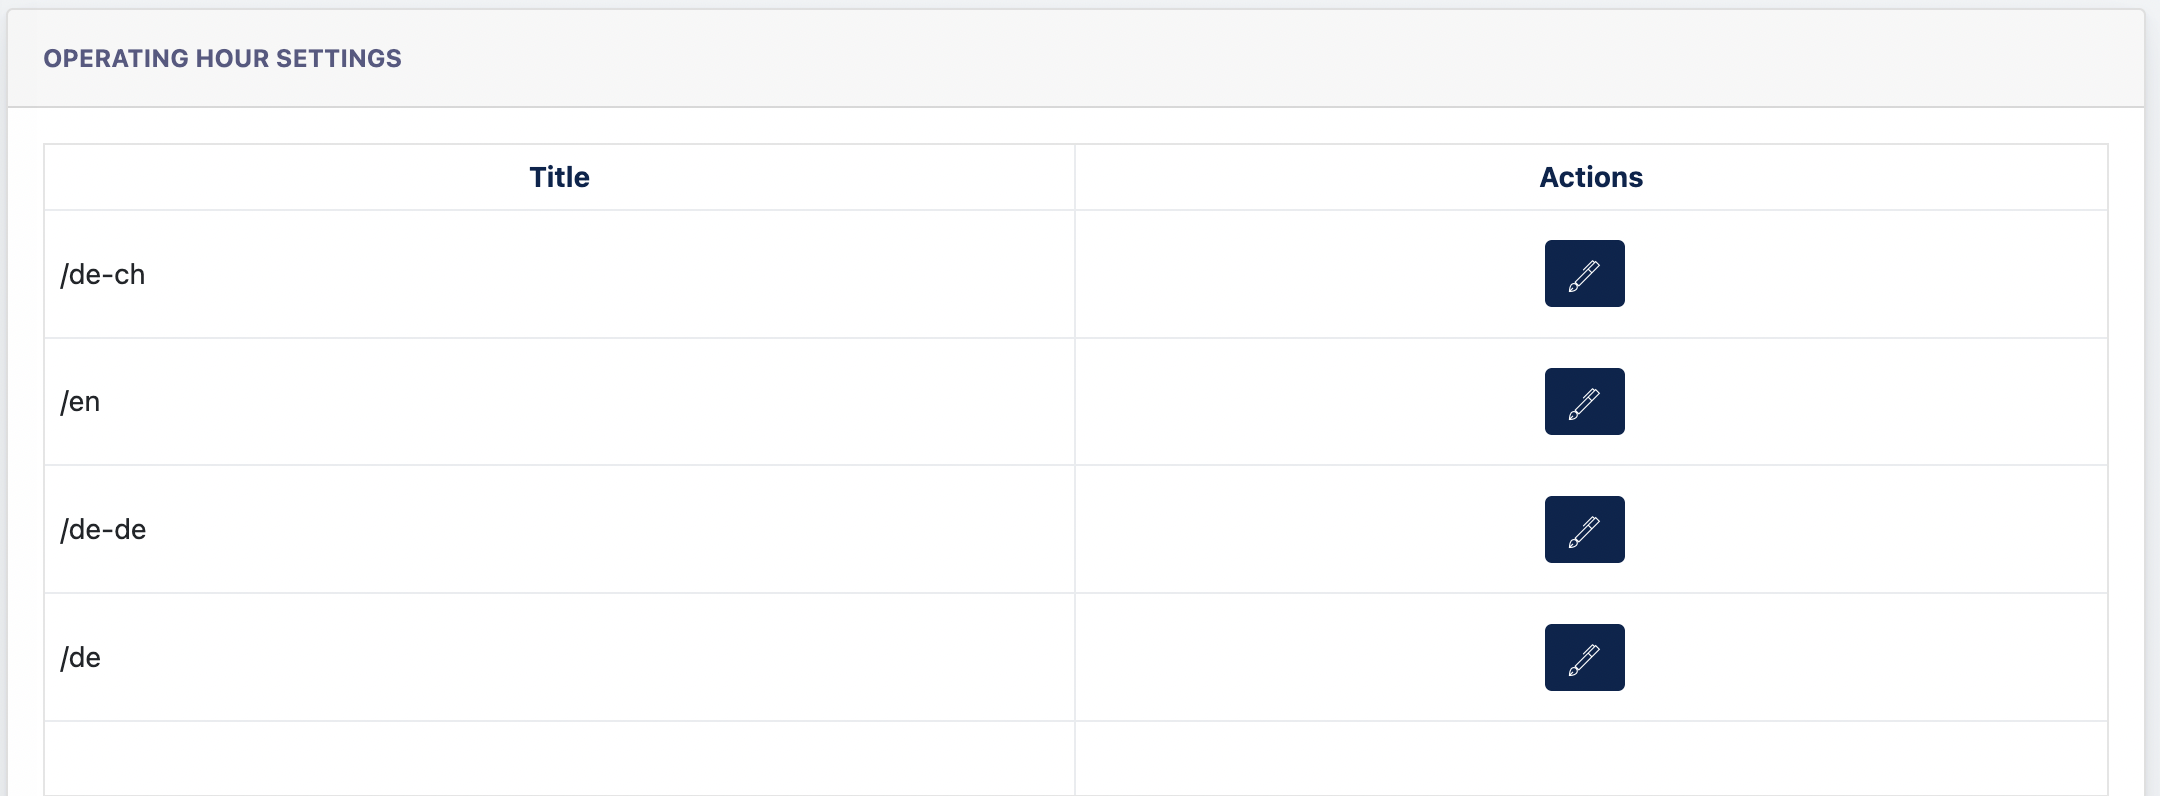
Click on "Edit" button to open up modal configuration.
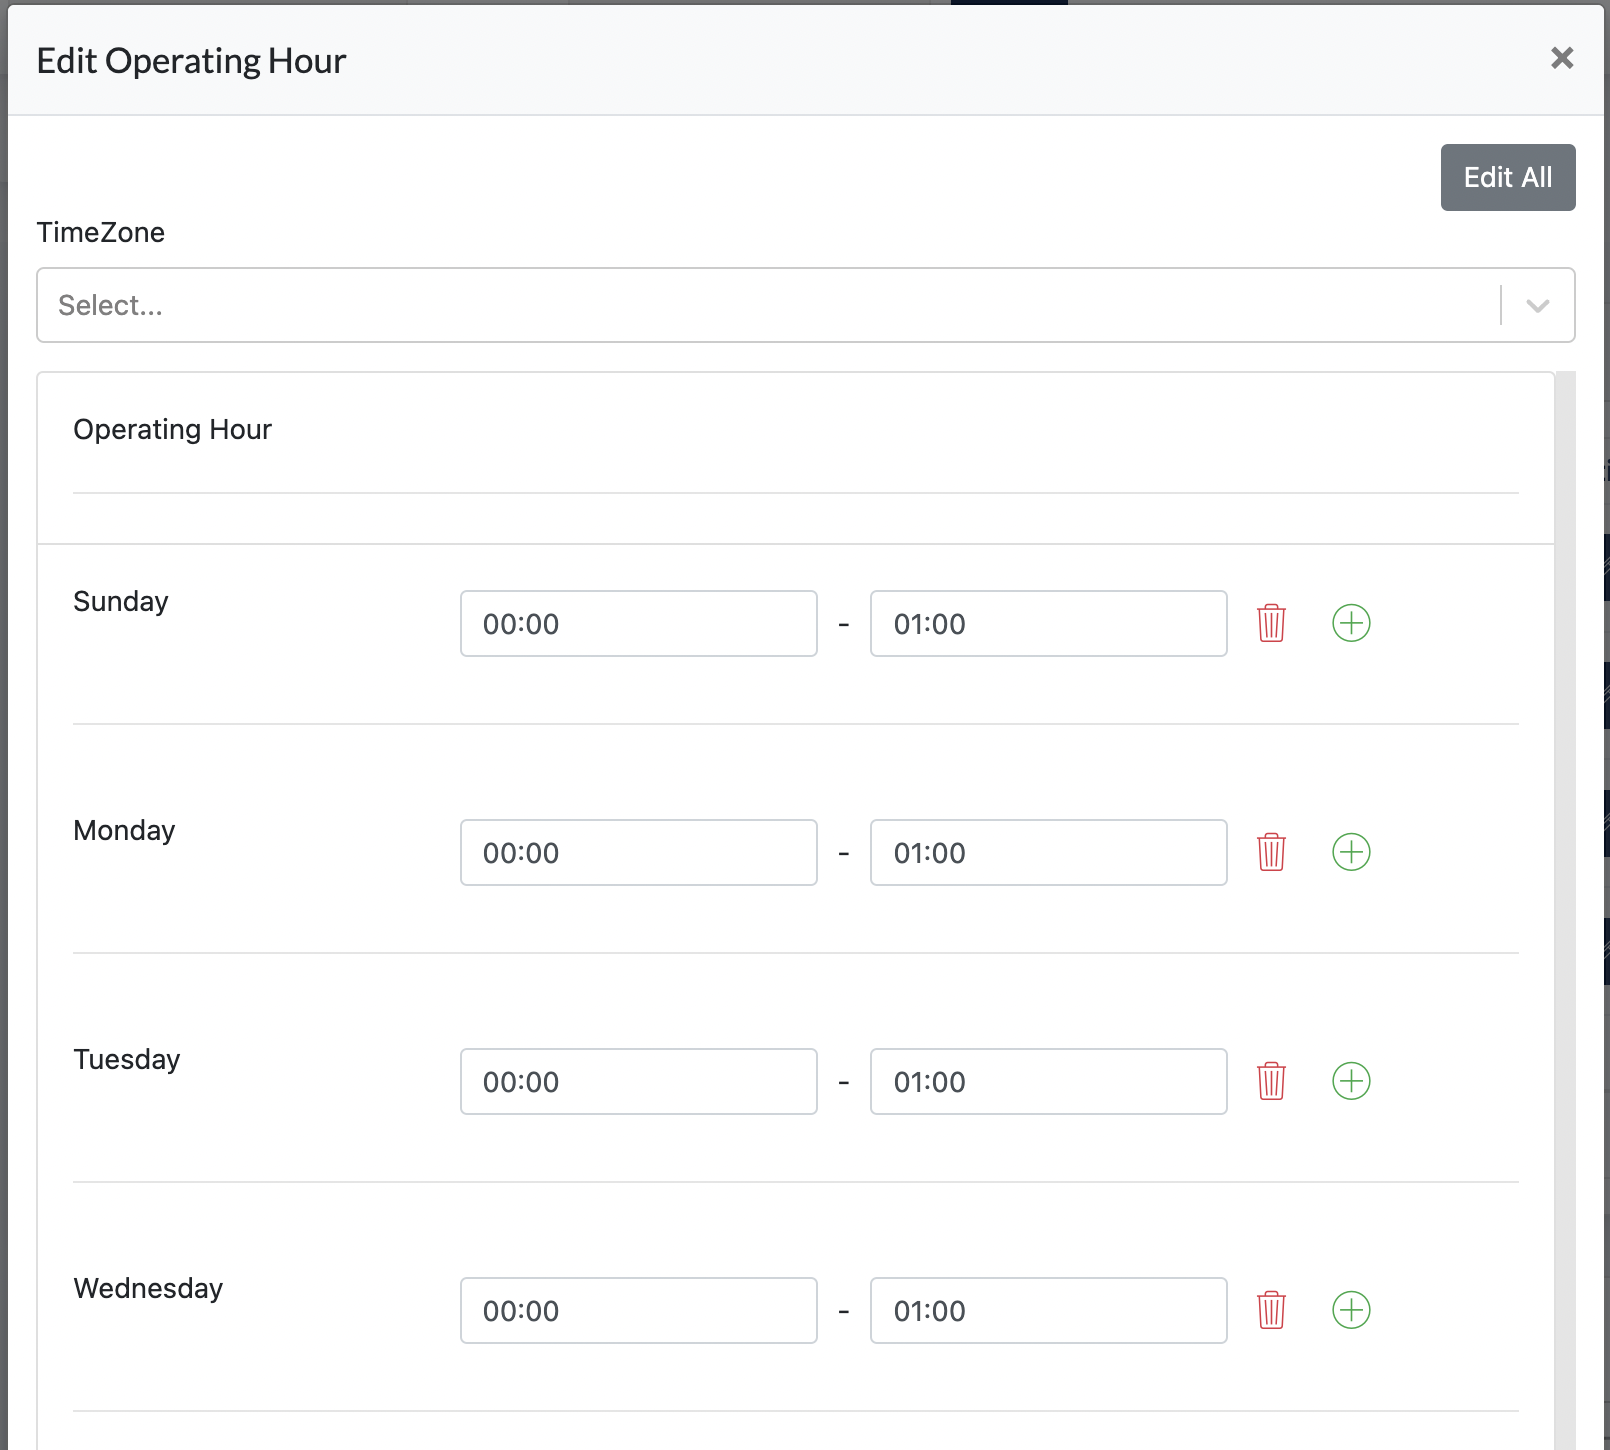
In the form :
- [ Edit All ] - Click on this will open up a separate modal to configure a time which then would apply to the rest of the days. This function is to ease the Admin so he doesn't need to configure the same time for every day, instead just do some minor modification to complete the configuration.
- [ Time Zone ] - Admin may select which timezone this language website is belonged to
- [ Operating Hour ] - Admin may set individual operating hour.

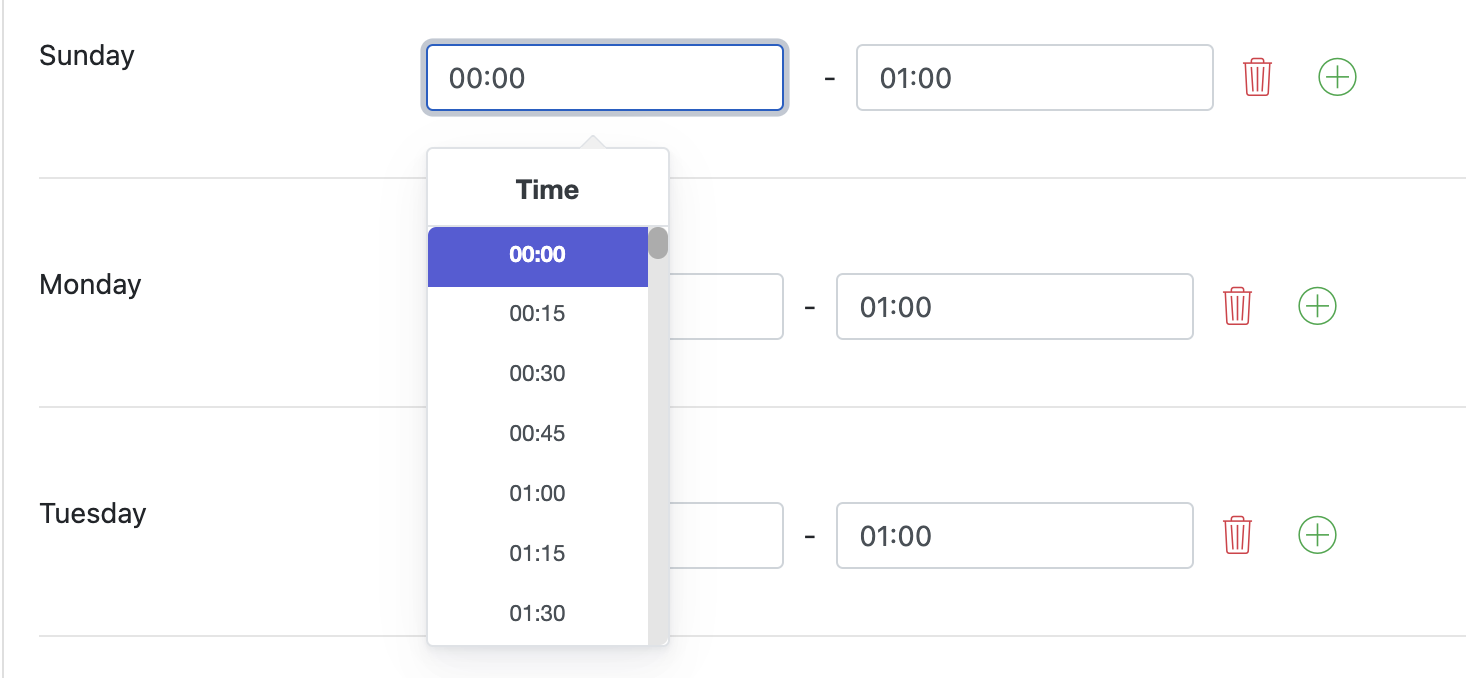
- Admin may also click on the ' + ' icon to add another opening hour for the day. An example shown below:

- Admin may also click on the ' + ' icon to add another opening hour for the day. An example shown below:

Please note that if the ark site doesn't set any Translation Setting, then it will display the Site Language like below :
B. Message Configuration
Admin can set different messages that displayed on the Customer Dialogue window on the Ark Site.
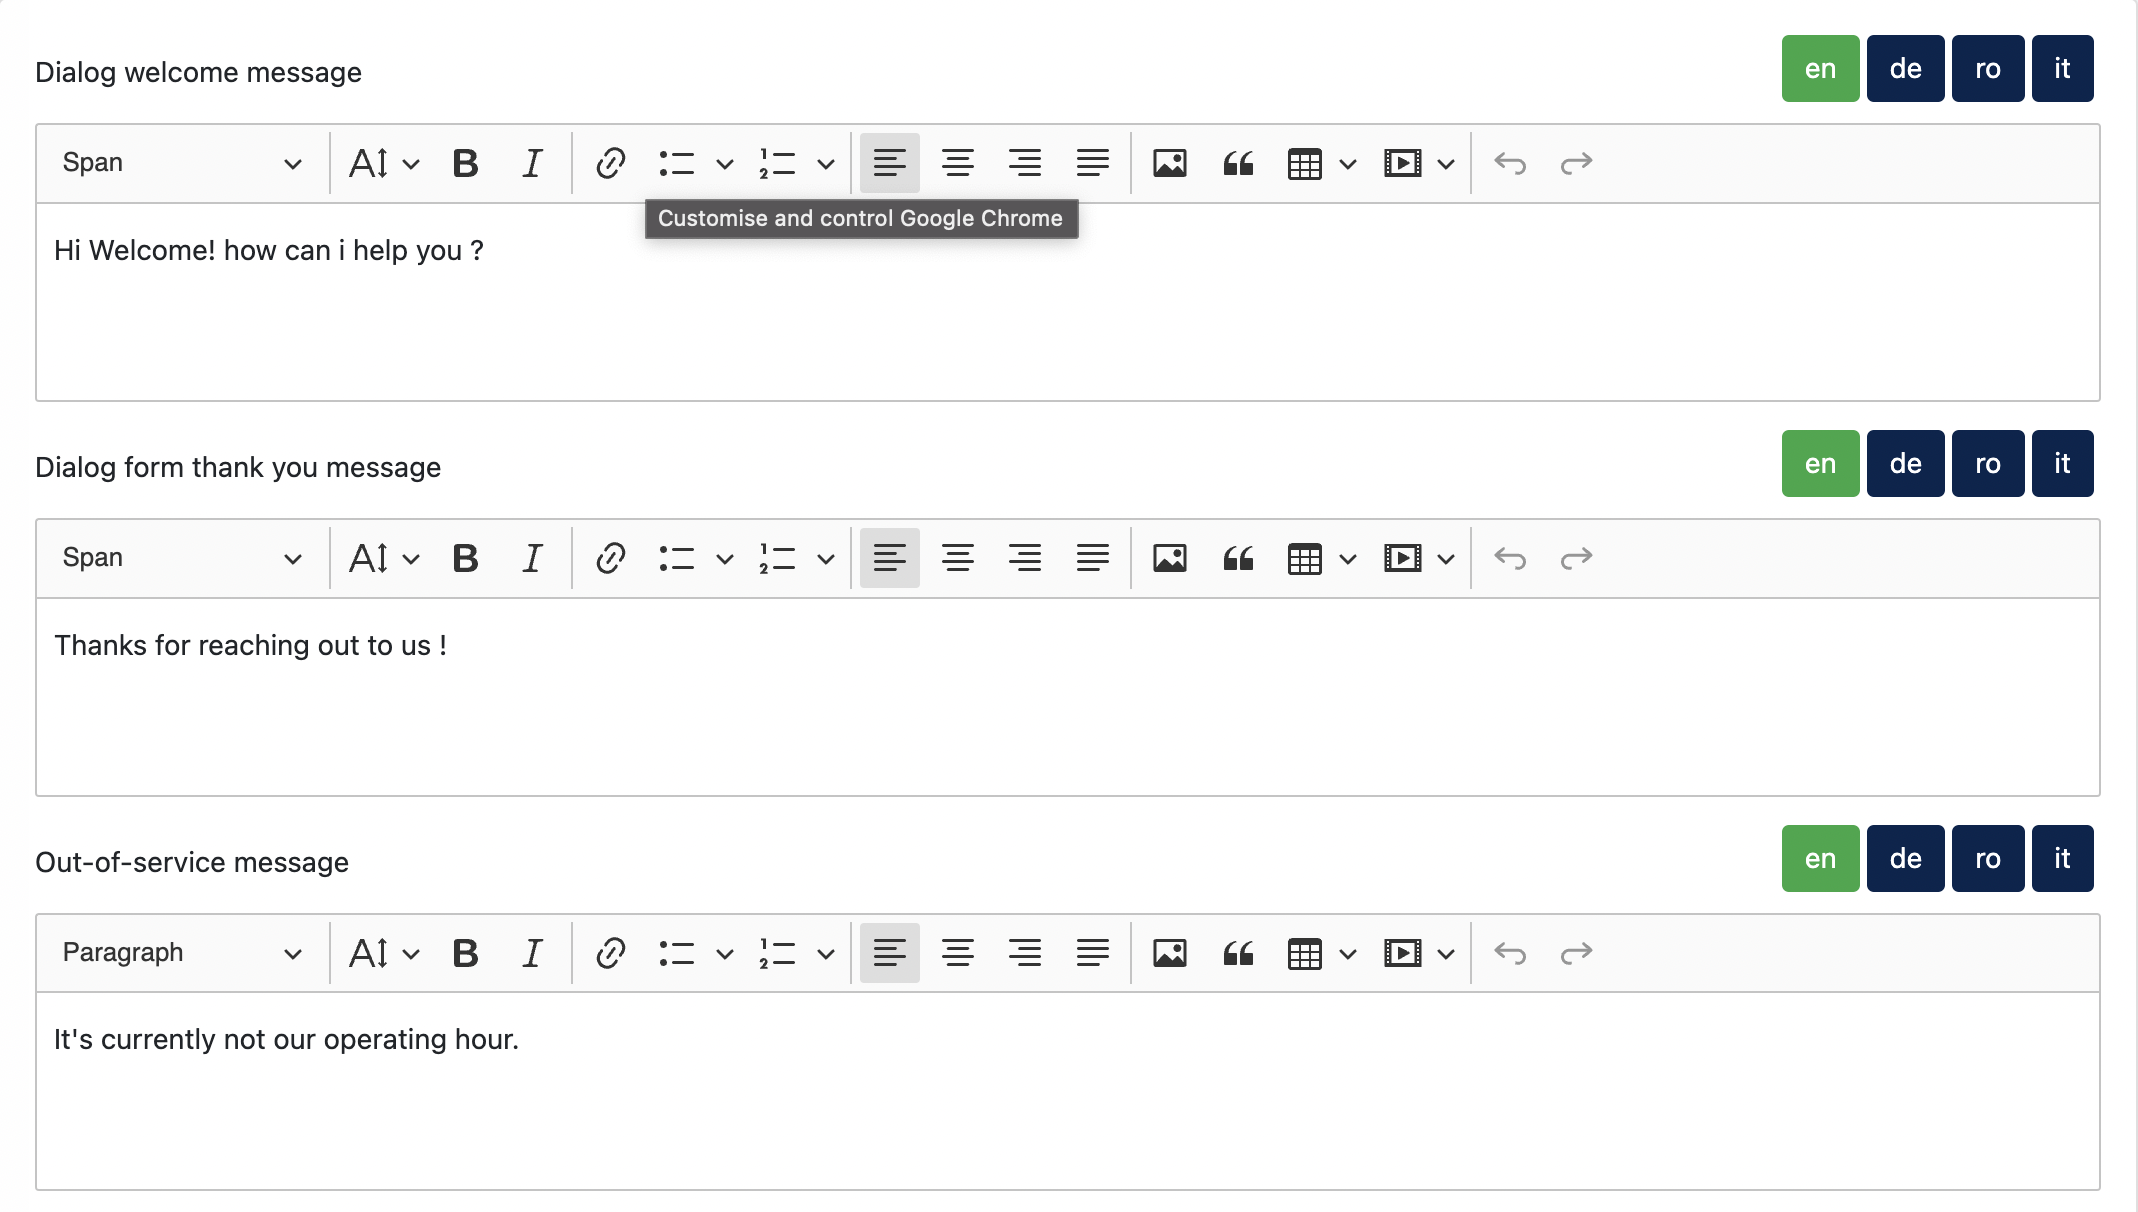
- Welcome message - 1st message appearing on the Dialogue window
- Thank you message - Thank you message displaying on the Dialogue window after customer fill in data.
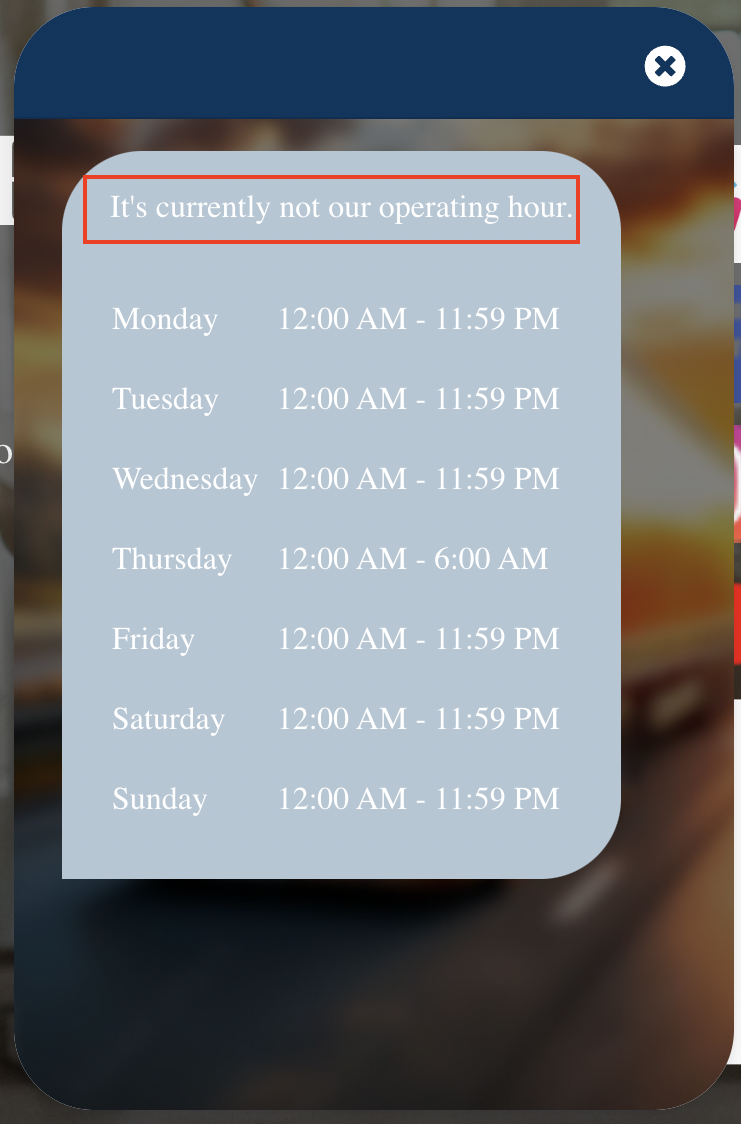
- Out-of-service message - Message displaying on the Dialogue window when outside of operating hour
Screenshot of Welcome & Thank You message :
Screenshot of Out-of-service message :
C. Dialogue Fields
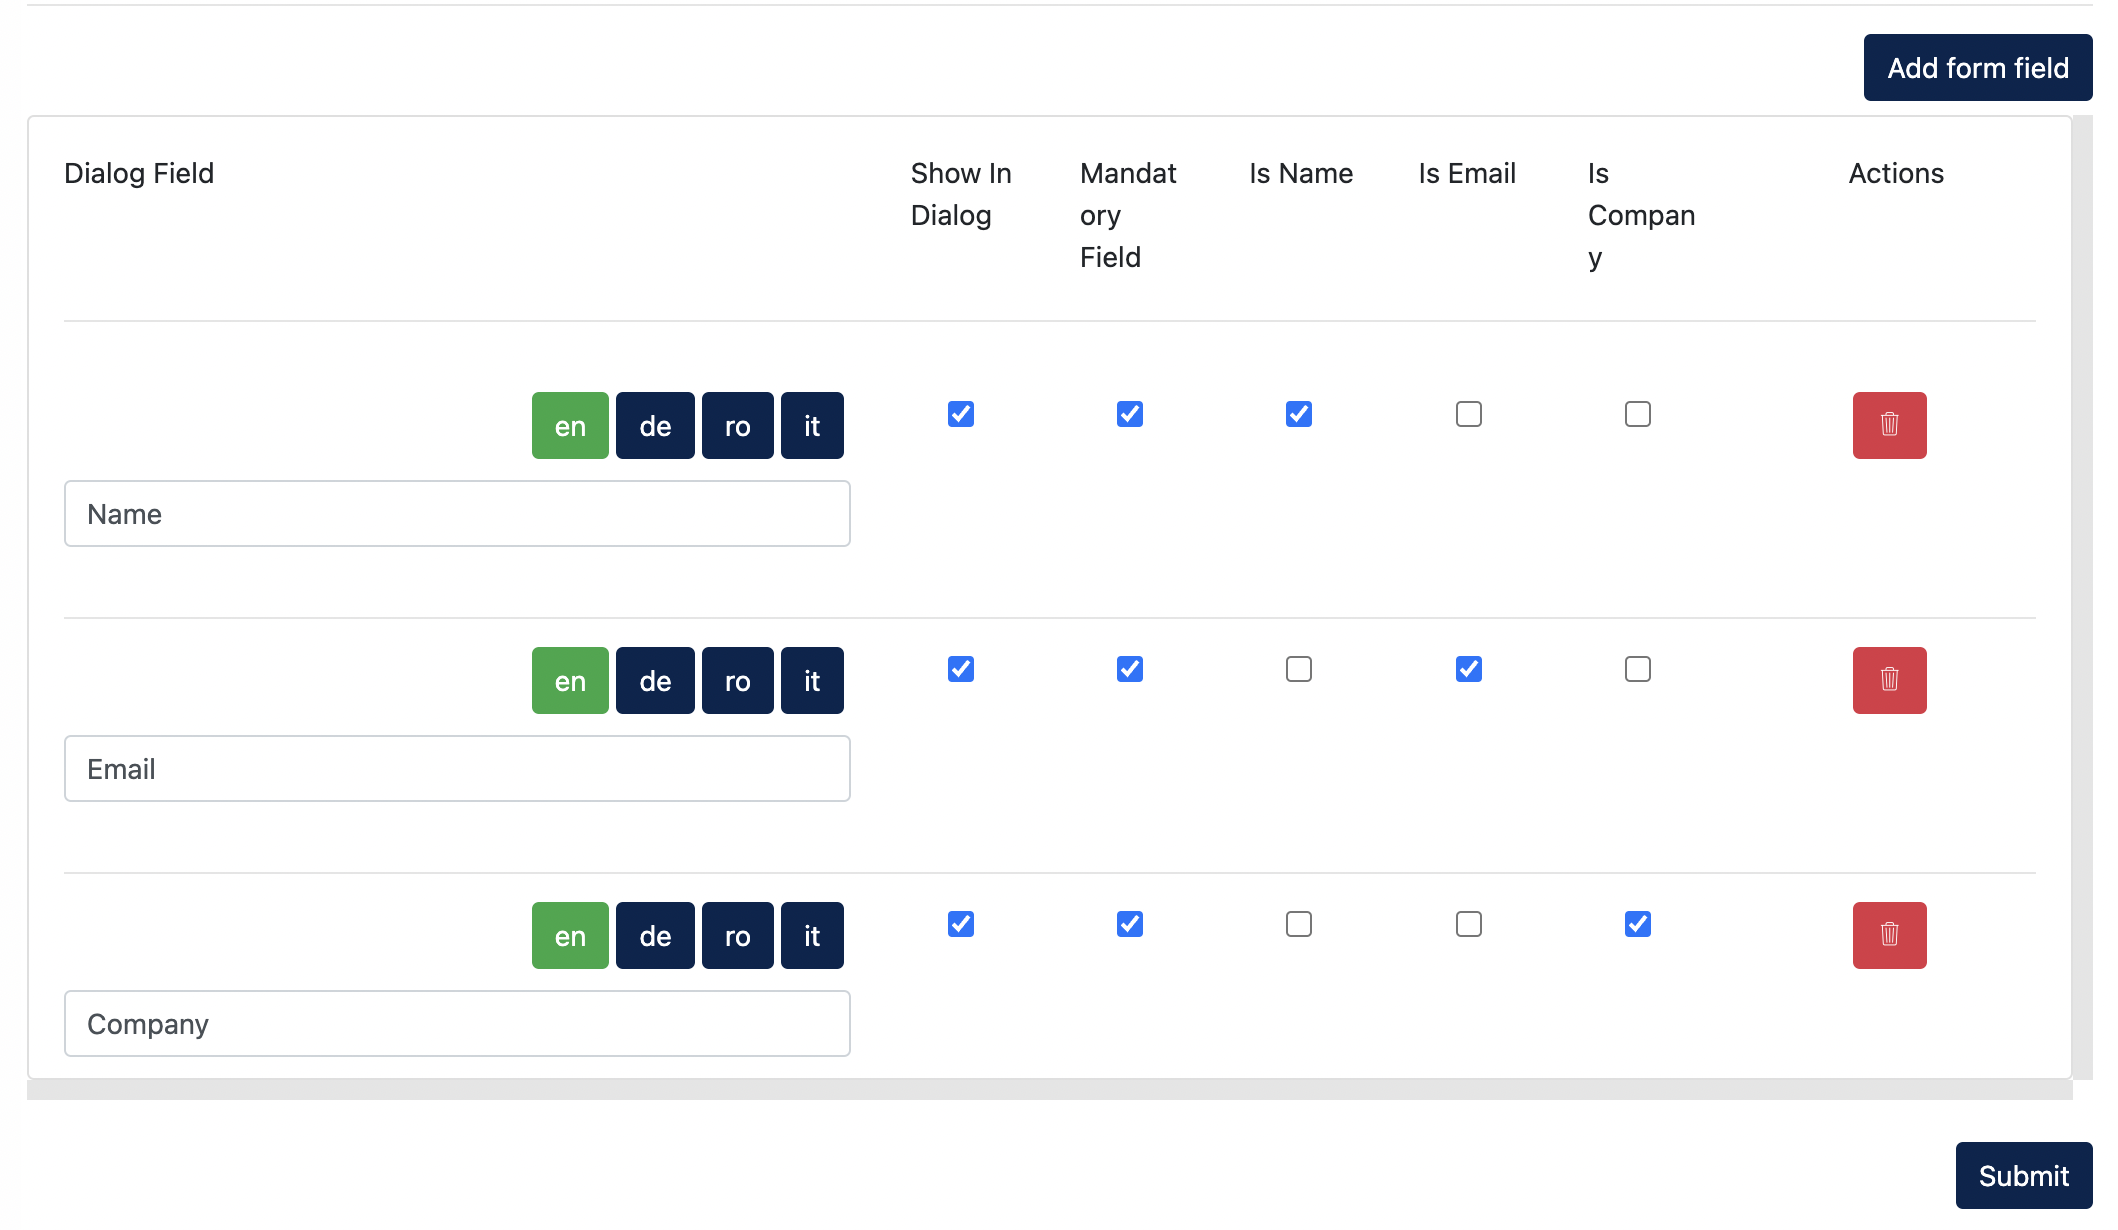
Dialogue fields are text fields displaying on Ark Site's dialogue window. Example screenshot below :

Admin can configure to add/remove any text fields to be displayed on the Ark Site, and set as mandatory if necessary.
Admin can also create text field that is not for Customer, but for Customer Support to add any remarks for this specific dialogue.
Example configuration will be :

How this is displayed on the Live Dialogue Window for Customer Support:
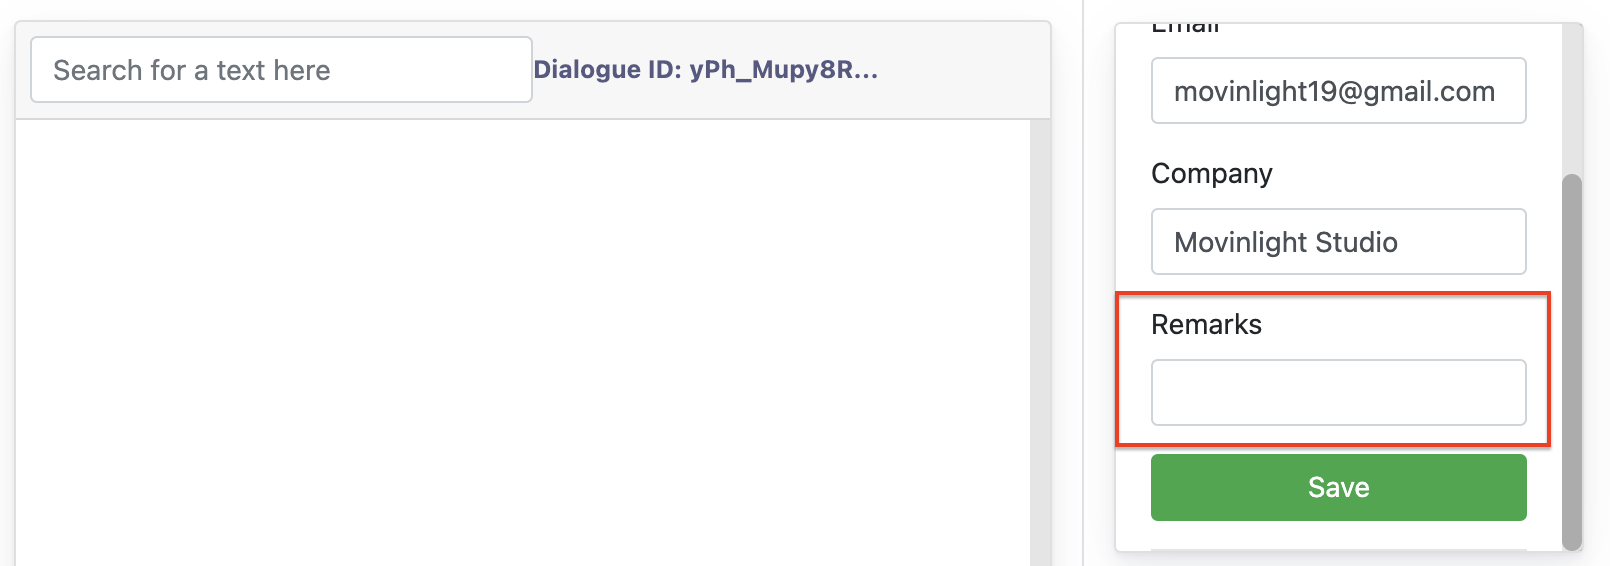
The Dialogue fields are sync between Ark Site and Cockpit. When a customer add/edit any text in the fields, it will be reflected on Cockpit, and vice versa.
Also all the data fields created will also be shown as text column on the Dialogue Listing :

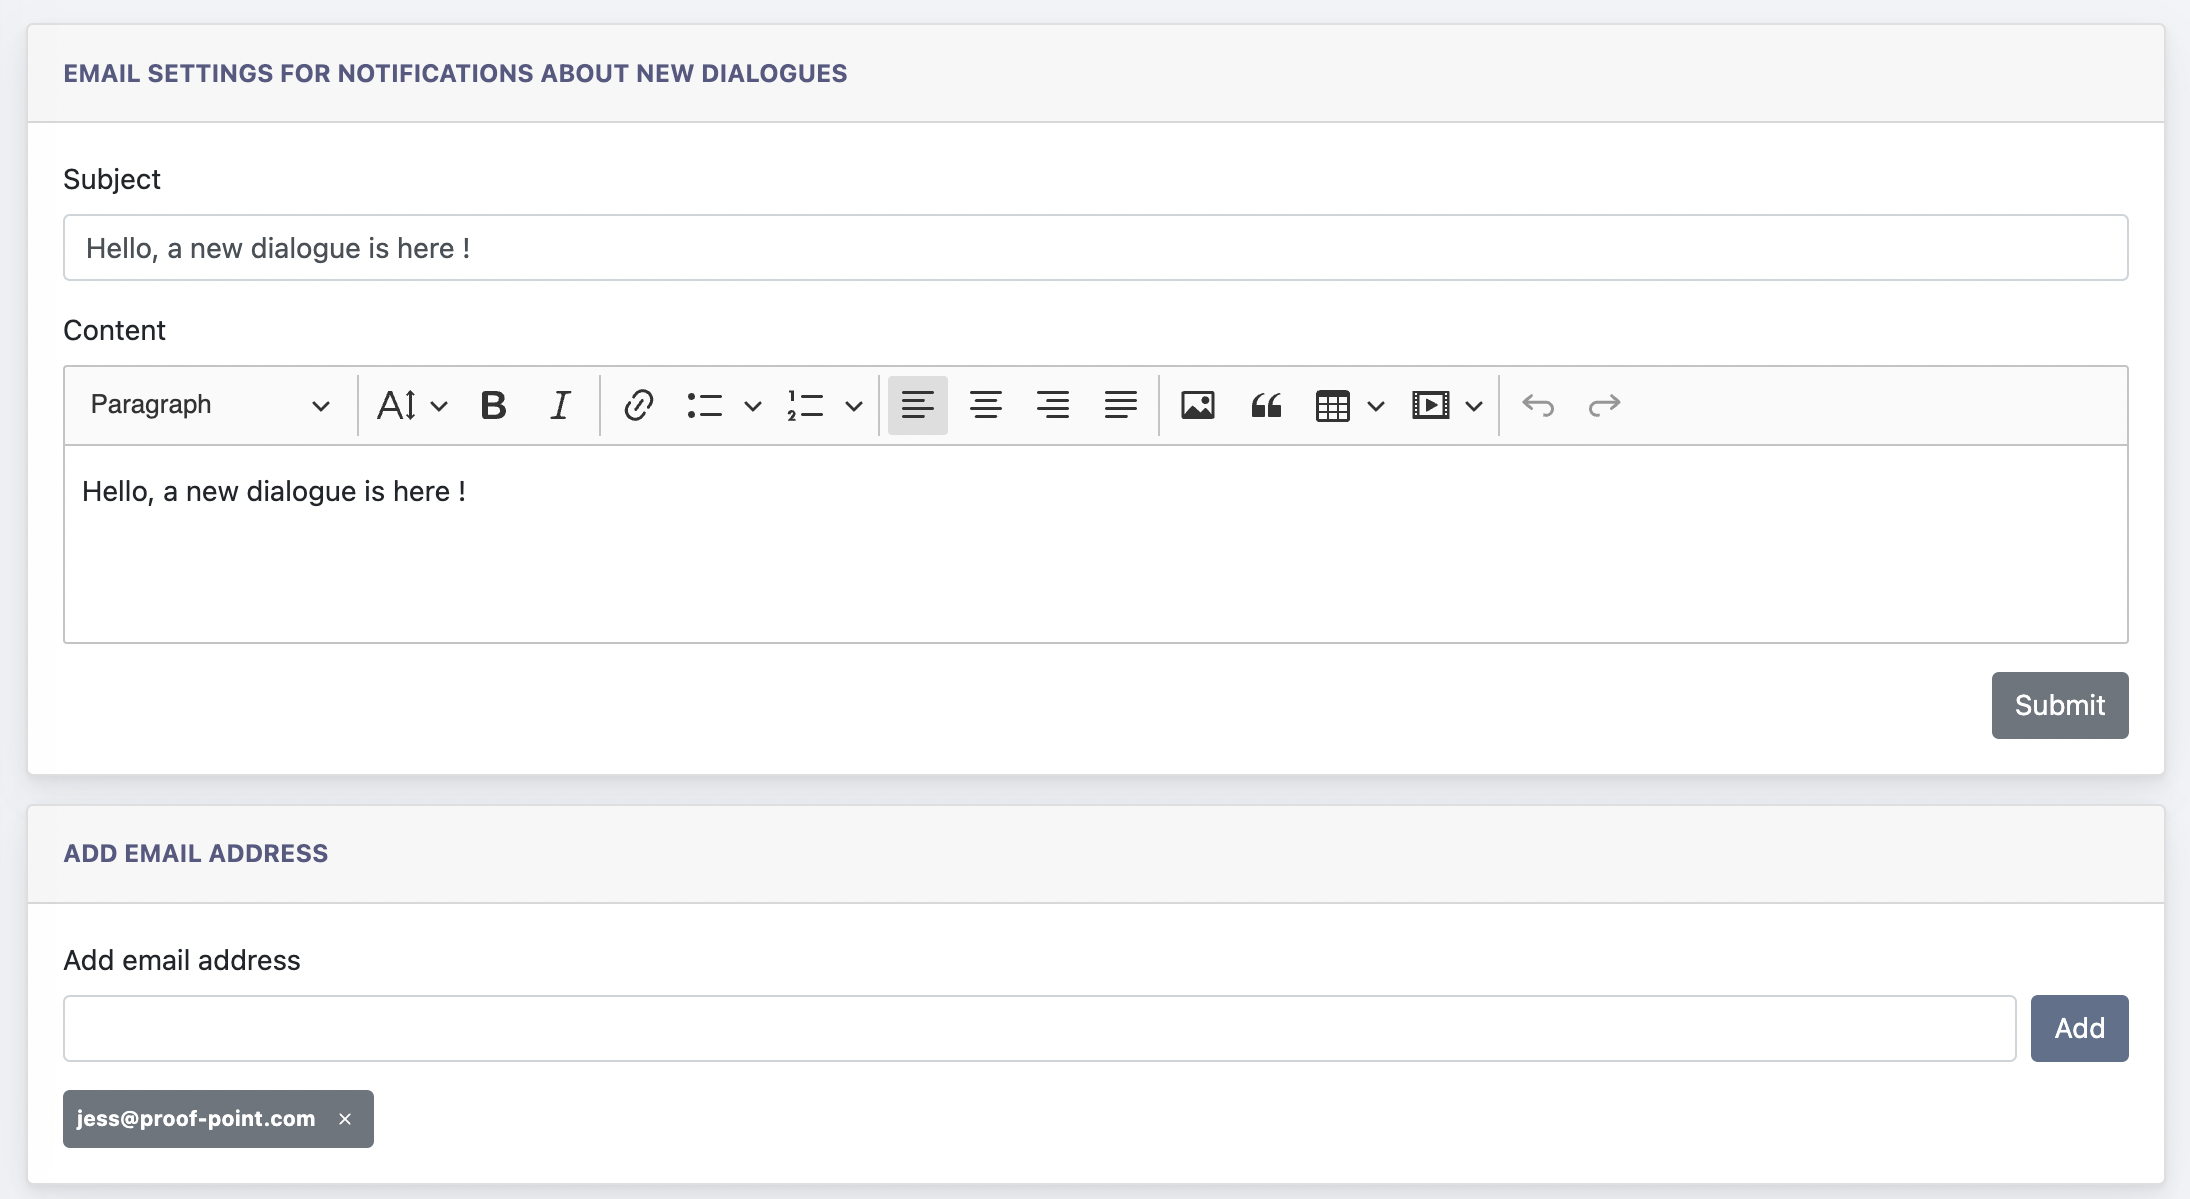
3.2 Email Settings
On this page, Admin can configure the content of a New Dialogue email, which sent to the set email address, when a new dialogue is generated.
New dialogue is generated when a customer send a text OR submit data in the Welcome fields on Ark Site.
4. Archive
When Customer Support ends a dialogue, dialogue will be removed from Dialogue Listing and move to Archive Listing.

Admin can click on the PDF button to download the dialogue history.
4.1 GDPR Center
Archive dialogues will be deleted according to GDPR Center configuration in Cockpit. ( GDPR Center > Data Configuration )

Based on the above example, archive dialogue will be removed from the listing and database after 7 days.