
Member Area Settings
The Member Area Settings module allows Admin to configure the general behaviour and settings of the Member Area portal.
Path : Member Area > Settings
The configuration is organised into the following tabs:
| Tab | Description |
|---|---|
| General | Configure general Member Area settings, including membership-related links and login options. |
| Page Settings | Configure the pages and navigation available within the Member Area. |
| Configure email-related settings for the Member Area. | |
| INJOY@home | Configure settings related to the INJOY@home integration. |
1. General
The General tab contains the main configuration options related to Member Area access and membership packages.
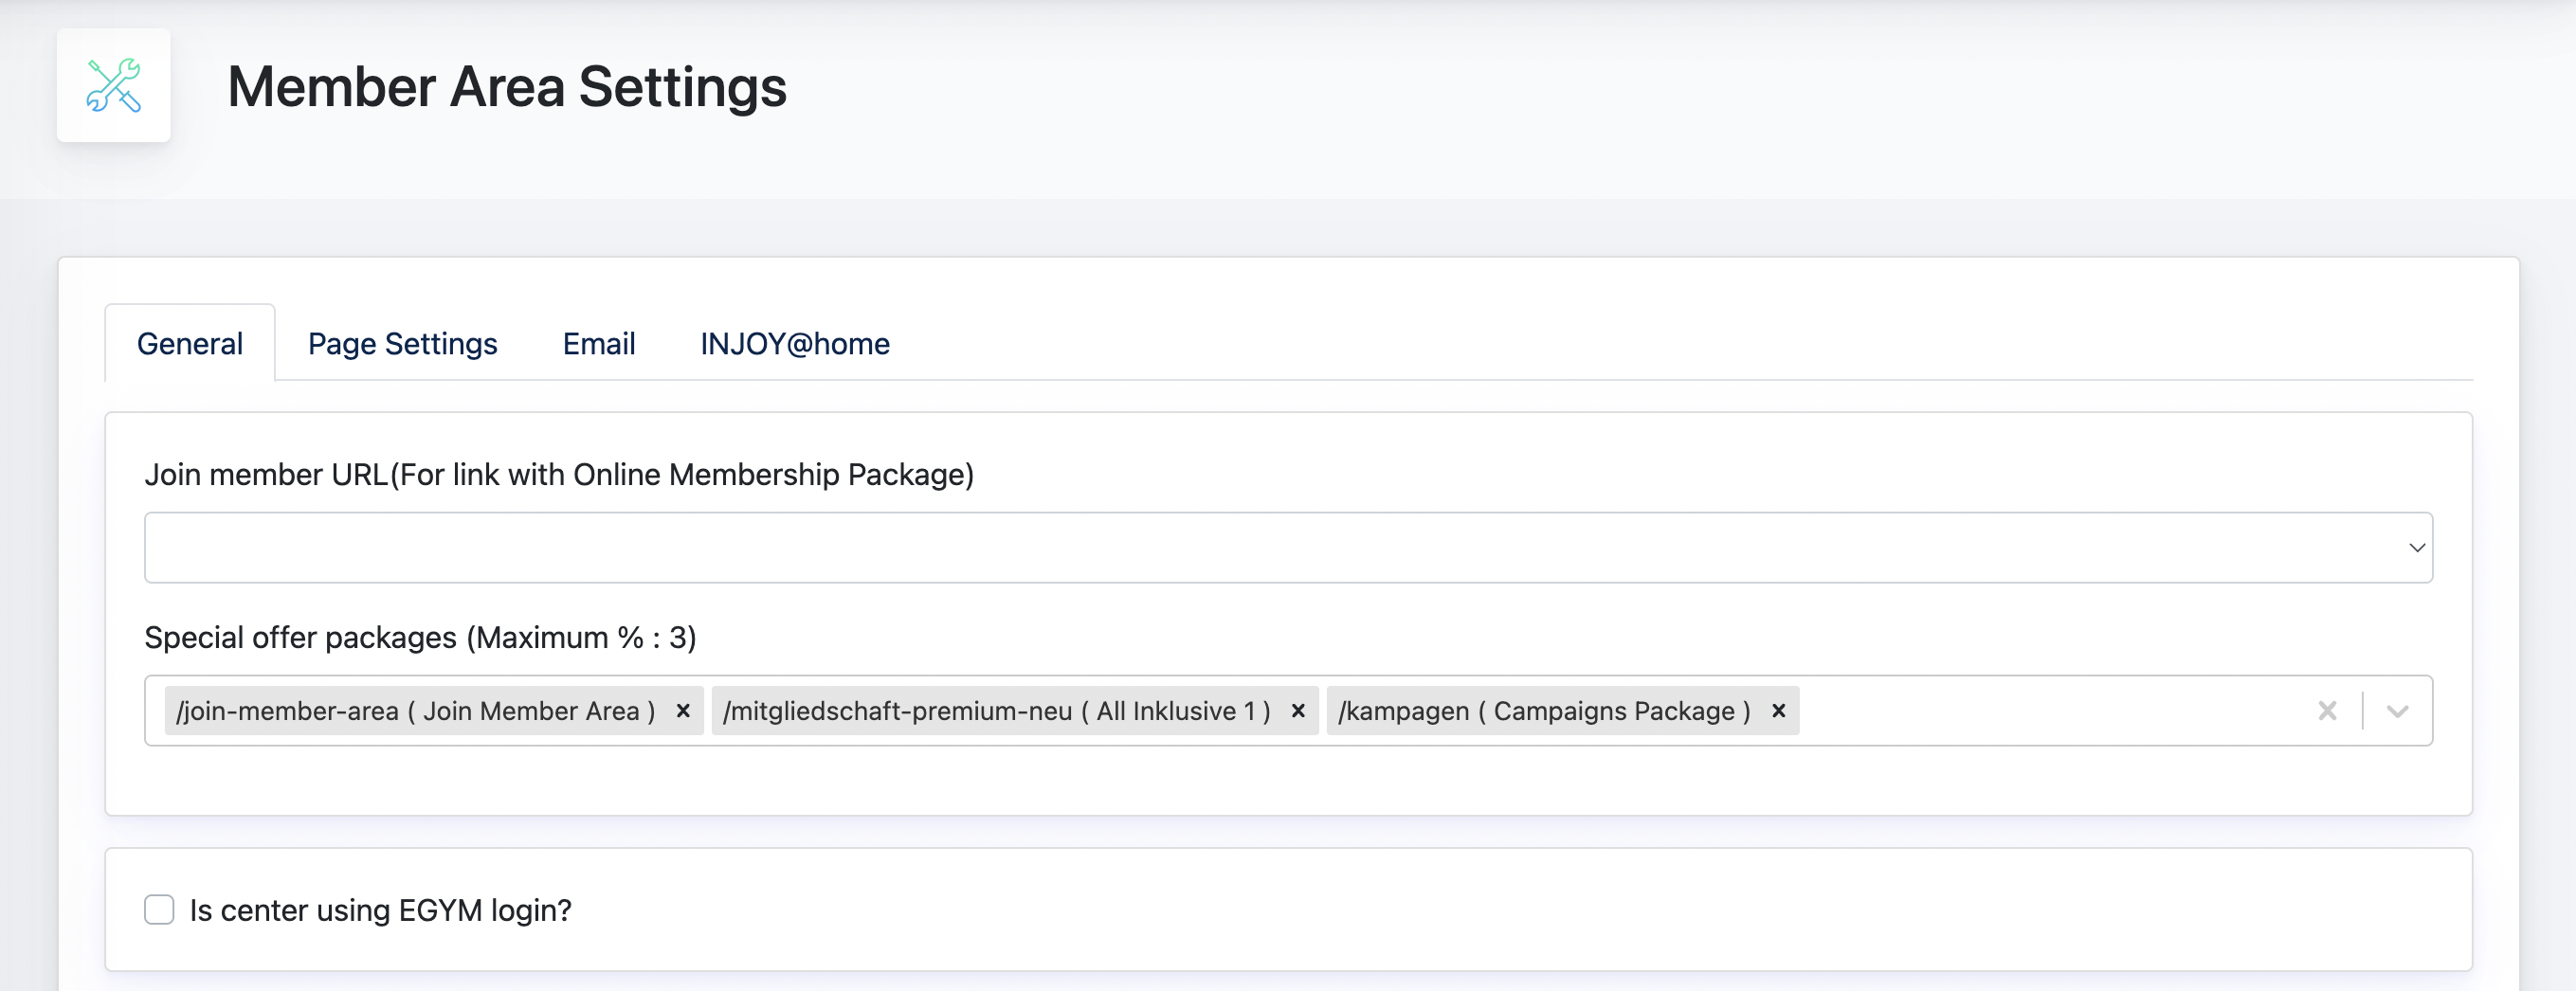
1.1 Join Member URL
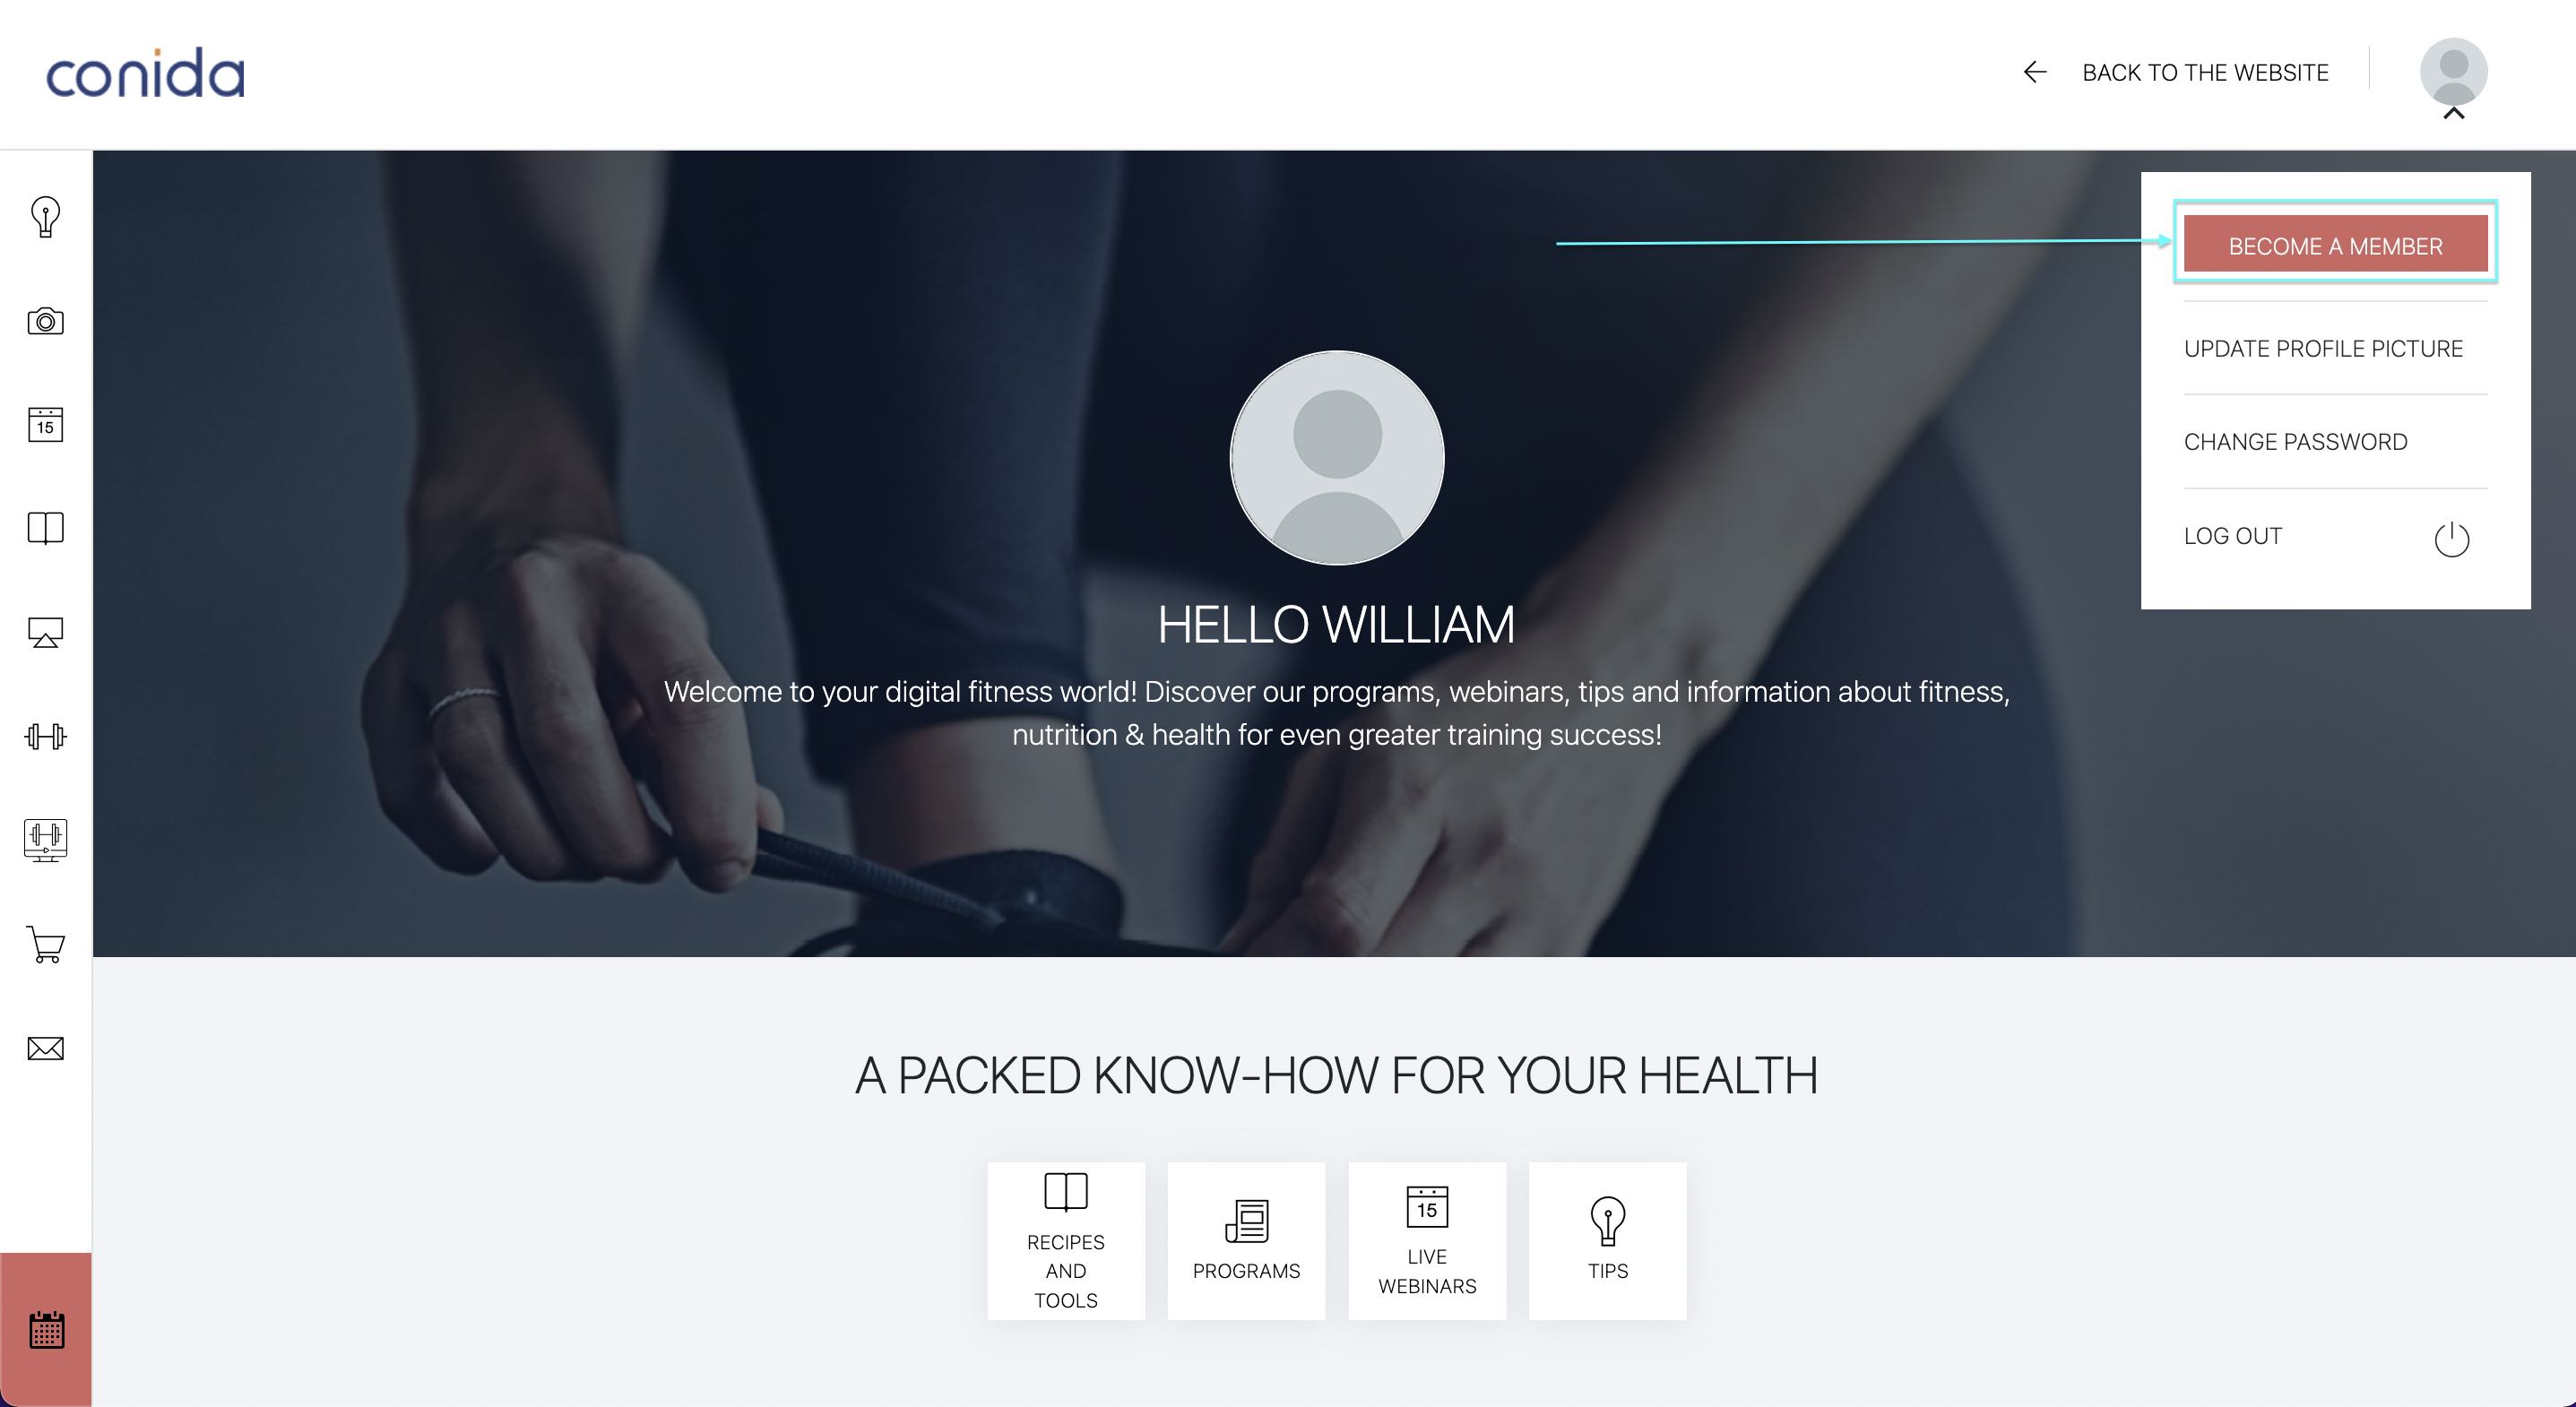
The Join Member URL determines which Online Membership Package is linked to the Become a Member button displayed to Trial Members on Members Area landing page.
When a Trial Member selects Become a Member, they are directed to the configured package in the Online Shop. If the Trial Member purchases the package, their role is updated from Trial Member to Member.
1.2 Special Offer Package
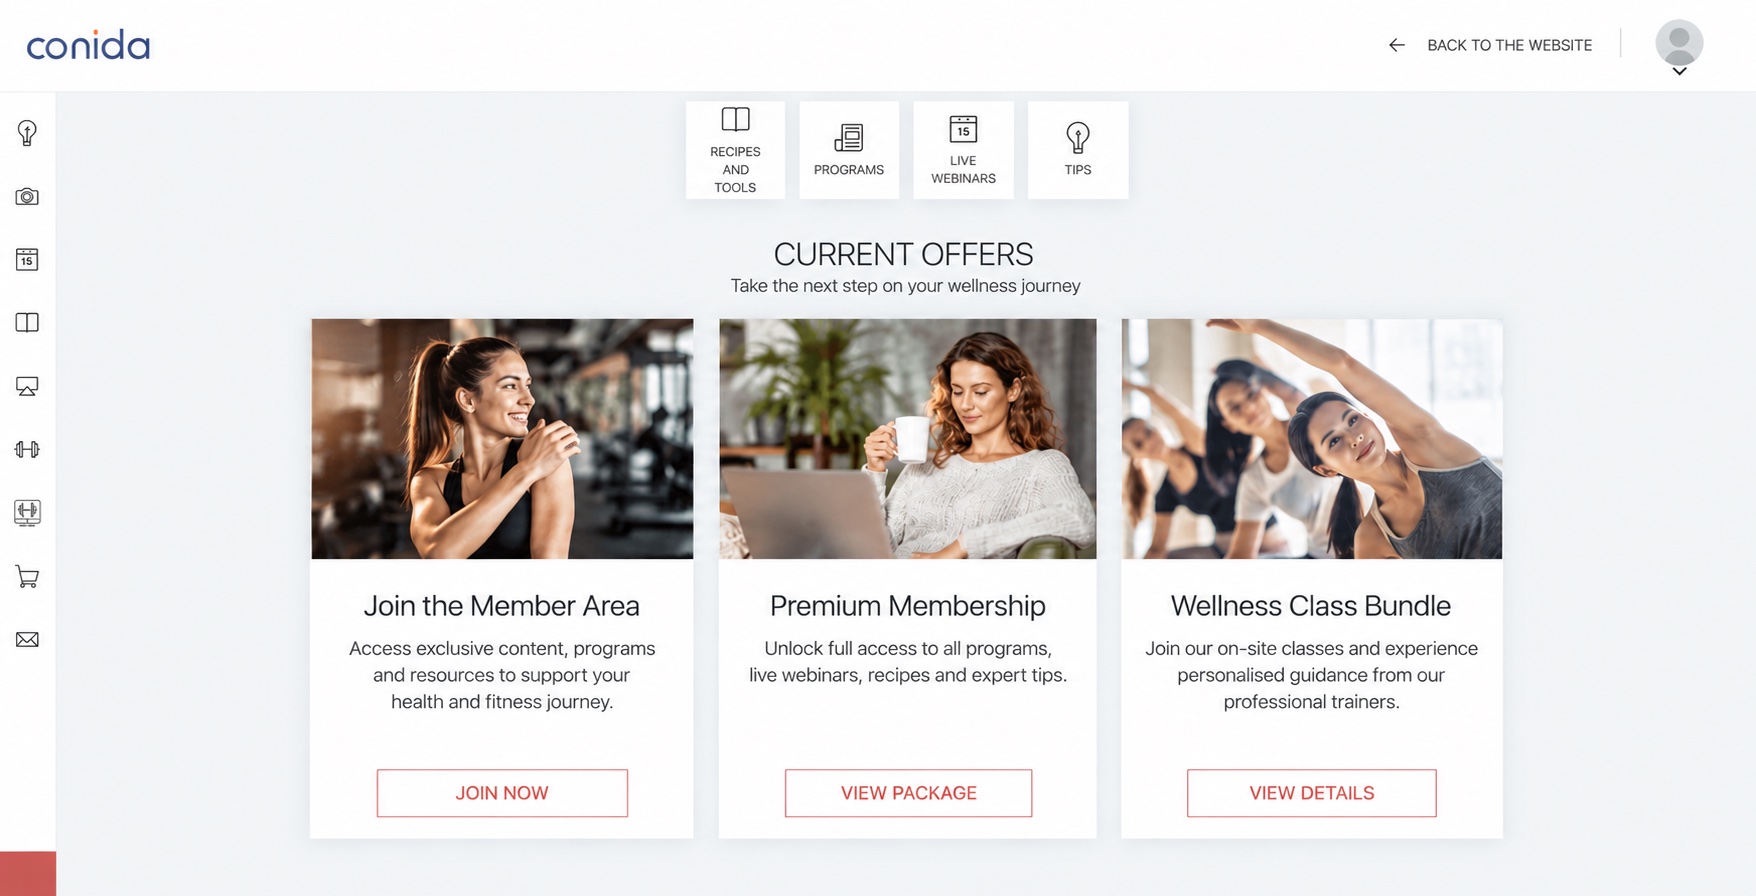
The Special Offer Packages setting allows Admin to display selected membership packages on the Member Area Dashboard as additional offers to existing online members.
This functions as a cross-selling option, allowing the centre to promote packages that members may also purchase, such as packages for physical courses offered at the centre.
Admin can select up to three Special Offer Packages to be displayed on the Member Area Dashboard.
Example screenshot from Live Site:
1.3 EGYM Login
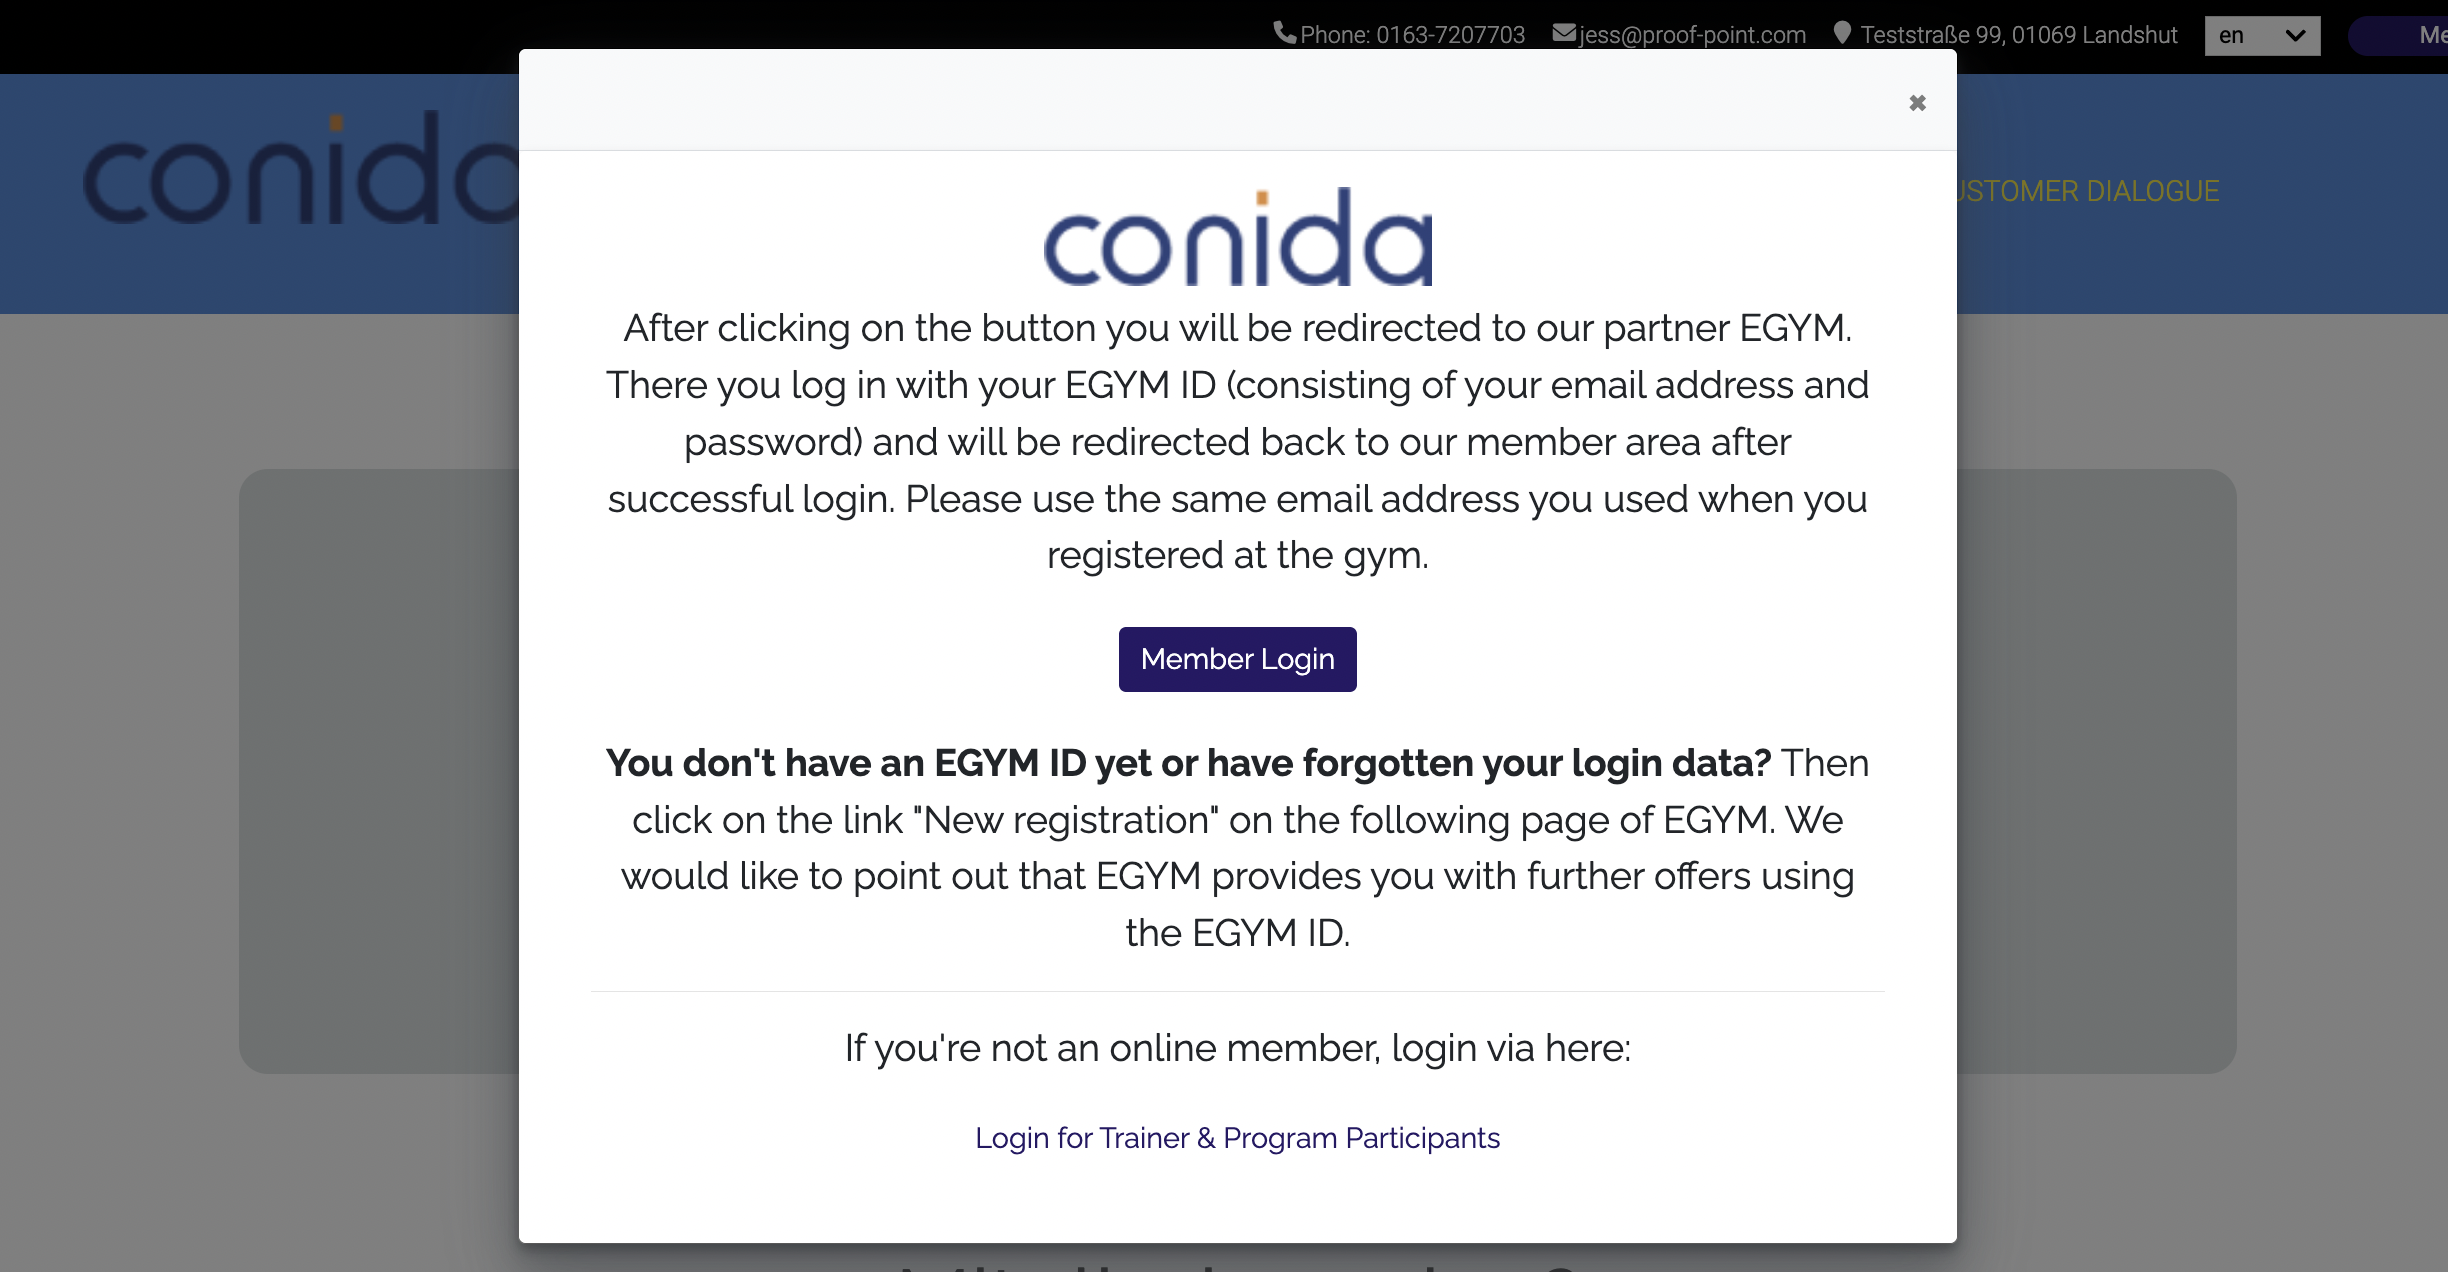
If the Center uses EGYM, Admin can enable [ Is center using EGYM login? ] to allow Members with an existing EGYM account to access the Member Area using their EGYM login credentials.
Once enabled, the EGYM login option will be available on the Member Area login page.
EGYM Login on the Member Area:
1.4 Menu / Navigation Configuration
Admin can configure which modules are displayed in the Member Area navigation and determine their display order. This allows the Member Area navigation to be customised according to the content and services offered by the Center.
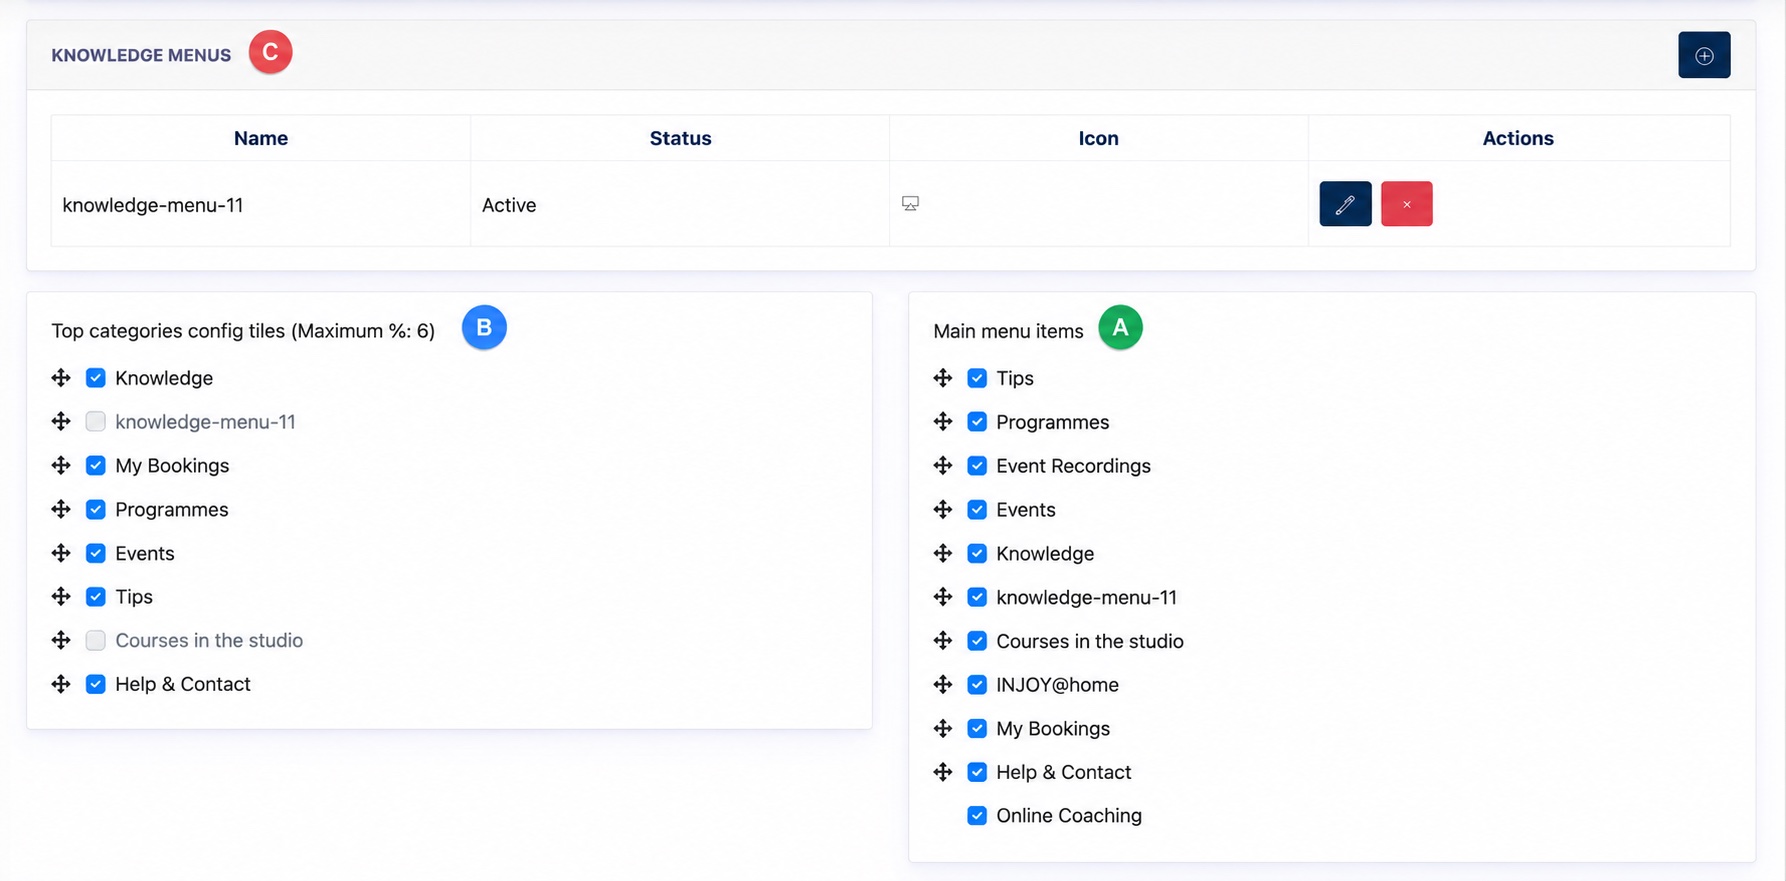
A. Main Menu Items
Admin can select the modules to be displayed and use drag and drop to change their display order.
B. Top Category Tiles
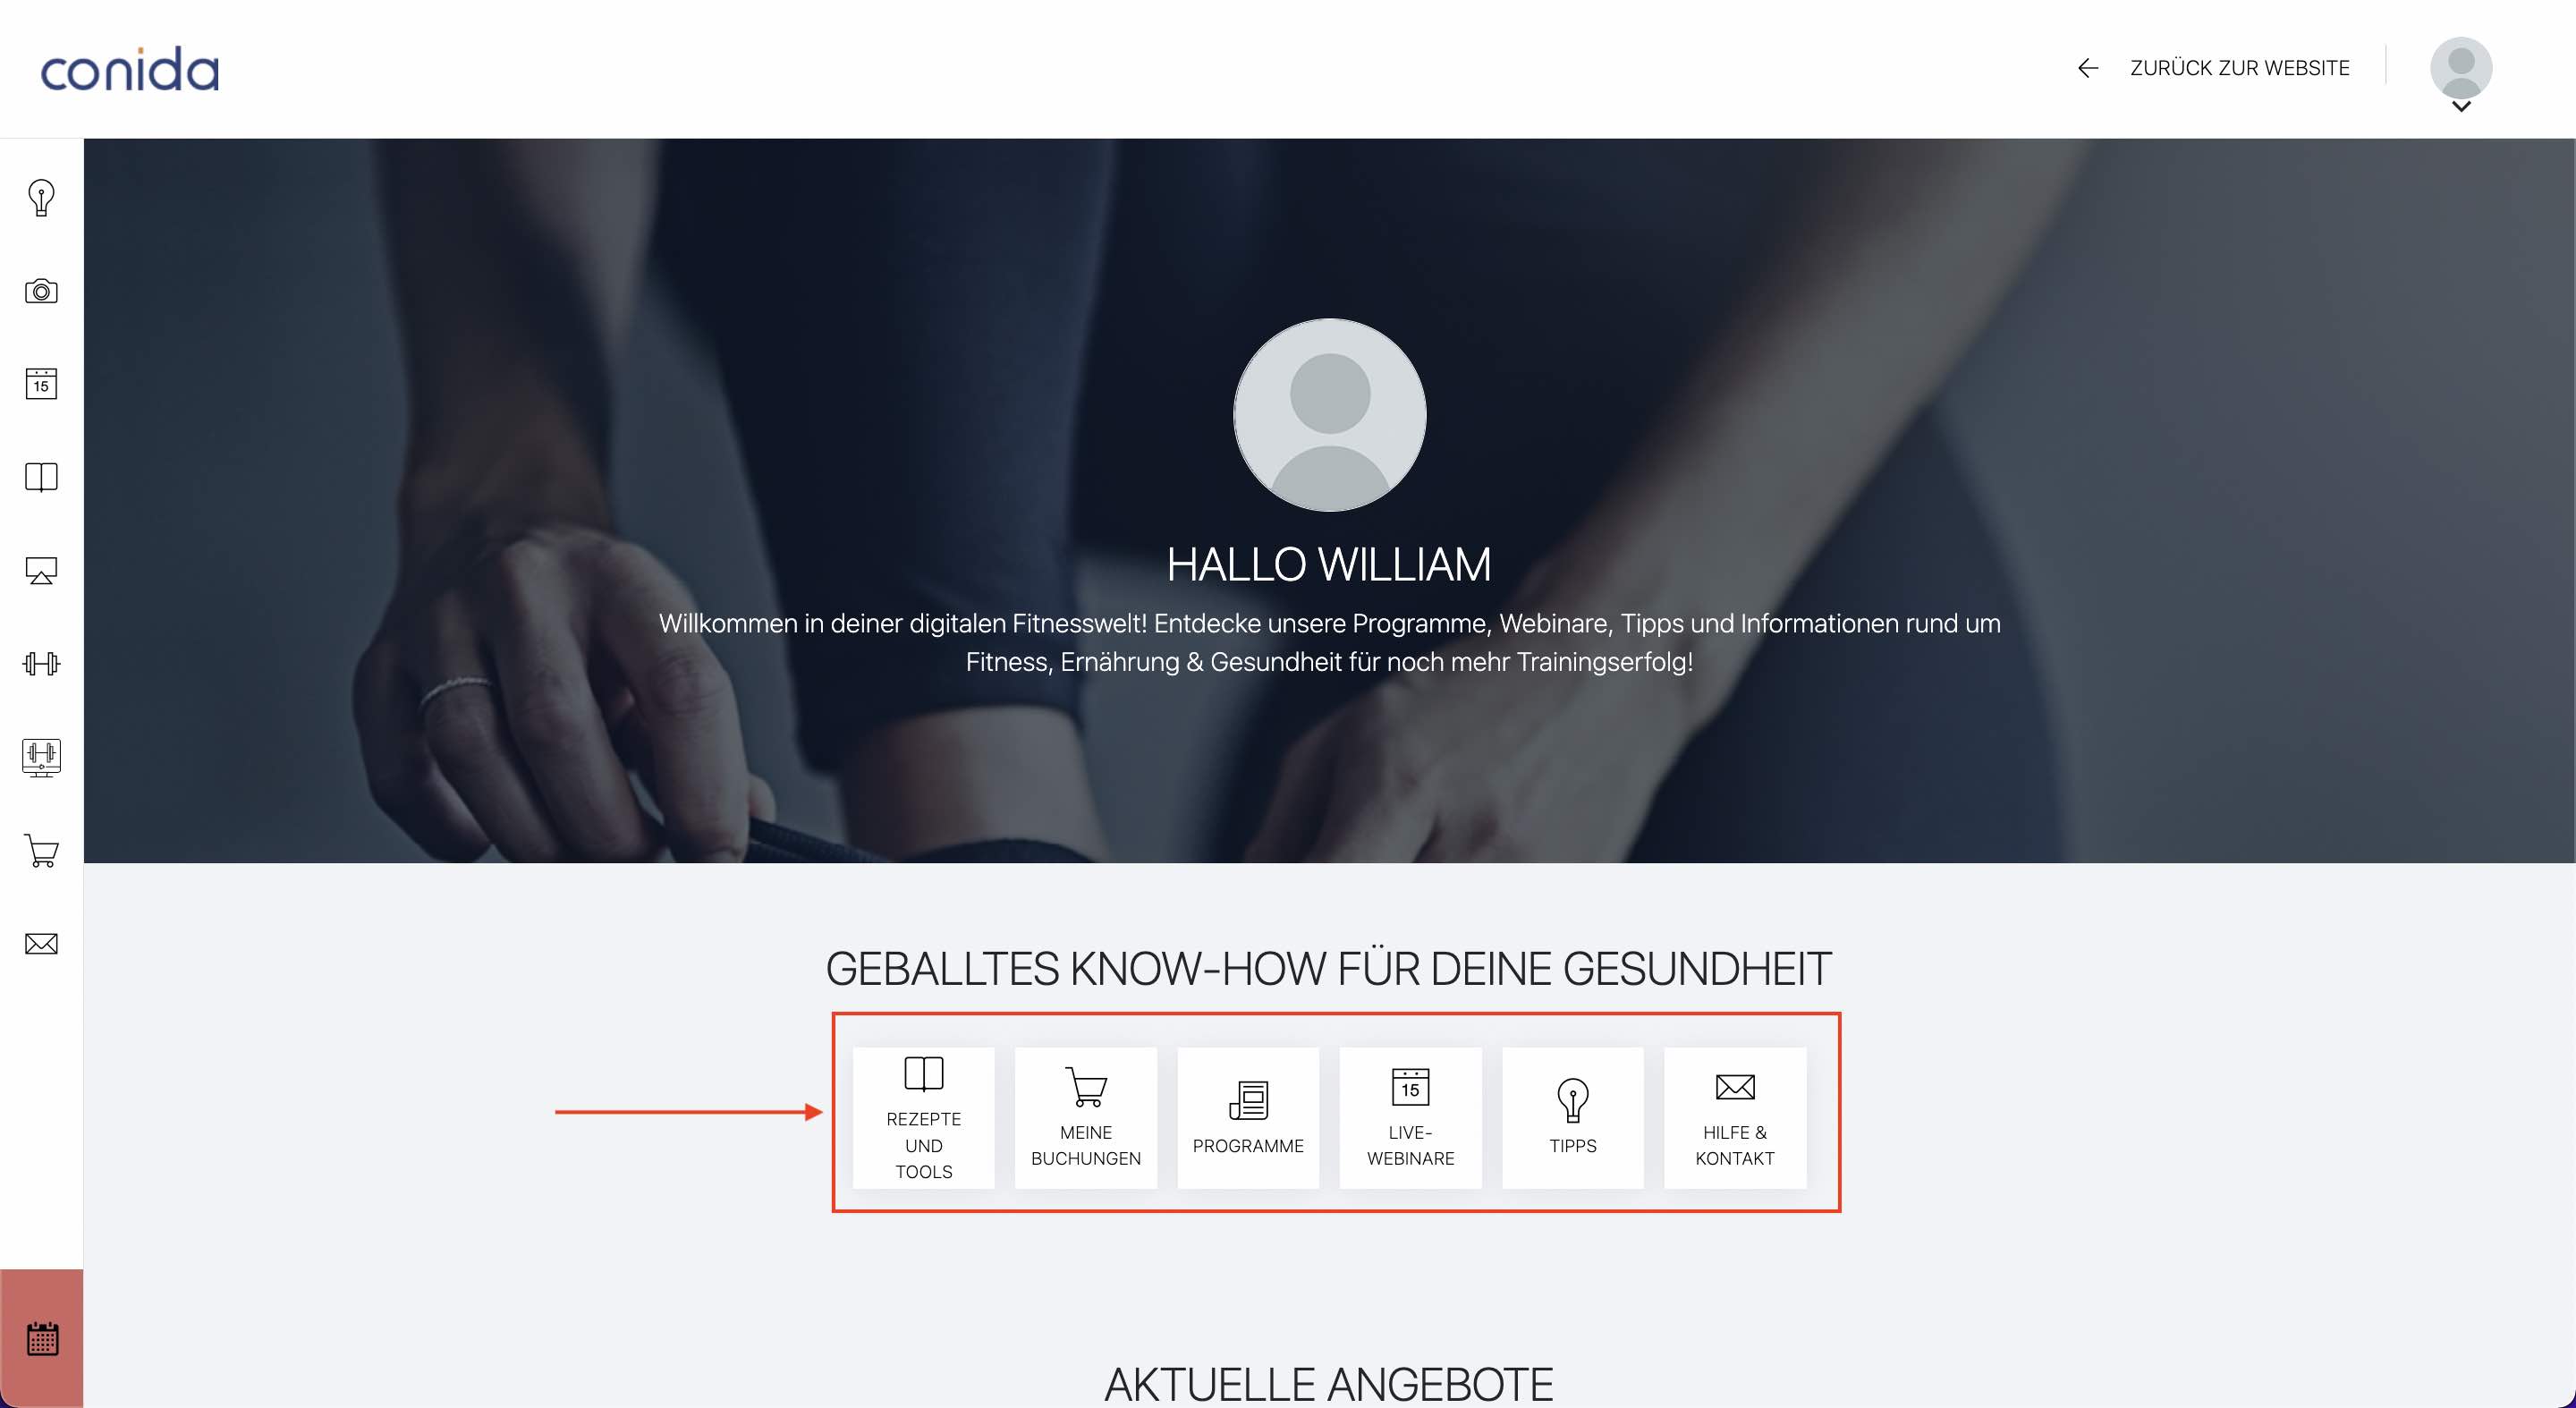
The Top Categories Config Tiles determine which modules are displayed as tiles at the top of the Member Area Dashboard.
Admin can enable or disable the available modules and use drag and drop to arrange their display order.
A maximum of six tiles can be displayed.
Screenshot from Live Site
C. Knowledge Menus
In addition to the default Knowledge menu, Admin can create additional Knowledge Menus to organise Knowledge content into different topics or categories.
- Name – Enter the name of the Knowledge menu.
- Status – Set whether the Knowledge menu is active.
- Icon – Select the icon to represent the menu in the Member Area.
Once created, the Knowledge Menu becomes available for selection under the Top Categories Config Tiles and Main Menu Items, allowing Admin to determine where it appears in the Member Area navigation.